1. Introduction
This manual provides detailed instructions for the setup, operation, and maintenance of your Tesvor S7 Pro AES Robot Vacuum. Designed for efficient home cleaning, this robot vacuum features powerful suction, automatic dust emptying, and smart control capabilities. Please read this manual thoroughly before using the device to ensure proper function and longevity.

Figure 1: Tesvor S7 Pro AES Robot Vacuum and Auto-Emptying Dock.
2. Setup and Initial Use
2.1 Unpacking and Placement
- Carefully remove all components from the packaging.
- Choose a suitable location for the auto-emptying dock. Ensure it is placed against a wall, on a hard, level surface, with at least 0.5 meters of clear space on either side and 1.5 meters in front.
- Connect the power adapter to the dock and plug it into a wall outlet.

Figure 2: Proper placement of the Base Station for optimal performance.
2.2 Initial Charging
Place the robot vacuum onto the charging contacts of the auto-emptying dock. Ensure the robot is properly aligned. The robot will automatically begin charging. For first-time use, fully charge the robot (approximately 4-5 hours) before its initial cleaning cycle. The 5200mAh battery provides extended runtime.
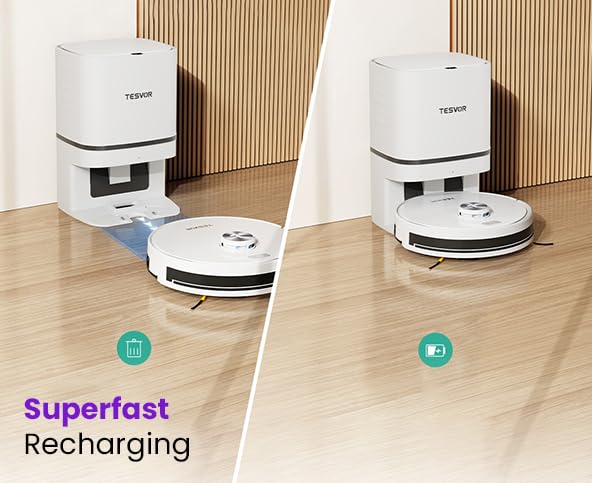
Figure 3: The robot vacuum automatically returns to the dock for recharging.
2.3 App Connection and Smart Control
- Download the "Tesvor" app from your mobile device's app store (iOS or Android).
- Open the app and follow the on-screen instructions to create an account and add your Tesvor S7 Pro AES.
- Ensure your Wi-Fi network is 2.4GHz for successful connection.
- Once connected, you can control the robot, schedule cleanings, view cleaning maps, and adjust settings via the app.
- The robot also supports voice control via Alexa and Google Home. Refer to the app for integration instructions.
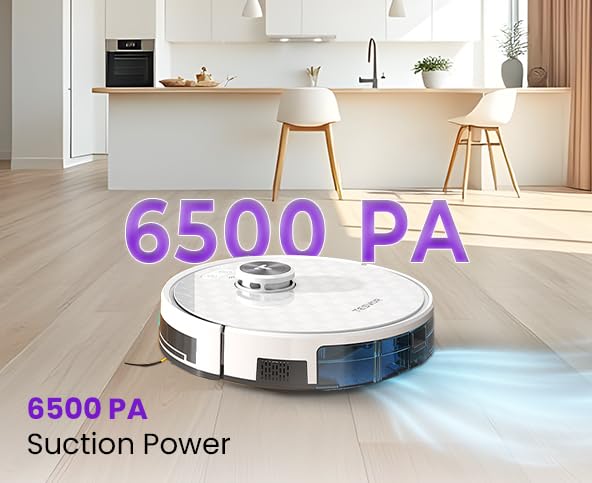
Figure 4: Manage your robot vacuum with the Tesvor app for scheduling and control.
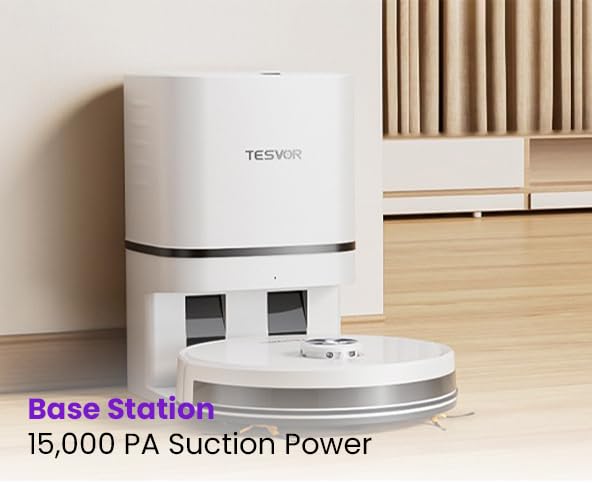
Figure 5: The Tesvor app provides comprehensive control and mapping features.
3. Operating Instructions
3.1 Starting a Cleaning Cycle
- Via Robot Button: Press the power button on the robot once to start a general cleaning cycle. Press again to pause.
- Via Tesvor App: Open the app and select "Start Cleaning" or choose a specific cleaning mode (e.g., spot clean, zone clean) from the map interface.
- Via Voice Command: Use integrated voice assistants (Alexa, Google Home) with commands like "Alexa, tell Tesvor to start cleaning."
The Tesvor S7 Pro AES features 6500Pa strong suction, effectively capturing dust, dirt, and pet hair from various floor types.
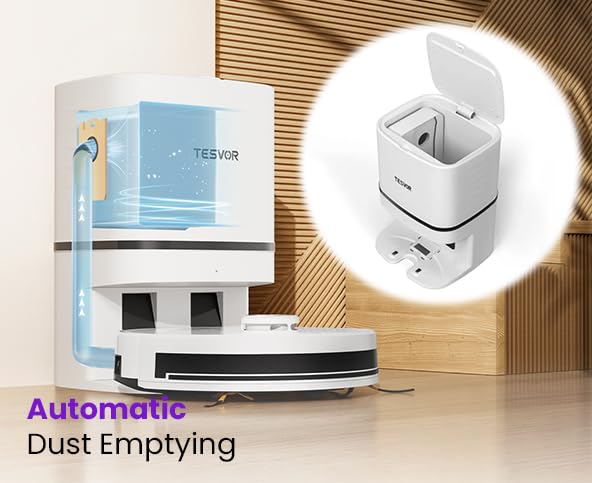
Figure 6: The robot vacuum demonstrating its powerful 6500 PA suction.
3.2 Automatic Dust Emptying
After completing a cleaning cycle or when the robot's dustbin is full, the Tesvor S7 Pro AES will automatically return to its auto-emptying dock. The dock will then suction the debris from the robot's internal dustbin into a large disposable dust bag within the dock. These large dust bags can last over a month, minimizing manual intervention. Six spare bags are included for convenient maintenance.
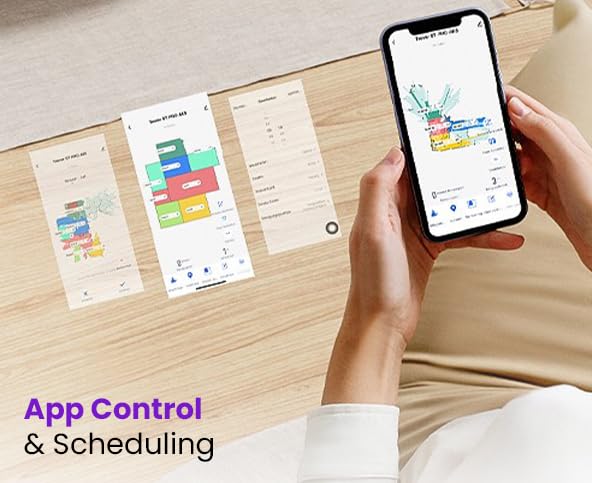
Figure 7: Illustration of the automatic dust emptying process into the dock's dust bag.
4. Maintenance
Regular maintenance ensures optimal performance and extends the lifespan of your Tesvor S7 Pro AES.
4.1 Auto-Emptying Dock Dust Bag Replacement
- When the dust bag in the auto-emptying dock is full (indicated by the app or a light on the dock), open the top cover of the dock.
- Carefully remove the full dust bag and dispose of it.
- Insert a new dust bag, ensuring it is properly seated. Close the cover.
4.2 Robot Dustbin and Filter Cleaning
Although the dock empties the robot's dustbin, occasional manual cleaning of the robot's internal dustbin and filter is recommended.
- Press the release button to remove the robot's dustbin.
- Empty any remaining debris.
- Remove the filter and tap it gently to remove dust. Do not wash the HEPA filter with water.
- Brush the dustbin clean with a small brush.
- Reinsert the filter and dustbin.
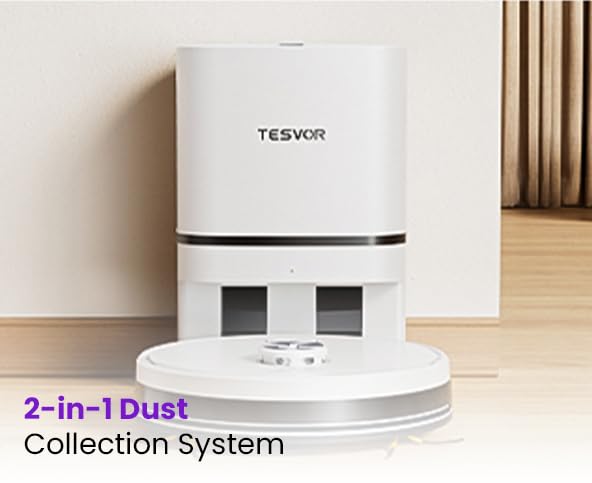
Figure 8: The robot's 2-in-1 dust collection system, showing the internal dustbin.
4.3 Brushes and Sensors Cleaning
- Main Brush: Remove the main brush cover and lift out the brush. Use the cleaning tool to remove hair and debris.
- Side Brushes: Check side brushes for tangled hair or debris. Remove and clean if necessary.
- Sensors: Gently wipe the cliff sensors, wall sensors, and charging contacts on both the robot and the dock with a clean, dry cloth.
5. Troubleshooting
If you encounter issues with your Tesvor S7 Pro AES, refer to the following common solutions. For more complex problems, contact customer support.
| Problem | Possible Cause | Solution |
|---|---|---|
| Robot does not start or charge. | Not properly docked; power adapter unplugged; low battery. | Ensure robot is correctly placed on the dock. Check power connection. Allow robot to charge fully. |
| Robot gets stuck frequently. | Obstacles (cables, rugs); dirty sensors. | Clear obstacles from cleaning path. Clean all sensors on the robot. |
| Poor cleaning performance. | Full dustbin; clogged filter; worn brushes. | Empty robot dustbin. Clean or replace filter. Clean or replace main/side brushes. |
| App connection issues. | Incorrect Wi-Fi password; 5GHz Wi-Fi network; robot too far from router. | Ensure correct 2.4GHz Wi-Fi network. Move robot closer to router. Restart robot and router. |
| Auto-emptying not working. | Dock dust bag full; dock suction port blocked. | Replace dust bag in the dock. Check for blockages in the dock's suction port. |
6. Specifications
| Feature | Detail |
|---|---|
| Brand | Tesvor |
| Model Name | S7 |
| Special Feature | Smart Mapping, Automatic Dust Emptying |
| Colour | White |
| Product Dimensions | 46L x 40W x 40.5H Centimeters |
| Battery Life | Up to 45 Days (standby/usage dependent) |
| Battery Capacity | 5200mAh |
| Suction Power (Robot) | 6500Pa |
| Suction Power (Base Station) | 15,000Pa (for dust emptying) |
| Manufacturer | Doodle Tech Pvt. Ltd |
| Country of Origin | India |
| Item Weight | 10 kg |
| Generic Name | Robotic Vacuum Cleaner (Semi Automatic) |
7. Warranty and Support
7.1 Warranty Information
The Tesvor S7 Pro AES comes with a 2-year official warranty, supported by Caiva. Please retain your proof of purchase for warranty claims.
7.2 Customer Support
For any queries, technical assistance, or warranty claims, please contact Tesvor customer support:
- Phone: +91 8733892933
- Email: connect@doodlegroup.in
- Availability: 24/7
Tesvor has active service centers across pan India to provide comprehensive support.

Figure 9: Tesvor's extensive service network across India.


