
1. Introduction
This manual provides detailed instructions for the safe and effective use of your Mulcort Model 850 Stud Center Finder. This device is designed to accurately detect studs, metal objects, and live AC wires behind various wall materials, including wood, gypsum board, and plastic board. It features an LCD digital display, audio alerts, and an integrated bubble level for enhanced precision.
Please read this manual thoroughly before operating the device and retain it for future reference.
2. Safety Information
Always observe the following safety precautions to prevent personal injury or damage to the device:
- Do not attempt to open or modify the device.
- Keep the device dry and away from extreme temperatures.
- Remove the battery if the device will not be used for an extended period.
- When detecting live AC wires, exercise extreme caution. Always turn off power to the area if possible before drilling or cutting.
- This device is intended for detection purposes only. Always verify findings with other methods if uncertainty exists.
3. Product Overview
The Mulcort Model 850 Stud Center Finder is equipped with advanced sensor technology for reliable detection. Its ergonomic design ensures comfortable handling during use.
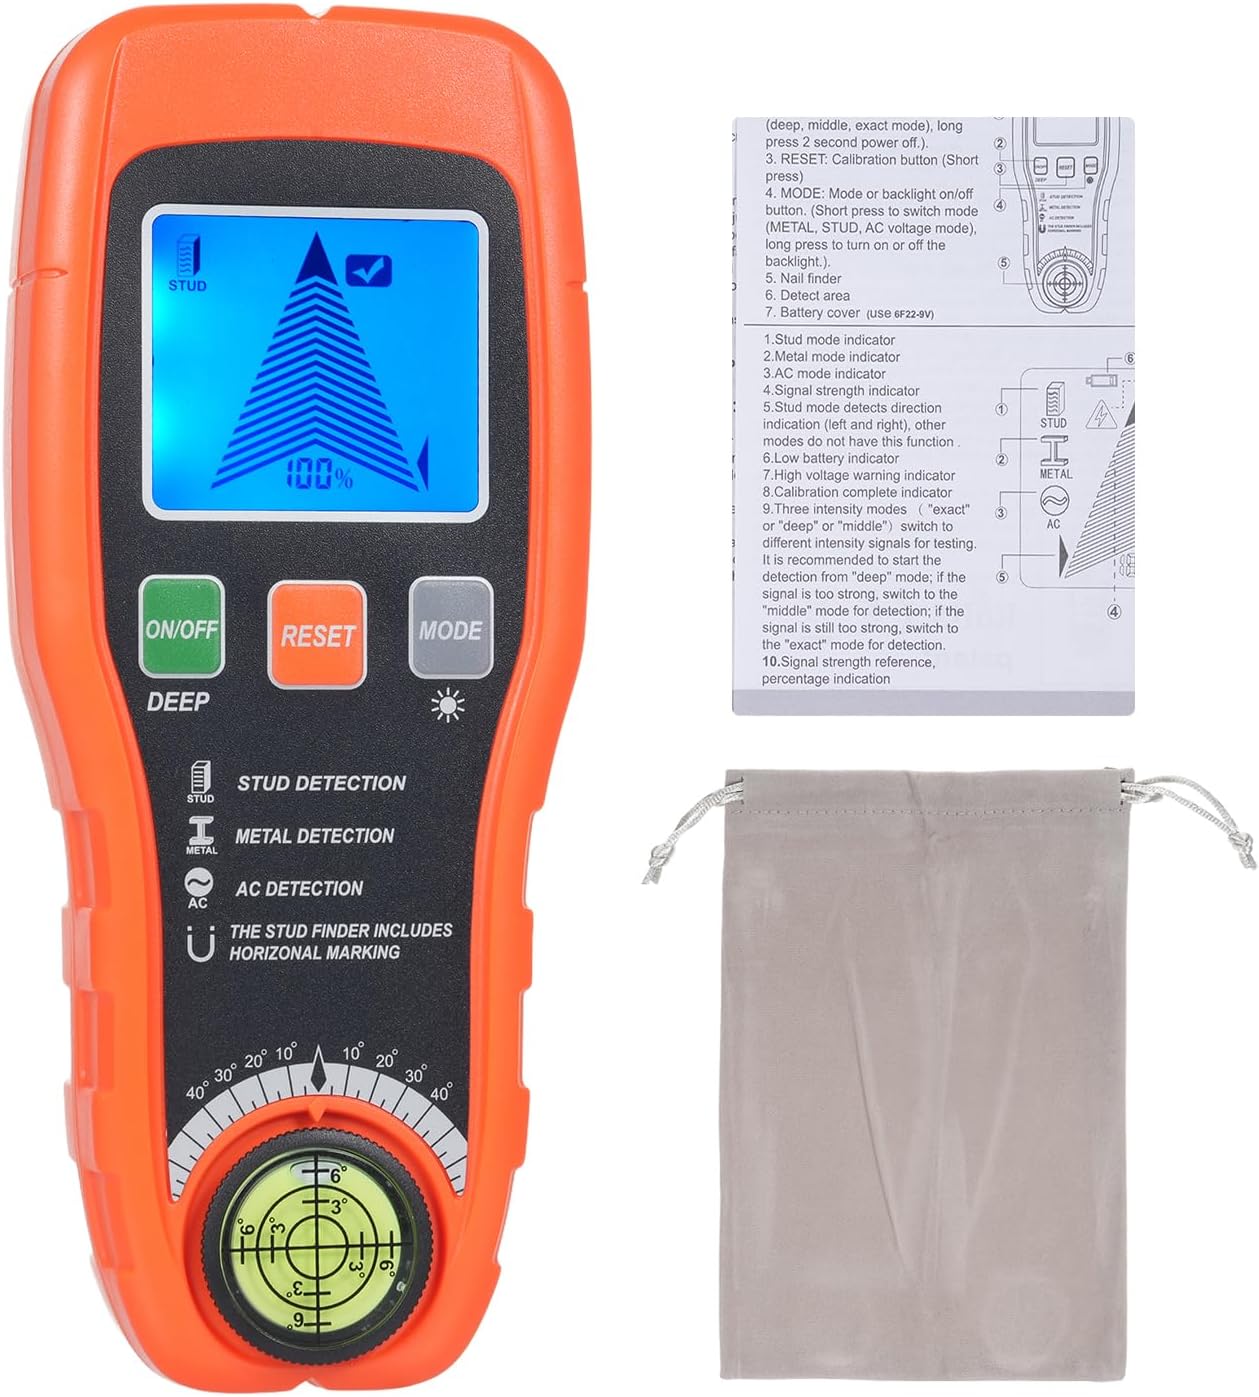
Image: The Mulcort Model 850 Stud Center Finder, shown with its included user manual and storage bag. The device is orange and black, featuring an LCD screen, control buttons, and a built-in bubble level at the bottom.
Key Features:
- Advanced Smart Sensor Technology: Ensures accurate and rapid detection.
- Versatile Detection Modes: Deep, medium, and precise strength sensing levels for various materials.
- Backlit LCD Digital Display: Clear, easy-to-read display in all lighting conditions.
- Audio Alerts: Combines with directional indicators for efficient object location.
- Integrated Bubble Level: For accurate horizontal and vertical alignment.

Image: A detailed diagram illustrating the components of the Mulcort Stud Finder, including the LCD Display, ON/OFF button, RESET button, MODE button, Sensor area, Battery cover, and Nail finder.
4. Setup
4.1 Battery Installation
The Mulcort Model 850 requires one 9V battery (not included).
- Locate the battery cover on the back of the device.
- Slide the cover open.
- Insert a new 9V battery, ensuring correct polarity.
- Close the battery cover securely.

Image: A user's hands demonstrating the installation of a 9V battery into the back compartment of the Mulcort Stud Finder.
4.2 Initial Calibration
Before each use, calibrate the device on a flat, clear surface.
- Press the ON/OFF button to power on the device.
- Place the tester flat against the wall or surface where you intend to scan.
- Press and hold the RESET button. Release it when the LCD screen displays a checkmark (✓). The buzzer will emit a short beep, and the LCD progress bar will clear, displaying zero percentage.
Video: A demonstration of the Mulcort Stud Center Finder's features and basic operation, including power-on, mode selection, and scanning. This video provides a visual guide to the device's functionality.
5. Operating Instructions
5.1 Selecting Detection Modes
Press the MODE button to cycle through the available detection modes:
- Stud Detection: For locating wood studs.
- Metal Detection: For identifying metal objects like pipes or rebar.
- AC Detection: For detecting live unshielded AC wires.
The LCD screen will display the active mode icon (Stud, Metal, or AC).

Image: A banner showcasing the Mulcort Stud Finder Wall Scanner's ability to detect AC wires, wooden beams, joist pipes, metal rebar, stud edges, stud centers, nails, and features an HD LCD screen, self-calibration, and a bubble level.
5.2 Scanning for Objects
After calibration and mode selection, move the tester slowly across the desired surface from left to right. Maintain firm contact with the wall.
- As the device detects an object, the LCD progress bar will rise, and the percentage will increase.
- When the signal strength is at its peak (100%), the LCD will display a full bar, and the buzzer will alarm continuously, indicating the center of the object.
- Mark the edges of the detected object as the signal strength decreases. The center is typically between these marks.

Image: An illustration demonstrating the operation of the Mulcort Stud Finder for metal detection. It shows the device being moved horizontally across a surface, indicating how to mark the edges and center of a detected metal object.
5.3 Stud Mode Detection
The device offers three depth settings for stud detection:
- 0.39 inches (10 mm) deep
- 0.79 inches (20 mm) deep
- 1.5 inches (38 mm) deep
If you are unsure of the wall thickness, it is recommended to scan in 0.39" mode first, then 0.79" mode, and finally 1.5" mode.

Image: A visual representation of the Mulcort Stud Finder's stud mode detection capabilities at three different depths: 0.39 inches (10mm), 0.79 inches (20mm), and 1.5 inches (38mm).
5.4 Metal Mode Detection
The metal detection mode can identify both magnetic and non-magnetic metals:
- Non-magnetic Metal Mode: Detects objects like copper pipes up to 1.65 inches (42 mm) deep.
- Magnetic Metal Mode: Detects objects like rebar up to 2.36 inches (60 mm) deep.

Image: An illustration showing the Mulcort Stud Finder detecting both non-magnetic metals (like copper pipes) and magnetic metals (like rebar) at different depths within a wall.
5.5 AC Wire Detection
The device can detect the presence of live, unshielded electrical wiring up to 2 inches (51 mm) deep.
- The AC detection mode indicates the presence of live current.
- A special lightning bolt symbol will appear on the screen when AC wires are detected.
- Important Note: Some wall objects may isolate the current, so buried live wires may not always be detected. Always exercise caution.

Image: A visual demonstrating the AC Wire Detection feature of the Mulcort Stud Finder, showing the device detecting live electrical wiring up to 2 inches (51mm) deep within a wall.
5.6 Using the Nail Finder and Bubble Level
The integrated nail finder and bubble level enhance the device's utility.
- The nail finder, located at the bottom of the device, can be used to detect nails or other small metal objects within the wall.
- The bubble level assists in ensuring accurate horizontal and vertical alignment when marking or installing items.

Image: An illustration detailing the use of the Nail Finder and Bubble Level on the Mulcort Stud Finder. It shows how to use the detector to find studs and then use the magnetic nail finder to locate metal on the studs, along with the bubble level for horizontal positioning.
6. Maintenance
- Clean the device with a soft, dry cloth. Do not use abrasive cleaners or solvents.
- Store the device in a cool, dry place, away from direct sunlight and moisture.
- Remove the battery if the device is not used for extended periods to prevent leakage.
7. Troubleshooting
| Problem | Possible Cause | Solution |
|---|---|---|
| Inaccurate readings or inconsistent detection. | Improper calibration; uneven scanning motion; wall material too thick for selected mode. | Ensure proper calibration on a clear, flat surface. Scan slowly and evenly. Try different depth modes. |
| Screen difficult to read. | Narrow viewing angles of the LCD. | Adjust your viewing angle. If space is limited, try turning the finder upside down to get a better angle. |
| Device does not power on. | Dead or improperly installed battery. | Replace the 9V battery. Ensure it is installed with correct polarity. |
| AC wire not detected. | Wire is shielded; wall material isolates current; wire is too deep. | Ensure the wire is unshielded. Be aware that some materials can block detection. Always use caution and verify with other methods. |
8. Specifications
- Model Number: 850
- Power Source: Battery Powered (1x 9V battery, not included)
- Stud Detection Depth: Up to 1.5 inches (38 mm)
- Metal Detection Depth: Magnetic up to 2.36 inches (60 mm), Non-magnetic up to 1.65 inches (42 mm)
- AC Wire Detection Depth: Up to 2 inches (51 mm) (unshielded live wires)
- Included Components: Detector, Instruction Manual, Storage Bag
- Color: Orange
9. Warranty and Support
For warranty information or technical support, please refer to the contact details provided with your purchase or visit the official Mulcort website. Keep your purchase receipt as proof of purchase.