
1. Introduction
This manual provides essential instructions for the safe and effective use of the Creality Falcon Rotary Roller, a 3-in-1 accessory kit designed exclusively for the Creality Falcon A1 Laser Engraver. This industrial-grade fixture enables precise engraving on various cylindrical and irregular objects. Please read this manual thoroughly before operation.
2. Product Overview
The Creality Falcon Rotary Roller is engineered to expand the capabilities of your Falcon A1 Laser Engraver, allowing for detailed engraving on non-flat surfaces. It features a versatile 3-in-1 design with adjustable clamps and non-slip pads to secure a wide range of objects.
Key Features:
- 3-in-1 Clamp Design: Equipped with trapezoidal, L-shaped, and hexagonal clamps to firmly secure diverse object shapes.
- High Precision Engraving: Supports engraving on cylindrical objects (cans, rods: 0.04–4.3 inch), irregular cylinders (handled mugs, roly-poly toys: 1–3 inch), spheres (glass balls, ping-pong balls: 0.4–5.1 inch), and rings/bracelets (0.6–4 inch).
- Non-slip Soft Pads: Enhances friction, improves grip, protects fragile objects, and ensures engraving precision.
- No Assembly Required: Ready for immediate use upon installation.
- Compatibility: Exclusively designed for the Creality Falcon A1 Laser Engraver.

Image: Adjustable Rotary Chuck for securing various objects.

Image: One-handed clamping mechanism for ease of use.

Image: Non-slip soft pads for enhanced grip and object protection.
Supported Engraving Modes:
- Sphere Rotary: Utilizes two sections of risers for engraving spheres with diameters between 80-130mm, such as baseballs.
- Ring Rotary: Uses one section of risers for engraving ring objects between 0-35mm in diameter, such as pens or rings.
- Roller Rotary: Employs 1-5 section risers for engraving cylindrical objects with a diameter between 30-90mm, like thermoses or cups.

Image: Sphere Rotary setup for engraving spherical objects.

Image: Ring Rotary setup for engraving small cylindrical or ring-shaped items.

Image: Roller Rotary setup for engraving larger cylindrical objects.
3. Setup Instructions
The Creality Falcon Rotary Roller is designed for quick and easy integration with your Creality Falcon A1 Laser Engraver. No complex assembly is required for the rotary roller unit itself.
- Prepare the Engraver: If your Falcon A1 Laser Engraver has a bottom tray, remove it to create space for the rotary roller.
- Install Risers (if needed): Based on the size and shape of the object you intend to engrave, install the appropriate risers onto the Falcon A1 Laser Engraver's legs. Three different risers are recommended to meet daily engraving needs.
- Connect Cables: Connect the rotary roller's cable to the Y-axis port on your Creality Falcon A1 Laser Engraver.
- Place and Secure Object: Place the object to be engraved onto the rotary roller. Adjust the jaws to tighten the object securely. Ensure the object is centered and level on the rollers for optimal engraving results.

Image: Removing the bottom tray from the laser engraver.

Image: Installing risers on the laser engraver legs.
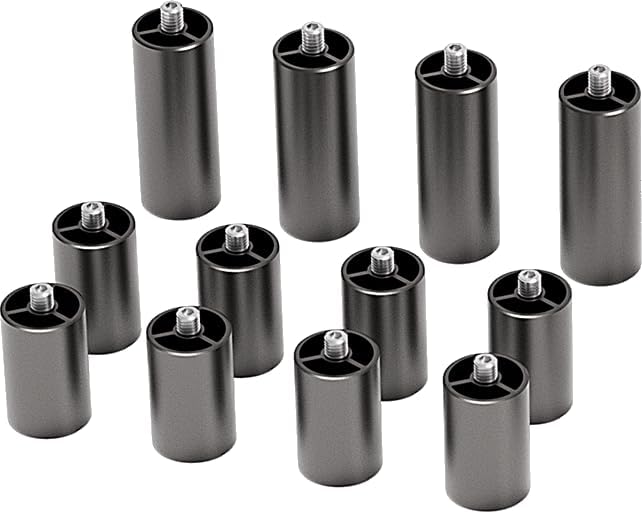
Image: Different riser sizes for adjusting engraving height.

Image: Connecting the rotary roller to the laser engraver's Y-axis port.

Image: Adjusting the rotary roller jaws to secure an object.
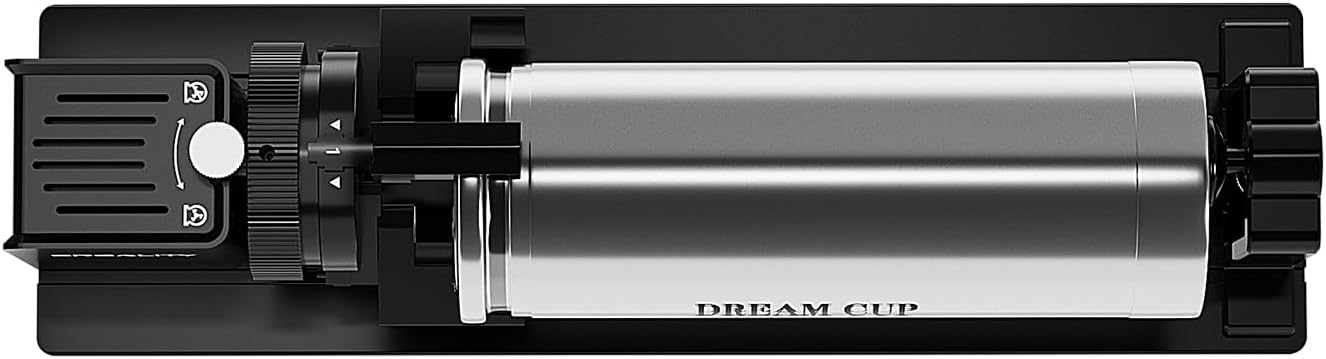
Image: Top view of the rotary roller with a cylindrical object in place.
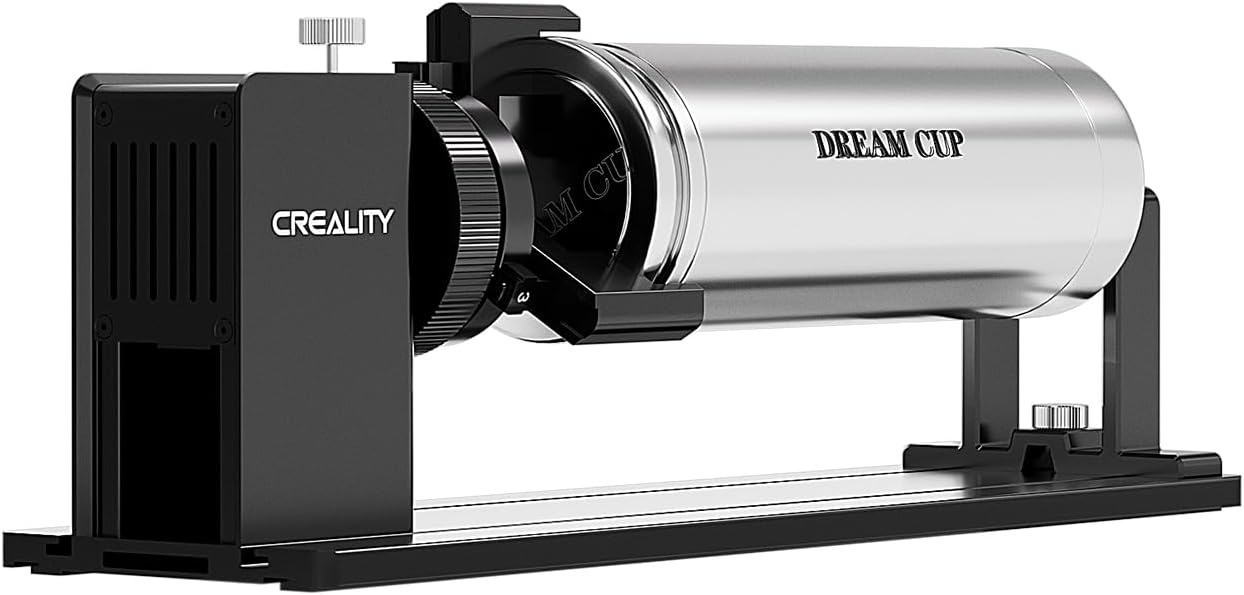
Image: Angled view of the rotary roller with a cylindrical object.

Image: Side view of the rotary roller with a cylindrical object.

Image: Another angled view of the rotary roller with a cylindrical object.
4. Operating Instructions
Once the Creality Falcon Rotary Roller is set up and your object is securely in place, you can proceed with the engraving process using your Creality Falcon A1 Laser Engraver's software.
- Software Configuration: Open your laser engraving software (e.g., LightBurn, LaserGRBL) and ensure the rotary axis is enabled and configured correctly for your object's dimensions. Refer to your laser engraver's software manual for detailed rotary axis settings.
- Positioning: Use the software to position the laser head to the starting point of your desired engraving area on the object.
- Focus Adjustment: Adjust the laser focus according to the material and the laser engraver's instructions.
- Start Engraving: Initiate the engraving process through the software. The rotary roller will automatically rotate the object as the laser engraves, ensuring a continuous pattern around the surface.
- Monitoring: Supervise the engraving process to ensure proper operation and safety.
5. Maintenance
Regular maintenance ensures the longevity and optimal performance of your Creality Falcon Rotary Roller.
- Cleaning: After each use, gently clean the rollers and clamping mechanisms to remove any dust, debris, or material residue. Use a soft, dry cloth. Avoid abrasive cleaners or solvents that could damage the surfaces.
- Inspection: Periodically inspect the rollers, clamps, and cables for any signs of wear, damage, or loose connections. Address any issues promptly.
- Storage: Store the rotary roller in a clean, dry environment when not in use to prevent dust accumulation and potential damage.
6. Troubleshooting
If you encounter issues with your Creality Falcon Rotary Roller, refer to the following common solutions:
- Object Not Rotating Smoothly: Ensure the object is properly seated and balanced on the rollers. Check for any obstructions or debris on the rollers. Verify that the clamping jaws are not overtightened or too loose.
- Engraving Distortion: Confirm that the object is perfectly level and centered on the rotary roller. Check your software settings for correct rotary axis configuration and object dimensions. Ensure the laser focus is accurate.
- Connection Issues: Verify that the cable connecting the rotary roller to the laser engraver's Y-axis port is securely plugged in at both ends. Restart your laser engraver and computer if necessary.
- Rotary Roller Not Responding: Check the power supply to your laser engraver. Ensure the rotary axis is enabled in your engraving software.
For persistent issues not covered here, please contact Creality customer support.
7. Specifications
| Feature | Detail |
|---|---|
| Product Dimensions | 15.35 x 5.31 x 5.12 inches |
| Item Model Number | 4007010222 |
| Item Weight | 6.24 pounds |
| Manufacturer | Creality |
| Date First Available | May 15, 2025 |
8. Warranty and Support
For warranty information, technical support, or service inquiries regarding your Creality Falcon Rotary Roller, please contact Creality customer service directly through their official website or the retailer where the product was purchased. Please have your model number (4007010222) and purchase date available when contacting support.


