
1. Introduction
This manual provides detailed instructions for the installation, operation, and maintenance of your MSI MAG PANO 110R PZ Mid-Tower Gaming PC Case. Please read this manual thoroughly before beginning installation to ensure proper assembly and safe usage. Keep this manual for future reference.
2. Safety Information
Always observe the following safety precautions:
- Disconnect all power sources before opening the PC case or performing any installation/maintenance.
- Handle components with care to prevent damage from electrostatic discharge. Use an anti-static wrist strap if available.
- Avoid placing the PC case in direct sunlight, near heat sources, or in areas with high humidity.
- Ensure proper ventilation around the case to prevent overheating.
- Keep small parts and tools away from children.
- The tempered glass panels are fragile. Handle them with extreme care to avoid breakage and injury.
3. Package Contents
Verify that all components are present in your package:
- MSI MAG PANO 110R PZ PC Case
- Accessory Box (screws, cable ties, standoffs, etc.)
- User Manual (this document)
- Pre-installed 3 x 120mm ARGB Reverse-blade fans (side)
- Pre-installed 1 x 120mm ARGB fan (rear)
4. Component Overview
Familiarize yourself with the key features and components of your PC case.

Figure 4.1: Front view of the MSI MAG PANO 110R PZ PC case, showcasing the tempered glass and pre-installed ARGB fans.

Figure 4.2: Angled view highlighting the case's overall structure and ventilation.

Figure 4.3: Interior view of the case, illustrating the cable management space and fan/ARGB hub.
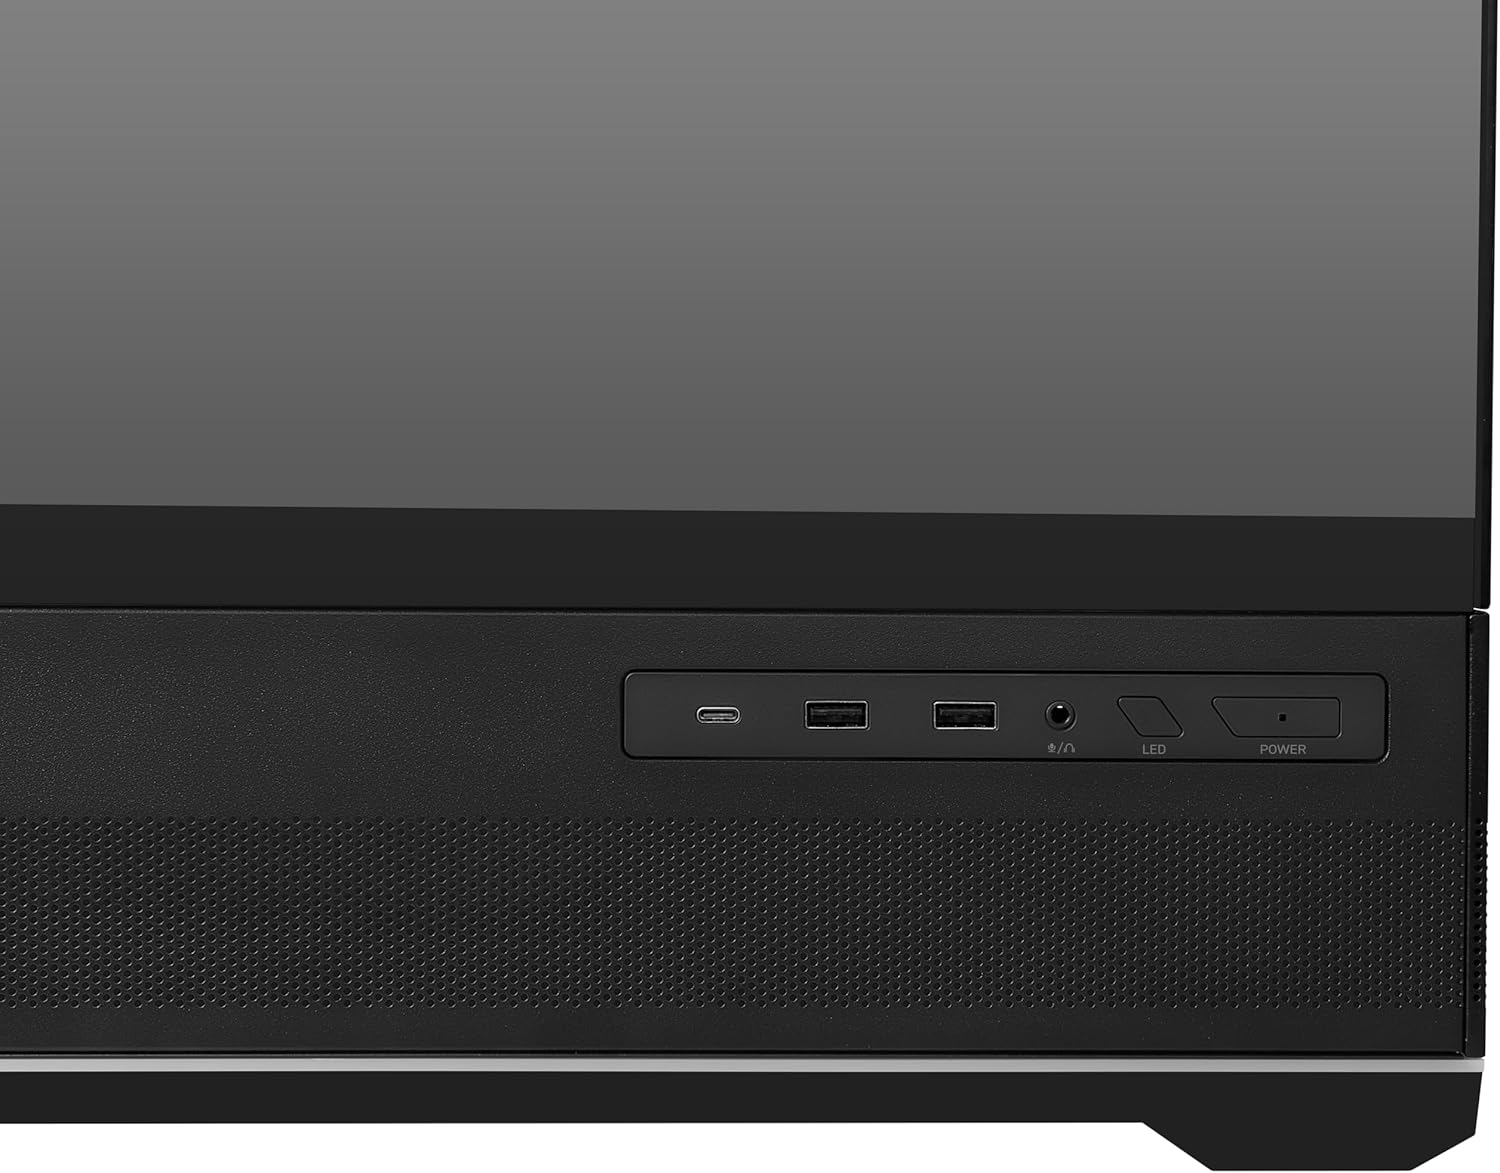
Figure 4.4: Detailed view of the front input/output panel.
Front I/O Panel

Figure 4.5: Front I/O Panel layout and functions.
- USB 20Gbps (Type-C): For high-speed data transfer.
- USB 5Gbps (Type-A) x2: Standard USB ports for peripherals.
- Mic In / Audio Out: For connecting headphones and microphones.
- LED Switch Button: Controls the ARGB lighting effects.
- Power Button: Turns the system on or off.
5. Setup and Installation
Follow these steps for installing your PC components into the MSI MAG PANO 110R PZ case.
5.1 Removing Side Panels
The case features a 270-degree panoramic tempered glass design. To access the interior, carefully remove the tempered glass side panels. They are typically secured with thumbscrews or a latch mechanism. Refer to the diagram below for guidance.

Figure 5.1: Tempered glass panel removal.
5.2 Motherboard Installation
This case supports ATX and Micro-ATX motherboards, including back-connect ATX/M-ATX types. Install the necessary standoffs for your motherboard form factor, then carefully place the motherboard and secure it with screws.

Figure 5.2: Component compatibility and dimensions.
5.3 Power Supply Unit (PSU) Installation
The case supports bottom-mount power supplies. Install your PSU into the designated compartment at the bottom rear of the case and secure it with screws.
5.4 Storage Drive Installation
The case offers multiple options for storage drives:
- HDD Bracket: For 3.5" drives.
- SSD Tray: For 2.5" drives.
- HDD / SDD Cage: Located in the PSU shroud area.
Refer to the diagram for specific locations.

Figure 5.3: Storage drive mounting options.
5.5 Graphics Processing Unit (GPU) Installation
Install your GPU into the appropriate PCIe slot on your motherboard. Ensure it is securely seated and fastened with the retention clip or screw.
5.6 Cooling System Installation
The case supports extensive cooling configurations:
- Radiator Support: Up to 360mm radiators can be mounted on the top, side, and bottom.
- Fan Support: Pre-installed with 3 x 120mm ARGB reverse-blade fans on the side and 1 x 120mm ARGB fan at the rear. Additional fan mounts are available.

Figure 5.4: Cooling system compatibility.
5.7 Cable Management
Utilize the cable routing channels and tie-down points behind the motherboard tray to organize cables. This improves airflow and aesthetics.

Figure 5.5: Integrated ARGB and Fan Hub for centralized control.
6. Operating Instructions
6.1 Powering On/Off
Press the Power Button on the front I/O panel to turn your system on or off.
6.2 ARGB Lighting Control
Use the LED Switch Button on the front I/O panel to cycle through various ARGB lighting effects for the pre-installed fans. For advanced control and synchronization with other MSI components, connect the ARGB hub to a compatible MSI motherboard via the provided cables and use MSI's software (e.g., Mystic Light).
7. Maintenance
Regular maintenance helps ensure optimal performance and longevity of your PC components.
- Dust Filters: Periodically remove and clean the dust filters located at the top, bottom, and front of the case. Use compressed air or a soft brush.
- Tempered Glass Panels: Clean the tempered glass with a soft, lint-free cloth and a non-abrasive glass cleaner. Avoid harsh chemicals.
- Interior Cleaning: Use compressed air to remove dust from internal components and fans. Ensure the system is powered off and unplugged before cleaning.
8. Troubleshooting
If you encounter issues, refer to the following common troubleshooting tips:
- No Power: Check all power connections, including the PSU, motherboard 24-pin, and CPU power cables. Ensure the power switch on the PSU is in the 'ON' position.
- Fans Not Spinning/No ARGB: Verify that all fan and ARGB cables are correctly connected to the fan hub and motherboard. Check motherboard BIOS settings for fan control.
- USB Ports Not Working: Ensure the front panel USB cables are correctly connected to the motherboard headers.
- Overheating: Check fan orientation for proper airflow (refer to Figure 5.4). Ensure dust filters are clean and there is adequate space around the case for ventilation.
For more complex issues, consult your motherboard or component manuals, or contact MSI support.
9. Specifications
| Feature | Specification |
|---|---|
| Model Name | MSI MAG PANO 110R PZ |
| Case Type | Mid Tower |
| Motherboard Compatibility | ATX, Micro-ATX, Mini-ITX (including Back-connect ATX/M-ATX) |
| Material | Tempered Glass, Steel |
| Dimensions (L x W x H) | Approx. 420mm x 225mm x 485mm |
| Weight | Approx. 20 lbs (9.07 kg) |
| Pre-installed Fans | 3 x 120mm ARGB Reverse-blade (Side), 1 x 120mm ARGB (Rear) |
| Radiator Support | Up to 360mm (Top, Side, Bottom) |
| CPU Cooler Max Height | < 160mm |
| GPU Max Length | < 400mm |
| PSU Max Length | < 200mm |
| Front I/O Ports | 1x USB 20Gbps Type-C, 2x USB 5Gbps Type-A, Mic In/Audio Out, LED Switch, Power Button |
10. Warranty and Support
For warranty information and technical support, please refer to the official MSI website or contact your local retailer. Keep your proof of purchase for warranty claims.
MSI Official Website: www.msi.com


