
1. Introduction
This manual provides detailed instructions for the installation, operation, and maintenance of your new litillbuly 10-inch Android 13 Car Stereo. This unit is designed for Chevy Silverado and GMC Sierra models manufactured between 2014 and 2018. Please read this manual thoroughly before installation and use to ensure proper functionality and safety.
2. Package Contents
Verify that all items listed below are included in your package:
- 10-inch Android 13 Car Stereo Unit
- Custom Fit Frame for Chevy Silverado/GMC Sierra 2014-2018
- Power Cable Harness
- RCA Cable Set
- Reversing Line Cable
- USB Cables (x2)
- CAN Bus Decoder Box
- GPS Antenna
- External Microphone
- Crowbar Tool
- Screwdriver
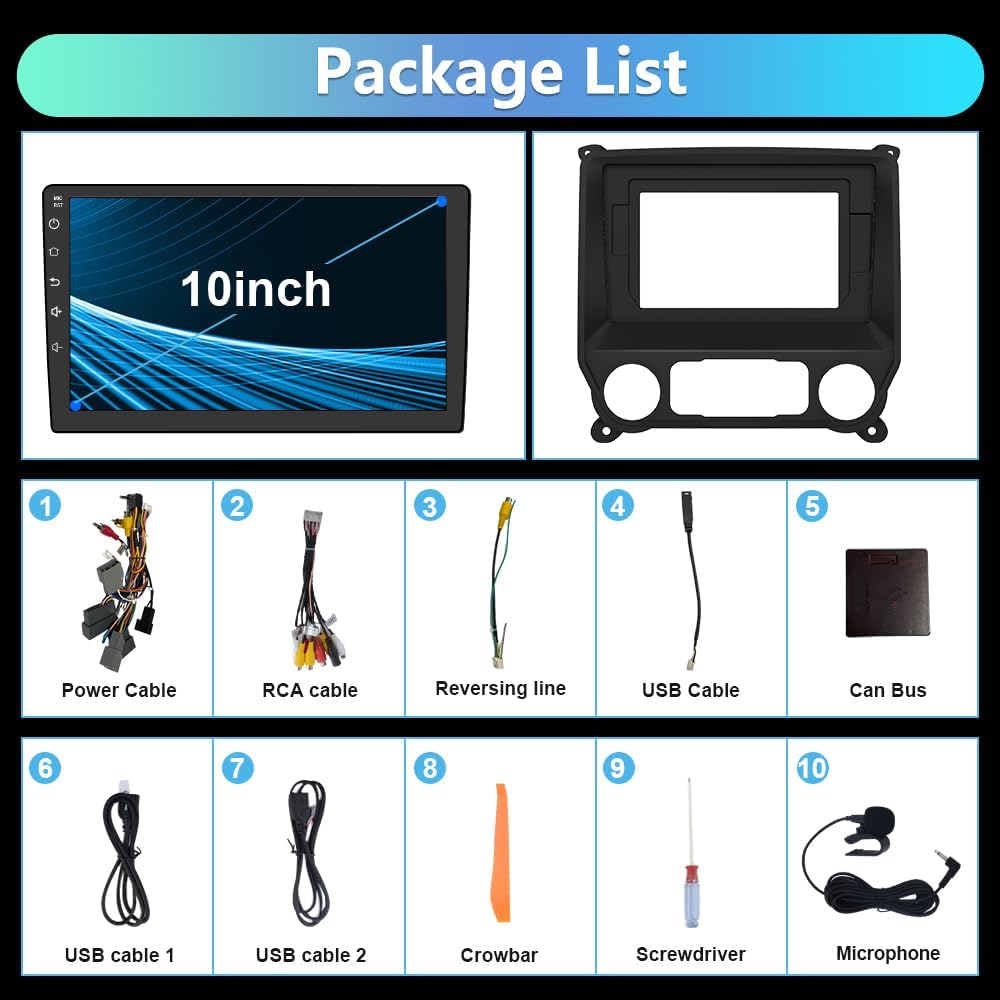
Figure 2.1: Included components in the litillbuly car stereo package.
3. Installation Guide
3.1. Pre-Installation Check
- Ensure the vehicle's ignition is off and the battery is disconnected before starting installation.
- Confirm compatibility with your vehicle model (Chevy Silverado/GMC Sierra 2014-2018).
3.2. Removing the Factory Radio
- Carefully pry off the dashboard trim surrounding the factory radio using the provided crowbar tool.
- Unscrew any retaining bolts holding the factory radio in place.
- Gently pull out the factory radio and disconnect all wiring harnesses and antenna cables.
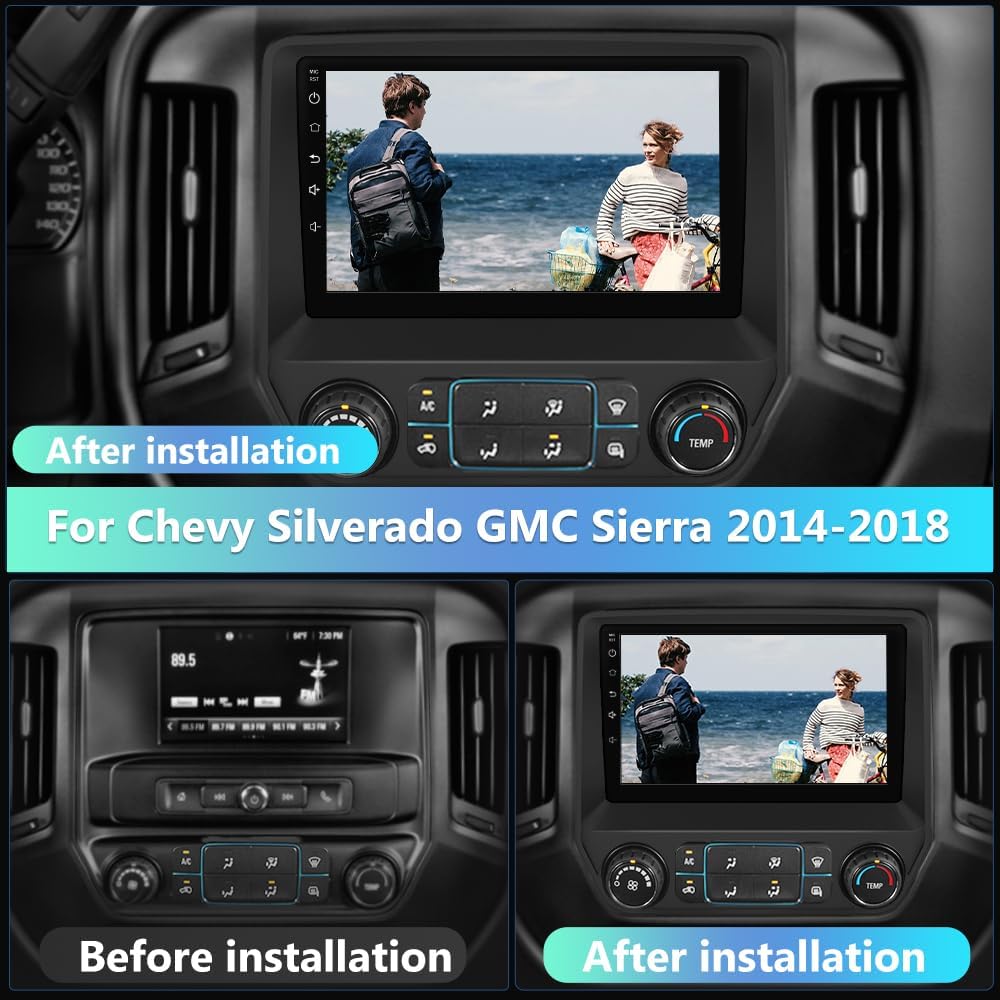
Figure 3.1: Before and After Installation of the Car Stereo.
3.3. Wiring Connections
Connect the provided wiring harnesses to the new litillbuly car stereo and the vehicle's existing wiring. Ensure all connections are secure.
- Power Cable: Connect the main power harness.
- RCA Cables: Connect for audio output (subwoofer, speakers) and video input (rear camera).
- USB Cables: Connect the two USB cables for media playback and device charging.
- GPS Antenna: Connect the GPS antenna and route it to a location with a clear view of the sky (e.g., dashboard corner).
- External Microphone: Connect the external microphone for improved call quality.
- CAN Bus Decoder Box: Connect the CAN Bus decoder box as per the wiring diagram to ensure proper communication with vehicle systems (e.g., steering wheel controls).
- Reversing Line: Connect the reversing line for rear camera functionality.

Figure 3.2: Wiring Diagram for 7-inch IOB Radio.

Figure 3.3: Wiring Diagram for 4-inch or 8-inch IOB Radio.
3.4. Steering Wheel Control Wiring
For vehicles with steering wheel controls, connect the appropriate wires as shown in the video. This allows you to control volume, tracks, and calls directly from your steering wheel.
Video 3.1: Installation of Steering Wheel Control Cables for 4-inch/8-inch IOB Radio. This video demonstrates the process of connecting the steering wheel control cables to the car stereo system, ensuring proper functionality for volume, track, and call management directly from the steering wheel.
3.5. Final Assembly
- Carefully place the new car stereo unit into the dashboard opening, ensuring all wires are tucked away and not pinched.
- Secure the unit with screws.
- Reattach the dashboard trim.
- Reconnect the vehicle battery.
4. Operating Instructions
4.1. Power On and Initial Setup
After installation, turn on your vehicle's ignition. The stereo will boot up, displaying the Android 13 operating system. Follow any on-screen prompts for initial setup, including language and time zone settings.

Figure 4.1: Android 13 System Interface.
4.2. Wireless CarPlay & Android Auto
The unit supports wireless CarPlay and wireless/wired Android Auto. Connect your smartphone via Bluetooth or USB to access navigation, music, messages, and voice control features directly on the stereo screen.
- Pairing: Go to the Bluetooth settings on your phone and the car stereo. Select your phone from the available devices on the stereo to pair.
- Activation: Once paired, CarPlay or Android Auto should automatically launch. Follow any on-screen instructions on your phone or stereo.
- Voice Control: Use voice commands (e.g., "Hey Siri" or "OK Google") for hands-free operation.
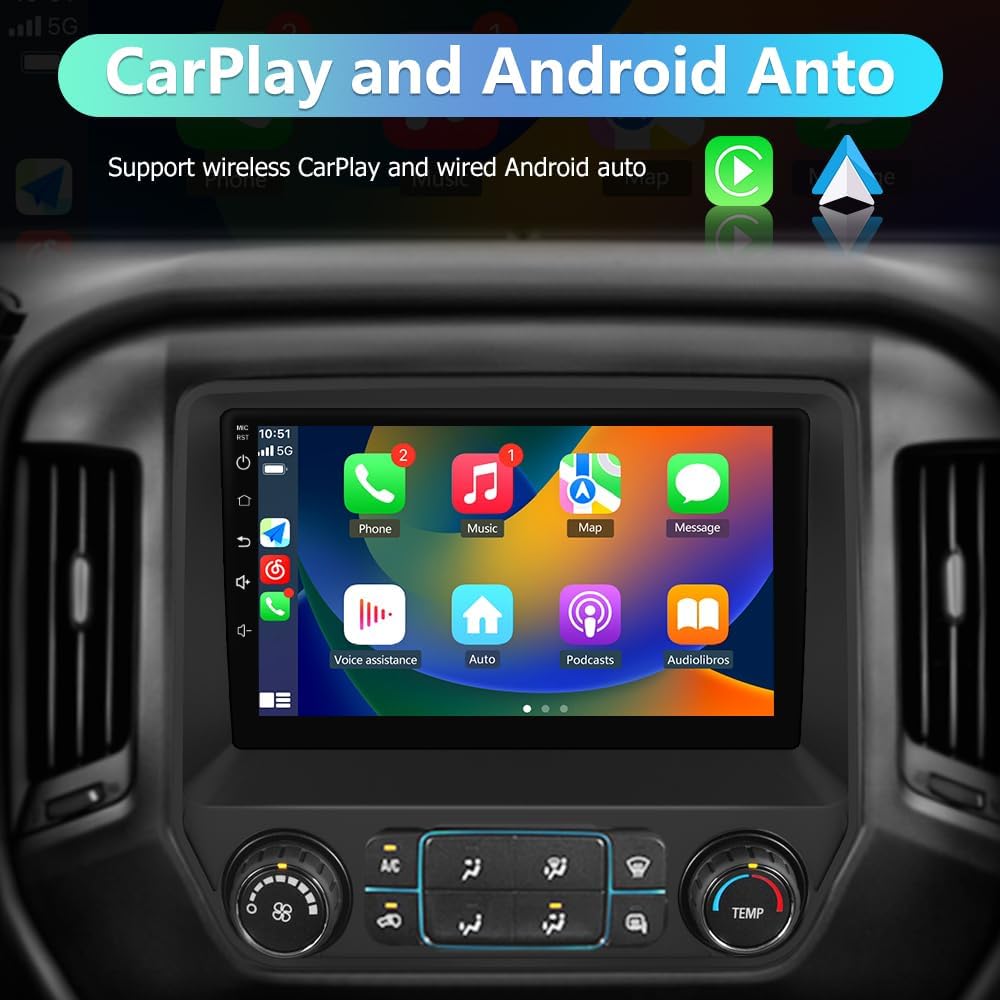
Figure 4.2: CarPlay and Android Auto Interface.

Figure 4.3: Voice Control for CarPlay and Android Auto.
4.3. GPS Navigation
The stereo supports both online and offline GPS navigation. Connect to Wi-Fi for online maps or download offline maps for areas with limited connectivity.

Figure 4.4: GPS Navigation and Steering Wheel Control Interface.
4.4. Bluetooth Hands-Free
Pair your phone via Bluetooth for hands-free calling and audio streaming. The external microphone enhances call clarity.
4.5. Wi-Fi Connectivity & App Expansion
Connect to a Wi-Fi hotspot to access the Google Play Store. Download and install compatible Android applications for music, video, and other services, expanding your in-car entertainment and utility.

Figure 4.5: App Expansion and Wi-Fi Connectivity.
4.6. Split Screen Functionality
The split-screen feature allows you to run two applications simultaneously on the 10-inch display, such as navigation and music playback.

Figure 4.6: Split Screen in Operation.
4.7. FM/AM/RDS Radio
Tune into your favorite radio stations with the built-in FM/AM/RDS tuner. RDS provides additional information like station name and song titles where available.

Figure 4.7: FM/AM/RDS Radio Interface.
4.8. Multimedia Playback
The unit supports various media playback methods, including USB, Bluetooth, and online streaming. It features 9 preset sound effects (jazz, rock, pop, classic, etc.) and manual equalizer (EQ) adjustments for customized audio in 4 zones.
5. Maintenance
5.1. Cleaning the Screen
Use a soft, lint-free cloth to gently wipe the touchscreen. Avoid abrasive cleaners or harsh chemicals that could damage the display.
5.2. Software Updates
The unit supports wireless firmware updates (OTA). Regularly check for and install updates to ensure optimal performance, new features, and enhanced security.

Figure 5.1: Wireless Firmware Update (OTA).
6. Troubleshooting
6.1. No Sound with Bose Audio System
If your vehicle has a Bose audio system and the power cord interface only has two cables, you may need to purchase a separate decoder box. Search for ASIN: B0D86PV15X for the compatible decoder box.

Figure 6.1: Bose Audio System Wiring Note.
6.2. General Wiring Issues
If your car's plug and interface match the photo shown, and you experience issues, you may need a different power harness. Please contact customer support for assistance.

Figure 6.2: Car Plug and Interface Compatibility Note.
6.3. Factory Backup Camera Not Working
Ensure the reversing line cable is correctly connected and configured in the stereo settings. If issues persist, consult a professional installer or contact customer support.
7. Specifications
- Operating System: Android 13
- RAM: 2GB
- ROM: 32GB
- Screen Size: 10.1 Inches
- Display Resolution: 1280*720 HD (IPS Technology)
- Connectivity: Wi-Fi, Bluetooth
- Special Features: Wireless CarPlay, Wireless/Wired Android Auto, Mirror Link, GPS Navigation (North America map type), Steering Wheel Controls, DSP Audio Settings, Split Screen, FM/AM/RDS Radio, 2 USB Ports, RCA Inputs (subwoofer, speakers, rear camera), External Microphone
- Mounting Type: Dashboard Mount
- Manufacturer: litillbuly
- Parcel Dimensions: 37.01 x 32.11 x 14.3 cm; 2.33 kg

Figure 7.1: 10-inch QLED Display Features.
8. Warranty and Support
For warranty information, technical support, or any questions regarding your litillbuly car stereo, please refer to the contact information provided with your purchase or visit the official litillbuly store on Amazon.
Amazon Store Link: litillbuly Store