1. Introduction
Thank you for choosing the Retevis RT22 Walkie Talkie System. This comprehensive bundle includes RT22 walkie talkies, a 10-way multi-unit charger, speaker microphones, and earpieces, designed for efficient and reliable communication. This manual provides detailed instructions for setup, operation, maintenance, and troubleshooting to ensure optimal performance of your devices.
1.1 Package Contents
Please verify that all items listed below are included in your package:
- 20 x Retevis RT22 Walkie Talkies
- 20 x Li-ion Batteries
- 20 x Belt Clips
- 1 x Ten-Way Multi-Unit Charger
- 2 x AC Adapter & DC Adapter (for charger)
- 20 x Walkie Talkie Speaker Microphones
- 20 x Earpieces
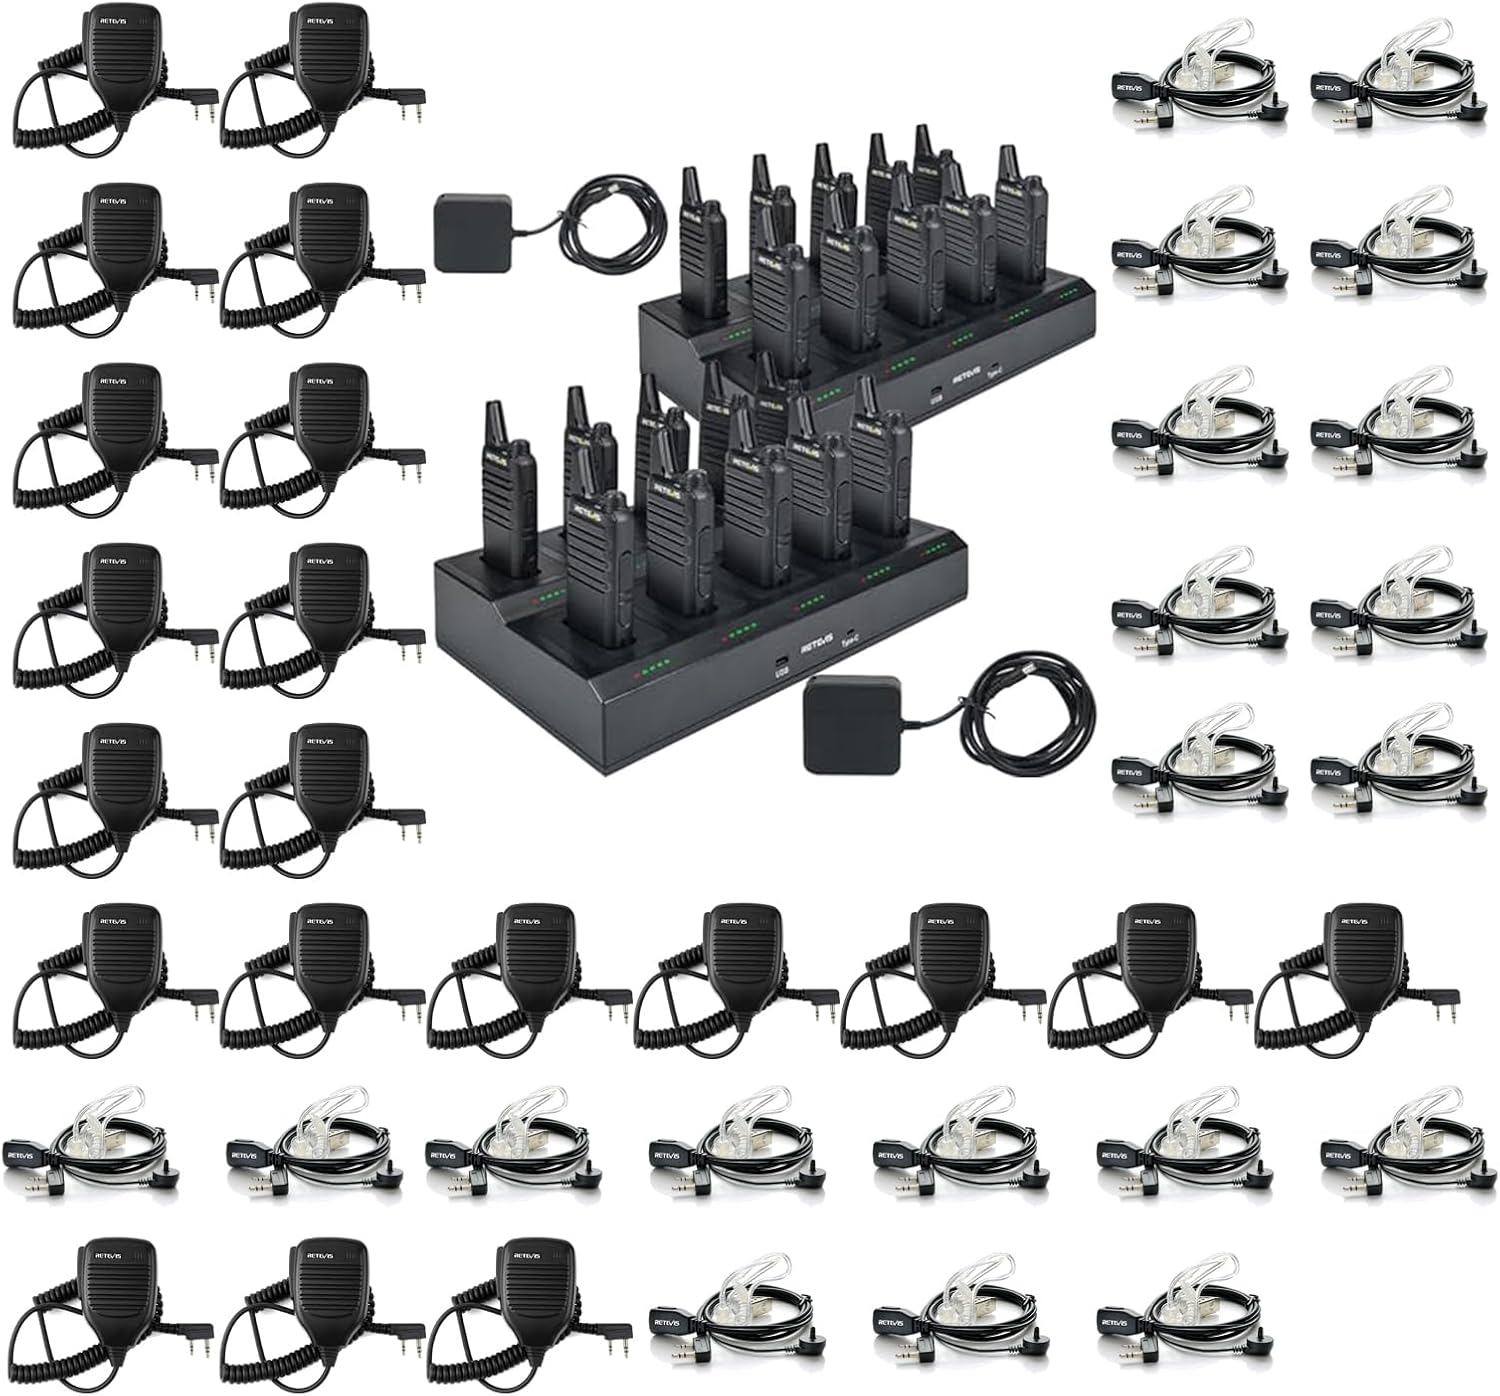
Figure 1.1: Overview of the Retevis RT22 Walkie Talkie Bundle, including walkie talkies, multi-charger, speaker mics, and earpieces.
2. Setup
2.1 Battery Installation
- Ensure the walkie talkie is powered off.
- Align the Li-ion battery with the battery compartment on the back of the walkie talkie.
- Gently slide the battery into place until it clicks securely.
- To remove, press the battery release latch (if present) and slide the battery out.
2.2 Multi-Unit Charger Setup
The 10-way multi-unit charger provides an efficient and organized charging solution for multiple walkie talkies simultaneously, addressing common issues like messy cords and difficulty tracking charging status.

Figure 2.1: Illustration of common charging challenges such as tangled cords, searching for adapters, and difficulty identifying charged devices, which the multi-unit charger is designed to resolve.
- Connect the AC adapter to the multi-unit charger.
- Plug the AC adapter into a standard wall outlet.
- Place the walkie talkies (with batteries installed) into the charging slots. Ensure proper alignment.
- The charger features LED indicators for each slot, showing charging progress.

Figure 2.2: The 10-way multi-unit charger actively charging multiple Retevis RT22 walkie talkies simultaneously, improving charging efficiency and organization.

Figure 2.3: Detail of the multi-unit charger showing replaceable charging slots, LED indicators for charging status, and built-in multiple safety protections.
The charger includes overheating, overvoltage, and overcurrent protection functions, and is UL certified to enhance charging safety.
2.3 Accessory Connection (Speaker Mic & Earpiece)
The speaker microphone and earpiece connect to the walkie talkie via a standard 2-pin K-head plug.
- Locate the accessory jack on the side of the Retevis RT22 walkie talkie.
- Align the 2-pin K-head plug of the speaker microphone or earpiece with the jack. The K-head plug has a 3.5mm stereo top pin for the ear and a 2.5mm stereo bottom pin for the mic.
- Gently push the plug firmly into the jack until it is fully seated.
- To disconnect, pull the plug straight out.

Figure 2.4: Close-up view of the acoustic tube earpiece, designed for clear and discreet audio reception.

Figure 2.5: Diagram illustrating the components of the earpiece and speaker microphone, including the K Plug, Acoustic Tube with surgical earbud, Microphone, PTT (Push-to-Talk) button, and Transducer with Clip.

Figure 2.6: Illustration showing the standard 2-pin K plug dimensions and its connection to a walkie talkie.
3. Operating Instructions
3.1 Basic Walkie Talkie Operation
- Power On/Off: Rotate the power/volume knob clockwise to turn on the walkie talkie. Rotate counter-clockwise until it clicks to turn off.
- Volume Adjustment: Continue rotating the power/volume knob clockwise to increase volume, and counter-clockwise to decrease volume.
- Channel Selection: The Retevis RT22 walkie talkies are pre-programmed with fixed channels. Ensure all walkie talkies intended for communication are set to the same channel. Refer to the specific RT22 user manual for channel changing procedures if applicable, or contact support for programming assistance.
3.2 Using the Speaker Microphone
The handheld speaker microphone allows for convenient communication without needing to hold the walkie talkie directly.
- Listening: Audio will be output through the speaker on the microphone.
- Transmitting: Press and hold the Push-to-Talk (PTT) button on the side of the speaker microphone. Speak clearly into the microphone. Release the PTT button when finished speaking to listen for a response.

Figure 3.1: Close-up of the speaker microphone, highlighting its sensitive microphones and loud speaker for high-quality audio transmission and reception.
The built-in speaker mic provides clear and loud audio, making communication effective even in noisy environments.
3.3 Using the Earpiece
The earpiece provides discreet and private audio reception.
- Insert the earpiece into your ear.
- Audio from incoming transmissions will be heard through the earpiece.
- If using an earpiece with an integrated microphone, use the PTT button on the earpiece cable or the walkie talkie itself to transmit.
4. Maintenance
4.1 Cleaning
- Wipe the walkie talkies, charger, and accessories with a soft, damp cloth.
- Do not use harsh chemicals, solvents, or abrasive cleaners.
- Ensure all devices are dry before charging or use.
4.2 Battery Care
- Charge batteries fully before first use.
- Avoid overcharging or completely draining batteries, as this can reduce their lifespan.
- Store batteries in a cool, dry place when not in use.
- If storing for extended periods, charge batteries to about 50% capacity.
4.3 Storage
- Store the walkie talkies and accessories in a dry, dust-free environment.
- Keep away from extreme temperatures and direct sunlight.
- Disconnect batteries from walkie talkies if storing for long periods to prevent discharge.
5. Troubleshooting
If you encounter issues with your Retevis RT22 system, please refer to the following common problems and solutions:
| Problem | Possible Cause | Solution |
|---|---|---|
| No power / Device won't turn on | Battery not installed correctly; Battery discharged; Faulty battery. | Ensure battery is securely installed. Charge the battery fully. Try a different battery if available. |
| Cannot transmit or receive | Different channels; Out of range; Low battery; Accessory not connected properly. | Ensure all radios are on the same channel. Move closer to the other radio. Charge the battery. Reconnect the speaker mic/earpiece firmly. |
| Poor audio quality / Static | Weak signal; Obstructions; Accessory connection issues. | Move to an open area. Check the connection of the speaker mic/earpiece. Adjust volume. |
| Charger not working | Power adapter not connected; Faulty outlet; Charger issue. | Ensure AC adapter is securely connected to charger and outlet. Try a different outlet. Check charger LED indicators. |
6. Specifications
| Feature | Detail |
|---|---|
| Model Number | RT22 |
| Brand | Retevis |
| Special Feature | Rechargeable |
| Voltage | 3.7 Volts |
| Water Resistance Level | Not Water Resistant |
| Compatible Devices | Earpieces, Speaker Mics, Headphones (with K-head 2-pin plug) |
| Charger Type | 10-Way Multi-Unit Charger |
| Charger Safety Features | Overheating protection, Overvoltage protection, Overcurrent protection, UL certification |
| Speaker Mic Plug Type | K-head 2-pin (Ear 3.5mm, Mic 2.5mm) |
| Compatibility (Speaker Mic) | Retevis H-777, RT21, RT22, RT68, RT18, RT19, RT27, RT-5R; Baofeng UV-5R series, BF-F8HP, BF-888S; Arcshell AR-5; Kenwood two-way radios and more. |

Figure 6.1: Visual representation of the speaker microphone's broad compatibility with various walkie talkie models from Retevis, Baofeng, Kenwood, Pxton, Arcshell, and Samcom.
7. Warranty Information
Retevis products are manufactured to high-quality standards. For specific warranty terms and conditions, please refer to the warranty card included with your product or visit the official Retevis website. Keep your purchase receipt as proof of purchase for any warranty claims.
8. Support
For technical assistance, troubleshooting beyond this manual, or inquiries regarding your Retevis RT22 system, please contact Retevis customer support. Contact information can typically be found on the product packaging, the official Retevis website, or through your point of purchase.
We are committed to providing excellent service and support for our products.


