
Warm Audio WA-C1
Warm Audio WA-C1 Analog Chorus Vibrato Pedal User Manual
Model: WA-C1
Introduction
The Warm Audio WA-C1 is an all-analog chorus and vibrato pedal designed to deliver classic modulated tones. This manual provides detailed instructions for setting up, operating, and maintaining your WA-C1 pedal to ensure optimal performance.
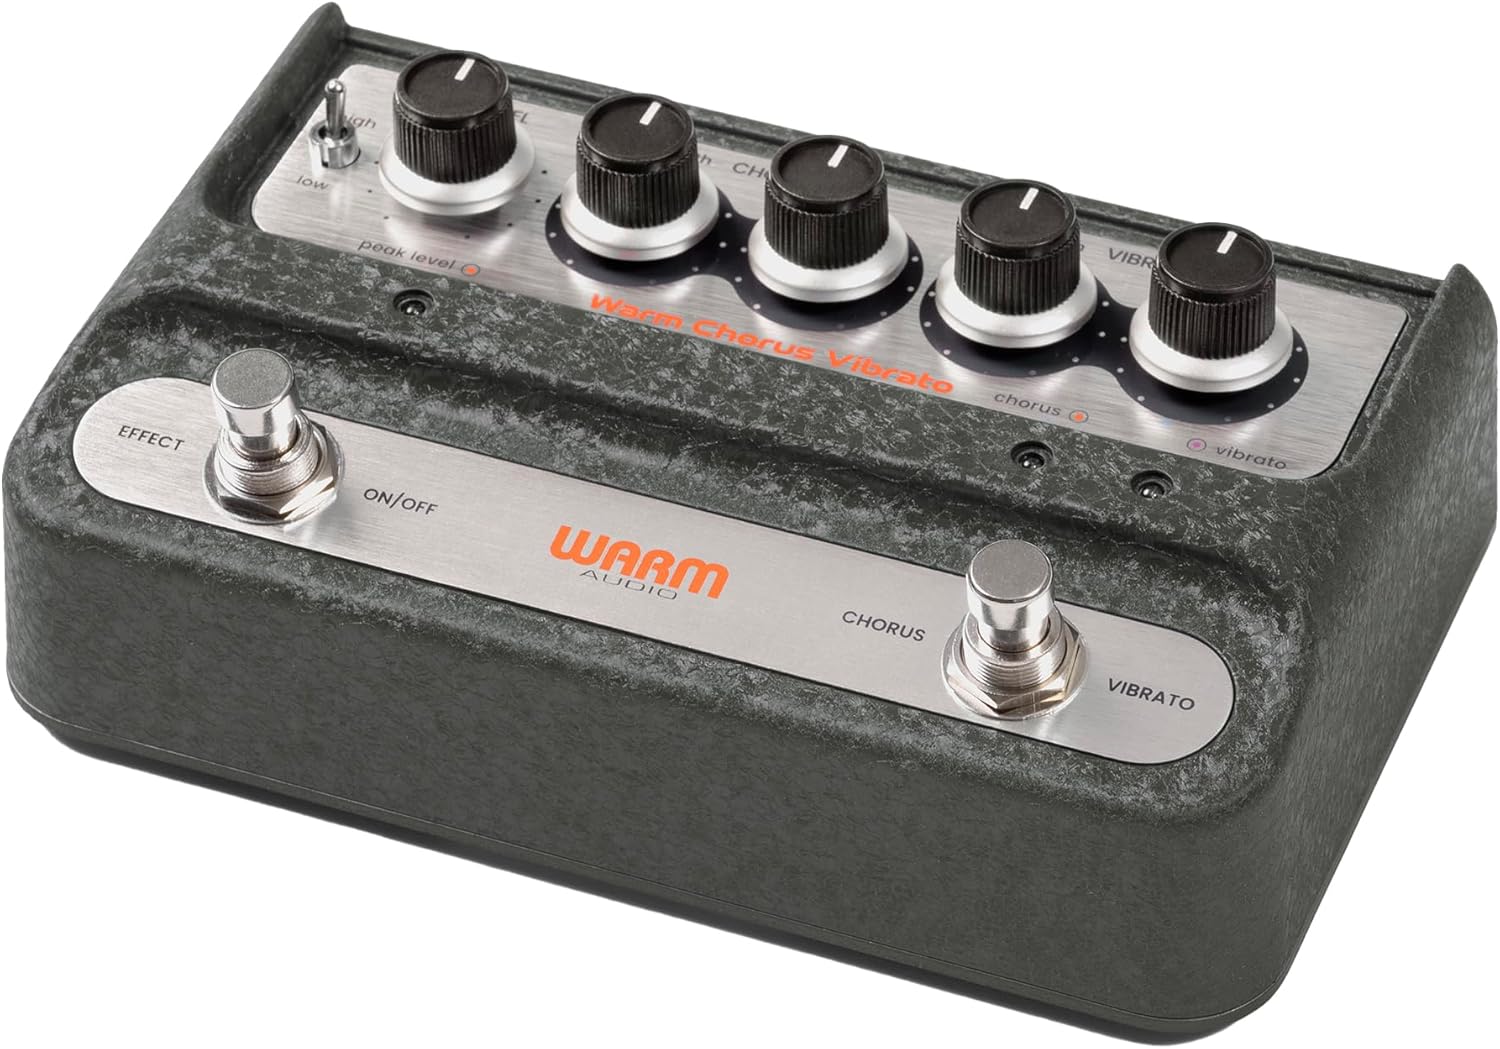
Image: Overall view of the Warm Audio WA-C1 Analog Chorus Vibrato pedal.
Important Safety Instructions
- Read these instructions thoroughly before use.
- Keep these instructions for future reference.
- Heed all warnings on the product and in this manual.
- Do not use this apparatus near water.
- Clean only with a dry cloth.
- Do not block any ventilation openings. Install in accordance with the manufacturer's instructions.
- Do not install near any heat sources such as radiators, heat registers, stoves, or other apparatus (including amplifiers) that produce heat.
- Only use attachments/accessories specified by the manufacturer.
- Unplug this apparatus during lightning storms or when unused for long periods.
- Refer all servicing to qualified service personnel. Servicing is required when the apparatus has been damaged in any way, such as power-supply cord or plug is damaged, liquid has been spilled or objects have fallen into the apparatus, the apparatus has been exposed to rain or moisture, does not operate normally, or has been dropped.
Features
- Faithful recreation of a classic all-analog chorus/vibrato circuit.
- Premium all-analog preamp for responsive tone.
- Independent Depth and Rate controls for Chorus.
- Authentic Vibrato section.
- Switchable Hi-Z input for optimizing guitar clarity.
- Mono and Stereo output options.
Controls and Connections
Front Panel Controls

Image: Top-down view of the WA-C1 pedal's front panel, showing all control knobs and footswitches.
- LEVEL Knob: Adjusts the overall output volume of the pedal.
- DEPTH (Chorus) Knob: Controls the intensity or sweep range of the chorus effect.
- RATE (Chorus) Knob: Controls the speed of the chorus modulation.
- DEPTH (Vibrato) Knob: Controls the intensity or sweep range of the vibrato effect.
- RATE (Vibrato) Knob: Controls the speed of the vibrato modulation.
- EFFECT ON/OFF Footswitch: Engages or bypasses the entire pedal effect. The associated LED indicates the effect status.
- CHORUS/VIBRATO Footswitch: Toggles between Chorus and Vibrato modes when the effect is active. The associated LEDs indicate the selected mode.
- HIGH/LOW Switch: A two-position switch that adjusts the input gain, allowing for optimal signal handling from various instruments.
- PEAK LEVEL LED: Illuminates to indicate signal clipping or excessive input level. Adjust the HIGH/LOW switch or input signal to prevent clipping.
Rear Panel Connections

Image: Rear view of the WA-C1 pedal, showing the power input, Hi-Z switch, input jack, and output jacks.
- POWER 9V Input: Connect a standard 9V DC power adapter (center negative, 2.1mm barrel connector). Ensure the power supply meets the pedal's requirements.
- HI-Z Switch: This switch adjusts the input impedance. Set to 'ON' for higher impedance instruments like guitars to enhance clarity in the high-end. Set to 'OFF' for lower impedance sources like keyboards.
- INPUT Jack: Connect your instrument (guitar, keyboard, etc.) to this 1/4-inch mono input.
- STEREO OUTPUT Jack: Use this 1/4-inch output for a stereo signal path, typically connecting to two amplifiers or a stereo effects loop.
- MONO OUTPUT Jack: Use this 1/4-inch output for a mono signal path, connecting to a single amplifier or the next pedal in your chain.
Setup
- Power Connection: Connect a compatible 9V DC (center negative) power adapter to the POWER 9V input on the rear panel. Do not use an incompatible power supply.
- Instrument Connection: Connect your instrument to the INPUT jack on the rear panel using a standard 1/4-inch instrument cable.
- Output Connection:
- For mono operation, connect the MONO OUTPUT jack to your amplifier or the next pedal in your signal chain.
- For stereo operation, connect both the MONO OUTPUT and STEREO OUTPUT jacks to two separate amplifiers or a stereo input device.
- Hi-Z Switch: If using a guitar, set the HI-Z switch to 'ON' for optimal high-end clarity. For other instruments like keyboards, set it to 'OFF'.
- Initial Settings: Start with all DEPTH and RATE knobs at their minimum (fully counter-clockwise) and the LEVEL knob at noon (12 o'clock) for initial sound adjustments.
Operating Instructions
- Engaging the Effect: Press the EFFECT ON/OFF footswitch to activate the pedal. The corresponding LED will illuminate.
- Selecting Mode: With the effect active, press the CHORUS/VIBRATO footswitch to toggle between Chorus and Vibrato modes. The respective LED will indicate the active mode.
- Adjusting Chorus: In Chorus mode, use the DEPTH (Chorus) and RATE (Chorus) knobs to dial in your desired modulation intensity and speed.
- Adjusting Vibrato: In Vibrato mode, use the DEPTH (Vibrato) and RATE (Vibrato) knobs to dial in your desired modulation intensity and speed.
- Output Level: Use the LEVEL knob to adjust the overall output volume of the pedal. Ensure it matches or slightly boosts your bypassed signal level.
- Input Gain: If your instrument's signal is too hot or too weak, use the HIGH/LOW switch to optimize the input gain. Monitor the PEAK LEVEL LED to avoid clipping.
Maintenance
- Cleaning: Clean the pedal's exterior with a soft, dry cloth. Do not use liquid cleaners or solvents.
- Storage: Store the pedal in a dry, cool environment away from direct sunlight and extreme temperatures.
- Power Supply: Always use the correct 9V DC (center negative) power supply. Incorrect power can damage the unit and void the warranty.
- Footswitches and Jacks: Periodically check connections for any loose cables or debris.
Troubleshooting
| Problem | Possible Cause | Solution |
|---|---|---|
| No sound when pedal is engaged. |
|
|
| Effect is too subtle or too intense. |
|
|
| Distortion or unwanted noise. |
|
|
Specifications
- Model: WA-C1
- Effect Type: Analog Chorus / Vibrato
- Signal Format: Analog
- Power Requirement: 9V DC, Center Negative (Power adapter not included)
- Input: 1/4-inch Mono Jack
- Outputs: 1/4-inch Mono Jack, 1/4-inch Stereo Jack
- Controls: Level, Chorus Depth, Chorus Rate, Vibrato Depth, Vibrato Rate, High/Low Switch, Hi-Z Switch
- Dimensions: Approximately 8 x 5.25 x 4 inches (Package Dimensions)
- Weight: Approximately 2 pounds (Item Weight)
Warranty and Support
Warm Audio products are designed for reliability and performance. For warranty information and technical support, please refer to the official Warm Audio website or contact your authorized dealer. Keep your purchase receipt as proof of purchase for warranty claims.
For further assistance, visit: www.warmaudio.com/support
Related documentsWA-C1


Ask a question about this manual
Ask about setup, troubleshooting, compatibility, parts, safety, or missing instructions. Manuals+ will review the question and use this page’s manual context to help answer it.