
Product Overview
The elec Space Mini Bluetooth Wireless Mouse (Model M109) is a compact and lightweight peripheral designed for portability and multi-functionality. It integrates a TF card reader, offers silent click operation, and features a rechargeable lithium battery. Its versatile connectivity options make it suitable for various computing environments.
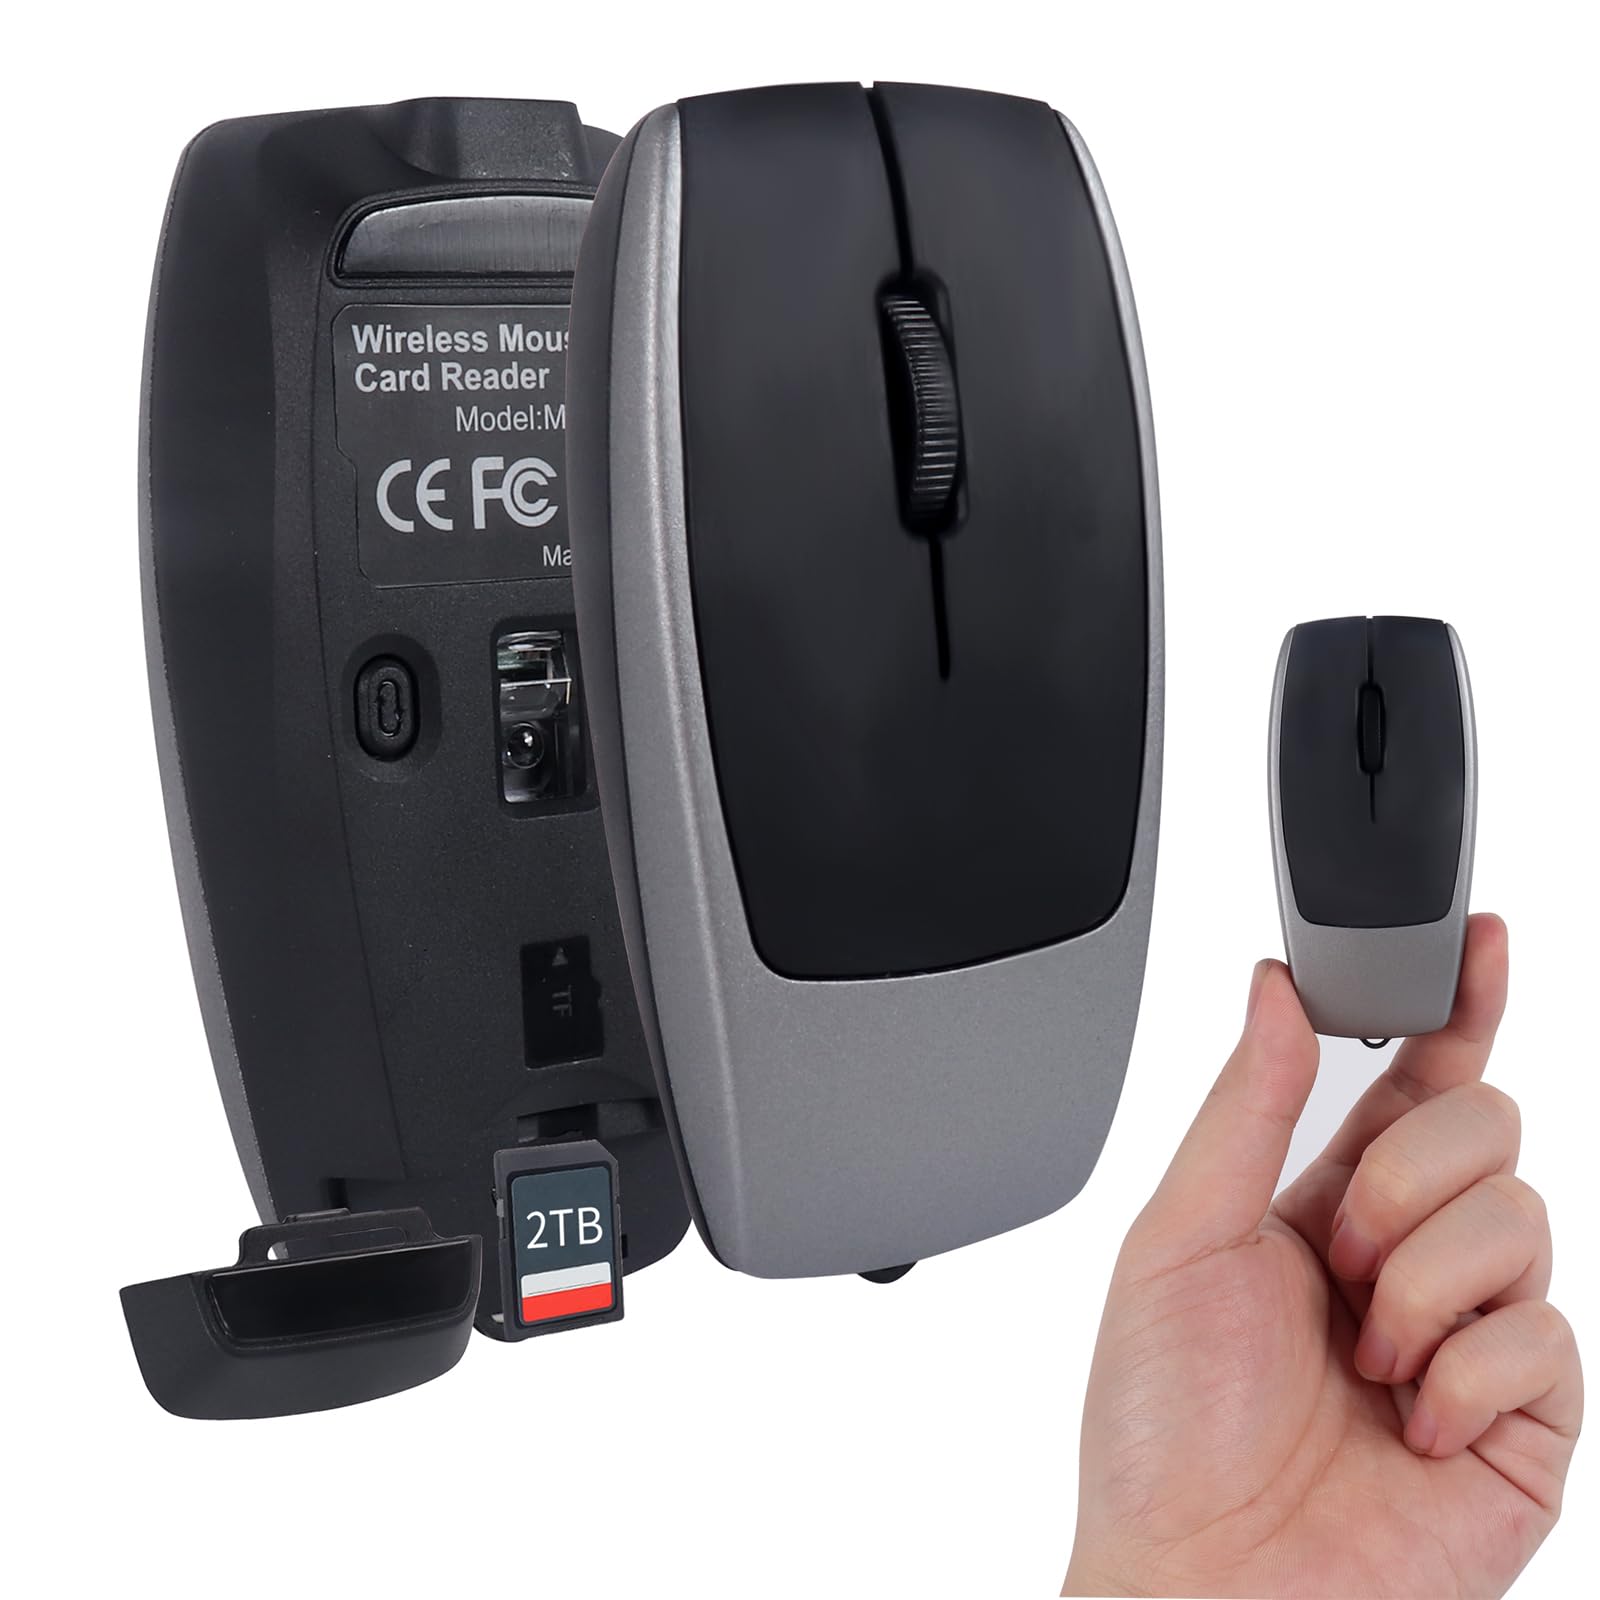
This mouse is engineered for convenience, featuring a built-in anti-lost strap and automatic sleep mode to conserve battery life. It supports fast data transfers and offers a seamless experience across multiple operating systems.
Setup and Connectivity
Charging the Mouse
Before initial use, ensure the mouse is fully charged. Connect the provided Type-C charging cable to the mouse's charging port and to a USB power source. A full charge typically takes 2-3 hours.

Connecting via Bluetooth 5.1
- Locate the power switch on the underside of the mouse.
- Slide the switch to the 'BT1' or 'BT2' position to activate Bluetooth mode. The indicator light on the mouse will begin to flash, indicating it is in pairing mode.
- On your device (laptop, PC, tablet, smartphone), navigate to the Bluetooth settings.
- Search for available devices and select 'BT Mouse' or a similar name from the list.
- Once connected, the indicator light on the mouse will stop flashing and remain solid.

Connecting via USB Dongle (2.4G Wireless)
- Locate the USB dongle, typically stored in a compartment on the underside of the mouse.
- Insert the USB dongle into an available USB port on your computer.
- Slide the power switch on the underside of the mouse to the '2.4G' position.
- The mouse should automatically connect to your device.

Video 1: This video demonstrates the setup and connectivity options of the elec Space Mini Bluetooth Mouse with TF Card Reader, including Bluetooth pairing and USB dongle usage.
Operating Instructions
Basic Mouse Functions
- Left Click: Primary selection and activation.
- Right Click: Accesses contextual menus.
- Scroll Wheel: Scrolls vertically through documents and web pages. The scroll wheel also functions as a middle button click.

Using the TF Card Reader
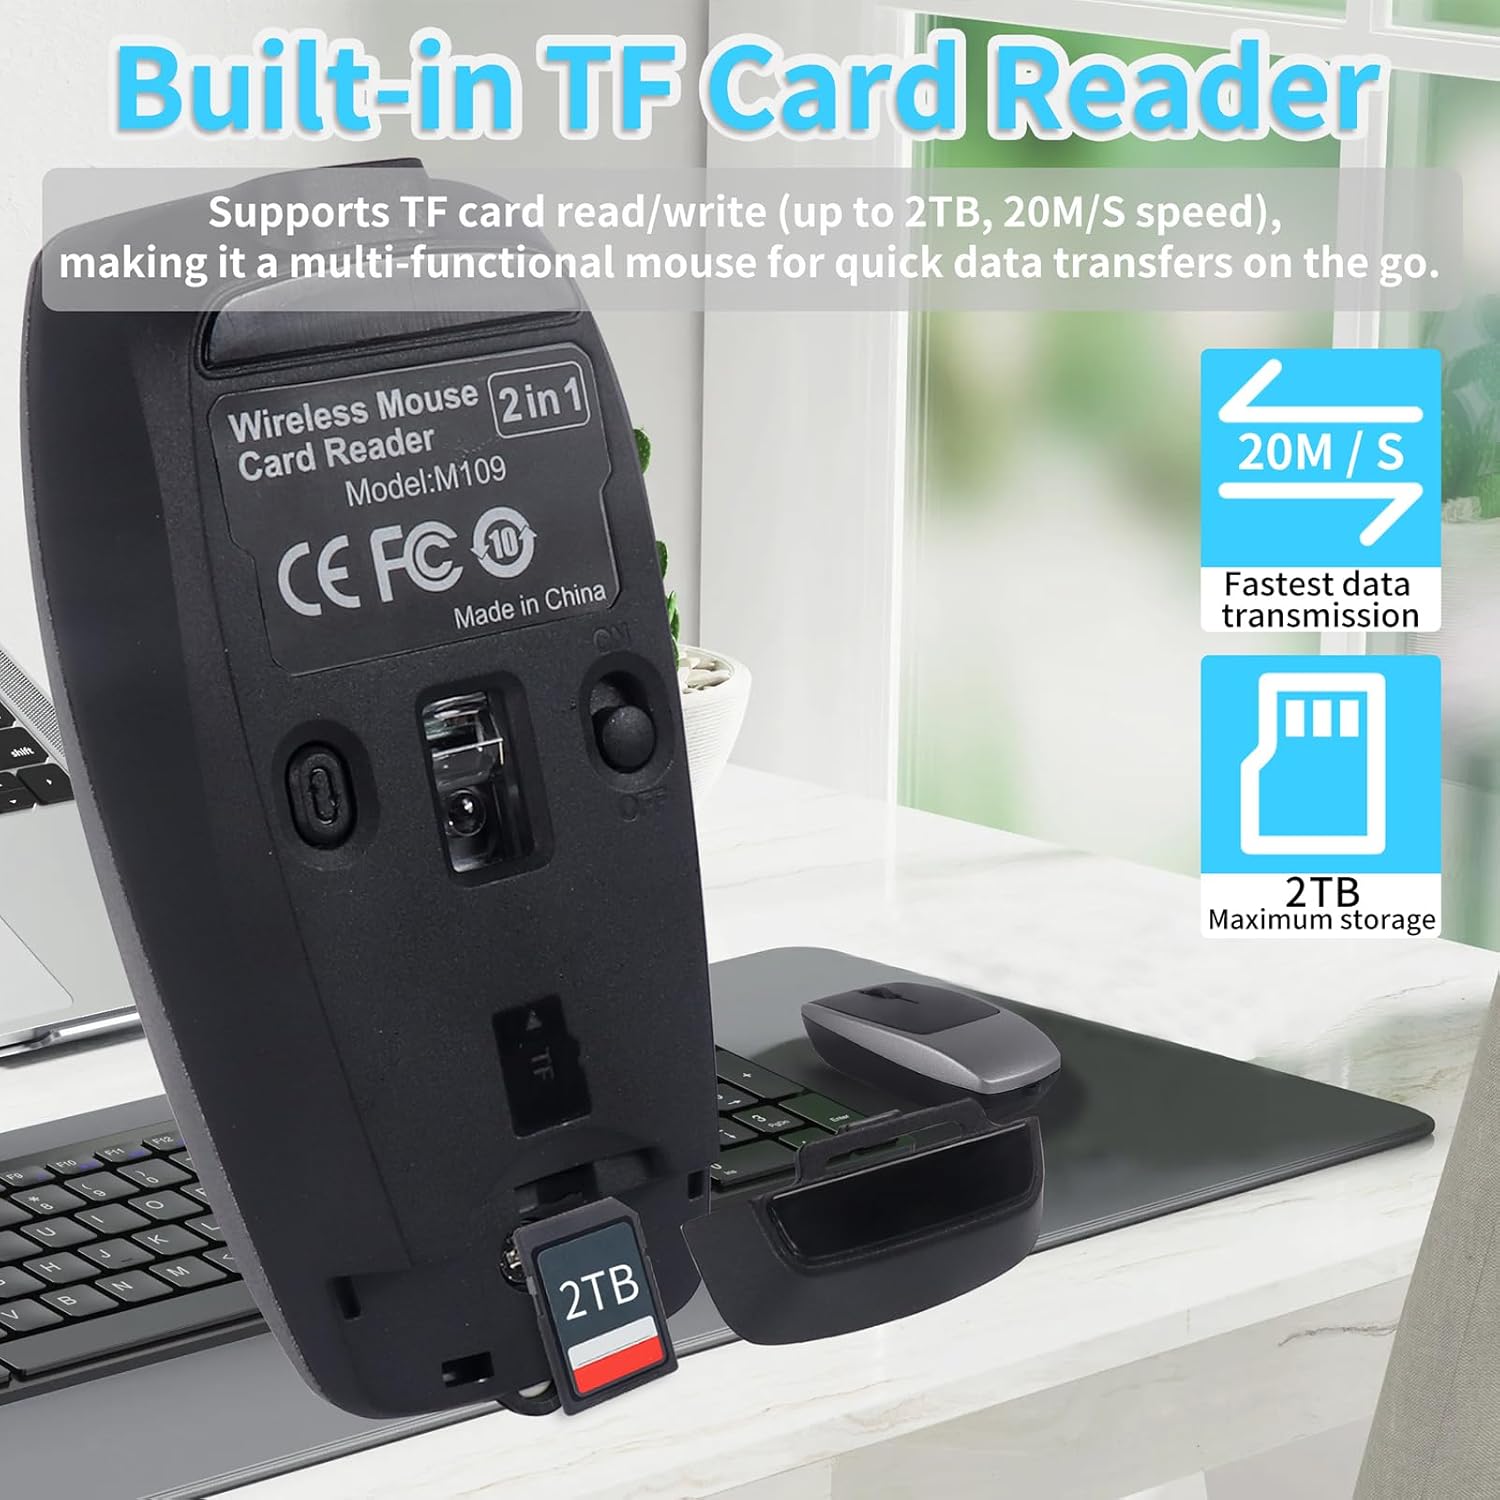
The mouse includes a built-in TF (MicroSD) card reader, supporting cards up to 2TB with data transfer speeds of up to 20MB/s.
- Locate the TF card slot on the underside of the mouse.
- Gently insert your TF card into the slot until it clicks into place.
- Your computer should recognize the TF card as a removable storage device.
- To remove the TF card, gently push it inward until it clicks, then release. The card will eject slightly, allowing you to pull it out.

Automatic Sleep Mode
To conserve battery life, the mouse will automatically enter sleep mode after a period of inactivity. To wake the mouse, simply press any button.
Maintenance and Care
To ensure the longevity and optimal performance of your mouse, follow these care guidelines:
- Cleaning: Use a soft, dry cloth to clean the mouse. Avoid using abrasive cleaners, solvents, or harsh chemicals, as these can damage the surface.
- Storage: When not in use, store the mouse in a cool, dry place. Utilize the built-in anti-lost strap for secure carrying, especially during travel. Avoid exposing the mouse to extreme temperatures or direct sunlight.
- Battery Care: Recharge the mouse regularly to maintain battery health. Avoid fully discharging the battery frequently.

Troubleshooting
Connectivity Issues
- Mouse not connecting via Bluetooth: Ensure the mouse is in Bluetooth pairing mode (indicator light flashing). Check your device's Bluetooth settings and try re-pairing. Ensure the mouse battery is charged.
- Mouse not connecting via USB dongle: Ensure the dongle is securely inserted into a USB port and the mouse is switched to '2.4G' mode. Try a different USB port.
Mouse Not Responding
- Check if the mouse is powered on.
- The mouse might be in automatic sleep mode; press any button to wake it up.
- Ensure the battery is charged.
TF Card Reader Not Working
- Ensure the TF card is inserted correctly and fully seated in the slot.
- Check if the TF card is damaged or corrupted. Try using a different TF card.
- Ensure your device's operating system drivers for card readers are up to date.
Specifications
| Feature | Detail |
|---|---|
| Brand | elec Space |
| Model | M109 |
| Color | Grey |
| Connectivity Technology | Bluetooth 5.1, 2.4G Wireless (USB Dongle) |
| Movement Detection Technology | Optical |
| Special Feature | Portable, Built-in TF Card Reader (up to 2TB), Silent Click, Rechargeable |
| Batteries | 1 Nonstandard Battery (included) |
| Item Weight | 3.2 ounces |
| Package Dimensions | 5.2 x 3.78 x 1.26 inches |
Warranty and Support
This product comes with a 1-year warranty from the date of purchase, covering manufacturing defects. Please retain your proof of purchase for warranty claims.

For technical support, troubleshooting assistance, or warranty inquiries, please contact elec Space customer service through the retailer's platform where the product was purchased.