
1. Product Overview
The Olucia Rona Square IP44 Adjustable Veranda Spotlights are designed to provide versatile and durable lighting for both indoor and outdoor environments, particularly verandas and covered outdoor spaces. This kit includes eight adjustable spotlights, a connection hub, a power adapter, and a remote control for convenient operation. The IP44 rating ensures protection against solid objects larger than 1mm and splashes of water from any direction, making them suitable for various applications.
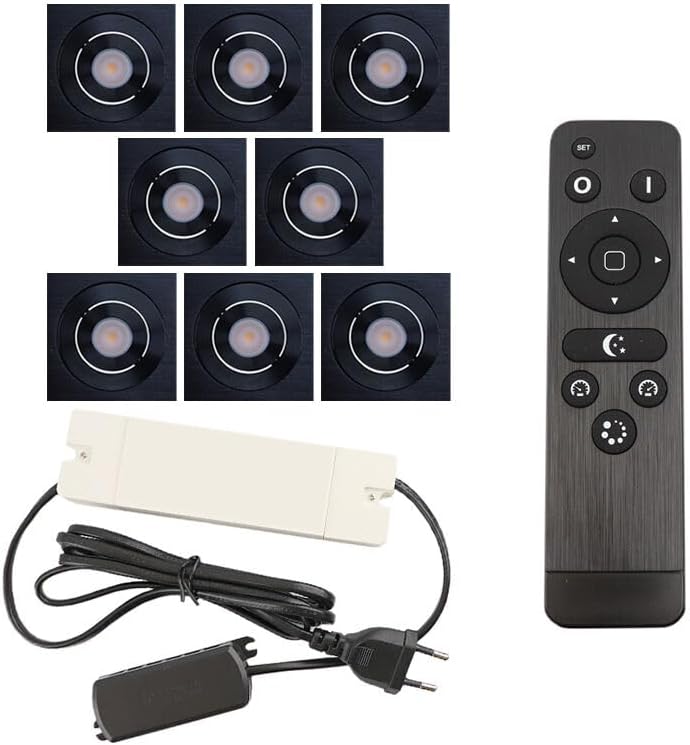
Image 1.1: Complete kit including eight spotlights, remote control, connection hub, and power adapter.
2. Safety Instructions
- Electrical Safety: Installation should be performed by a qualified electrician or competent person in accordance with local electrical codes and regulations.
- Power Supply: Ensure the power supply voltage matches the requirements specified on the product label.
- IP44 Rating: The spotlights are rated IP44, meaning they are protected against splashing water. They are suitable for outdoor use in covered areas but should not be submerged in water or exposed to direct high-pressure water jets.
- Ventilation: Ensure adequate ventilation around the spotlights to prevent overheating. Do not cover the lights with insulating material unless specifically designed for it.
- Cleaning: Disconnect power before cleaning. Use a soft, dry cloth. Do not use abrasive cleaners or solvents.
- Damage: Do not operate the product if any part is damaged. Contact customer support for assistance.
3. Package Contents
Verify that all components are present in the package:
- 8 x Olucia Rona Square IP44 Adjustable Spotlights (Black)
- 1 x Remote Control
- 1 x Connection Hub
- 1 x Power Adapter with Cable

Image 3.1: Power adapter and connection hub.

Image 3.2: Remote control, showing battery compartment (batteries not included).
4. Setup and Installation
Follow these steps for proper installation:
- Plan Installation: Determine the desired locations for each of the eight spotlights. Ensure sufficient space for recessed installation and access for wiring.
- Prepare Mounting Holes: Cut appropriate-sized holes in the ceiling or mounting surface for each spotlight. The dimensions of each spotlight are 6 x 6 x 6 cm.
- Connect Spotlights to Hub: Connect each spotlight cable to an available port on the connection hub. Ensure secure connections.
- Connect Hub to Power Adapter: Plug the connection hub into the provided power adapter.
- Mount Spotlights: Insert each spotlight into its prepared hole. The spring clips on the sides of the spotlight will secure it in place. The spotlights are adjustable, allowing you to direct the light as needed.
- Power Connection: Plug the power adapter into a suitable electrical outlet.
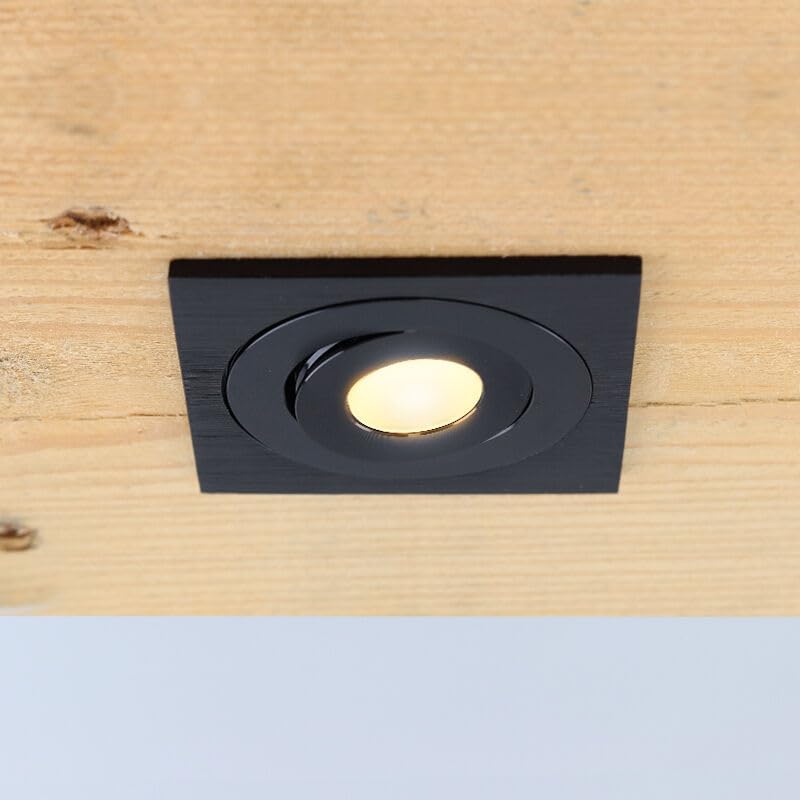
Image 4.1: An Olucia Rona spotlight recessed into a wooden surface.
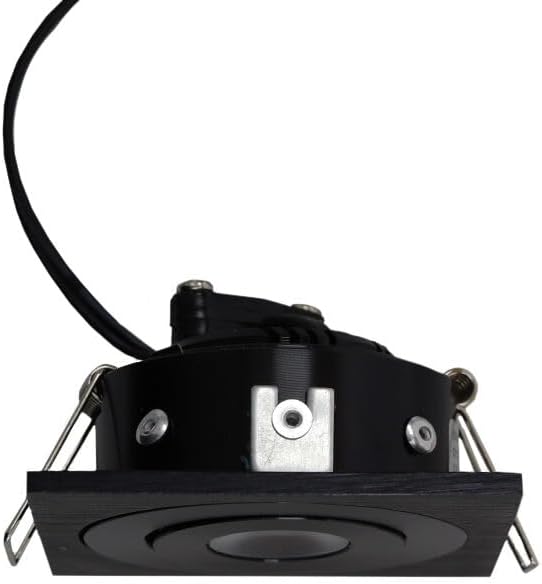
Image 4.2: Side view illustrating the spring clips for secure installation.
5. Operating Instructions
The Olucia Rona spotlights are operated using the included remote control.
- Power On/Off: Press the 'I' button to turn the lights on, and the 'O' button to turn them off.
- Dimming: Use the up and down arrow buttons to adjust the brightness level of the spotlights.
- Mode Selection: The remote may include buttons for different lighting modes or color temperatures (e.g., 'moon' icon for warmer/night mode, 'sun' icon for brighter/daylight mode). Refer to the remote's specific icons for functionality.
- Adjustable Spotlights: Each spotlight can be manually adjusted to direct the light beam to your desired area.

Image 5.1: Close-up of an illuminated spotlight, showing its warm light output.

Image 5.2: Close-up of an unilluminated spotlight, showcasing its square design.
6. Maintenance
- Cleaning: Regularly clean the spotlights with a soft, dry, or slightly damp cloth to remove dust and dirt. Ensure the power is off before cleaning.
- Inspection: Periodically inspect the cables and connections for any signs of wear or damage.
- Battery Replacement: If the remote control's range or responsiveness decreases, replace the batteries (AAA type, not included).
7. Troubleshooting
- Lights Not Turning On:
- Check if the power adapter is securely plugged into the outlet and the connection hub.
- Ensure the remote control batteries are correctly inserted and not depleted.
- Verify all spotlight connections to the hub are secure.
- Remote Control Not Responding:
- Replace the batteries in the remote control.
- Ensure there are no obstructions between the remote and the receiver (usually integrated into the connection hub).
- Flickering Lights:
- Check for loose connections at the power adapter, hub, or individual spotlights.
- Ensure the power supply is stable.
If issues persist, contact Olucia customer support.
8. Specifications
| Feature | Specification |
|---|---|
| Brand | Olucia |
| Model Number | SRC80000000C211 |
| Product Dimensions (L x W x H) | 6 x 6 x 6 cm (per spotlight) |
| IP Rating | IP44 |
| Number of Spotlights | 8 |
| Color | Black |
| Control Method | Remote Control |
9. Warranty and Support
Olucia provides a two-year warranty for this product, ensuring peace of mind regarding its quality and performance. For warranty claims, technical support, or any inquiries, please contact Olucia customer service through your retailer or the official Olucia website.
10. Application Examples
The Olucia Rona spotlights are ideal for illuminating various outdoor and indoor spaces, including verandas, pergolas, covered patios, and even garages or sheds, providing both functional and ambient lighting.

Image 10.1: Examples of Olucia Rona spotlights installed in various veranda and outdoor settings.