
Introduction
This manual provides essential information for the safe and efficient operation of your Retoo Electric Instant Water Heater Faucet. Please read it thoroughly before installation and use, and retain it for future reference.
The Retoo Electric Instant Water Heater is designed to provide immediate hot water, making it ideal for kitchens, gardens, garages, and other locations where access to a central hot water supply is limited or unavailable. Its compact design and energy-efficient operation ensure convenience and cost savings.
Safety Information
WARNING: Electrical appliance. Improper installation or use can lead to electric shock, fire, or injury.
- Ensure the power supply matches the appliance's requirements (220V).
- Installation must be performed by a qualified electrician in accordance with local electrical codes.
- Do not operate the unit if the power cord or plug is damaged.
- Do not immerse the appliance in water or other liquids.
- Ensure proper grounding.
- Do not block the water outlet during operation.
- Keep out of reach of children.
- Disconnect power before cleaning or maintenance.
- The appliance is rated IPX4 for water resistance. Do not expose to direct water jets from all directions.
Package Contents
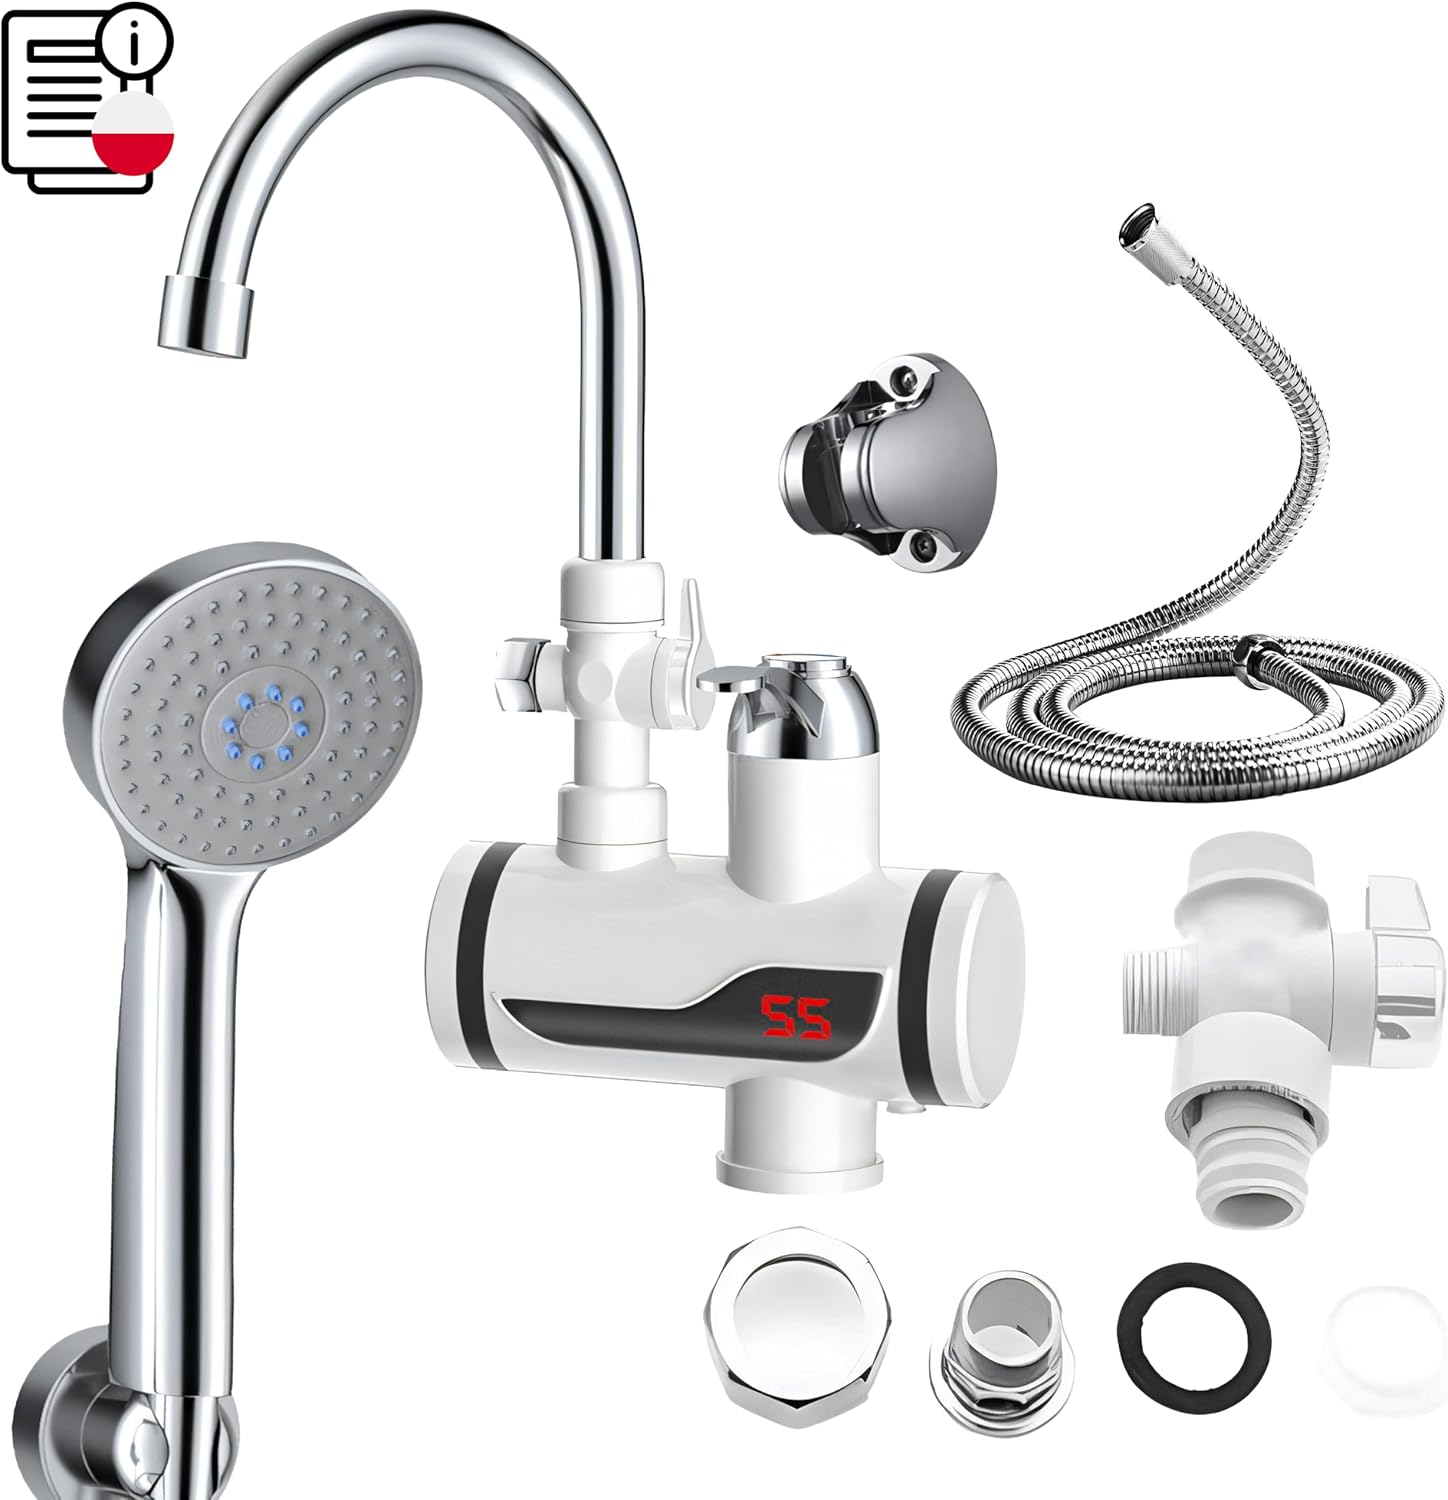
This image displays all the components included in the package: the main electric water heater unit with faucet, a shower head, a shower hose, a shower valve, a metal spout, a metal water connection reducer, and various seals and mounting hardware.
Verify that all items listed below are present and undamaged:
- Electric Water Heater Faucet Unit
- Shower Head
- Metal Spout
- Shower Valve
- Metal Water Connection Reducer
- Shower Hose
- Mounting Hardware and Seals
- User Manual (this document)
Specifications
| Feature | Specification |
|---|---|
| Mounting Type | Wall Mount |
| Power | 3000 W |
| Voltage | 220 V |
| Cable Length | 1.5 m |
| Heater Dimensions | 14.5 x 35 cm |
| Handset Length (Shower Head) | 23 cm |
| Display | LED (LCD) |
| Water Resistance Rating | IPX4 |
| Water Pressure | 0.4-0.5 MPa |
| Water Connection | Standard ¾" thread |
| Heating Method | Instantaneous |
| Temperature & Flow Control | Yes |
| Water Aerator | Yes |
| Shower Valve | Yes |
| Color | White and Black |
Setup and Installation
Proper installation is crucial for the safe and efficient operation of your instant water heater. It is highly recommended that installation be performed by a certified professional.
Pre-Installation Checklist:
- Ensure the installation location has adequate water pressure (0.4-0.5 MPa).
- Verify that the electrical supply is 220V and can support a 3000W appliance. A dedicated circuit is recommended.
- Confirm the wall is suitable for mounting and can support the weight of the unit when filled with water.
- Gather necessary tools: wrench, screwdriver, drill, measuring tape, level, thread sealant tape.
Installation Steps:
- Mounting the Unit: Securely attach the main water heater unit to the wall using the provided mounting hardware. Ensure it is level and stable.
- Water Connection: Connect the water inlet to your cold water supply using the standard ¾" thread. Apply thread sealant tape to prevent leaks. Connect the metal spout and shower valve to the appropriate outlets on the unit.
- Shower Head Assembly: Attach the shower hose to the shower valve and then connect the shower head to the hose. Mount the shower head holder to the wall at a convenient height.
- Electrical Connection: Connect the appliance to a grounded 220V electrical outlet. Ensure the connection is secure and protected from water.
- First Use Preparation: Before turning on the power, open the water faucet and allow water to flow through the unit for a few minutes to purge any air from the system. This prevents damage to the heating element.

This image shows the shower head, its flexible hose, and the wall-mounted bracket for holding the shower head, illustrating the components involved in the shower assembly.
Operating Instructions
Basic Operation:
- Turn on Water: Open the water faucet or shower valve. Water will begin to flow.
- Activate Heating: Once water is flowing, the unit will automatically detect the flow and begin heating the water. The LCD display will show the current water temperature.
- Adjust Temperature/Flow: Use the faucet handle to adjust the water flow rate and temperature. Higher flow rates may result in slightly lower temperatures, and vice-versa. The unit heats water instantaneously, so the temperature displayed is the output temperature.
- Turn off: Close the water faucet or shower valve. The heating element will automatically turn off.

This image provides a clear view of the main faucet unit, highlighting its integrated LCD display which shows the real-time water temperature during operation.

This diagram illustrates how the faucet controls both hot and cold water flow, allowing users to adjust the desired temperature and flow rate for optimal comfort.
LCD Display:
The integrated LCD display shows the real-time water temperature, typically ranging from 30°C to 60°C. This allows for precise control and monitoring of the water temperature.

A magnified view of the LCD display, clearly showing the temperature reading, in this case, 55 degrees Celsius.
Maintenance
Regular maintenance ensures the longevity and optimal performance of your instant water heater.
- Cleaning: Clean the exterior of the unit with a soft, damp cloth. Do not use abrasive cleaners or solvents.
- Aerator Cleaning: Periodically unscrew and clean the aerator at the end of the faucet spout to remove any mineral deposits or debris that may affect water flow.
- Shower Head Cleaning: If water flow from the shower head becomes uneven, clean the nozzles by gently rubbing them or by soaking the shower head in a descaling solution.
- Winterization (if applicable): If the unit is installed in an area prone to freezing temperatures, ensure all water is drained from the unit and pipes to prevent damage from freezing.
Troubleshooting
| Problem | Possible Cause | Solution |
|---|---|---|
| No hot water / Unit not heating | No power; Insufficient water flow; Air in system; Heating element failure. | Check power supply/breaker. Ensure adequate water flow. Purge air by running water. Contact qualified technician if heating element is suspected. |
| Water flow is weak | Clogged aerator/shower head; Low water pressure. | Clean aerator/shower head. Check household water pressure. |
| Water is not hot enough | Too high water flow; Incoming water too cold. | Reduce water flow. The unit has a fixed power output (3000W) and heats instantaneously based on flow rate and incoming water temperature. |
| Leaks from connections | Loose connections; Damaged seals; Improperly applied thread sealant. | Tighten connections. Replace damaged seals. Reapply thread sealant tape. |
| LCD display not working | Power issue; Display malfunction. | Check power. If unit heats but display is off, contact support. |
Warranty and Support
For warranty information and technical support, please refer to the purchase documentation or contact your retailer. Keep your proof of purchase for any warranty claims.
For spare parts availability, please note that information is currently unavailable. Please contact the manufacturer or your retailer for assistance.