
1. Introduction
This manual provides comprehensive instructions for the installation, operation, and maintenance of your AINAVI 8.8 Inch Touch Screen CarPlay Radio. This unit is designed to upgrade the multimedia capabilities of specific BMW models while retaining original vehicle functions.
1.1 Compatibility
This product is exclusively designed for BMW 3 Series E90, E91, E92, E93 and BMW 5 Series E60, E61, E63, E64 models manufactured between 2005 and 2008, specifically those equipped with the original BMW CCC system and a 10-Pin LVDS connector. It is not compatible with CIC systems (4-Pin LVDS) or NBT systems (6-Pin LVDS).
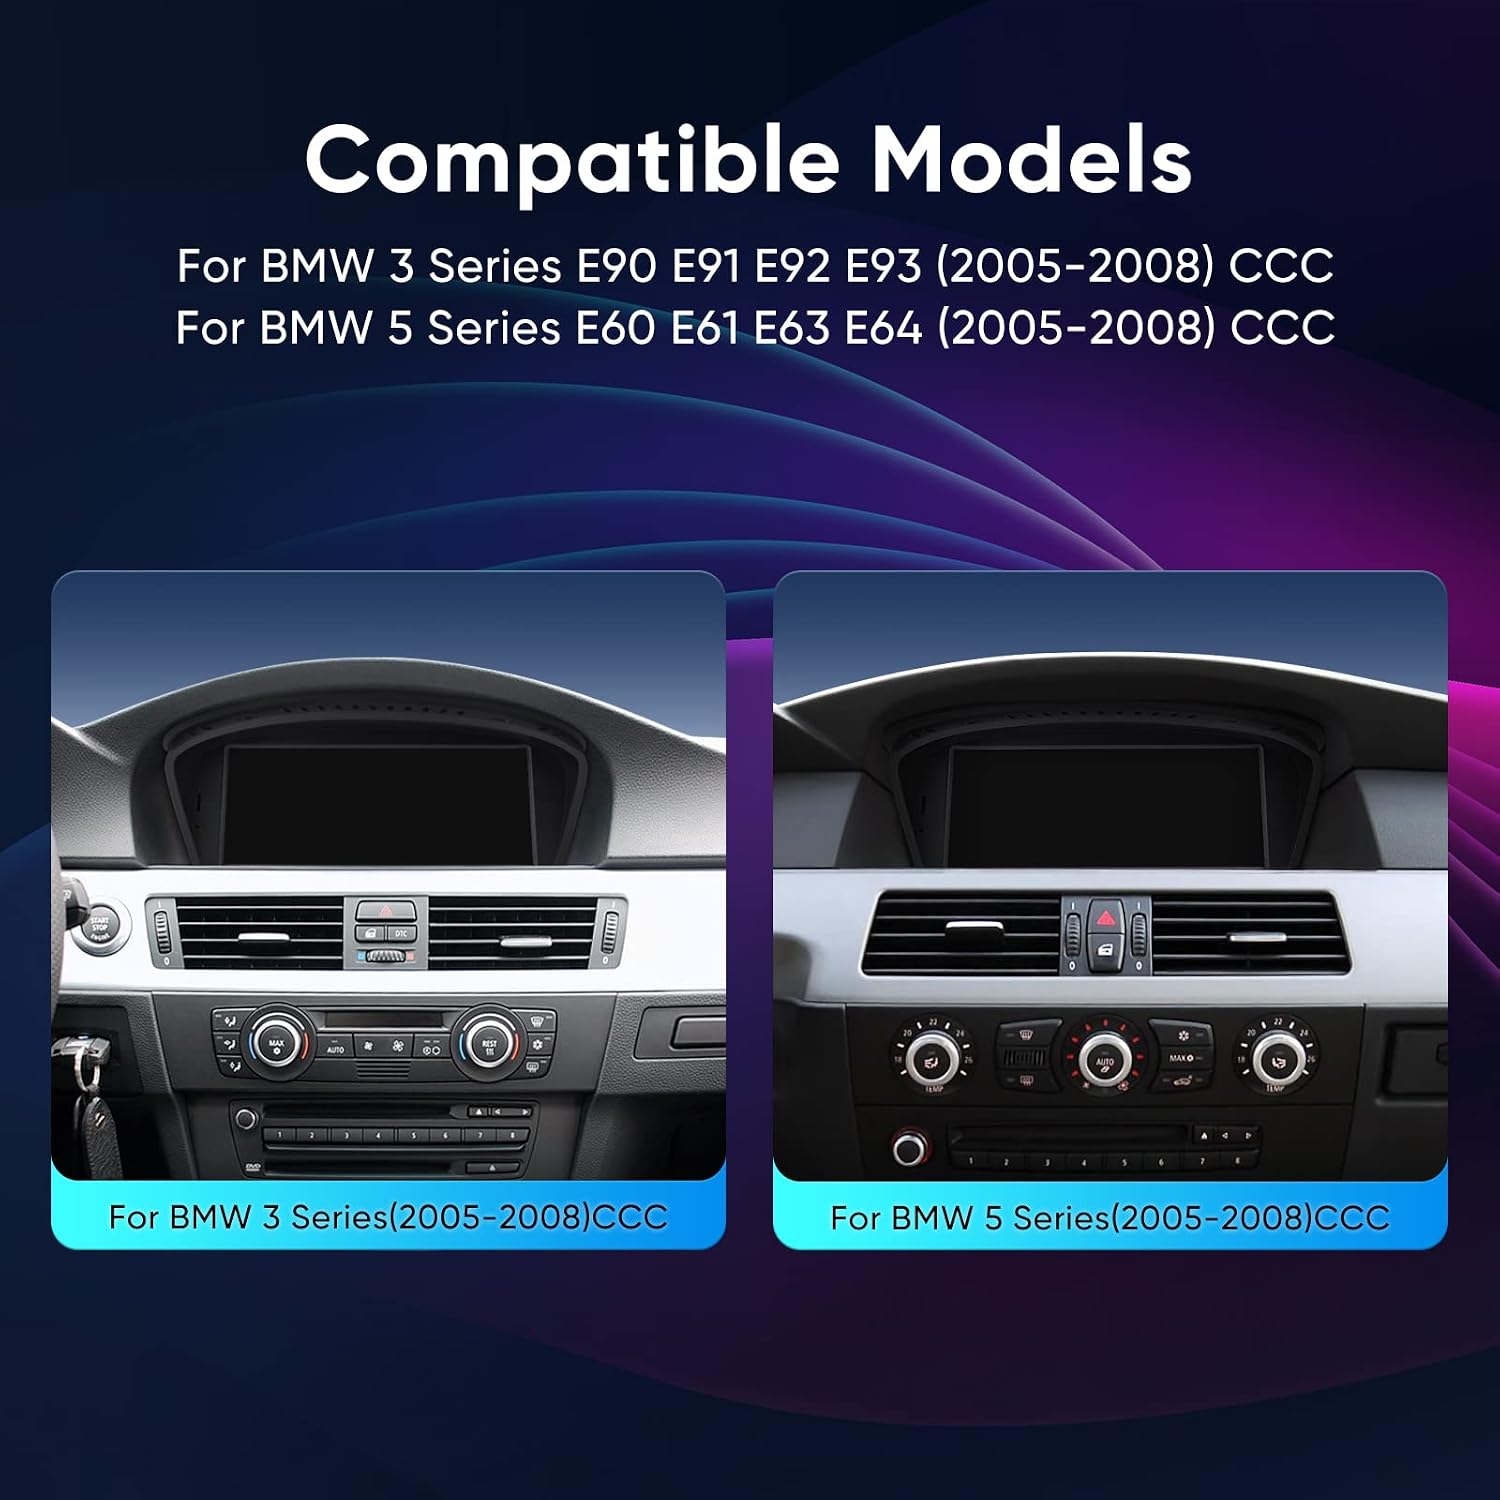
Image 1.1: Compatible BMW 3 Series (E90-E93) and 5 Series (E60-E64) dashboards with CCC system.
1.2 Important Note: Audio AUX Requirement
Before purchasing or installing, ensure your vehicle has an original Audio AUX input. This device requires the original Audio AUX for proper sound integration. If your car does not have an Audio AUX input, this unit is not compatible.
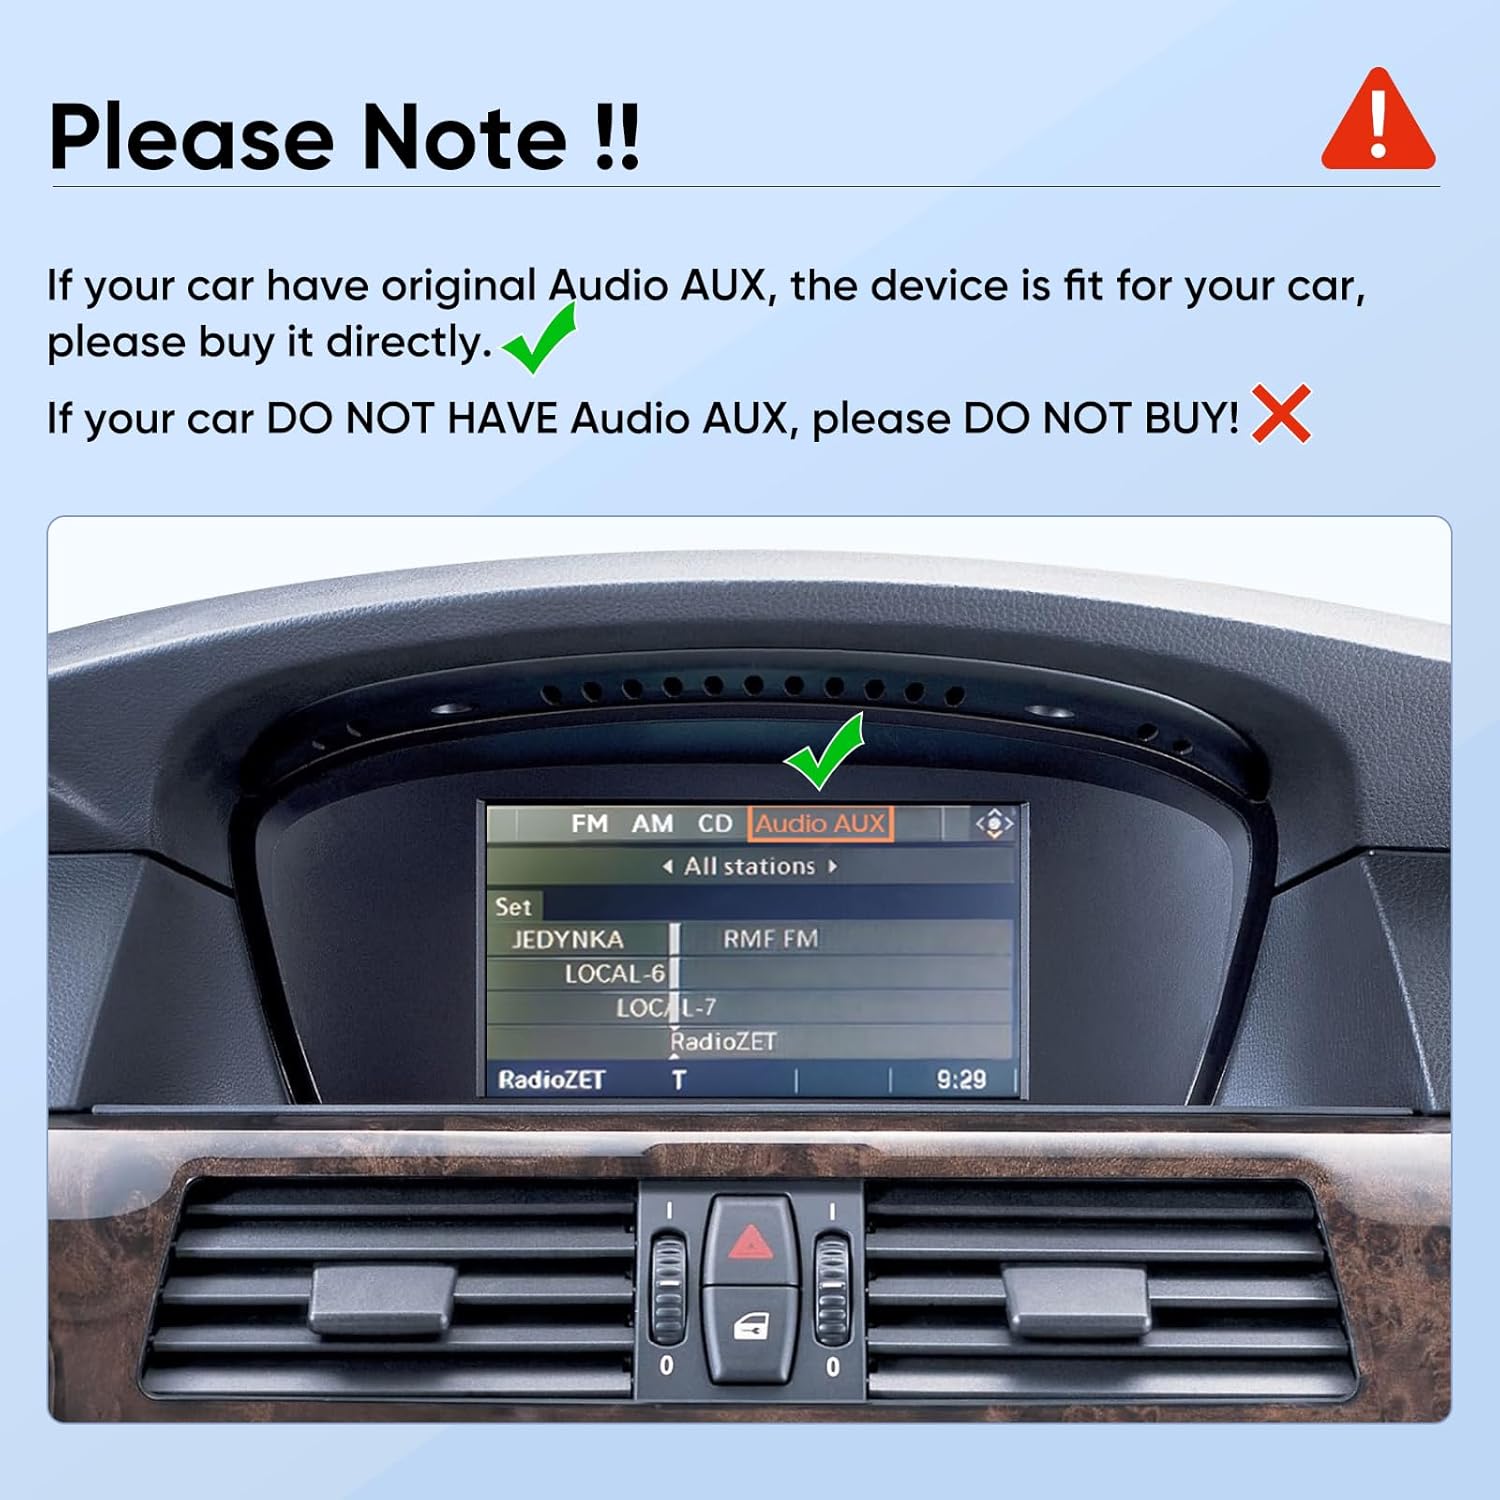
Image 1.2: Verify the presence of 'Audio AUX' in your original BMW system menu.
2. Package Contents
Please verify that all items listed below are included in your package:
- 8.8" Linux Head Unit (1x)
- ISO Wiring Harness Cable (1x)
- Audio Extension Cable (1x)
- USB Cable (1x)
- Installation Instruction (1x)

Image 2.1: Included accessories: ISO wiring harness, USB cable, audio cable, and installation instructions.
3. Setup & Installation
Professional installation is recommended. Ensure the vehicle's battery is disconnected before beginning installation.
3.1 Identify Your iDrive System
It is crucial to correctly identify your BMW's original iDrive system (CCC, CIC, or NBT) before installation. This unit is only compatible with CCC systems. To verify, remove the original screen and check the LVDS port connector type.
- CCC System: 10-Pin LVDS Plug
- CIC System: 4-Pin LVDS Plug
- NBT System: 6-Pin LVDS Plug

Image 3.1: Visual guide to identifying your BMW's iDrive system by its LVDS plug.
3.2 Wiring Diagram
Refer to the following diagram for correct wiring connections. Ensure all cables are securely connected to their respective ports.

Image 3.2: Detailed wiring diagram for the head unit. Key connections include ISO Wiring Harnesses, CAM-PWR for aftermarket backup camera, CCD-CVBS for backup camera input, DVR-CVBS for DVR camera input, ACC-OUT, AUX-OUT, USB1, USB2, and LVDS Port.
3.3 General Installation Steps
Follow the detailed installation instructions provided in your package. Key steps typically involve:
- Remove the original BMW display and trim.
- Connect the provided ISO wiring harness to the vehicle's existing wiring.
- Connect the LVDS cable from the new unit to the vehicle's LVDS port.
- Route the USB and audio extension cables to desired locations.
- Mount the new 8.8-inch head unit into the dashboard.
- Reconnect the vehicle battery and test functionality.

Image 3.3: Reference for general installation steps. Consult the included instruction manual for specific details.
4. Operating Instructions
4.1 System Switching
The unit operates with dual systems, allowing you to switch between the original BMW CCC system and the new Linux-based CarPlay/Android Auto system. This ensures that all original car functions are retained while providing enhanced multimedia capabilities.

Image 4.1: Seamless switching between the original vehicle system and the CarPlay interface.
4.2 Wireless CarPlay & Wired Android Auto
The unit features built-in wireless Apple CarPlay and wired Android Auto. Connect your smartphone via Bluetooth for wireless CarPlay or use a USB cable for wired Android Auto to access navigation, calls, messages, and music directly on the display.
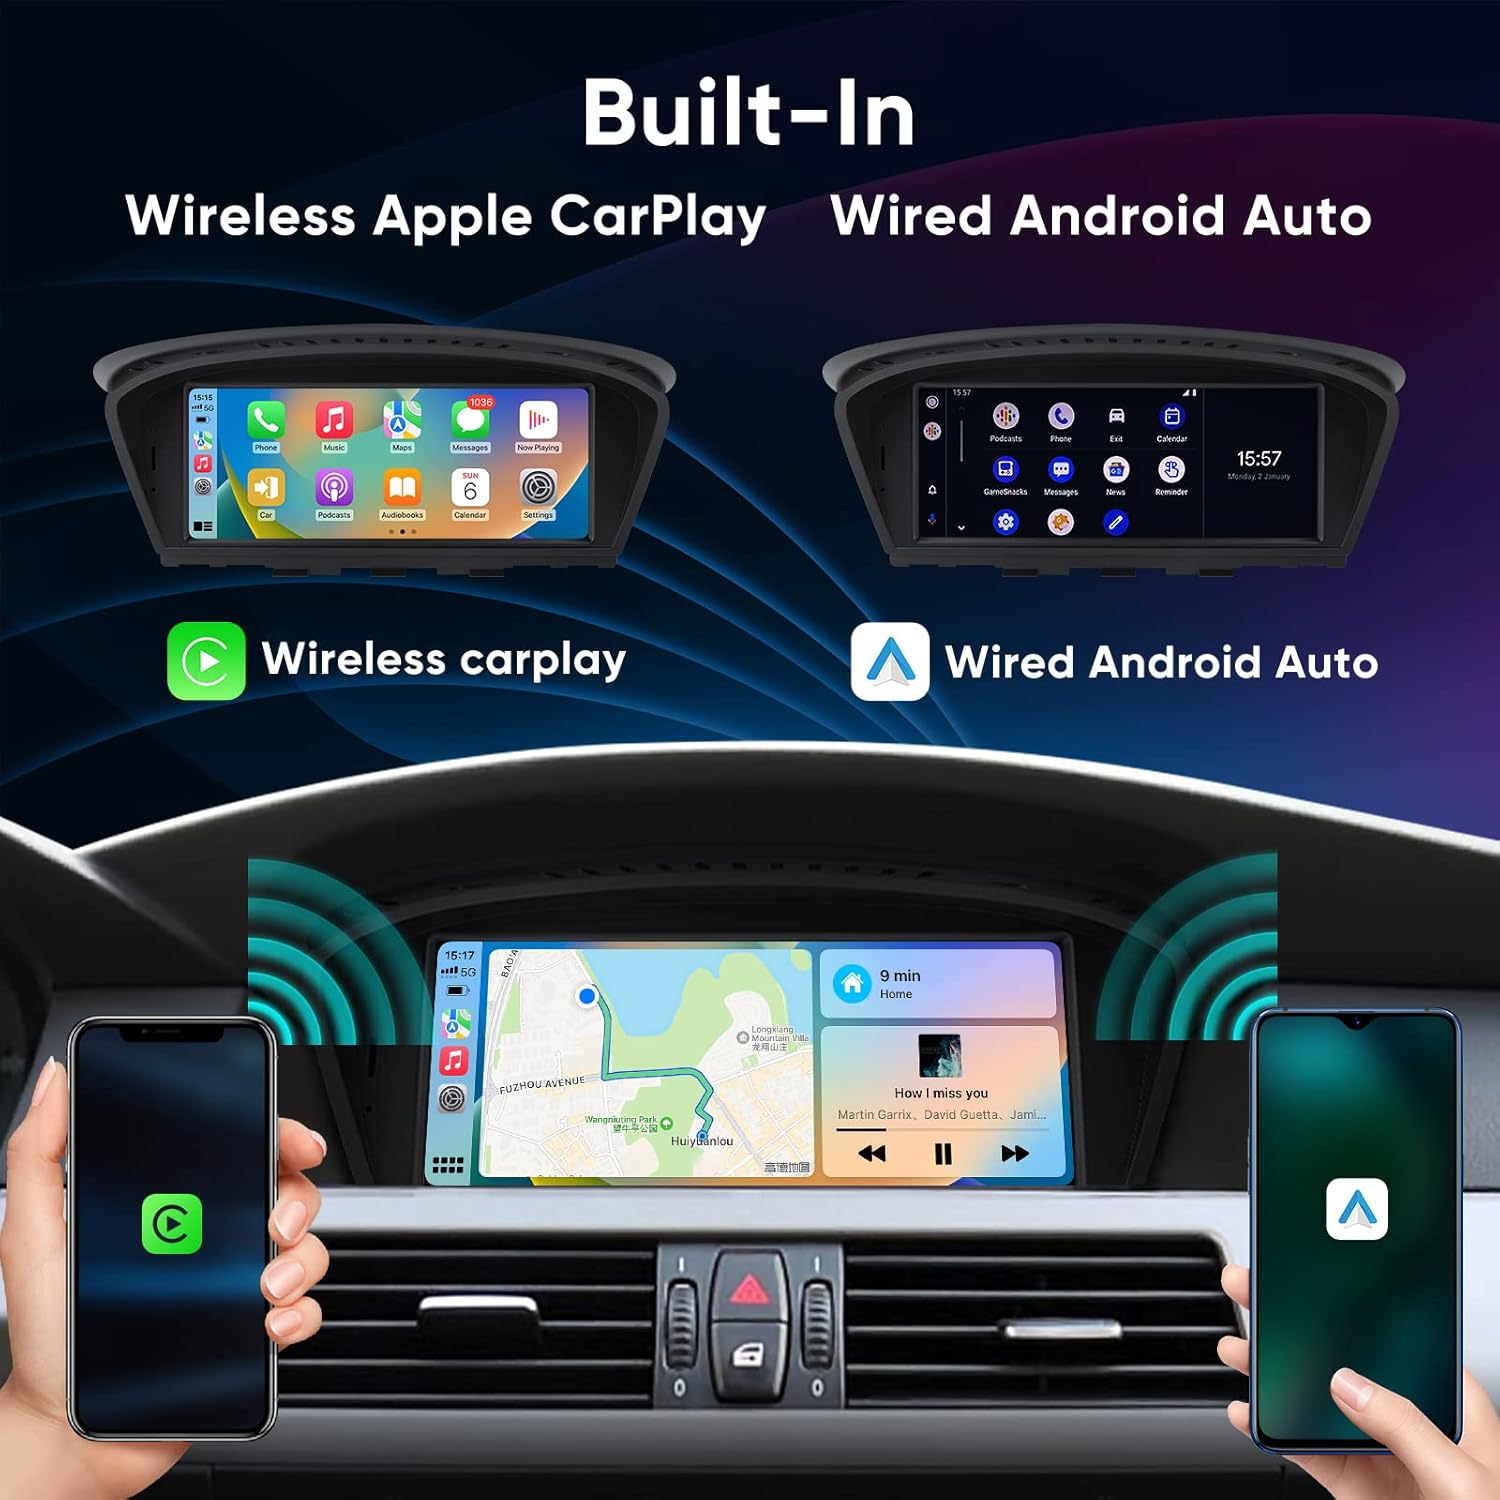
Image 4.2: Wireless Apple CarPlay and Wired Android Auto functionality.
4.3 Retained Original BMW Features
This unit is designed to retain and be compatible with various original BMW features, including:
- iDrive Knob control
- Original Bluetooth
- Original Radio
- OEM rear camera
- Radar display
- Steering wheel controls
- Original Amplifier System
- Original Car Information Display (speed, fuel level, oil pressure, safety warnings)

Image 4.3: The unit supports original BMW features for a seamless integration.
4.4 Bluetooth 5.1 & Dual WiFi Band
The integrated Bluetooth 5.1 module supports audio streaming, automatic phone book transfer, and hands-free calling. The dual WiFi band connectivity (2.4GHz and 5GHz) provides a stable and fast internet connection for online features.
5. Maintenance
To ensure the longevity and optimal performance of your AINAVI CarPlay Radio, follow these maintenance guidelines:
- Cleaning: Use a soft, dry, lint-free cloth to clean the screen and exterior. Avoid abrasive cleaners, solvents, or aerosol sprays.
- Temperature: Avoid exposing the unit to extreme temperatures, direct sunlight for prolonged periods, or high humidity.
- Software Updates: Periodically check for available software updates from AINAVI to ensure the best performance and access to new features.
- Power: Ensure the vehicle's electrical system is stable. Avoid frequent power fluctuations.
6. Troubleshooting
If you encounter issues with your AINAVI CarPlay Radio, refer to the following common troubleshooting steps:
| Problem | Possible Cause | Solution |
|---|---|---|
| No power/Unit does not turn on | Loose power connection, blown fuse, incorrect wiring. | Check all power cables and connections. Inspect vehicle fuses. Verify wiring against the diagram. |
| No sound or distorted sound | Audio AUX not selected, incorrect audio input, loose audio cables. | Ensure Audio AUX is selected on your original BMW system. Check audio extension cable connections. |
| CarPlay/Android Auto not connecting | Bluetooth/USB connection issue, phone settings. | For CarPlay, ensure Bluetooth is enabled and paired. For Android Auto, try a different USB cable. Check phone settings for CarPlay/Android Auto permissions. |
| Touch screen unresponsive | Software glitch, screen damage. | Restart the unit (turn off and on vehicle ignition). If issue persists, contact support. |
| Original BMW functions not working | Incorrect LVDS connection, system switching error. | Verify LVDS cable connection. Ensure proper system switching. |
If the problem persists after attempting these solutions, please contact AINAVI customer support for further assistance.
7. Specifications
Key technical specifications of the AINAVI 8.8 Inch Touch Screen CarPlay Radio:
- Screen Size: 8.8 Inches
- Display Type: LCD
- Resolution: 1280x480 HD
- Touch Screen Type: Capacitive, Glass to Glass 2.5D
- Operating System: Linux System
- Connectivity: Wireless CarPlay, Wired Android Auto, Bluetooth 5.1, Dual WiFi Band (2.4GHz & 5GHz)
- Audio Output Mode: Stereo, Built-in DSP processing chips, 16-band EQ
- Compatible Devices: iPhone and Android Phones
- Supported Satellite Navigation System: GPS
- Vehicle Service Type: Car (BMW 3/5 Series E60-E64, E90-E93 CCC System 2005-2008)
- Item Weight: 1.55 Kilograms

Image 7.1: The 8.8-inch 1280x480 HD LCD display features 2.5D glass and IPS technology.
Image 7.2: Physical dimensions of the 8.8-inch head unit.
8. Warranty Information
The AINAVI 8.8 Inch Touch Screen CarPlay Radio comes with a 12 Months Manufacturer Guarantee from the date of purchase. This warranty covers defects in materials and workmanship under normal use. It does not cover damage caused by improper installation, accident, misuse, abuse, unauthorized modifications, or normal wear and tear.
Please retain your proof of purchase for warranty claims.
9. Support
For technical assistance, installation questions, or any other inquiries regarding your AINAVI CarPlay Radio, please contact our customer support team. We offer 24-hour engineer support.
9.1 Contact Methods
- Online Support: If purchased from Amazon, you can reach us via your order center. Navigate to your order, click on the seller name (HomeCar), and then select 'Ask a question'. Please provide pictures or videos of your technical or installation questions for faster resolution.
- Hotline: +1 (833) 858-5016 (Working hours: 01:00 PM to 00:00 AM PST)
- Email: info@ainavi.com

Image 9.1: Guide to contacting support through Amazon's order center.

Image 9.2: AINAVI customer support contact details.