
Lamshaw GTX05, GTX12, GTX13, AR-01 Charger
Lamshaw Magnetic Smartwatch Charger Instruction Manual
Compatible with Kececo GTX05, GTX12, GTX13, AR-01 Smartwatches
Model: GTX05, GTX12, GTX13, AR-01 Charger | Brand: Lamshaw
1. Introduction
This manual provides essential information for the safe and efficient use of your Lamshaw Magnetic Smartwatch Charger. Please read these instructions carefully before using the product and retain them for future reference. This charger is designed for specific smartwatch models, including Kececo GTX05, GTX12, GTX13, and AR-01.
2. Product Overview
The Lamshaw Magnetic Smartwatch Charger offers a convenient and secure charging solution. It features a magnetic 2-pin connector for easy attachment to your smartwatch and a standard USB-A connector for power input.

Figure 2.1: Multiple Charging Methods for the Lamshaw Smartwatch Charger. The charger can be connected to various USB-enabled devices such as laptops, computers, power banks, or wall chargers.

Figure 2.2: Detailed components of the charger, including the pure copper probe for stable conduction, durable ABS+PC materials, and a flexible PVC cable for easy storage. The cable measures 1 meter (3.3 feet) in length.

Figure 2.3: The magnetic 2-pin connector ensures a secure connection to your smartwatch, while the USB-A plug provides universal compatibility with various power sources.
3. Safety Information
Your Lamshaw charger is equipped with a built-in Short-circuit protection IC to prevent overvoltage and overcurrent. This intelligent protection system automatically cuts off the circuit in case of a short-circuit and maintains safety even if the charger remains plugged in after charging is complete.
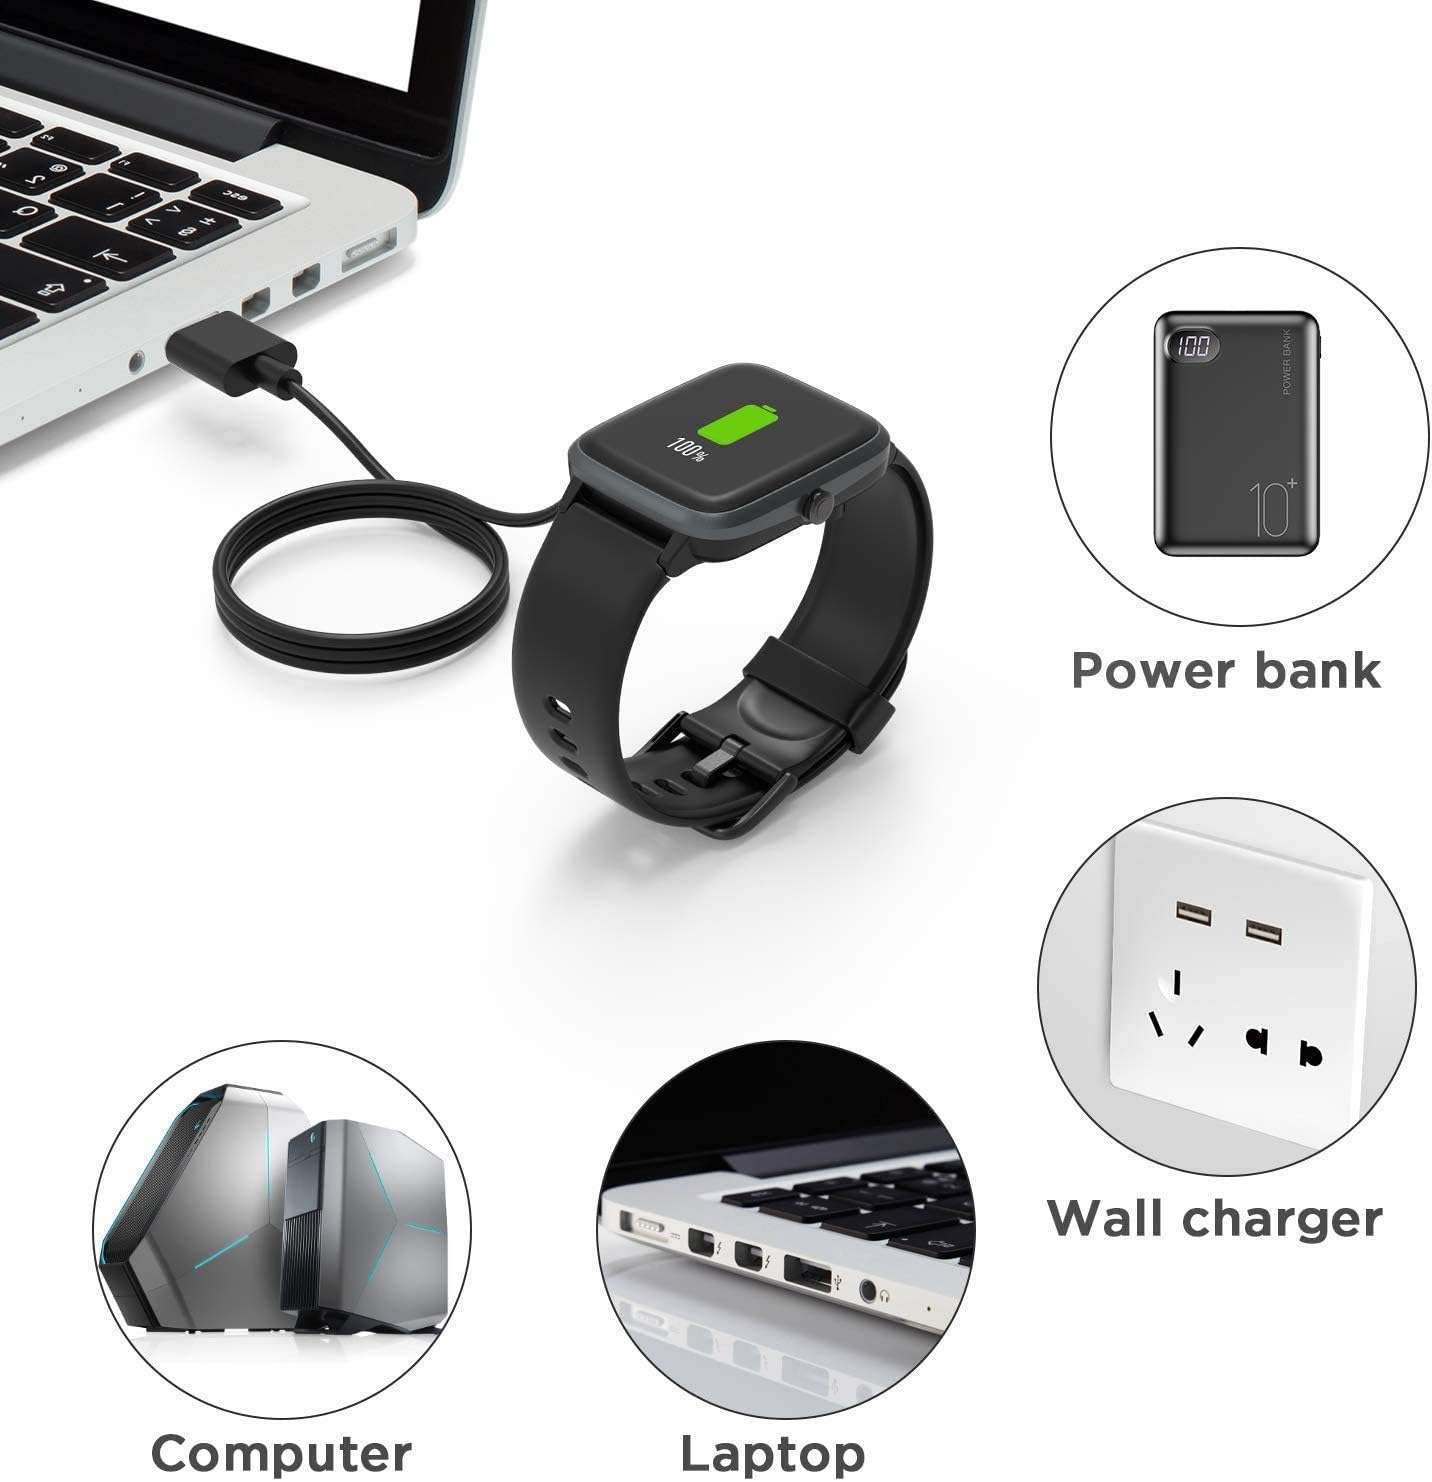
Figure 3.1: The charger incorporates multiple safety features, including temperature, over-current, and over-voltage protection, to ensure a safe charging experience for your smartwatch.
Video 3.1: This video demonstrates the proper usage method for magnetic smartwatch chargers, highlighting how to connect the charger to the smartwatch for effective charging.
- Do not expose the charger to extreme temperatures or humidity.
- Avoid dropping or subjecting the charger to strong impacts.
- Keep out of reach of children.
- Use only with compatible devices as specified.
4. Setup & Charging Instructions
Charging your smartwatch with the Lamshaw Magnetic Charger is straightforward. Ensure your smartwatch is compatible with a 2-pin magnetic charging interface.
- Connect the USB-A end of the charging cable to a power source (e.g., computer, laptop, power bank, or wall adapter).
- Align the magnetic 2-pin connector with the charging points on the back of your smartwatch. The magnets will automatically snap into place, ensuring correct polarity.
- Verify that the charging indicator appears on your smartwatch screen.
- A full charge typically takes approximately 2.5 hours with a 1A output current.
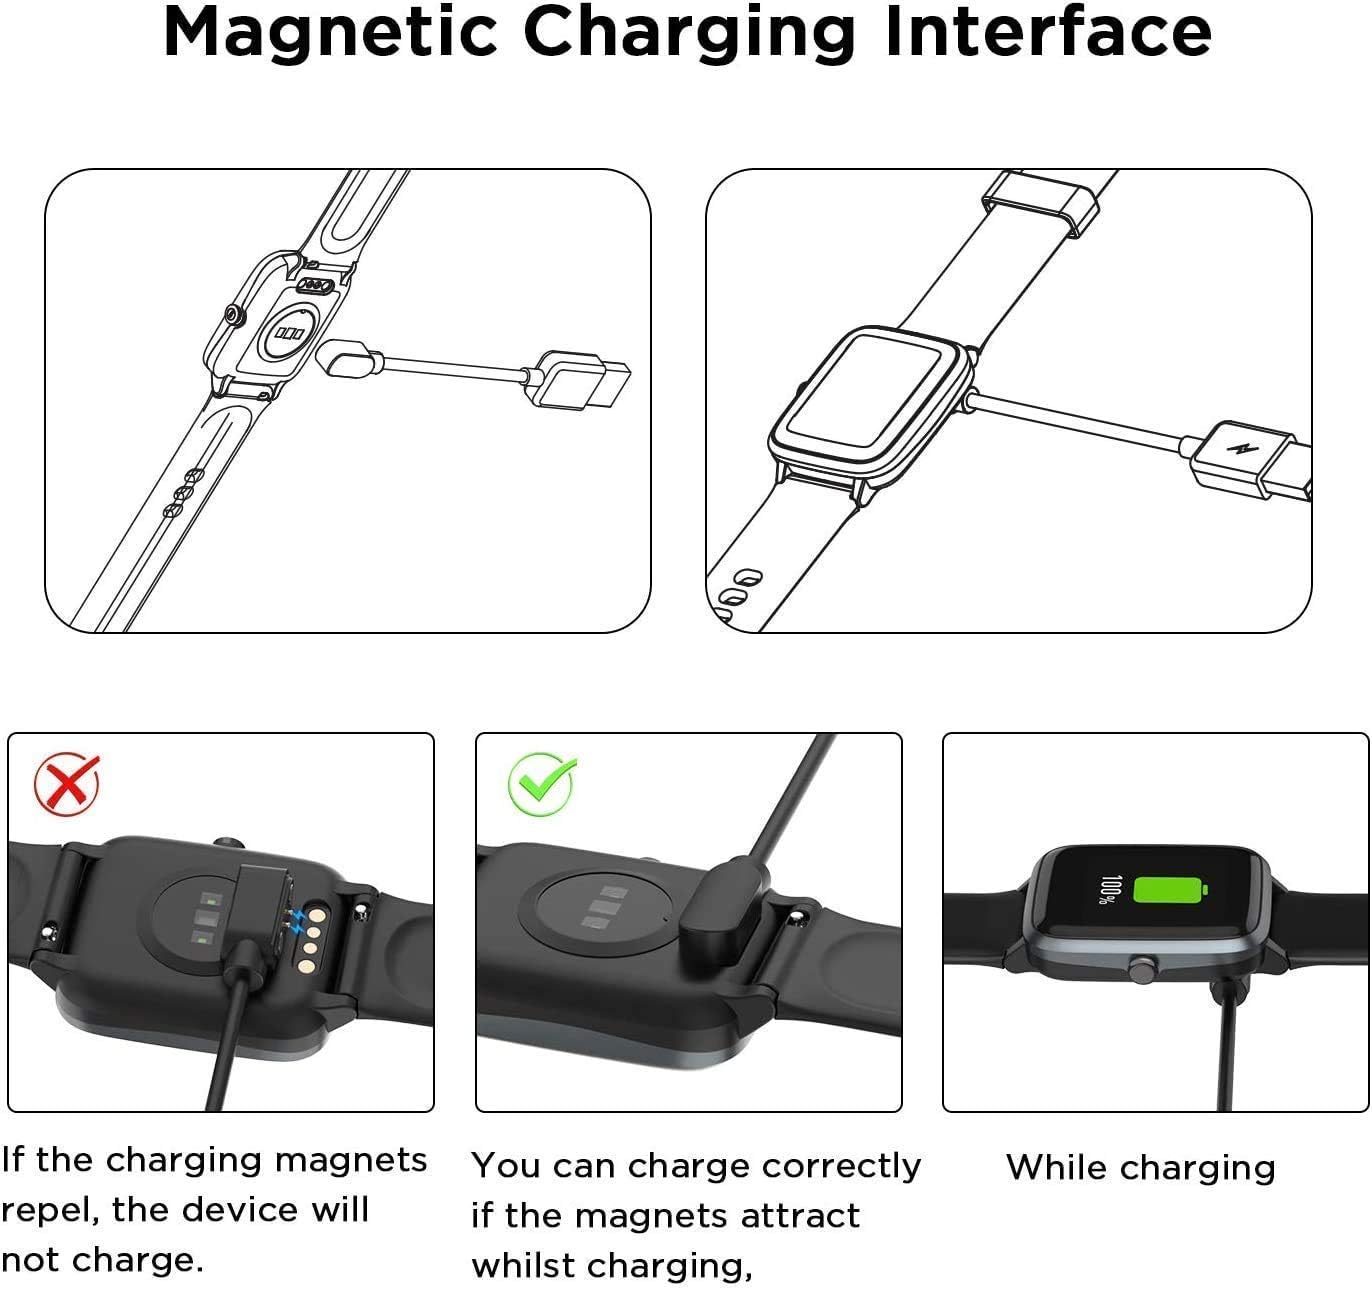
Figure 4.1: Proper alignment of the magnetic charging interface. Ensure the magnets attract for correct charging; if they repel, the device will not charge.

Figure 4.2: The charger supports high-speed charging, allowing for a full charge in approximately 2.5 hours when using a 1A output current.
5. Operating
The charger operates automatically once connected to a power source and your smartwatch. No additional operational steps are required beyond proper connection.
6. Maintenance
- Keep the charging contacts clean and free from dust or debris.
- Store the cable neatly to prevent kinks or damage. The flexible PVC cable is designed for easy rolling and storage.
- Avoid pulling the cable forcefully from the smartwatch or power source.
7. Troubleshooting
- Smartwatch not charging: Ensure the magnetic connector is correctly aligned and firmly attached to the smartwatch's charging points. Check if the USB-A end is securely plugged into a working power source. Try a different USB port or power adapter.
- Slow charging: Ensure your power source provides sufficient output (e.g., 5V/1A). Using a lower amperage power source may result in slower charging times.
- Overheating: If the charger or smartwatch feels excessively hot during charging, disconnect it immediately. This could indicate an issue with the power source or the device. Contact customer support if the problem persists.
8. Specifications
| Feature | Detail |
|---|---|
| Model Compatibility | Kececo GTX05 Smart Watch-1.32 Inches, GTX05, GTX12, GTX13, AR-01 Charger |
| Interface | USB-A to Magnetic 2-pin |
| Input Voltage | 5 Volts |
| Output Current | 1 Amps |
| Cable Length | 1 meter (3.3 feet) |
| Material | ABS+PC, Flexible PVC Cable, Pure Copper Probe |
| Safety Features | Built-in Short-circuit protection IC, Overvoltage Protection, Overcurrent Protection, Temperature Protection |
| Item Weight | 1.23 ounces (0.04 Kilograms) |
| Product Dimensions | 0.5 x 0.5 x 0.5 inches |
9. Warranty & Support
Lamshaw products are designed for durability and performance. For warranty information or technical support, please refer to the product packaging or visit the official Lamshaw website. Keep your purchase receipt for warranty claims.
If you encounter any issues not covered in this manual, please contact our customer support team for assistance.
Ask a question about this manual
Ask about setup, troubleshooting, compatibility, parts, safety, or missing instructions. Manuals+ will review the question and use this page’s manual context to help answer it.