
1. Introduction
This manual provides comprehensive instructions for the installation, operation, and maintenance of your Hiorucet Attic Fan Thermostat Humidistat Controller, Model 158035. This device is designed to automatically regulate attic ventilation by controlling an exhaust fan based on preset temperature and humidity levels, optimizing energy efficiency and maintaining indoor comfort in various environments.
Video: Overview of the Hiorucet Attic Fan with Thermostat Humidistat Controller. This video demonstrates the physical appearance and basic functions of the control unit.
2. Important Safety Information
- Electrical Hazard: Always disconnect power at the circuit breaker before installing or servicing this unit to prevent electric shock.
- Qualified Personnel: Installation and wiring should be performed by a qualified electrician in accordance with all local and national electrical codes.
- Voltage: Ensure the power supply voltage matches the unit's requirements (120V).
- Secure Mounting: Mount the controller securely to a stable surface to prevent accidental dislodgement.
- Indoor Use: This device is intended for indoor use or within a protected enclosure. Do not expose to direct water or extreme weather conditions.
3. Product Features
- Adjustable Temperature Control: Easily set the desired start-up temperature between 60°F and 120°F. Recommended settings are typically 100-110°F for optimal attic ventilation.
- Adjustable Humidistat Control: Set the humidity activation range from 30% to 90% to manage moisture levels effectively.
- Energy Efficiency: Designed to maximize energy savings by activating ventilation only when necessary, based on user-defined temperature and humidity thresholds.
- Easy Installation: Features a clear wiring diagram for straightforward installation, requiring minimal professional tools.
- Durable Construction: Built for efficiency and durability, promoting balanced temperature and humidity inside and outside the attic.
- Finger Adjustable Dials: Equipped with clear arrow indications on mechanical knobs for precise and easy adjustment of temperature and humidity settings.

Image: This diagram illustrates the benefit of using an attic fan with a thermostat, showing how it helps maintain comfortable temperatures and prevents overheating compared to an attic without such a system.
4. Specifications
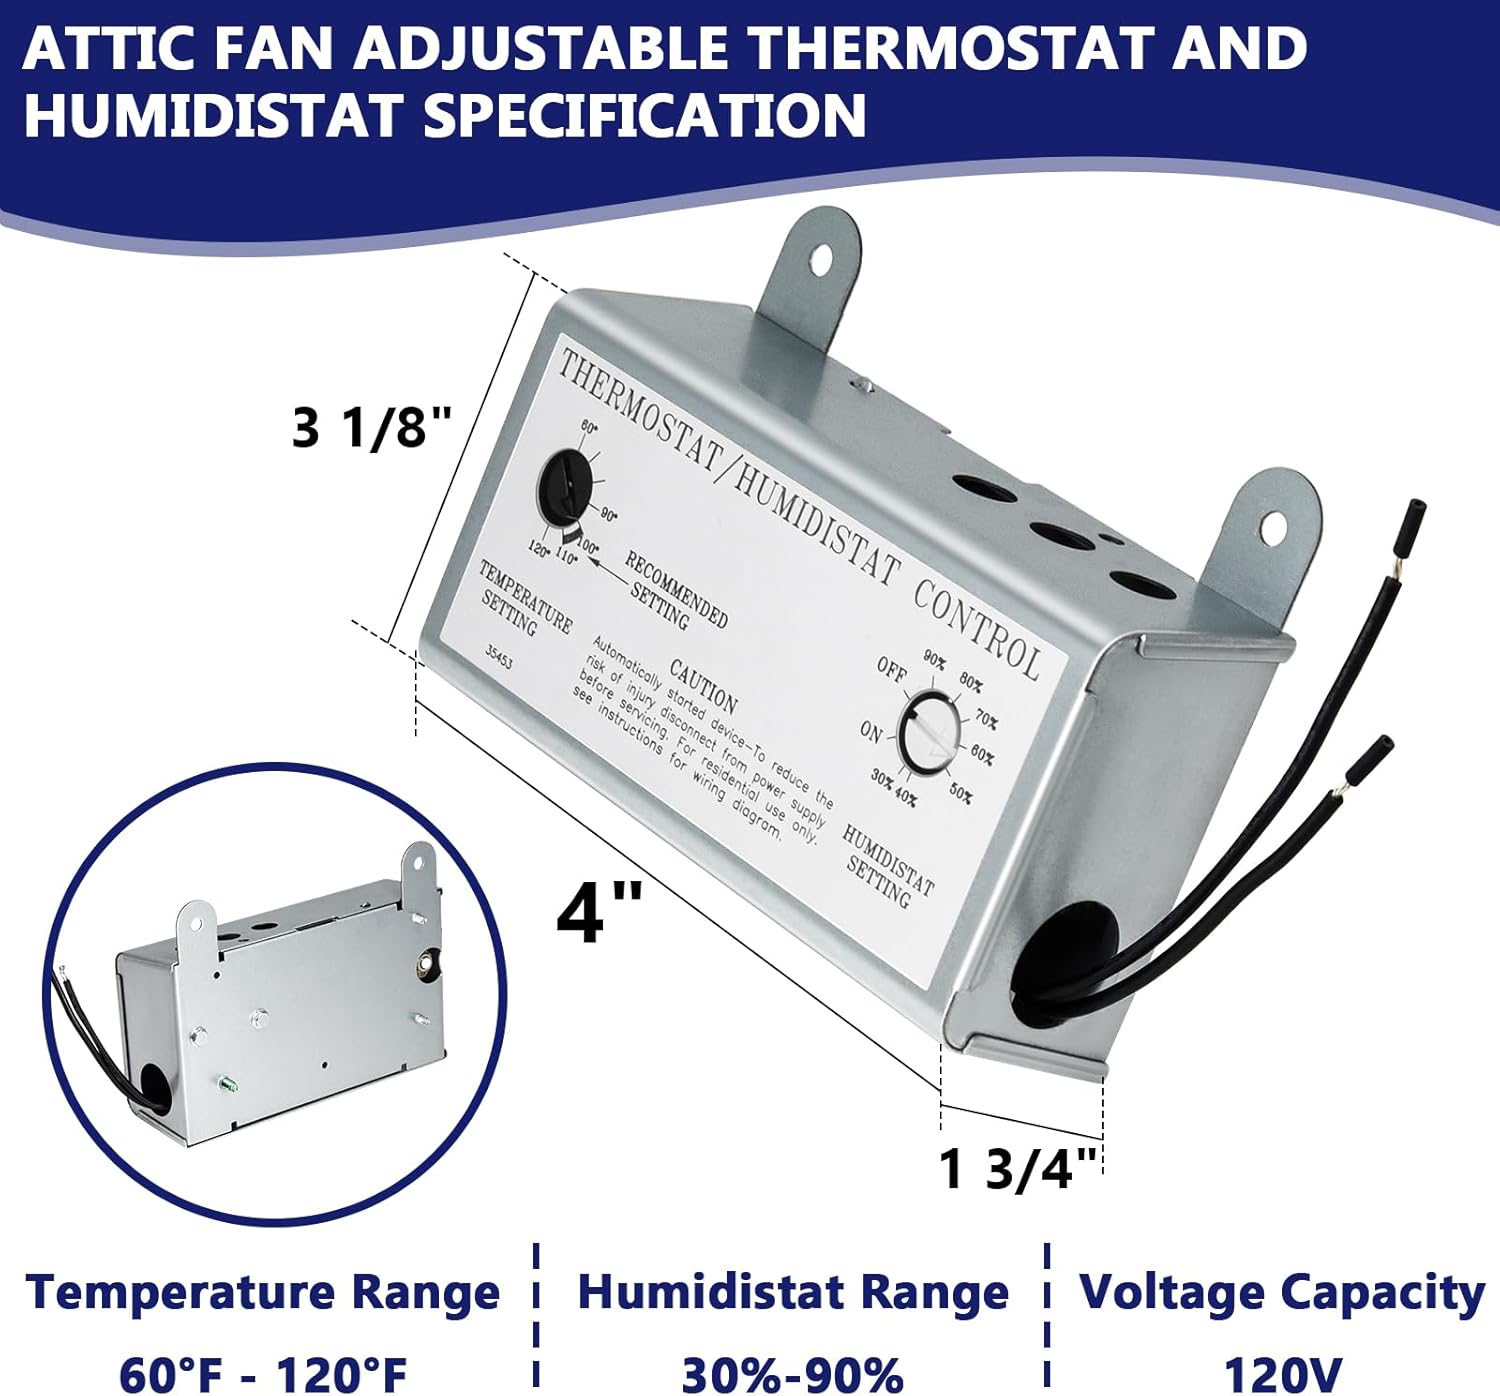
Image: The Hiorucet Thermostat Humidistat Control Box, displaying its physical dimensions (approximately 4 inches long, 3 1/8 inches high, 1 3/4 inches deep) and key specifications including temperature range (60°F-120°F), humidistat range (30%-90%), and voltage capacity (120V).
| Specification | Detail |
|---|---|
| Brand | Hiorucet |
| Model Number | 158035 |
| Controller Type | Mechanical knob |
| Temperature Control Type | Manual |
| Temperature Setting Range | 60°F - 120°F |
| Humidistat Setting Range | 30% - 90% |
| Power Source | Corded Electric |
| Display Type | Analog |
| Control Method | Touch (via knob adjustment) |
| Mounting Type | Wall Mount |
| Material Type | Metal |
5. Package Contents
The package includes:
- 1 x Hiorucet Attic Fan Adjustable Thermostat/Humidistat Controller
6. Installation Guide
Before beginning installation, ensure all power to the attic fan circuit is turned OFF at the main electrical panel. Refer to the wiring diagram provided on the controller itself for specific connections.
6.1 Mounting the Controller
- Select a suitable location for the controller within the attic or desired control area, ensuring it is easily accessible and protected from direct moisture.
- Use appropriate screws to securely mount the metal control box to a stud or solid surface.
6.2 Wiring Instructions
A clear wiring diagram is located on the inside of the controller's cover. Follow these general steps:
- Remove the rack cover of the controller to access the wiring terminals.
- Connect the incoming 120V power supply wires (Line and Neutral) to the designated terminals on the controller.
- Connect the attic fan's power wires to the output terminals of the controller.
- Ensure all connections are tight and secure.
- Replace the rack cover.
Caution: Incorrect wiring can cause damage to the unit or pose a fire hazard. If you are unsure about any step, consult a qualified electrician.
7. Operation Instructions
The Hiorucet controller features two finger-adjustable dials for setting temperature and humidity thresholds.

Image: The Hiorucet control box, showing the temperature adjustment dial on the left and the humidistat adjustment dial on the right. The temperature dial ranges from 60°F to 120°F, and the humidistat dial from OFF to 90% humidity.
7.1 Setting the Temperature
- Locate the temperature dial on the left side of the controller.
- Rotate the dial to your desired temperature setting. The fan will activate when the attic temperature exceeds this set point.
- Recommended Setting: For most attics, a setting between 100°F and 110°F is recommended to prevent excessive heat buildup without over-ventilating.
7.2 Setting the Humidistat
- Locate the humidistat dial on the right side of the controller.
- Rotate the dial to your desired humidity percentage. The fan will activate when the attic humidity exceeds this set point.
- The range is from 30% to 90%. An 'OFF' position is also available to disable humidity control.
- Note: Setting the humidity too low may cause continuous fan operation, while setting it too high may result in insufficient air circulation.
8. Applications
This thermostat humidistat controller is versatile and can be used in various environments to manage temperature and humidity effectively:
- Attics: Prevents heat and moisture buildup, extending roof life and reducing cooling costs.
- Garages: Improves air quality and prevents excessive heat.
- Workshops: Maintains comfortable working conditions and protects tools from humidity.
- Greenhouses: Regulates internal climate for optimal plant growth.
- Chicken Coops: Ensures proper ventilation and humidity levels for poultry health.
- Warehouses: Helps control environmental conditions for stored goods.

Image: This image highlights the benefits of the controller, such as exhausting hot air, safe and reliable use, and adjustable temperature and humidity. It also shows various applications including greenhouse ventilation, farm ventilation, and workshop ventilation.

Image: A visual representation of the controller's wide applicability, demonstrating its compatibility with various designs and sizes of attic exhaust fans.
9. Maintenance
The Hiorucet Thermostat Humidistat Controller is designed for minimal maintenance. However, periodic checks can ensure optimal performance:
- Cleaning: Periodically wipe the exterior of the control box with a dry, soft cloth to remove dust and debris. Do not use abrasive cleaners or solvents.
- Wiring Inspection: Annually, or if issues arise, visually inspect all wiring connections to ensure they remain secure and free from corrosion. Ensure power is disconnected before inspection.
- Sensor Clearance: Ensure the temperature and humidity sensors (located within the unit) are not obstructed by dust or insulation, which could affect their accuracy.
10. Troubleshooting
| Problem | Possible Cause | Solution |
|---|---|---|
| Fan does not turn on | No power to the controller Temperature/humidity not met Faulty wiring Fan motor issue | Check circuit breaker Adjust temperature/humidity settings Verify wiring connections (power off) Test fan directly |
| Fan runs continuously | Temperature/humidity settings too low Sensor malfunction | Increase temperature/humidity settings Contact support if issue persists |
| Inaccurate readings | Sensor obstructed or dirty Improper placement | Clean sensor area Ensure controller is in an open area, not near heat sources or vents |
11. Warranty and Support
Hiorucet products are manufactured to high-quality standards. This product typically comes with a standard manufacturer's warranty against defects in materials and workmanship. For specific warranty details, including duration and coverage, please refer to the documentation included with your purchase or contact Hiorucet customer support.
For technical assistance, troubleshooting not covered in this manual, or warranty claims, please contact Hiorucet customer service through the retailer where the product was purchased or visit the official Hiorucet website for contact information.