
1. Introduction
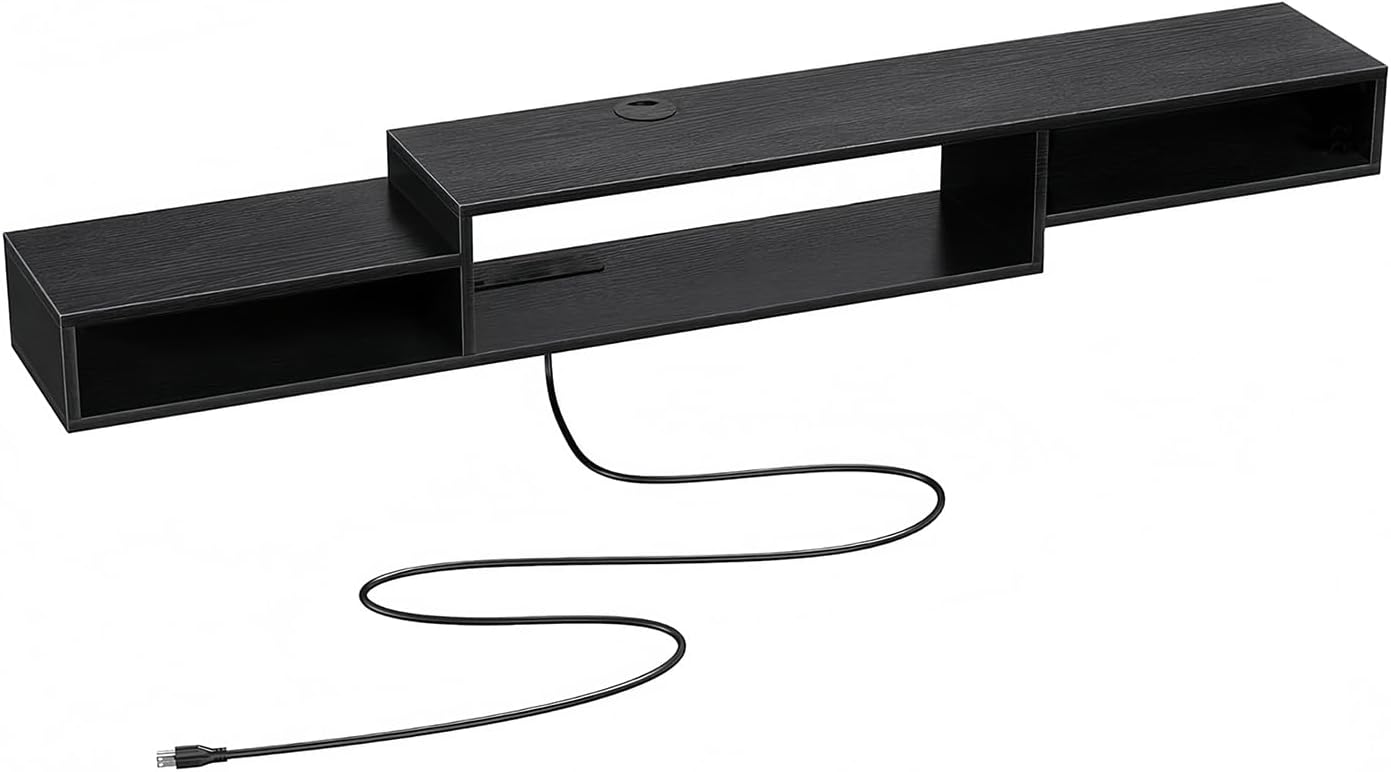
Thank you for choosing the TRIUMPHKEY Floating TV Cabinet. This modern, wall-mounted entertainment unit is designed to enhance your living space with its minimalist design, integrated LED lighting, and convenient charging station. This manual provides detailed instructions for safe assembly, proper operation, and effective maintenance of your new TV cabinet. Please read all instructions carefully before beginning assembly and retain this manual for future reference.
Important Safety Information
- Always follow assembly instructions precisely. Incorrect assembly can lead to instability and injury.
- Ensure the wall material is suitable for mounting and can support the weight of the cabinet and its contents. Use appropriate wall anchors (not included, as wall types vary).
- Do not overload the cabinet. Refer to specifications for weight limits.
- Keep electrical components (charging station, LED lights) away from water and moisture.
- Unplug the unit from the power outlet before cleaning or performing any maintenance.
2. Package Contents
Before assembly, please verify that all components listed below are present and undamaged. If any parts are missing or damaged, contact TRIUMPHKEY customer service immediately.
- Floating TV Cabinet Panels (Engineered Wood)
- Assembly Hardware (screws, dowels, brackets)
- Integrated Power Strip with 2 AC Outlets and 2 USB Ports
- LED Light Strip
- LED Light Remote Control (batteries not included)
- Instruction Manual
Note: Wall mounting hardware (e.g., specific anchors for drywall, concrete, or studs) is not included and must be purchased separately based on your wall type.
3. Setup and Assembly
Assembly typically requires two people. Ensure you have a Phillips head screwdriver, a drill, a level, and a measuring tape.
Step-by-Step Assembly Guide:
- Unpack and Identify Parts: Carefully remove all components from the packaging. Lay them out on a clean, soft surface to prevent scratches. Identify each panel and hardware piece using the provided parts list in the assembly diagram (refer to the separate assembly diagram sheet).
- Assemble Cabinet Sections: Follow the numerical sequence in the assembly diagram to connect the engineered wood panels using the provided screws and dowels. Ensure all connections are tight and secure. The cabinet consists of three main sections that connect to form the floating design.
- Install Integrated Power Strip: Locate the designated area for the power strip. Secure the power strip with the provided screws. Ensure the power cable can extend freely from the back or bottom of the cabinet.
- Attach LED Light Strip: Adhere the LED light strip to the designated areas within the cabinet compartments. Ensure the strip is firmly pressed into place for proper adhesion. Connect the LED strip to its power source, typically a small connector on the power strip or a separate adapter.
- Determine Mounting Location: Choose a suitable wall location, considering the height for your TV and viewing comfort. Use a stud finder to locate wall studs for secure mounting, if applicable. Mark the desired height and width for the mounting brackets.
- Install Wall Mounting Brackets: Using a level, mark the drill points for the wall mounting brackets. Drill pilot holes appropriate for your wall type and chosen wall anchors (e.g., drywall anchors, concrete anchors, or wood screws for studs). Securely attach the mounting brackets to the wall. Ensure they are perfectly level and can support the cabinet's weight.
- Mount the Cabinet: With assistance, carefully lift the assembled TV cabinet and align its pre-drilled holes or mounting points with the wall brackets. Secure the cabinet to the wall brackets using the provided hardware. Double-check that the cabinet is stable and securely fastened to the wall.
- Cable Management: Utilize the cable management holes (top and side) to route your TV, media player, and charging cables neatly. This helps maintain a clean and organized appearance.

This image illustrates the final appearance of the floating TV cabinet once assembled and mounted. Note the integrated LED lighting and the spacious compartments for media devices.

This image highlights the built-in power strip, providing convenient access to two standard AC outlets and two USB charging ports for your electronic devices.

This image demonstrates the effective cable management design, including a top cable hole and the integrated power strip, which helps keep wires organized and out of sight.
This diagram provides the overall dimensions of the TV cabinet, including its length (150cm), depth (28cm), and varying heights of its compartments, crucial for planning your installation space.
4. Operating Instructions
4.1. LED Lighting System
The LED lighting system is controlled by the included remote control (requires 2x AAA batteries, not included). Ensure the LED strip is properly connected to its power source.
- Power On/Off: Press the Power button on the remote to turn the lights on or off.
- Static Color Mode: Select from 20 available static colors by pressing the corresponding color buttons on the remote. This allows you to create various atmospheres such as warmth, romance, or a modern tech feel.
- Dynamic Mode: Choose from 19 dynamic modes that cycle through colors and effects. These modes add vitality and fun, suitable for parties, movie nights, or ambient background lighting.
- Brightness Adjustment: Use the Brightness Up (+) and Brightness Down (-) buttons to adjust the intensity of the lights.
- Speed Adjustment: In dynamic modes, use the Speed Up and Speed Down buttons to control the transition speed of the effects.

This image displays the TV cabinet illuminated by its LED lights and the remote control used to manage the various color and dynamic lighting modes.
4.2. Charging Station
The integrated charging station provides convenient power access for your devices.
- AC Outlets: The two 120V/12A AC outlets are suitable for powering TVs, DVD players, routers, and other standard electronic devices.
- USB Ports: The two 5V/2A USB ports are ideal for charging smartphones, tablets, and other USB-powered gadgets.
- Cable Management: Utilize the cable holes to route power cords and USB cables neatly, keeping your entertainment area organized and free of clutter.
5. Maintenance
Proper care and maintenance will ensure the longevity and appearance of your TRIUMPHKEY Floating TV Cabinet.
- Cleaning: Wipe surfaces with a soft, damp cloth. Avoid using harsh chemicals, abrasive cleaners, or excessive moisture, as these can damage the engineered wood finish.
- Dusting: Regularly dust the cabinet with a dry, soft cloth to prevent dust buildup.
- Spills: Immediately wipe up any spills to prevent staining or damage to the wood material.
- Electrical Components: Ensure the power strip and LED lights are clean and free of dust. Do not attempt to disassemble or repair electrical components yourself.
- Check Connections: Periodically check all screws and mounting hardware to ensure they remain tight and secure. Retighten if necessary.
6. Troubleshooting
If you encounter any issues with your TRIUMPHKEY Floating TV Cabinet, refer to the following common problems and solutions:
| Problem | Possible Cause | Solution |
|---|---|---|
| LED lights do not turn on. |
|
|
| Charging station (AC/USB) is not working. |
|
|
| Cabinet feels unstable or wobbly. |
|
|
If the problem persists after trying these solutions, please contact TRIUMPHKEY customer support for further assistance.
7. Specifications
Detailed technical specifications for the TRIUMPHKEY Floating TV Cabinet (Model T1).
- Model Number: T1
- Brand: TRIUMPHKEY
- Color: Black
- Material: Engineered Wood
- Product Dimensions (L x W x H): 150 cm x 28 cm x 28 cm (59.1 in x 11 in x 11 in)
- Product Weight: Approximately 8 kg (17.6 lbs)
- Special Features: Integrated LED Lighting (20 static colors, 19 dynamic modes), Remote Control, Integrated Charging Station (2 AC outlets, 2 USB ports), Cable Management Holes.
- Recommended TV Size: Compatible with TVs and projectors from 32" to 60" (e.g., 32", 43", 50", 55", 60").
- Power Strip Output: AC: 120V/12A, USB: 5V/2A
- Power Cable Length: 1.5 meters (approx. 4.9 feet)
8. Warranty and Support
TRIUMPHKEY is committed to providing high-quality products and customer satisfaction. While specific warranty details are not provided in this manual, most products come with a standard manufacturer's warranty against defects in materials and workmanship.
For warranty claims, technical support, missing parts, or any other inquiries, please contact TRIUMPHKEY customer service through the retailer where you purchased the product or visit the official TRIUMPHKEY website for contact information. Please have your product model number (T1) and purchase details ready when contacting support.
We aim to provide a solution within 24 hours of your inquiry.