
1. Introduction
The Oreilet SCO-2-10M is a portable, 2-channel digital oscilloscope designed for various electrical measurement and diagnostic tasks. Featuring a 3.2-inch LCD display, it offers a 50M per channel sampling rate and 20K storage depth with waveform compression capabilities. This device is suitable for applications such as home appliance repair, mobile phone maintenance, automotive troubleshooting, electronic hobbyist projects, and power supply repair.
Its compact design and built-in 2500mAh battery provide extended operational time, making it a versatile tool for both field and bench work.

Figure 1: Field of Application for the Oreilet SCO-2-10M Oscilloscope.
2. Safety Information
Please read and understand all safety instructions before operating the device. Failure to follow these instructions may result in electric shock, fire, or damage to the device.
- Do not operate the oscilloscope in wet or damp conditions.
- Ensure the device is charged using the provided charging cable and a compatible 5V power source.
- Do not exceed the maximum input voltage ratings (X1/±40V, X10/±400V).
- Always connect the ground clip of the probe before connecting the signal clip.
- Avoid touching exposed connections or components while the device is powered on.
- Keep the device away from strong electromagnetic fields.
3. Package Contents
Verify that all items are present in the package:
- 1 x Oreilet SCO-2-10M Handheld Oscilloscope
- 2 x Red and Black Probe Clips
- 1 x Charging Cable (USB)
- 1 x User Manual (this document)
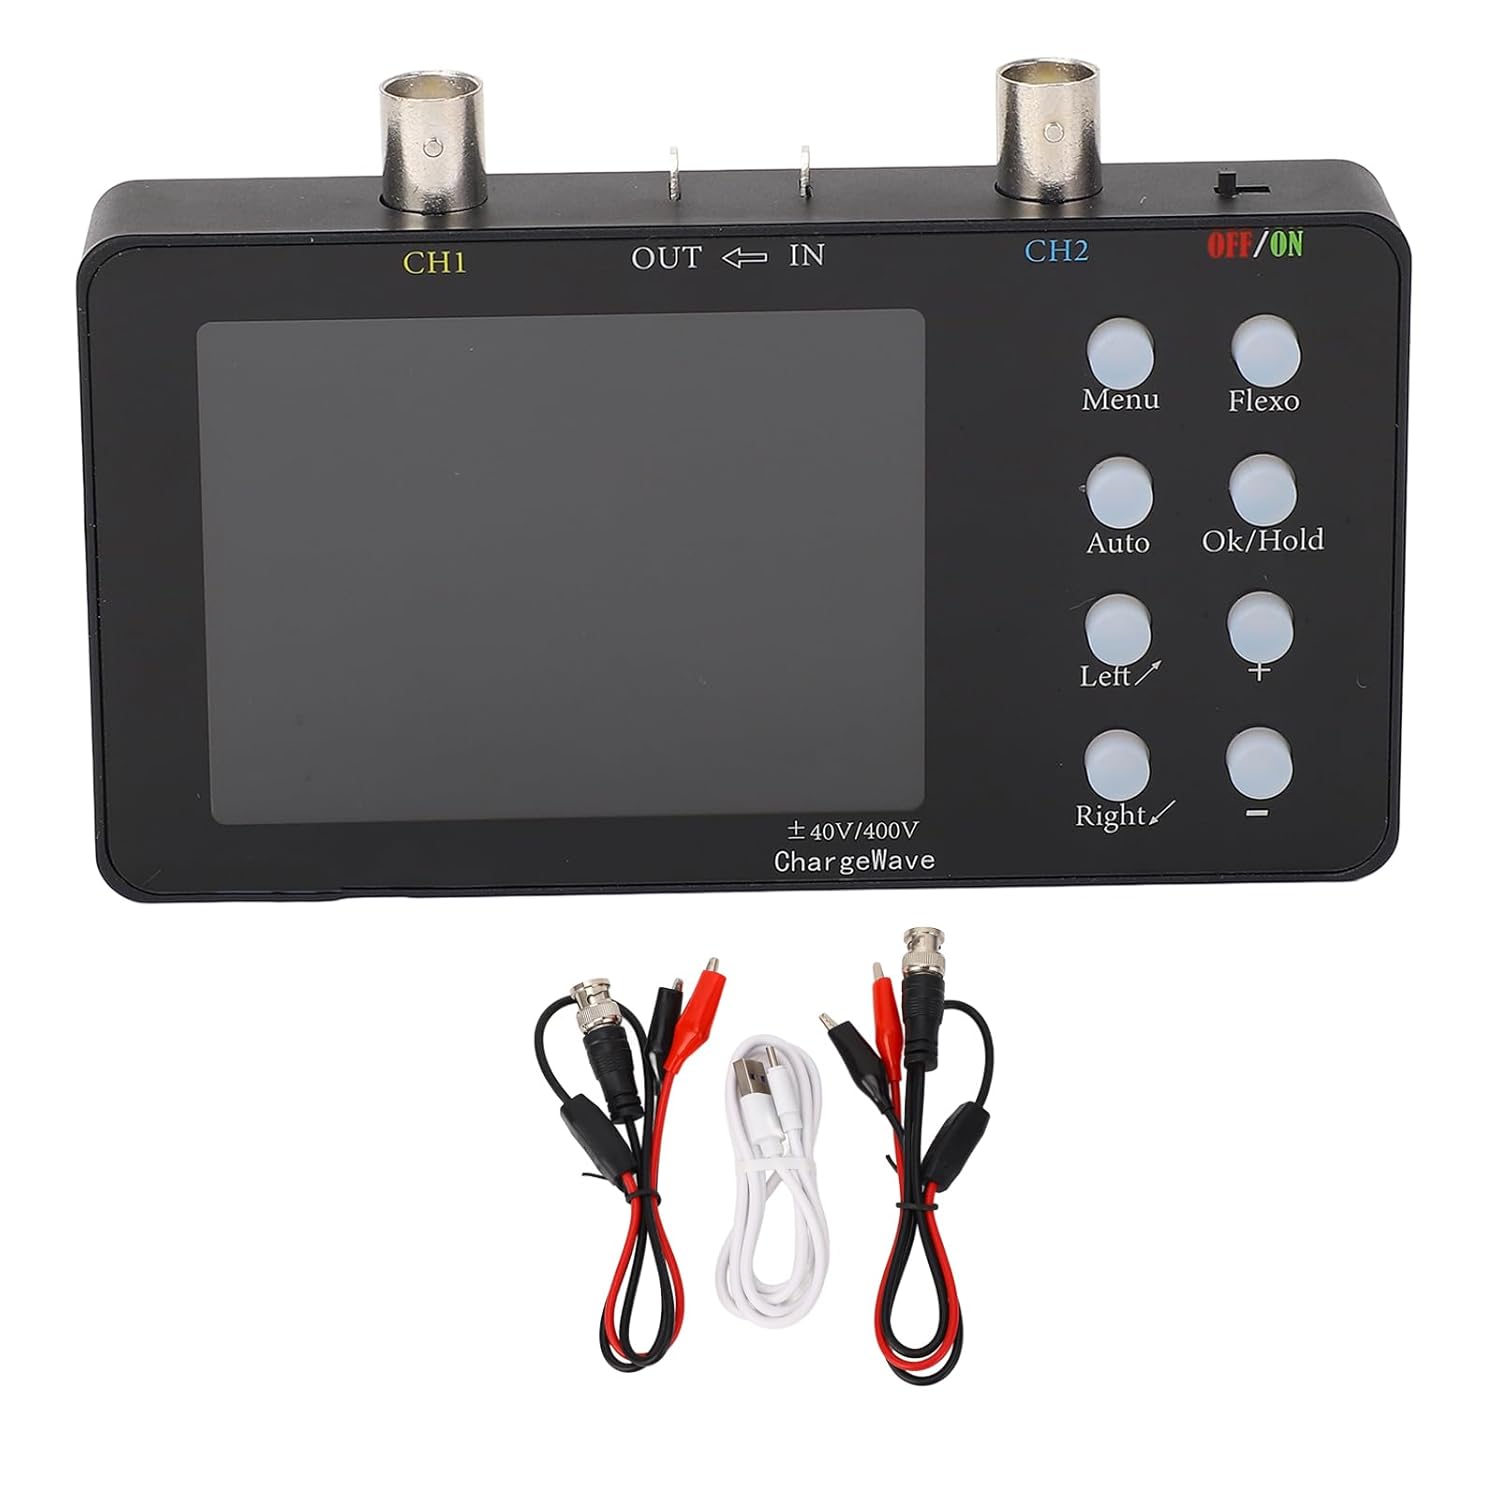
Figure 2: Oscilloscope and Included Accessories.
4. Product Overview
The Oreilet SCO-2-10M features a compact design with a 3.2-inch LCD display on the front. Input channels CH1 and CH2 are located at the top, along with an OUT/IN port. Control buttons are positioned on the right side of the display.

Figure 3: Top View of the Oscilloscope with Inputs and Controls.

Figure 4: Side View of Oscilloscope Controls.
Controls and Indicators:
- CH1 / CH2: Input channels for connecting probes.
- OFF/ON: Power switch for the device.
- Menu: Accesses the main menu for settings and functions.
- Flexo: Function button, specific operation may vary by mode.
- Auto: Automatically adjusts settings for optimal waveform display.
- Ok/Hold: Confirms selections or pauses the waveform display.
- Left / Right: Navigation buttons for menu options or waveform positioning.
- + / -: Adjusts parameters such as voltage scale, time base, or menu values.
- LCD Display: 3.2-inch screen with 320x240 resolution for waveform visualization and data display.
5. Setup
5.1 Charging the Device
Before first use, ensure the oscilloscope is fully charged. Connect the provided charging cable to the charging port on the device and to a standard 5V USB power adapter (not included). The built-in 2500mAh Li-Battery provides approximately 4.5-6 hours of continuous working time when fully charged.
5.2 Connecting Probes
- Identify the two red and black probe clips.
- Connect the BNC connector of each probe clip to the CH1 and CH2 input ports on the top of the oscilloscope.
- Ensure the connections are secure.
6. Operating Instructions
6.1 Power On/Off
To power on the oscilloscope, slide the OFF/ON switch to the 'ON' position. To power off, slide it to the 'OFF' position.
6.2 Basic Waveform Display
- Connect the probe clips to the circuit you wish to measure. Remember to connect the ground clip first.
- Press the Auto button to automatically adjust the vertical and horizontal scales for a stable waveform display.
- Use the + and - buttons to manually adjust the voltage scale (V/DIV) or time base (S/DIV) as needed.
- The Left and Right buttons can be used to shift the waveform horizontally.

Figure 5: Oscilloscope in Use, Displaying a Waveform.
6.3 Waveform Measurement and Analysis
The oscilloscope provides various measurement parameters displayed on the screen. It supports 20K storage depth with waveform compression and expansion capabilities. Current waveform compression can be steplessly adjusted up to 165 times, allowing for detailed examination of current variation curves.

Figure 6: Dual Channel Waveform Measurement Display.
6.4 Menu Functions
Press the Menu button to access advanced settings and functions. Use the Left, Right, +, and - buttons to navigate and adjust menu options. Press Ok/Hold to confirm selections or exit a menu.
7. Specifications
| Parameter | Value |
|---|---|
| Model | SCO-2-10M |
| Sampling Rate | 50M/Channel |
| Channels | 2 |
| Analog Bandwidth | 10MSa/s (per channel) |
| Voltage Measurement (X1) | ±40V |
| Voltage Measurement (X10) | ±400V |
| Input Impedance | 1MΩ |
| Storage Depth | 20Kb |
| Parameter Display | 12 Types |
| Current Measurement | 0-6A |
| Minimum Current Accuracy | 2mA |
| Current Sampling Rate | 2.5KSa/s |
| Display | 3.2 inch LCD, 320x240 Resolution |
| Charging Voltage | 5V |
| Battery Capacity | 1 x 2500mAh Li Battery (built-in) |
| Continuous Working Time | 4.5-6 hours |
| Firmware Upgrade | Supported |
| Package Dimensions | 9.06 x 6.3 x 1.97 inches |
| Item Weight | 11.25 ounces |
8. Maintenance
- Cleaning: Use a soft, dry cloth to clean the device. Do not use abrasive cleaners or solvents.
- Storage: Store the oscilloscope in a cool, dry place away from direct sunlight and extreme temperatures.
- Battery Care: For optimal battery life, avoid fully discharging the battery frequently. Charge the device regularly, even if not in use for extended periods.
- Probe Care: Inspect probe clips regularly for damage. Replace if insulation is compromised.
9. Troubleshooting
- Device does not power on:
- Ensure the battery is charged. Connect the charging cable and try again.
- Verify the OFF/ON switch is in the 'ON' position.
- No waveform displayed:
- Check if probes are correctly connected to the input channels and the circuit under test.
- Press the Auto button to automatically adjust the display settings.
- Ensure the input signal is within the voltage measurement range of the oscilloscope.
- Waveform is unstable or noisy:
- Ensure proper grounding of the probe and the circuit.
- Adjust the time base and voltage scale using the + and - buttons.
- Minimize external electromagnetic interference.
10. Warranty and Support
For warranty information or technical support, please refer to the documentation provided at the time of purchase or contact your retailer. You may also visit the official Oreilet website for further assistance.