
1. Introduction
This manual provides detailed instructions for the installation, operation, and maintenance of your visiPower GS-107-K GSM/4G WiFi Home Security Alarm System. This system is designed to provide comprehensive security for your home or office, featuring a 4.3-inch TFT full-color touch screen, dual network support (GSM/4G and 2.4GHz WiFi), and remote control via the Tuya Smart Life application.
Please read this manual thoroughly before operating the device to ensure proper functionality and safety.
2. Package Contents
Carefully unpack your visiPower GS-107-K system and verify that all items listed below are present and in good condition. If any items are missing or damaged, please contact customer support.
- 1 x Alarm Panel (Main Unit)
- 2 x PIR Motion Sensors
- 4 x Door/Window Sensors
- 2 x Remote Controllers
- 2 x RFID Tags
- 1 x Wired Siren
- 1 x Power Adapter (for Alarm Panel)
- Mounting Screws and Adhesives

Figure 2.1: All components included in the visiPower GS-107-K alarm system kit.
3. Product Overview
The visiPower GS-107-K alarm system features a central control panel with an intuitive touch screen interface and various sensors to detect intrusions and emergencies.
3.1. Alarm Panel Features
- Display: 4.3-inch TFT full-color IPS touch screen for live status, date, and time display.
- Connectivity: Supports GSM/4G (with SIM card) and 2.4GHz WiFi (IEEE802.11b/g/n). Note: 5GHz WiFi is not supported.
- Zones: 90 wireless zones for accessories (sensors, remote controls) and 10 zones for RFID tags.
- Control: SMS arm/disarm, voice arm/disarm, and parameter settings.
- Notifications: Supports accessory low battery, AC power failure, hub or accessory battery shortage, and tamper alarms. Door/window unclosed notification when armed.
- Zone Types: Configurable as in/out zone, indoor zone, outdoor zone, 24-hour zone, or doorbell.
- Emergency: One-click SOS button for immediate alerts.
- Communication: Supports 5 groups of alarm phone numbers, 20-second message and voice alarm.
- Smart Home Integration: Compatible with Tuya and Smart Life apps, allowing control of smart sockets (with same RF frequency) and voice control via Amazon Alexa and Google Assistant.
- Backup Power: Built-in 3.7V/500mAh lithium-ion standby battery for up to 8 hours of emergency operation.
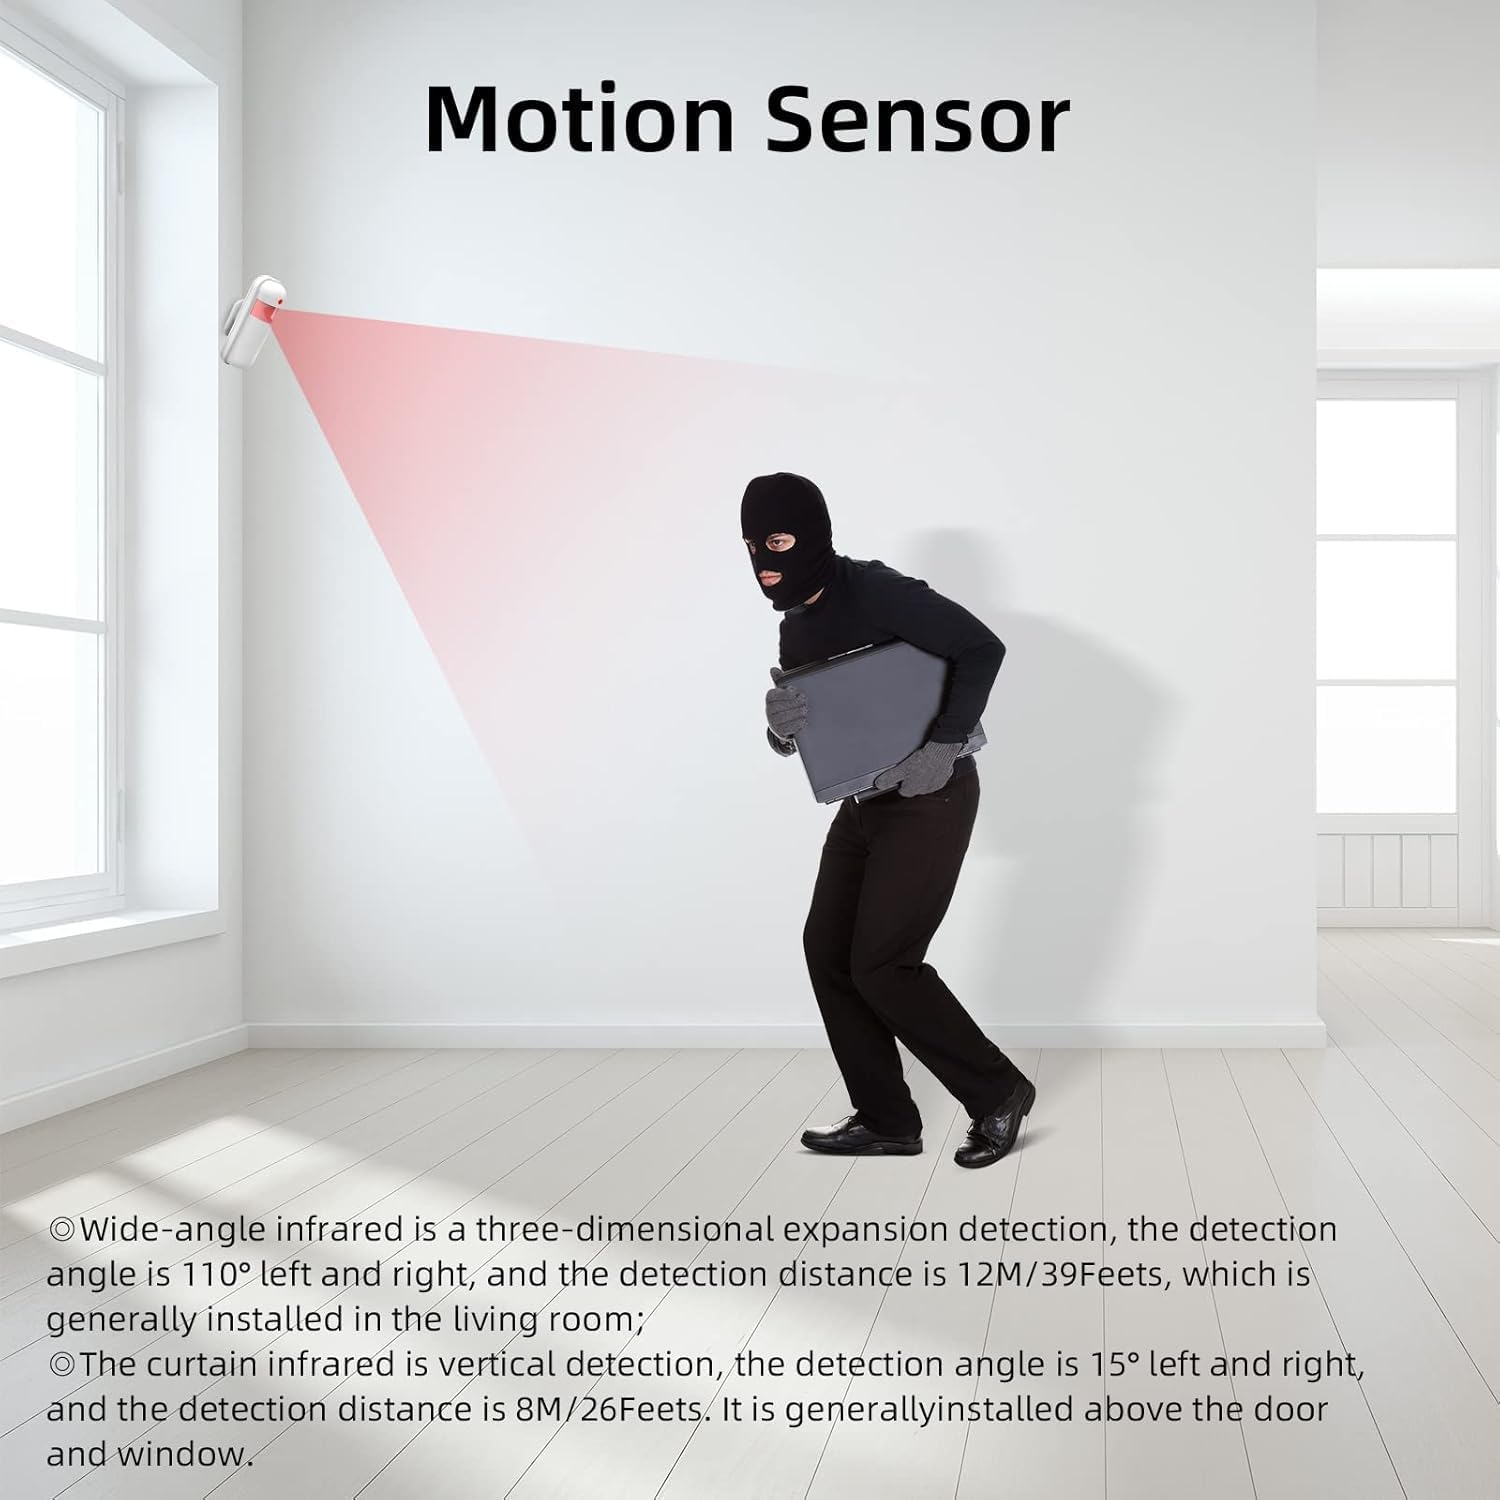
Figure 3.1: The 4.3-inch TFT touch screen interface of the alarm panel.

Figure 3.2: The alarm panel features a built-in rechargeable battery for continuous operation during power outages.
4. Setup
Follow these steps to set up your visiPower GS-107-K alarm system.
4.1. Alarm Panel Installation
- Mounting: Choose a central location in your home, away from direct sunlight and heat sources. Use the provided screws to securely mount the alarm panel to a wall.
- Power Connection: Connect the provided DC 5V micro USB power adapter to the alarm panel and plug it into a standard wall outlet. The panel will power on automatically.
- SIM Card (Optional): If you intend to use GSM/4G features, insert a 2G/3G/4G SIM card into the designated slot on the alarm panel. Ensure the SIM card is active and has sufficient credit/data.
4.2. App Download and WiFi Connection
- Download App: Search for "Tuya Smart" or "Smart Life" in your smartphone's app store (iOS or Android) and download the application.
- Register/Login: Create a new account or log in to your existing account.
- Add Device: In the app, tap '+' to add a new device. Select 'Security & Video Surveillance' > 'Alarm (Wi-Fi)'.
- Connect to WiFi: Follow the on-screen instructions in the app to connect the alarm panel to your 2.4GHz WiFi network. Ensure your phone is also connected to the same 2.4GHz network during pairing.
4.3. Sensor Installation and Pairing
The system supports up to 90 wireless accessories. Sensors are typically pre-paired, but you may need to add or re-pair them.
4.3.1. PIR Motion Sensors
- Placement: Install PIR sensors in areas where intruders are likely to pass, such as hallways or living rooms. Mount them at a height of approximately 2.2-2.5 meters (7-8 feet) for optimal detection. Avoid placing them near heat sources or direct sunlight.
- Detection: The wide-angle infrared detection covers 110° left and right with a detection distance of 12 meters (39 feet). Curtain infrared detection covers 15° left and right with a distance of 8 meters (26 feet), suitable for mounting above doors or windows.
- Pairing: If not pre-paired, enter the alarm panel's 'Add Accessory' menu, trigger the PIR sensor by moving in front of it, and confirm pairing.

Figure 4.1: Illustration of PIR motion sensor detection range and optimal placement.
4.3.2. Door/Window Sensors
- Placement: Attach the main part of the sensor to the door or window frame and the smaller magnetic part to the door or window itself. Ensure the two parts are aligned and within 1 cm (0.4 inches) of each other when the door/window is closed.
- Pairing: If not pre-paired, enter the alarm panel's 'Add Accessory' menu, separate the two parts of the sensor, and confirm pairing.
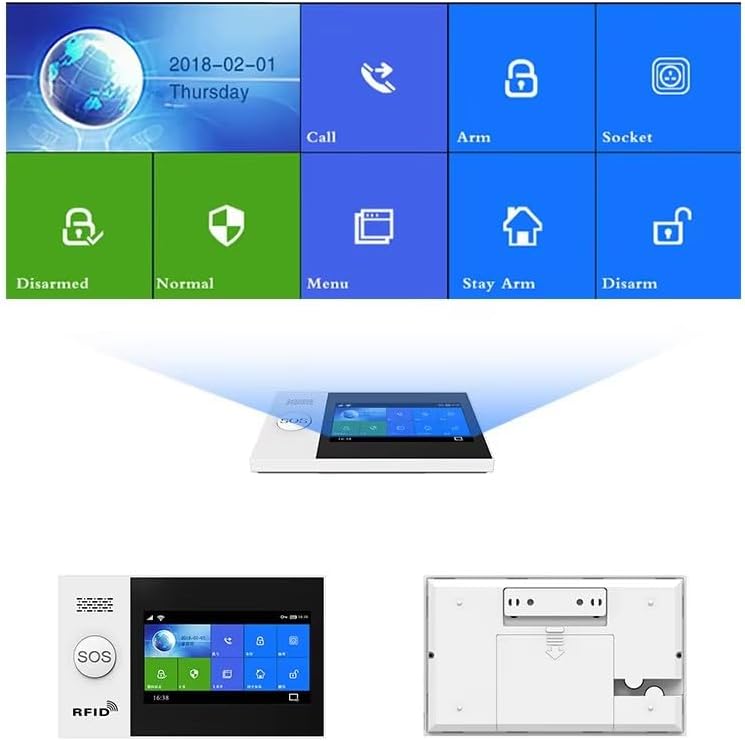
Figure 4.2: Proper installation of a door magnetic sensor on a door frame and door.
4.3.3. Remote Controllers and RFID Tags
- Remote Controllers: These are typically pre-paired. If not, follow the alarm panel's instructions to add a new remote by pressing a button on the remote when prompted.
- RFID Tags: To add an RFID tag, navigate to the 'RFID' section in the alarm panel menu and scan the tag when prompted.
4.4. Wired Siren Connection
Connect the wired siren to the designated wired alarm connector on the alarm panel. Ensure the connection is secure. The siren will sound and flash when an alarm is triggered.
5. Operating Instructions
Understand how to effectively use your alarm system for daily security.
5.1. Arming and Disarming
The system can be armed or disarmed using the alarm panel, remote controllers, the mobile app, or SMS commands.
- Arm: Activates all configured sensors. Any triggered sensor will initiate an alarm.
- Disarm: Deactivates all sensors, allowing free movement without triggering an alarm.
- Stay Arm (Home Arm): Activates perimeter sensors (e.g., door/window sensors) while allowing movement within indoor zones (e.g., PIR sensors in living areas are disarmed).

Figure 5.1: Diagram illustrating the operating principle: sensors trigger, panel sends signal, siren sounds, and app receives notification.
5.2. SOS Function
In an emergency, press the SOS button on the alarm panel or remote controller. The system will immediately trigger an alarm, sound the siren, and send emergency notifications to the preset phone numbers and the mobile app.
5.3. Two-Way Voice Intercom
The alarm panel supports a two-way voice intercom function. When an alarm call is received, you can speak through the panel to the person at the location, and they can respond. This feature also allows for voice messages and SMS remote control.

Figure 5.2: The alarm panel facilitates two-way voice communication.
5.4. Smart Home Integration (Tuya/Smart Life App)
Control your alarm system and integrated smart devices remotely using the Tuya Smart or Smart Life app. Receive instant notifications, arm/disarm the system, and manage settings from anywhere.

Figure 5.3: The system supports voice control via Amazon Alexa and Google Assistant through the Tuya/Smart Life app.
5.5. Doorbell Function
The alarm panel can function as a visible doorbell. When a doorbell accessory is pressed, the panel will emit a chime, notifying you of visitors.

Figure 5.4: The alarm panel can integrate with a doorbell accessory to provide a visible doorbell function.
6. Maintenance
Regular maintenance ensures the longevity and optimal performance of your alarm system.
6.1. Battery Management
- Alarm Panel Backup Battery: The built-in lithium-ion battery is designed for emergency backup. Ensure the panel is always connected to AC power for primary operation. The system will notify you of low battery status.
- Sensor Batteries: PIR motion sensors and door/window sensors are battery-powered. The system will alert you when sensor batteries are low. Replace batteries promptly with the recommended type (refer to sensor specifications or product packaging).
6.2. Cleaning
Wipe the alarm panel and sensors with a soft, dry cloth. Avoid using abrasive cleaners or solvents, which can damage the surfaces.
6.3. Firmware Updates
Periodically check the Tuya Smart or Smart Life app for available firmware updates for your alarm panel. Keeping the firmware updated ensures you have the latest features and security enhancements.
7. Troubleshooting
If you encounter issues with your visiPower GS-107-K system, refer to the following common problems and solutions.
- System not powering on:
- Ensure the power adapter is securely connected to the alarm panel and a working power outlet.
- Check if the power outlet is functional. - WiFi connection failure:
- Confirm your WiFi network is 2.4GHz. The system does not support 5GHz WiFi.
- Ensure your WiFi password is correct.
- Move the alarm panel closer to your WiFi router.
- Restart your router and the alarm panel. - Sensors not triggering alarm:
- Check the battery status of the sensor. Replace if low.
- Ensure the sensor is properly paired with the alarm panel.
- Verify the sensor's zone settings are correctly configured (e.g., not set to 'disarm' or 'doorbell' mode when expecting an alarm).
- For door/window sensors, ensure the magnetic gap is within 1 cm when closed. - No alarm notifications on phone:
- Ensure the alarm panel has a stable WiFi connection or an active SIM card with signal.
- Check app notification settings on your smartphone and within the Tuya/Smart Life app.
- Verify that alarm phone numbers are correctly set in the panel's settings. - Remote controller not working:
- Check the remote controller's battery.
- Ensure the remote is paired with the alarm panel.
If the problem persists, please contact visiPower customer support for further assistance.
8. Specifications
| Feature | Specification |
|---|---|
| Power Input | DC 5V (Micro USB standard interface) |
| Working Current | <120mA |
| Standby Current | <80uA |
| Alarm Current | <500mA |
| Wireless Frequency | 433MHZ |
| Wireless Coding | EV 1527 |
| 2G Bands | 850/900/1800/1900MHZ |
| Wi-Fi Bands | IEEE802.11b/g/n RF standard (2.4GHz) |
| Standby Battery | 3.7V/500mAh Lithium-ion |
| Temperature Range | 0℃ ~ 55℃ (32°F ~ 131°F) |
| Humidity Range | <80%RH (Non-freezing) |
| Product Dimensions | 9 x 3.9 x 0.7 inches |
| Item Weight | 2 pounds |
9. Warranty and Support
Your visiPower GS-107-K Home Security Alarm System is covered by a manufacturer's warranty. For specific warranty terms and conditions, please refer to the documentation included with your purchase or contact visiPower customer support.
For technical support, troubleshooting assistance, or warranty claims, please contact visiPower directly through their official website or the contact information provided with your product.