Important Safety Instructions
Please read these instructions carefully before using the appliance and keep them for future reference. This appliance is intended for household use only.
- Do not immerse the appliance, cord, or plug in water or any other liquid.
- Always unplug the appliance from the power outlet when not in use, before cleaning, or in case of malfunction.
- Keep the appliance out of reach of children.
- Do not operate the appliance with a damaged cord or plug.
- Do not place the appliance near hot surfaces or open flames.
- Ensure proper ventilation around the toaster during operation.
- Never insert metal objects into the toaster slots.
- Do not toast items with excessive sugar or glaze, as they may drip and cause a fire.
- Always use the crumb tray and empty it regularly to prevent fire hazards.
- The appliance is not intended to be operated by means of an external timer or separate remote-control system.
Product Overview
The SEVERIN AT 2591 Automatic Toaster is designed for efficient and uniform toasting of bread and pastries. It features two long slots, accommodating up to four slices of standard bread.
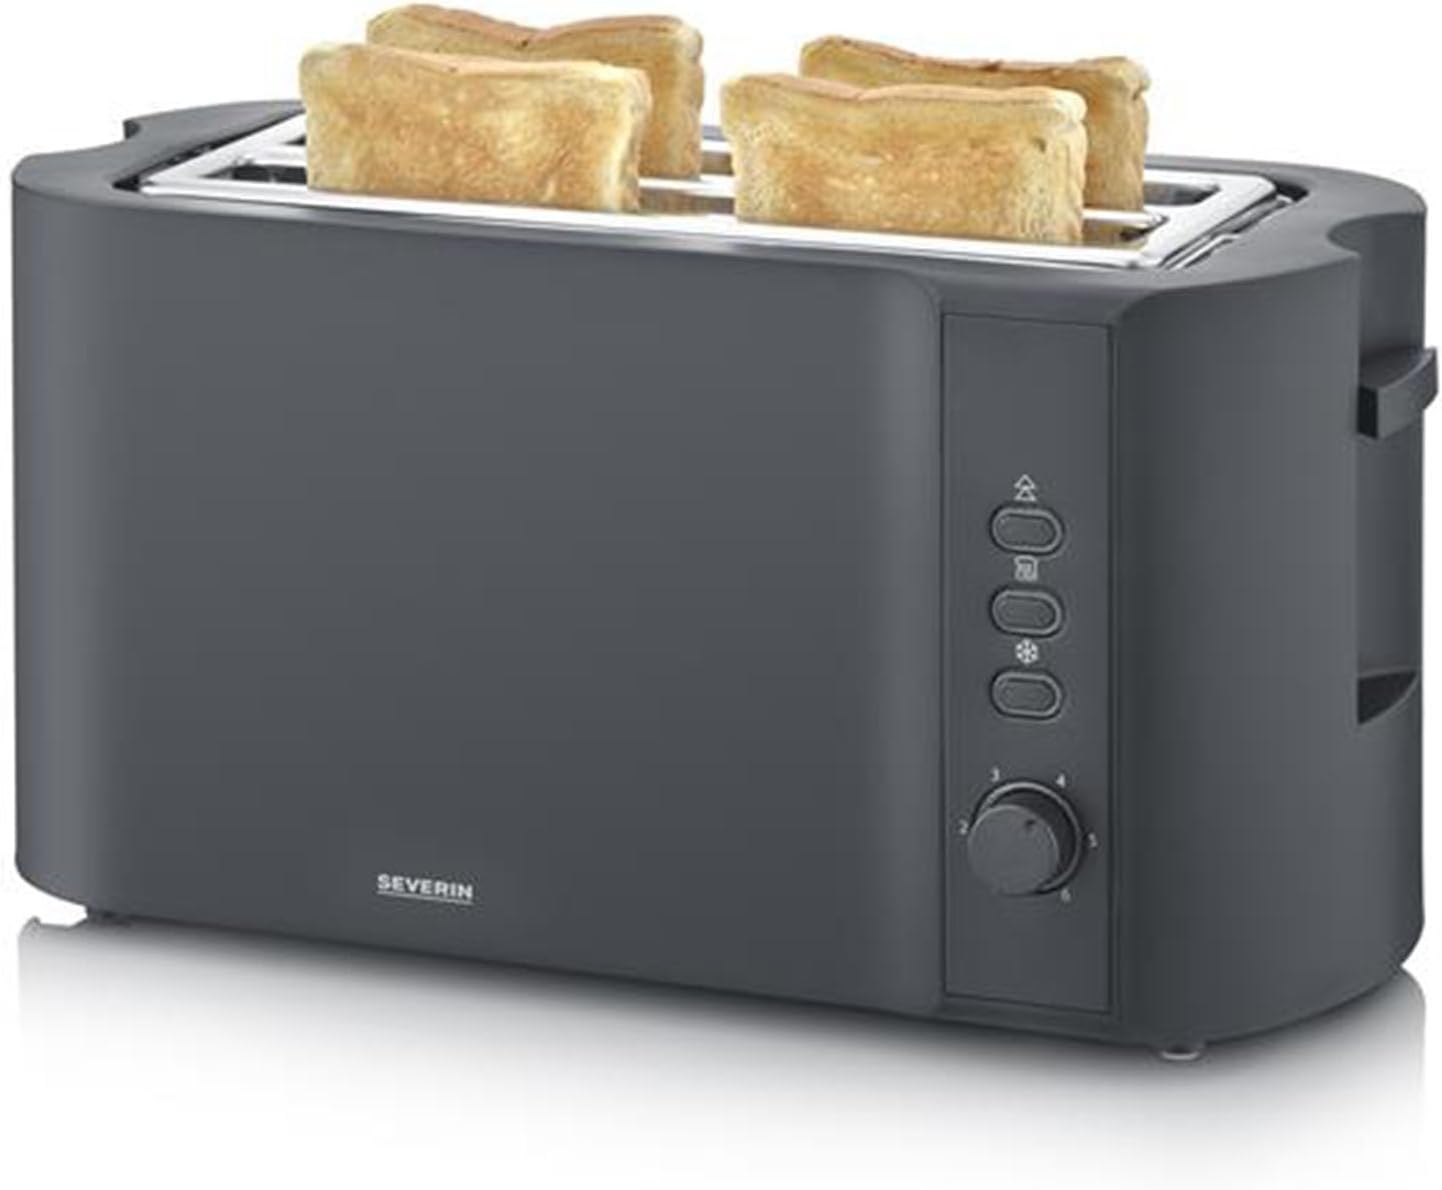
Figure 1: Front view of the SEVERIN AT 2591 Automatic Toaster with toast. This image shows the toaster's main body, control panel, and the two long slots with bread slices.
- Toasting Slots: Two long slots for up to 4 slices of bread.
- Browning Control Dial: Adjustable browning levels from 1 (light) to 6 (dark).
- Function Buttons:
- Reheat Button: For warming up toast without further browning.
- Defrost Button: For toasting frozen bread.
- Cancel/Eject Button: To stop the toasting process at any time.
- Integrated Warming Rack: For reheating pastries and rolls.
- Removable Crumb Tray: For easy cleaning.
- Cord Storage: Integrated cord winder for tidy storage.
Setup
- Unpack the toaster and remove all packaging materials.
- Place the toaster on a stable, heat-resistant, and dry surface, away from walls and curtains.
- Ensure there is sufficient space around the toaster for ventilation.
- Before first use, operate the toaster without bread for a few cycles at the highest browning setting to burn off any manufacturing residues. This may produce a slight odor and smoke, which is normal. Ensure the area is well-ventilated.
- Clean the crumb tray and wipe the exterior with a damp cloth after the initial burn-off.
Operating Instructions
Toasting Bread
- Insert up to four slices of bread into the toasting slots. The slice centering system will automatically position the bread for uniform browning.
- Select the desired browning level using the browning control dial (1 for light, 6 for dark).
- Press down the toast lever until it locks into place. The toasting process will begin.
- Once the selected browning level is reached, the toast will automatically pop up.
- To stop the toasting process at any time, press the Cancel/Eject button.
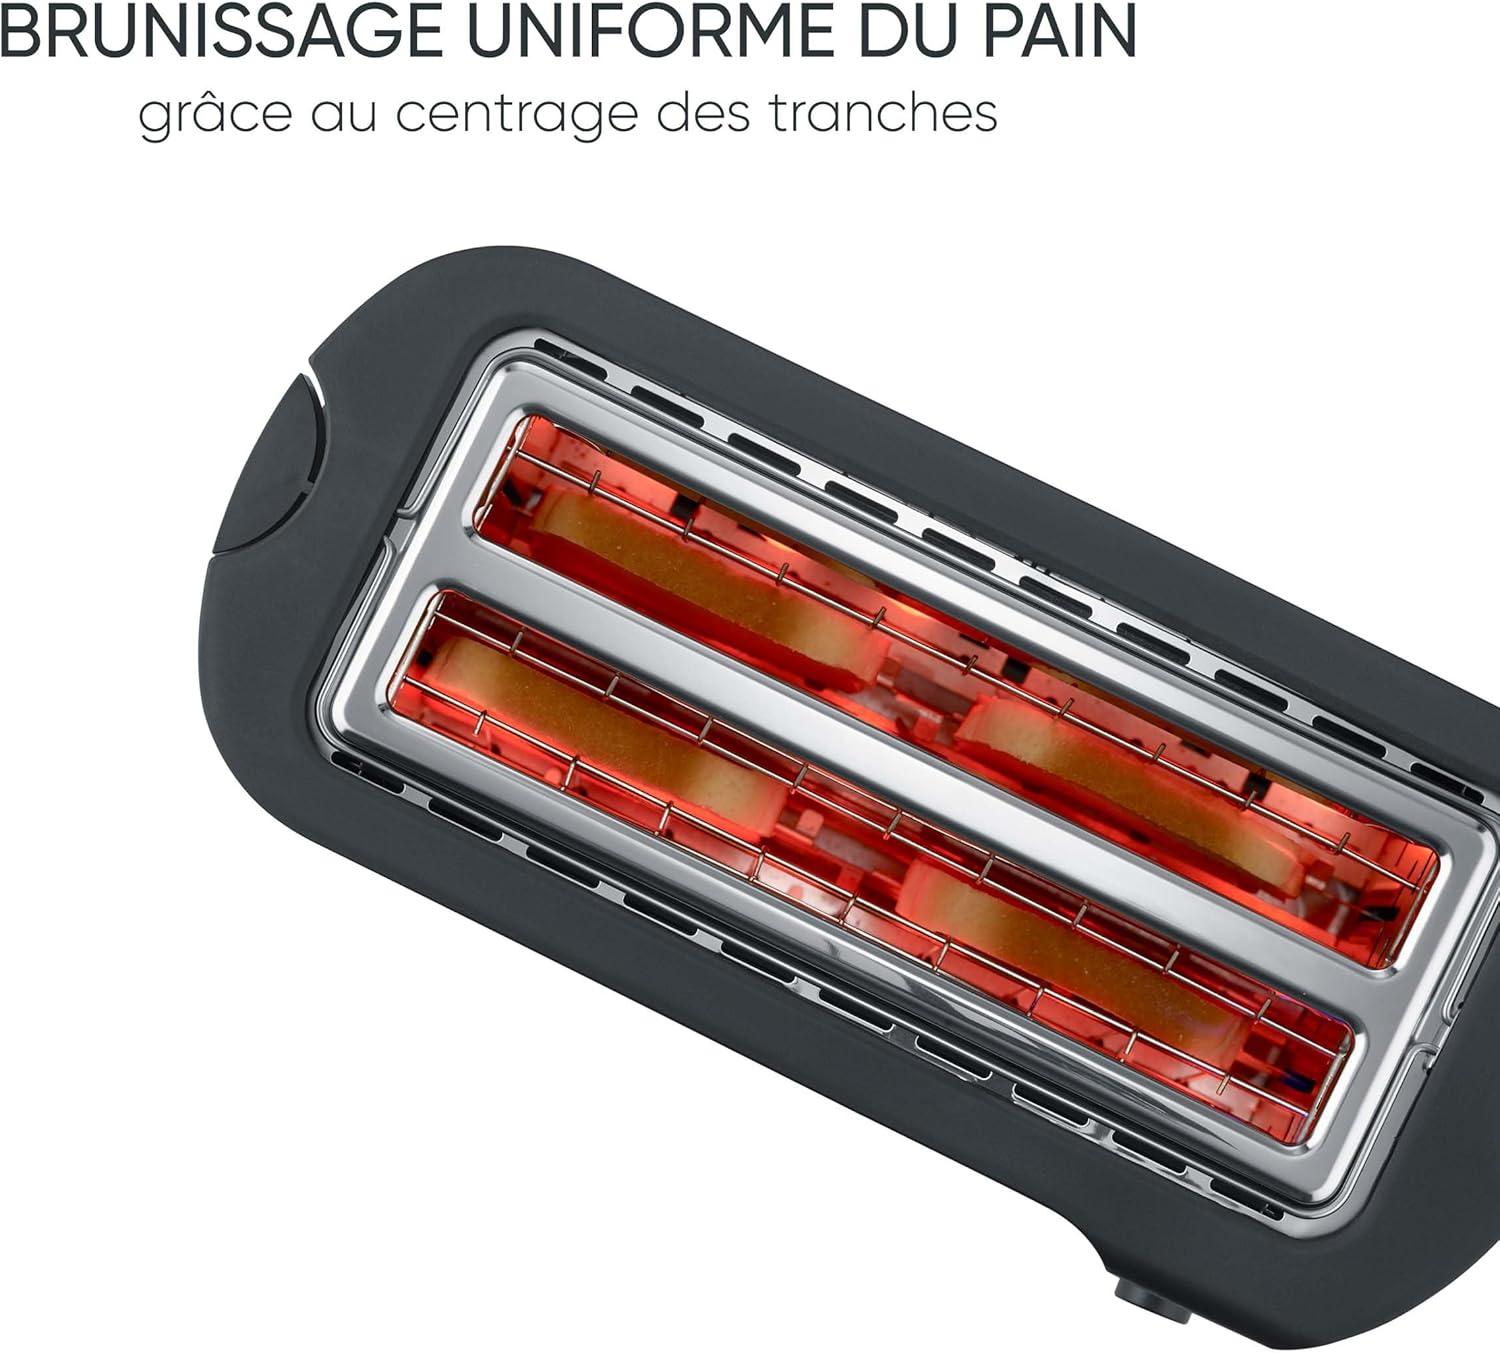
Figure 2: View into the toaster slots, illustrating the heating elements and the automatic slice centering for even browning.
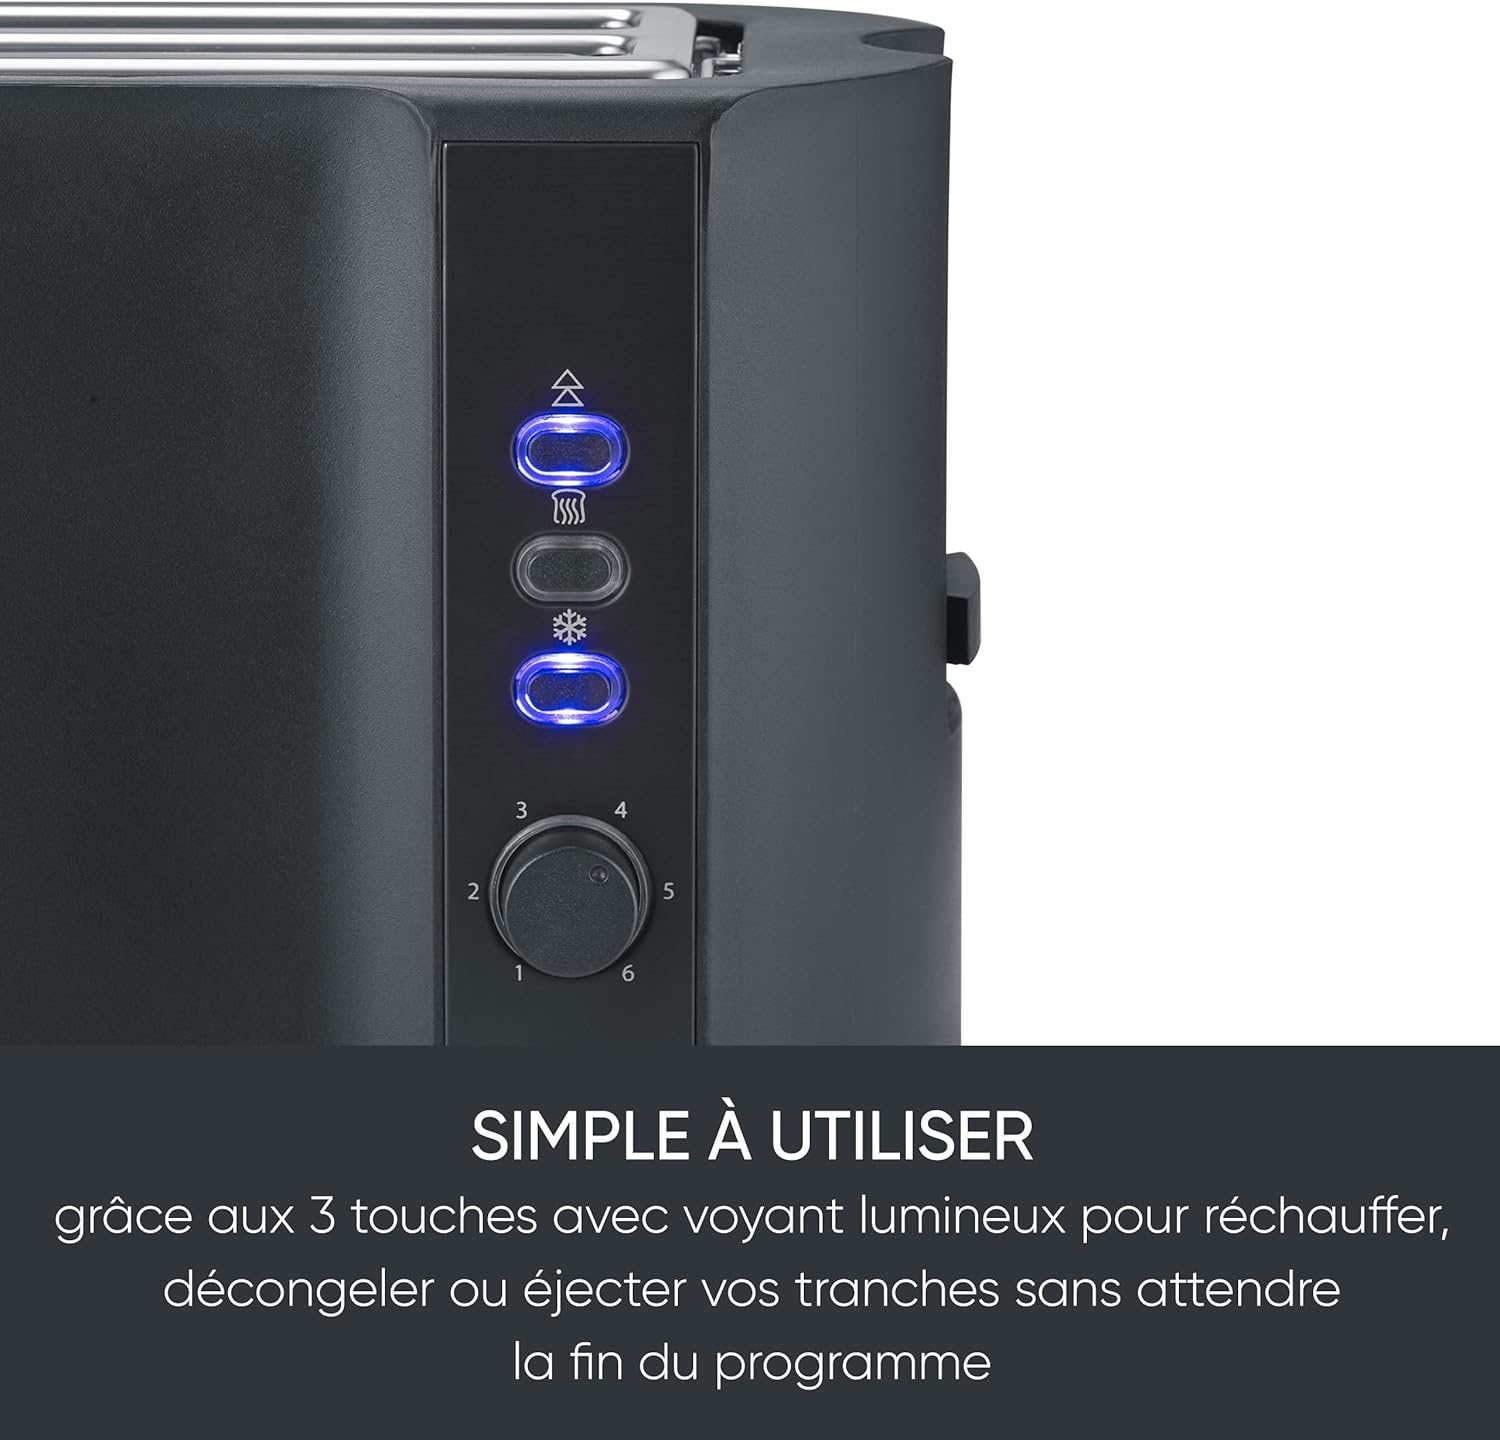
Figure 3: Detail of the control panel showing the illuminated Reheat, Defrost, and Cancel/Eject buttons, and the browning control dial.
Reheating Pastries and Rolls
- Pull up the integrated warming rack.
- Place pastries or rolls on the warming rack.
- Set the browning control dial to a low setting (e.g., 1 or 2).
- Press down the toast lever.
- After a short period, the lever will pop up. Turn the pastries/rolls over and repeat the process if necessary.
- Once done, push the warming rack back down for storage.

Figure 4: The toaster with its integrated warming rack deployed, demonstrating how to reheat pastries or rolls.
Defrosting Frozen Bread
- Insert frozen bread slices into the toasting slots.
- Select the desired browning level.
- Press down the toast lever, then press the Defrost button. The defrost button will illuminate.
- The toaster will automatically adjust the toasting time for frozen bread.
- The toast will pop up when ready.
Reheating Cold Toast
- Insert cold toast into the slots.
- Press down the toast lever, then press the Reheat button. The reheat button will illuminate.
- The toaster will warm the toast without further browning.
- The toast will pop up when ready.
Maintenance and Cleaning
Regular cleaning ensures optimal performance and extends the lifespan of your toaster.
- Always unplug the toaster from the power outlet and allow it to cool completely before cleaning.
- Emptying the Crumb Tray:
- Pull out the removable crumb tray located at the bottom of the toaster.
- Discard the crumbs and wipe the tray clean with a damp cloth.
- Slide the crumb tray back into place until it locks.

Figure 5: The removable crumb tray pulled out from the toaster, demonstrating ease of cleaning.
- Cleaning the Exterior: Wipe the exterior of the toaster with a soft, damp cloth. Do not use abrasive cleaners or scouring pads.
- Internal Cleaning: Never insert any objects into the toasting slots to clean them. If a piece of bread gets stuck, unplug the toaster and carefully remove the bread after it has cooled.
Troubleshooting
| Problem | Possible Cause | Solution |
|---|---|---|
| Toaster does not turn on. | Not plugged in; power outlet malfunction; appliance malfunction. | Ensure the plug is securely inserted. Test the outlet with another appliance. If still not working, contact customer support. |
| Bread is not toasting evenly. | Incorrect browning setting; bread not centered (unlikely with auto-centering); crumbs obstructing elements. | Adjust browning setting. Ensure bread is inserted correctly. Empty crumb tray regularly. |
| Smoke or burning smell. | Crumbs accumulated in the tray or inside the toaster; food stuck in slots. | Immediately unplug the toaster. Allow to cool. Empty crumb tray. Carefully remove any stuck food. |
| Toast lever does not stay down. | Toaster not plugged in; internal mechanism issue. | Ensure the toaster is plugged into a live outlet. If the issue persists, contact customer support. |
Specifications
| Feature | Detail |
|---|---|
| Model Number | AT 2591 |
| Brand | Severin |
| Power | 1400 Watts |
| Voltage | 230 Volts |
| Dimensions (L x W x H) | 20 x 17.5 x 37 cm |
| Weight | 1.65 Kilograms |
| Material | Plastic |
| Number of Slots | 2 long slots (for 4 slices) |
| Special Features | Cool-touch exterior, Reheat mode, Self-centering support, Defrost function, Cancel button, Integrated warming rack, Removable crumb tray, Cord storage. |
Warranty and Support
SEVERIN products are designed for performance, ease of use, and durability. This product comes with a 2-year warranty from the date of purchase.
For warranty claims, technical support, or spare parts inquiries, please contact SEVERIN customer service or visit their official website. Keep your proof of purchase for warranty validation.
SEVERIN Official Website: www.severin.com
(Note: Specific contact details may vary by region. Please refer to the packaging or official website for local support information.)


