1. Introduction
Thank you for choosing the GREATEN AP 300 Pro Electronic Wind Instrument. This digital saxophone is designed to offer a versatile and expressive musical experience with its 108 global tones, dual-mode Bluetooth connectivity, and OTG recording capabilities. This manual provides detailed instructions for setup, operation, maintenance, and troubleshooting to ensure optimal performance and enjoyment of your instrument.

Image 1.1: Overview of the GREATEN AP 300 Pro Electronic Wind Instrument and its key features.
2. What's in the Box
Please verify that all items listed below are included in your package:
- AP 300 Pro EWI Instrument
- USB Cable
- Mouthpiece Cap
- Spare Mouthpiece
- Carrying Case
- Neck Strap
- Screwdriver
- User Manual (this document)

Image 2.1: Illustration of the package contents and instrument dimensions.
3. Product Overview: Panel Descriptions
Familiarize yourself with the various components and controls of your AP 300 Pro instrument:
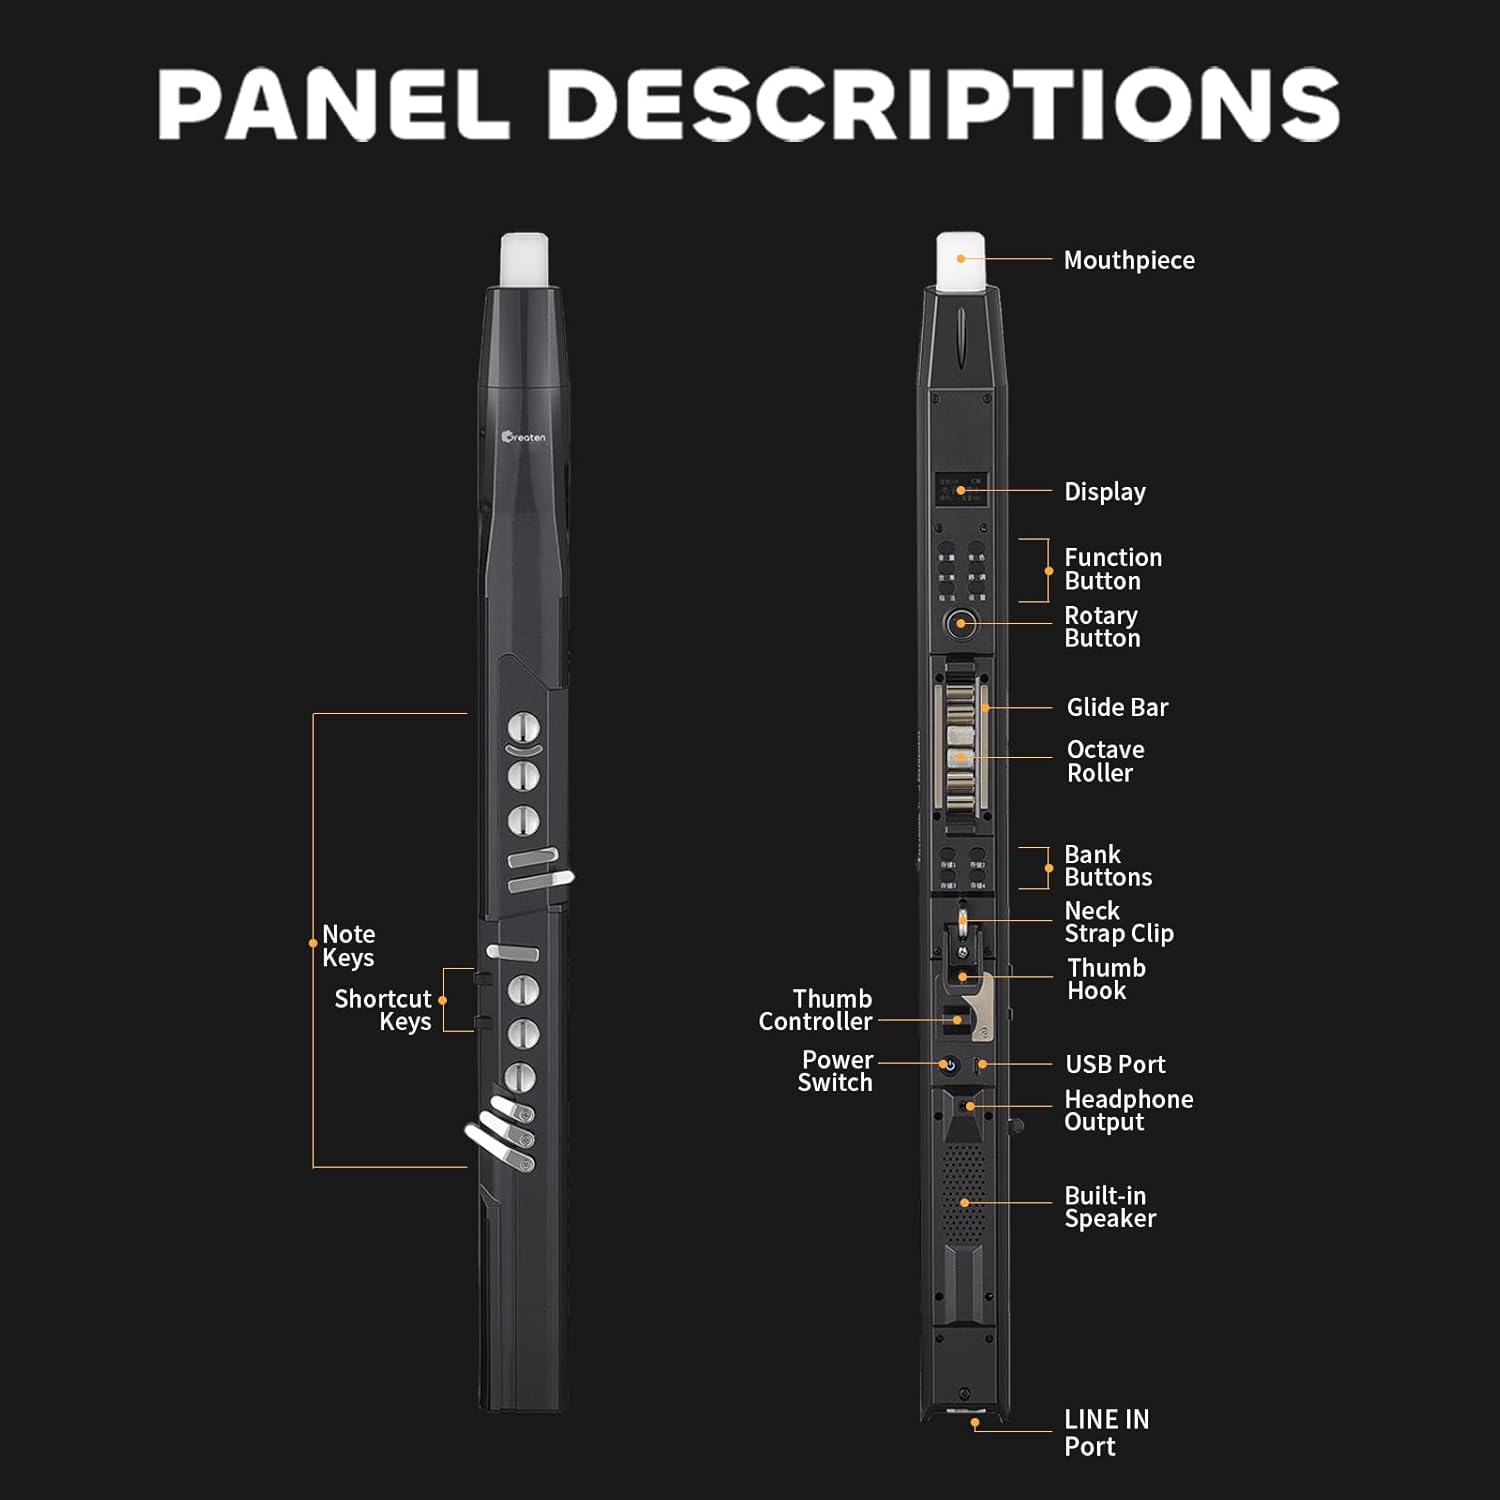
Image 3.1: Front and back views with labeled components.
- Mouthpiece: Food-grade silicone, features a built-in sensor for expressive control.
- Display: LCD screen shows selected parameters, tones, volume, and key settings.
- Function Button: Used to access and confirm menu options.
- Rotary Button: Navigates through menus and adjusts parameter values.
- Glide Bar: Allows for portamento effects by sliding a finger up or down.
- Octave Roller: Easily changes the playing octave.
- Bank Buttons (1-4): Stores and recalls customized settings.
- Key Strap Clip & Thumb Hook: For attaching a neck strap and adjusting holding comfort.
- Thumb Controller: Used for pitch bends and other expressive controls.
- Power Switch: Turns the instrument on or off.
- USB Port: For charging and OTG recording.
- Headphone Output: For silent practice.
- Built-in Speaker: For direct sound output.
- LINE IN Port: For connecting external audio sources.
- Note Keys & Shortcut Keys: Touch-sensitive keys for playing notes and accessing quick functions.
4. Setup
4.1. Charging the Instrument
The AP 300 Pro is equipped with a 6000mAh battery, providing up to 6 hours of continuous use. Before first use, fully charge the instrument.
- Connect the provided USB cable to the USB Port on the instrument.
- Connect the other end of the USB cable to a standard USB power adapter (not included) or a computer's USB port.
- The LCD display will indicate charging status. A full charge typically takes several hours.
4.2. Attaching the Neck Strap
For comfortable playing, attach the neck strap to the Key Strap Clip on the instrument.
4.3. Adjusting the Thumb Hook and Controller
The thumb hook and controller can be adjusted for a comfortable fit, accommodating different hand sizes and playing styles.
- Thumb Hook: Use the provided screwdriver to loosen the screw, slide the thumb hook up or down to your preferred position, and then tighten the screw.
- Reversible Thumb Controller: The thumb controller can be reversed to suit your preference. Refer to Image 4.1 for visual guidance.

Image 4.1: Adjusting the thumb hook and controller for ergonomic comfort.
5. Operating Instructions
5.1. Power On/Off
To power on the instrument, slide the Power Switch to the 'ON' position. To power off, slide it to 'OFF'.
5.2. LCD Display Navigation
The LCD display provides real-time information and allows you to adjust settings.
- Use the Rotary Button to scroll through menu options and adjust values.
- Press the Function Button to select an option or confirm a setting.
5.3. Tone Selection
The AP 300 Pro features 108 global instrument tones.
- Press the Function Button to enter the tone selection menu.
- Rotate the Rotary Button to browse through the available tones.
- Press the Function Button again to confirm your selection.

Image 5.1: Accessing the 108 global instrument tones.
5.4. Fingering Modes
The instrument supports 8 different fingering options, including Standard, Saxophone, Flute, Oboe, and Trumpet, allowing players with existing wind instrument experience to adapt quickly.

Image 5.2: Multiple fingering options for diverse playing styles.
5.5. Bluetooth Connectivity
The AP 300 Pro supports dual-mode Bluetooth for both audio and MIDI.
- Bluetooth Audio: Connect your phone or tablet to play backing tracks through the instrument's speaker or connected headphones/amplifiers.
- Bluetooth MIDI: Connect wirelessly to MIDI-compatible applications or devices for expanded creative possibilities.

Image 5.3: Using Bluetooth for accompaniment.
5.6. OTG Recording
The built-in OTG recording function allows for high-quality recording directly to a connected device, minimizing external noise interference.
- Connect your smartphone or tablet to the instrument's USB port using an OTG adapter (not included).
- Use a recording application on your device to capture your performance.

Image 5.4: Easy recording via OTG connection.
5.7. Storage Function (Bank Buttons)
The instrument allows you to store four independent tone libraries, enabling quick recall of preferred settings.
- Configure your desired tone, fingering, and effects.
- Press and hold one of the Bank Buttons (1-4) to save the current settings to that bank.
- To recall saved settings, simply press the corresponding Bank Button.

Image 5.5: Saving and recalling custom settings using Bank Buttons.
5.8. Practice Options
The AP 300 Pro offers flexible practice options:
- Built-in Speaker: For general practice and performance.
- Headphone Connection: Plug headphones into the Headphone Output for silent practice without disturbing others.
- Connect to Amplifiers: Use the LINE IN port to connect to an external amplifier for louder output.
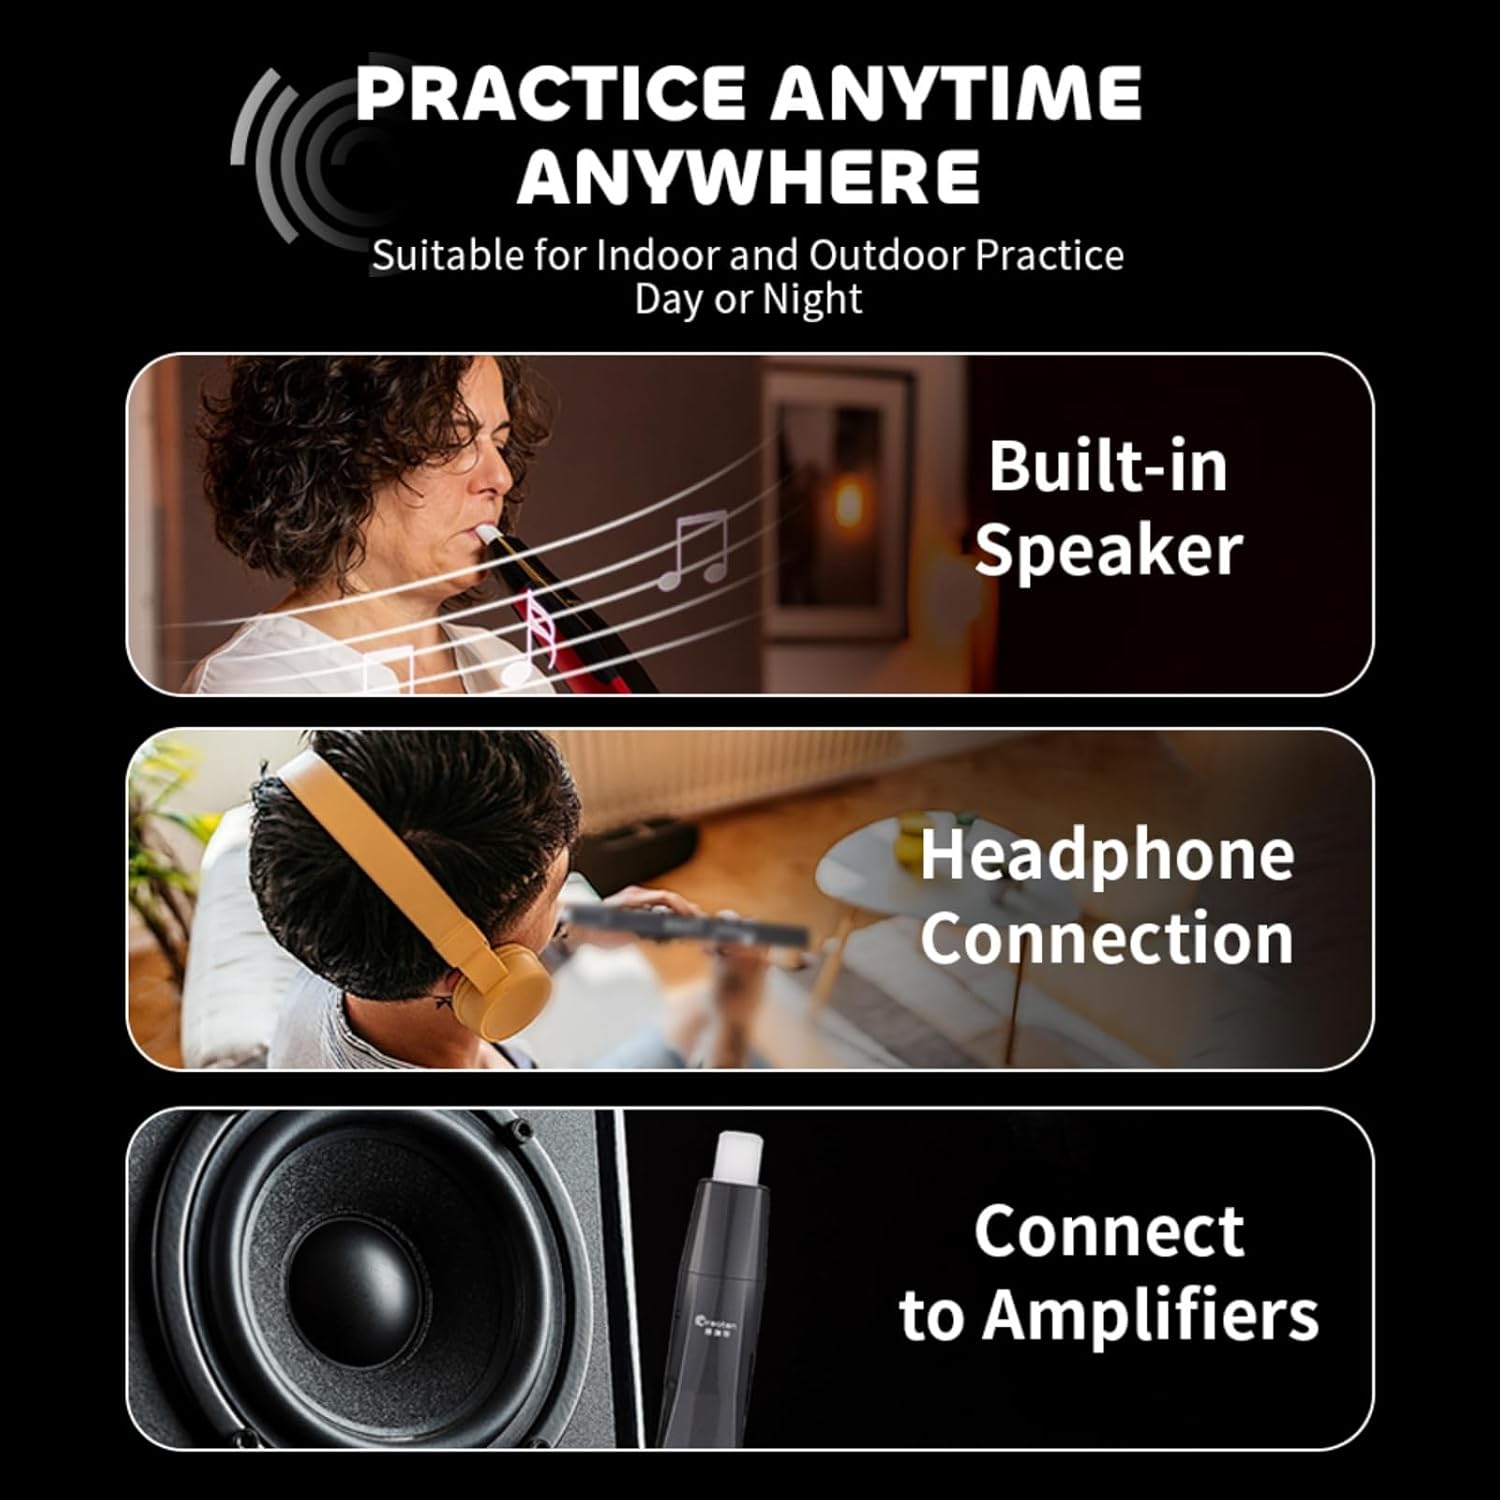
Image 5.6: Versatile practice options for any environment.
6. Advanced Features
6.1. Octave Roller
The Octave Roller allows for quick and easy octave shifts during performance.
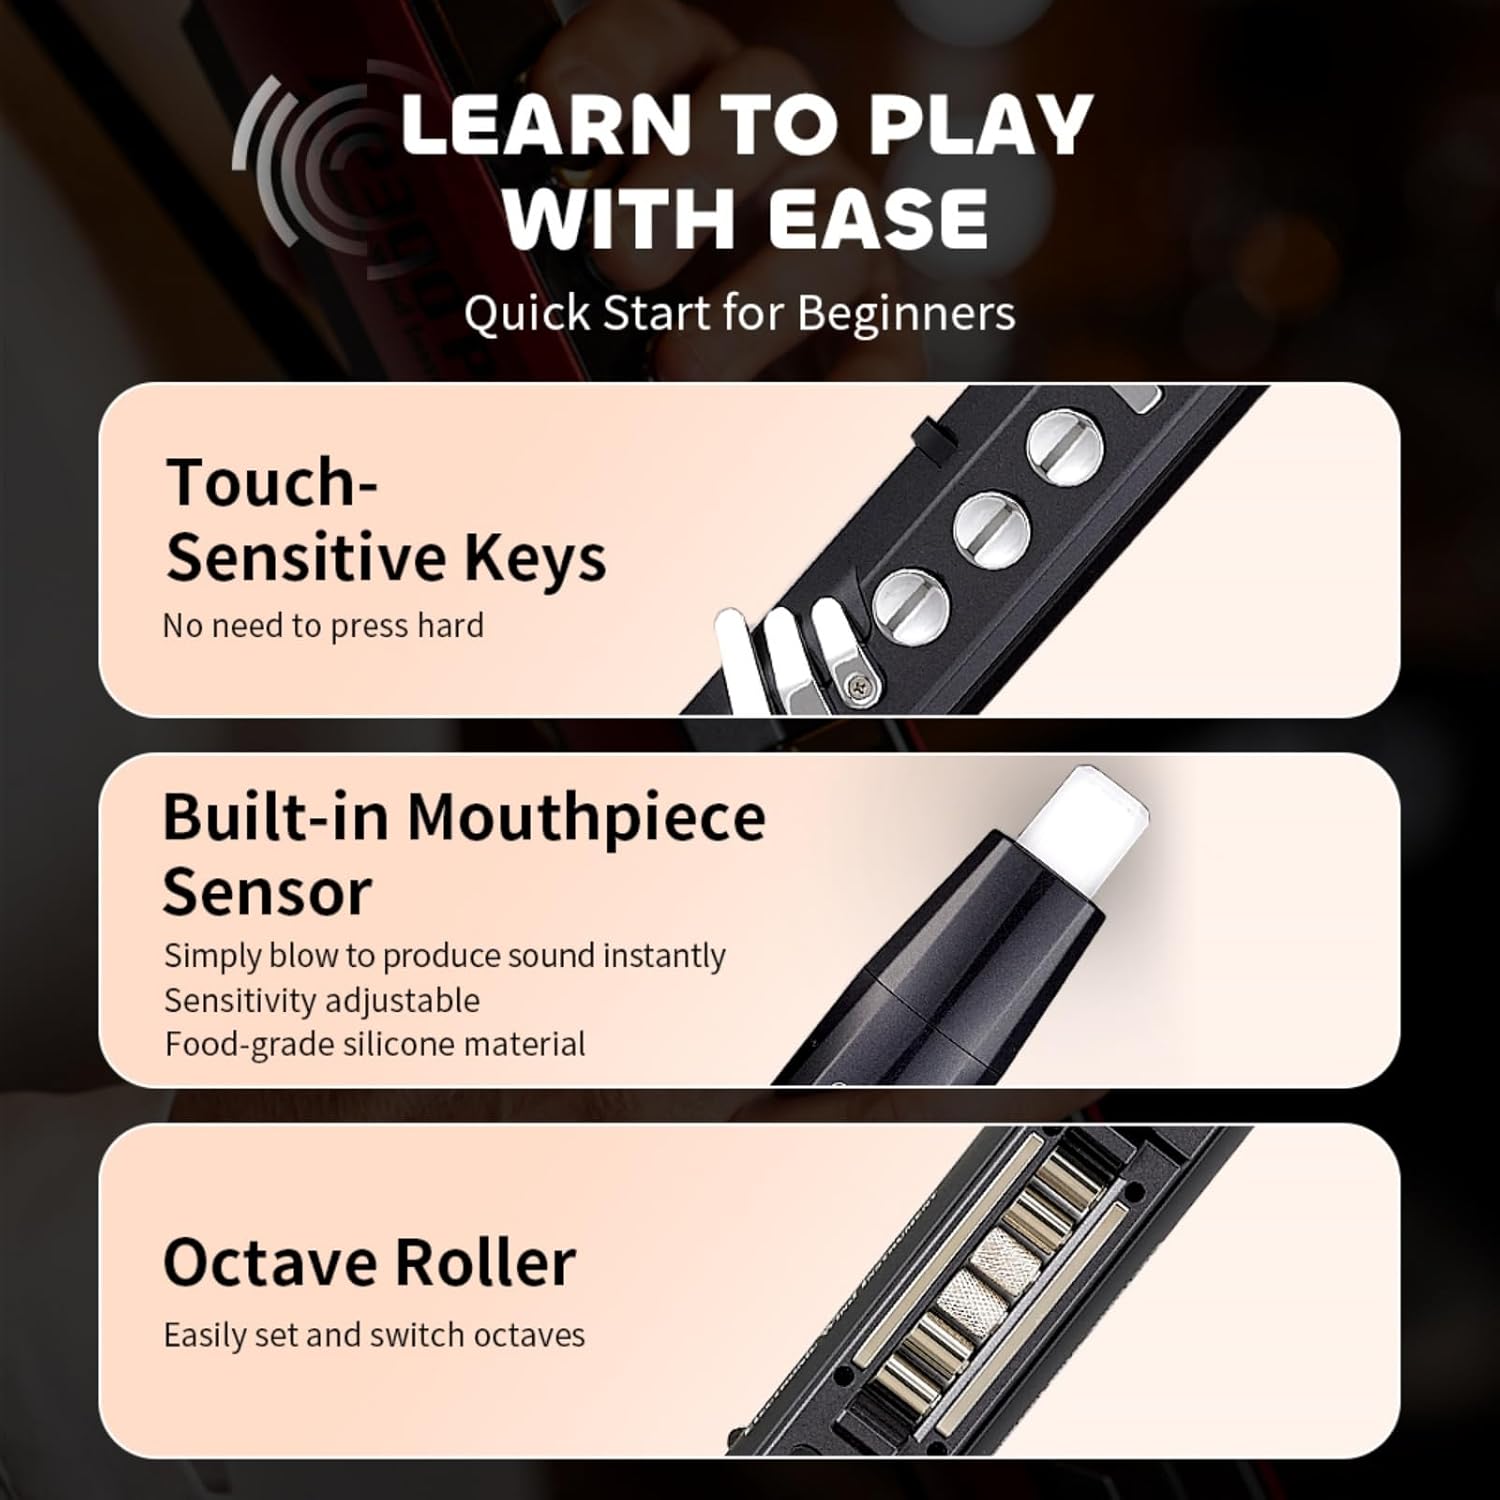
Image 6.1: Octave Roller for dynamic range.
6.2. Portamento (Glide Bar)
Achieve smooth pitch transitions by sliding your finger along the Glide Bar.

Image 6.2: Using the Glide Bar for portamento.
6.3. Pitch Bends (Thumb Controller)
Use the Thumb Controller to bend notes up and down for expressive playing.

Image 6.3: Applying pitch bends with the Thumb Controller.
6.4. Vibrato Modes
Choose from three vibrato modes with adjustable sensitivity:
- Semi-Auto: Blow and hold a bite on the mouthpiece.
- Full-Auto: Simply blow into the mouthpiece.
- Vibrato: Bite the mouthpiece repeatedly.

Image 6.4: Understanding vibrato modes.
6.5. Special Effects (Skill Set)
The "Skill Set" function enables advanced effects like flutter-tonguing or growling. This setting can be toggled on or off as needed.

Image 6.5: Activating special effects.
7. Maintenance
7.1. Cleaning the Mouthpiece
Regular cleaning of the mouthpiece is essential for hygiene and optimal performance.
- Remove the mouthpiece from the instrument.
- Wash it with mild soap and warm water.
- Rinse thoroughly and allow it to air dry completely before reattaching.
7.2. General Care
- Store the instrument in its carrying case when not in use to protect it from dust and damage.
- Avoid exposing the instrument to extreme temperatures or humidity.
- Do not use abrasive cleaners or solvents on the instrument's surface. Wipe with a soft, dry cloth.
8. Troubleshooting
If you encounter issues with your AP 300 Pro, refer to the following common problems and solutions:
| Problem | Possible Cause | Solution |
|---|---|---|
| No sound output | Volume too low; headphones connected; instrument not powered on; tone not selected. | Increase volume; disconnect headphones; power on instrument; select a tone. |
| Instrument does not power on | Battery is depleted. | Charge the instrument fully using the USB cable. |
| Bluetooth connection issues | Device is out of range; Bluetooth is off on instrument or external device; interference. | Ensure devices are close; activate Bluetooth on both; restart both devices. |
| Keys are unresponsive | Instrument malfunction; dirty keys. | Restart the instrument. If problem persists, contact customer support. Clean keys with a soft, dry cloth. |
| OTG recording has noise | Incorrect cable; external interference. | Ensure proper OTG cable connection. Test in a quiet environment. |
If the issue persists after attempting these solutions, please contact GREATEN customer support.
9. Specifications
| Feature | Detail |
|---|---|
| Model | AP 300 Pro |
| Dimensions | 25.4 x 2.36 x 2.36 inches (645 x 60 x 60 mm) |
| Weight | 1.79 pounds (810 grams) |
| Material Type | Aluminum, Copper, Plastic |
| Instrument Key | A |
| Tones | 108 Global Tones |
| Battery | 6000mAh (up to 6 hours use) |
| Connectivity | Dual-Mode Bluetooth (Audio & MIDI), USB (for charging & OTG recording), LINE IN |
| Display | LCD Screen |
| Fingering Options | 8 (including Standard, Saxophone, Flute, Oboe, Trumpet) |
10. Warranty and Support
For warranty information, please refer to the documentation provided at the time of purchase or contact your retailer. For technical support, product inquiries, or service requests, please contact GREATEN customer service through the official GREATEN website or your purchase platform.
Online resources and FAQs may also be available on the GREATEN brand store page: GREATEN Store


