
1. Introduction
This instruction manual provides essential information for the proper installation, operation, and maintenance of your Spares2go Rear Flap Microswitch. This component is designed as a compatible replacement part for various Stiga lawn mower models. Please read this manual thoroughly before attempting any installation or repair to ensure safety and correct functionality.
2. Product Overview
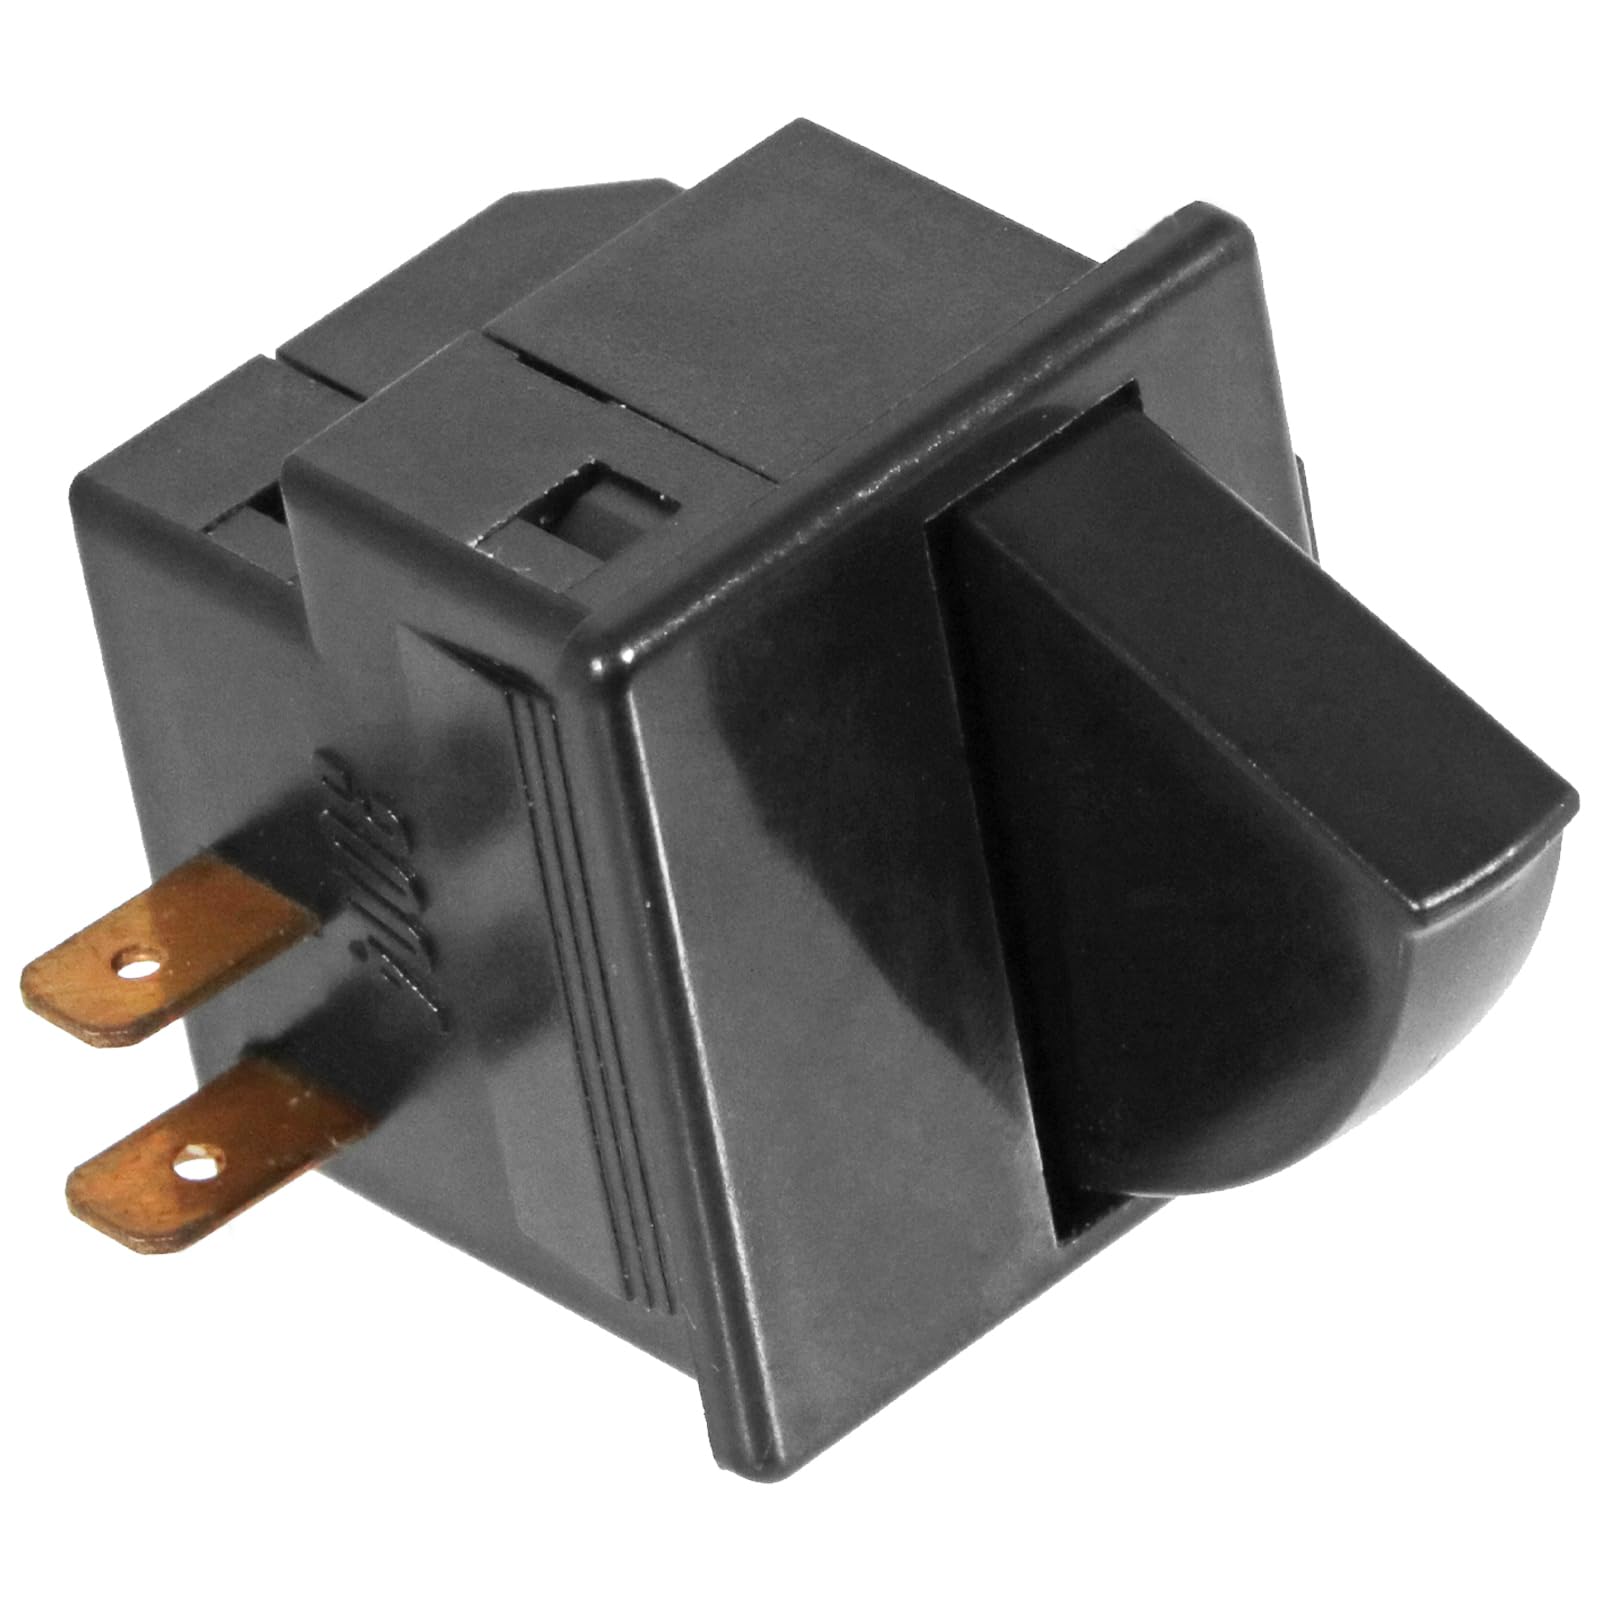
The Spares2go Rear Flap Microswitch is a safety-critical electrical component. It detects the position of the lawn mower's rear flap, ensuring that the mower operates only when the flap is correctly closed, preventing accidental contact with moving parts. This microswitch features a durable black plastic housing and two copper electrical terminals for connection.


3. Compatibility
This Spares2go Rear Flap Microswitch is compatible with a wide range of Stiga lawn mower models. It is designed to fit various models within the Combi, Estate, Grand Tornado, Master, and Tornado series. Please verify your specific model number against the list below to ensure compatibility before installation.
Examples of compatible Stiga models include:
- Stiga Combi Series: Combi 1066 H, Combi 1066 HQ, Combi 3072 H, Garden Combi H HST, Garden Combi HST, Garden Combi Pro HST.
- Stiga Estate Series: Estate 2084, Estate 3084 H, Estate 3098 H, Estate 4092, Estate 5092 H, Estate 6102 HW, Estate Baron, Estate Basic, Estate Collector, Estate Grand Royal, Estate Master, Estate President, Estate Pro series.
- Stiga Grand Tornado Series: Grand Tornado, Grand Tornado H HST, Grand Tornado Pro HST.
- Stiga Master Series: Master, Master HST, Master HST H.
- Stiga Tornado Series: Tornado 1066 H, Tornado 2098 H, Tornado 3098 H, Tornado 4108 H AP, Tornado 5108 HW, Tornado HST.
- And many other models with specific part numbers such as 2T0930481/10, 2T0950281/10, 2T0980281/11, 2T1310281/10, 2T56627331/CZ, 2T5665781/VI, 299941881/08E, 299951321/STG, 2T0320281/10, 2T2242781/VI, 2T0420281/11, 2T0520281/10, 2T3232781/09, 2T0630281/11, 2T4642781/09, 2T1132781/09, 2T0210481/10, 2T0030281/10, 2T1515281/10, 2T1425281/10, 2T2000484/12, 2T0520284/13, 2T0030224/11, 2T0920224/10, 2T0610481/14.
This product is a compatible replacement part and is not an original Stiga component. Original manufacturer names, model names, and part numbers are used for reference purposes only.
4. Safety Information
Always prioritize safety when working with electrical components and power equipment. Failure to follow these safety guidelines may result in injury or damage to the equipment.
- Disconnect Power: Before attempting any installation, maintenance, or repair, ensure the lawn mower's engine is off and the spark plug wire is disconnected to prevent accidental starting. For battery-powered mowers, remove the battery.
- Read Manuals: Refer to your lawn mower's original instruction manual for specific safety procedures and component locations.
- Electrical Safety: Be cautious when handling electrical wiring. If you are not confident in your ability to perform electrical work, seek assistance from a qualified technician.
- Proper Tools: Use appropriate tools for the task to avoid damage to the microswitch or surrounding components.
- Personal Protective Equipment (PPE): Wear safety glasses and gloves to protect against potential hazards.
- Component Integrity: Inspect the new microswitch for any visible damage before installation. Do not install a damaged component.
5. Installation
The rear flap microswitch is typically located near the grass collector opening, where the rear flap engages with the mower body. Its purpose is to ensure the flap is closed before the blades can operate.
- Preparation: Ensure the lawn mower is turned off, the engine is cool, and the spark plug wire is disconnected (or battery removed for electric models).
- Locate the Microswitch: Identify the existing rear flap microswitch. It is usually mounted in a position where the rear flap presses against it when closed.
- Disconnect Wiring: Carefully disconnect the electrical wires connected to the old microswitch. Note the orientation and connection points if they are not color-coded or unique. Taking a photograph before disconnecting can be helpful.
- Remove Old Microswitch: Unmount the old microswitch. This may involve unscrewing it or releasing retaining clips.
- Install New Microswitch: Position the new Spares2go microswitch in the same location and secure it using the original fasteners or clips.
- Connect Wiring: Reconnect the electrical wires to the new microswitch, ensuring they are securely attached to the correct terminals.
- Test Functionality: Before reconnecting the spark plug or battery, manually operate the rear flap to ensure it properly engages and disengages the microswitch. The switch should click when activated.
- Final Test: Reconnect the spark plug wire (or battery). Test the mower's operation in a safe, open area. The mower should only start or allow blade engagement when the rear flap is securely closed. If the mower starts with the flap open, immediately shut it off and re-check the installation.

If you are unsure about any step of the installation process, it is recommended to consult a qualified service technician.
6. Operation
The rear flap microswitch functions as a critical safety interlock. When the lawn mower's rear flap is in the closed and secured position, it activates the microswitch. This activation completes an electrical circuit, allowing the mower's engine to start or the blades to engage. If the rear flap is open or not properly secured, the microswitch remains disengaged, interrupting the circuit and preventing the mower from operating, thereby reducing the risk of injury.
7. Maintenance
The Spares2go Rear Flap Microswitch is designed for durability and typically requires minimal maintenance. However, periodic inspection can help ensure its continued reliable operation:
- Visual Inspection: Regularly check the microswitch for any signs of physical damage, corrosion on the terminals, or loose wiring.
- Cleanliness: Keep the area around the microswitch free from grass clippings, dirt, and debris, which could impede its movement or cause electrical issues.
- Functionality Check: Periodically test the safety interlock by attempting to start the mower with the rear flap intentionally left open. The mower should not start or engage its blades. If it does, the microswitch may be faulty and require replacement.
- Secure Connections: Ensure all electrical connections to the microswitch remain tight and free from corrosion.
8. Troubleshooting
If your lawn mower is experiencing issues related to starting or blade engagement, and you suspect the rear flap microswitch, consider the following:
| Problem | Possible Cause | Solution |
|---|---|---|
| Mower does not start or blades do not engage when rear flap is closed. |
|
|
| Mower starts or blades engage with the rear flap open. |
|
|
Always ensure power is disconnected before performing any inspection or repair. If troubleshooting does not resolve the issue, consult a professional technician.
9. Specifications
| Feature | Detail |
|---|---|
| Product Type | Rear Flap Microswitch |
| Brand | Spares2go |
| Model Number | 04-SHC-100 |
| Manufacturer | SPARES2GO |
| ASIN | B0F1465R7G |
| Compatibility | Compatible with various Stiga Combi, Estate, Grand Tornado, Master, Tornado lawn mower models. |
10. Warranty and Support
As this product is a compatible replacement part, warranty and support are typically provided by the seller, SPARES-2-GO. For any questions regarding product defects, returns, or technical assistance, please contact the seller directly through your purchase platform. Always retain your proof of purchase for warranty claims.
For general information or to contact the seller, you may visit the Spares2go Store on Amazon.