
Psisuvry FU
Psisuvry 1.3 Cubic Feet Small Fire Safe Box User Manual
Model: FU | Brand: Psisuvry
1. Introduction
Thank you for choosing the Psisuvry 1.3 Cubic Feet Small Fire Safe Box. This safe is designed to provide secure storage for your valuables, including money, jewelry, ID documents, and other important items. Featuring a digital keypad, spare keys, and a removable shelf, it offers both convenience and robust protection against theft and fire.
This manual provides detailed instructions for the setup, operation, maintenance, and troubleshooting of your new safe. Please read it thoroughly before use to ensure proper functionality and to maximize the security features of your product.

Image: The Psisuvry 1.3 Cubic Feet Small Fire Safe Box with its door open, revealing various valuables such as gold bars, stacks of money, passports, and medicine bottles stored neatly inside. This illustrates the safe's capacity and intended use for securing personal items.
2. Safety Information
Always keep the emergency keys in a secure location away from the safe. Do not store them inside the safe. Ensure the safe is placed on a stable, level surface. For optimal security, consider anchoring the safe as described in the setup section. Keep the keypad dry and clean. Avoid using abrasive cleaners.
3. Product Overview and Components
The Psisuvry safe features a robust steel construction with a digital keypad for secure access. It includes a removable shelf for flexible storage and is designed with anti-theft features such as a dual alarm system and pry-resistant hinges.
Included Components:
- Safe Box Unit
- Spare Keys (x2)
- Expansion Screws (x4) for mounting
- User Manual
- Protective Mat (x1)
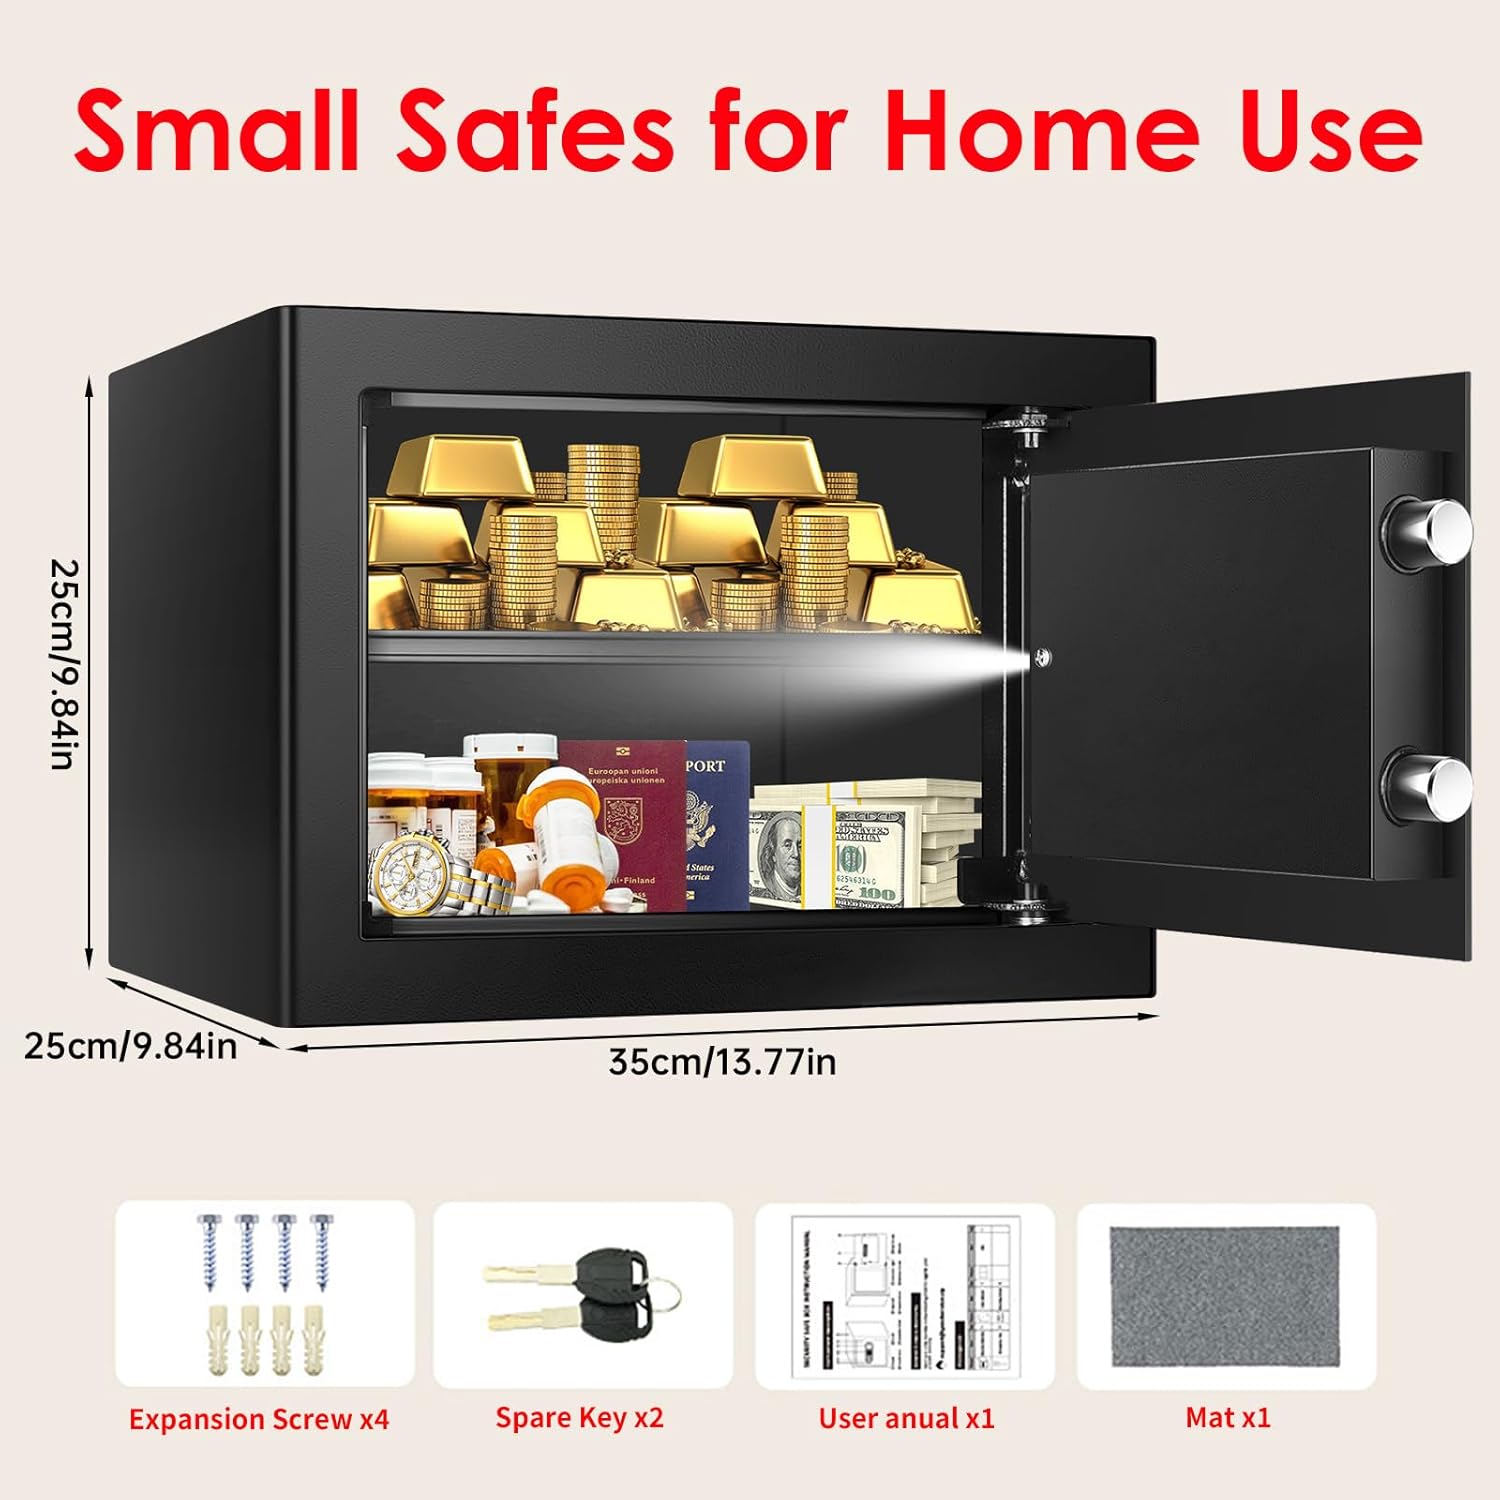
Image: A visual representation of the Psisuvry safe, highlighting its external dimensions (9.84 inches height and depth, 13.77 inches width). Below the safe, the included accessories are displayed: four expansion screws, two spare keys, the user manual, and a protective mat.
4. Setup
4.1 Unboxing and Inspection
Carefully remove all contents from the packaging. Inspect the safe and all components for any signs of damage. If any items are missing or damaged, please contact customer support immediately.
4.2 Battery Installation
The digital keypad requires batteries to operate. Locate the battery compartment, typically on the inside of the safe door. Insert the required batteries (usually 4 AA batteries, not included) ensuring correct polarity. Close the battery compartment cover securely.
4.3 Anchoring the Safe
For enhanced security, it is highly recommended to anchor the safe to a wall or floor. The safe is equipped with pre-drilled holes on the back and/or bottom. Use the provided expansion screws to secure the safe to a solid surface. Ensure the mounting location is suitable and can support the weight of the safe and its contents.
- Position the safe in the desired location.
- Mark the drilling points through the pre-drilled holes on the safe.
- Drill pilot holes into the wall or floor using an appropriate drill bit.
- Align the safe with the drilled holes and insert the expansion screws.
- Tighten the screws firmly to secure the safe in place.
5. Operating Instructions
5.1 Setting Your Personal Code
Upon first use, you will need to set your personal 3-8 digit PIN code. The initial password is typically "159" (refer to the sticker on the safe or the included user manual for confirmation).
- With the safe door open, press the red reset button located on the inside of the door near the hinge. A beep will sound, and the indicator light on the keypad will illuminate.
- Enter your desired 3-8 digit personal code.
- Press the "#" key to confirm. The light will turn off, indicating the code has been successfully set.
5.2 Opening the Safe with Digital Code
- Enter your 3-8 digit personal code on the keypad.
- Press the "#" key. The indicator light will turn green, and you will hear a click.
- Within 5 seconds, turn the knob clockwise to open the safe door.
5.3 Opening the Safe with Emergency Key
In case of forgotten code or battery failure, the safe can be opened using the emergency key.
- Locate the emergency keyhole, usually hidden behind a cover on the keypad panel.
- Insert the emergency key and turn it counter-clockwise.
- While holding the key turned, rotate the main knob clockwise to open the safe door.
- Remove the key once the door is open.

Image: A visual guide illustrating the two methods of quick access to the safe. Method 1 shows entering the digital code on the keypad. Method 2 shows using the physical key in the hidden keyhole. A note reminds the user to press '#' to confirm the initial password "159" after inputting the personal code.
5.4 Anti-Theft Alarm System
The safe is equipped with an anti-theft alarm. If an incorrect code is entered 3 consecutive times, the alarm system will activate, and the safe will lock for 20 seconds. During this time, no operations can be performed on the keypad. The alarm will cease automatically after 20 seconds, or it can be stopped by entering the correct code or using the emergency key.
5.5 Using the Removable Shelf
The safe includes a removable shelf to help organize items of different sizes. To adjust or remove the shelf, simply lift it and slide it out of its supports. Reinsert by aligning it with the desired support grooves.
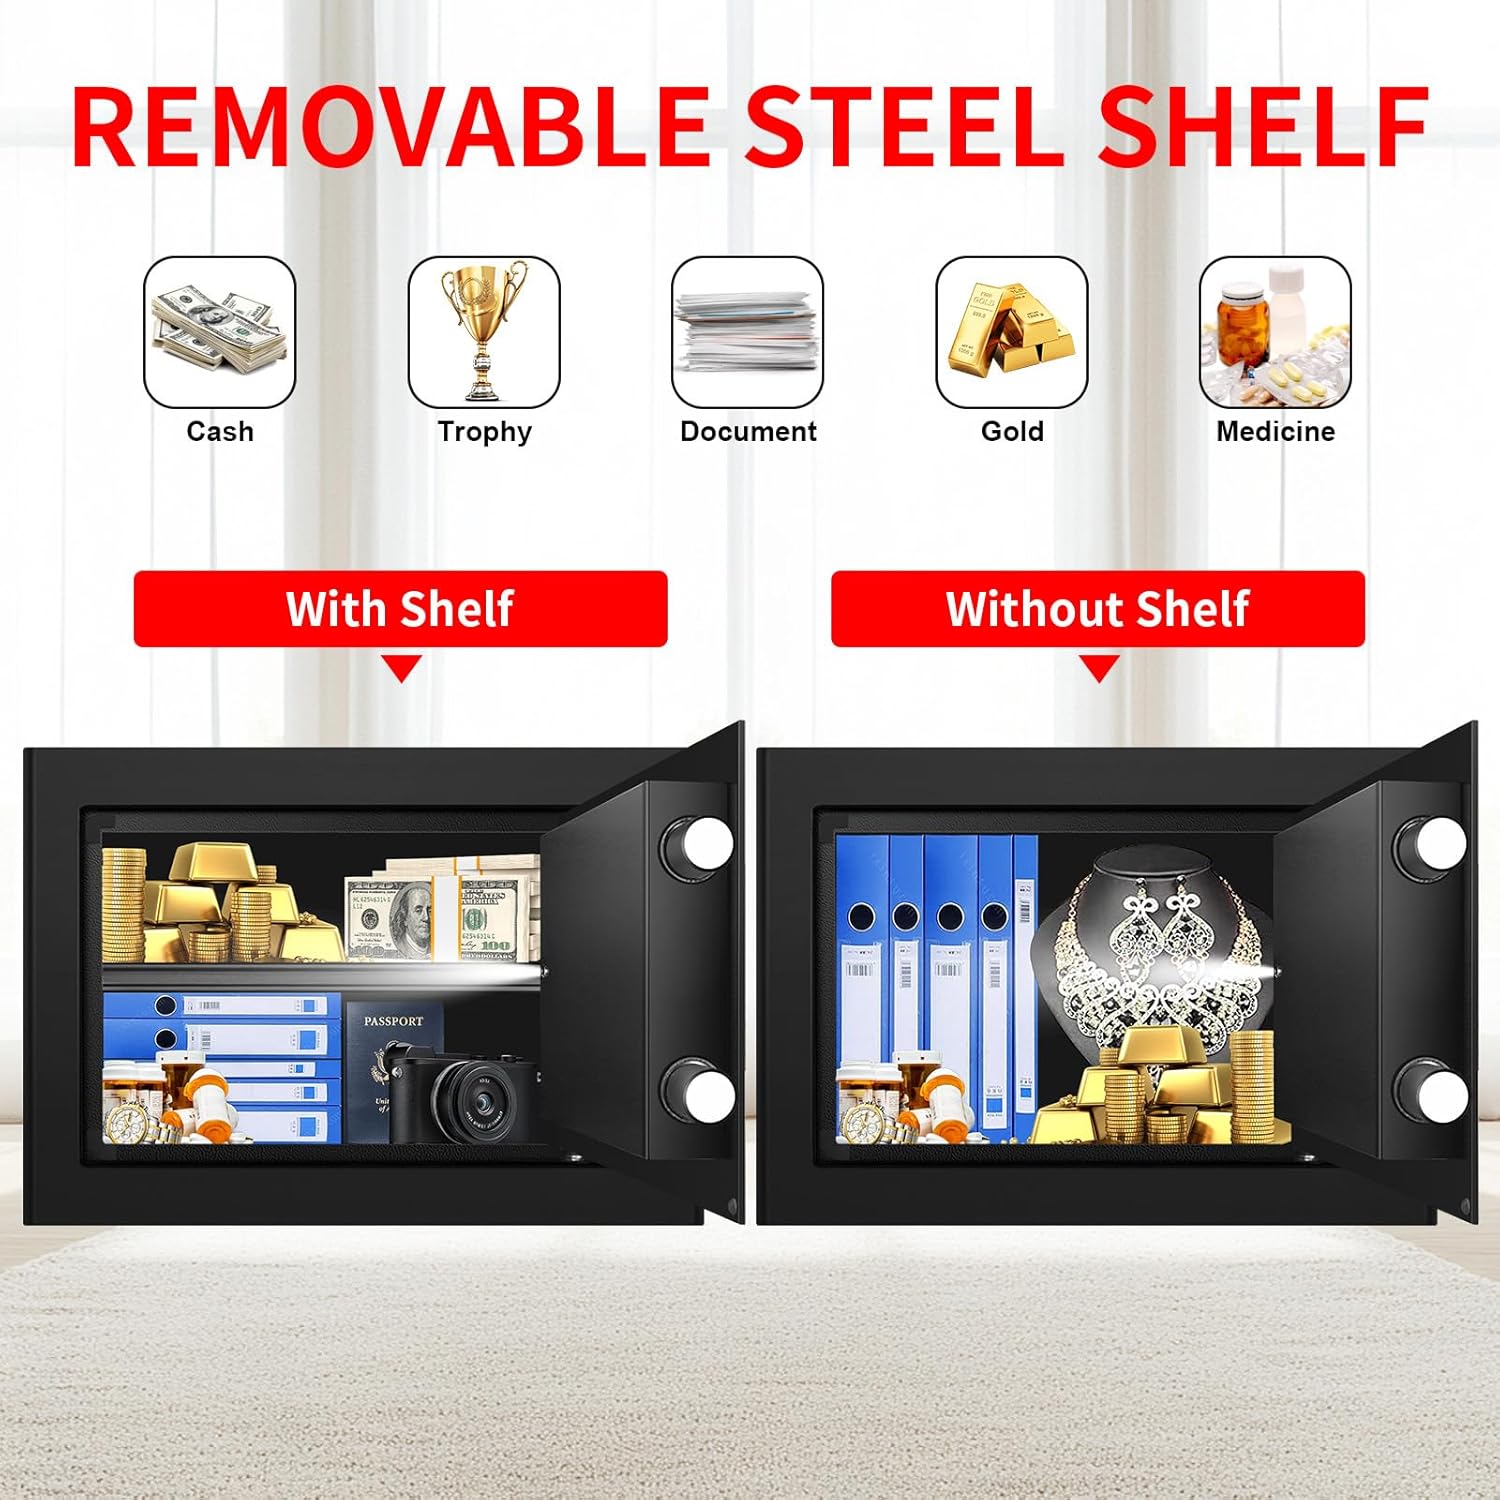
Image: This image illustrates the versatility of the removable steel shelf. It shows the safe's interior with the shelf in place, organizing items like cash, trophies, documents, gold, and medicine. Another view shows the interior without the shelf, accommodating larger items such as binders and jewelry, demonstrating flexible storage options.
6. Maintenance
6.1 Cleaning
Wipe the exterior of the safe with a soft, damp cloth. Do not use harsh chemicals or abrasive cleaners, as they may damage the finish or the keypad. Ensure the safe is dry after cleaning.
6.2 Battery Replacement
When the battery power is low, the keypad indicator light may flash or dim, or the safe may not respond to code entry. Replace all batteries promptly to ensure continuous operation. Always use new batteries of the specified type (AA).
6.3 Key Care
Store your emergency keys in a safe, accessible location outside the safe. Avoid exposing keys to extreme temperatures or moisture. Do not force keys into the lock.
7. Troubleshooting
| Problem | Possible Cause | Solution |
|---|---|---|
| Safe does not open with code. | Incorrect code entered; Low batteries; Keypad malfunction. | Re-enter code carefully. Replace batteries. Use emergency key. Contact support if issue persists. |
| Alarm sounds unexpectedly. | Incorrect code entered multiple times; Tampering attempt. | Enter correct code to disarm. Wait 20 seconds for alarm to reset. |
| Knob does not turn after entering code. | Not turning within 5 seconds; Mechanism obstruction. | Ensure you turn the knob immediately after successful code entry. Check for obstructions around the door. |
| Lost emergency key. | Key misplaced. | Note the unique number on the keyhole and contact Psisuvry customer support for a replacement. |
8. Specifications
| Feature | Detail |
|---|---|
| Brand | Psisuvry |
| Model Number | FU |
| Product Dimensions (D x W x H) | 9.85" x 13" x 9.85" |
| Capacity | 1.3 Cubic Feet (advertised), 1.2 Cubic Feet (specified) |
| Lock Type | Electronic Combination Lock, Key |
| Color | Black |
| Material | Metal (Steel Construction) |
| Special Features | Alarm System, Sensor Light, Anti-Theft, Removable Shelf, Scratch Resistant, Fire Resistant |
| Mounting Type | Wall/Floor Mountable (Anchoring) |
| Item Weight | 16.76 pounds |
| Water Resistance Level | Waterproof |
9. Warranty and Support
Psisuvry products are manufactured to high-quality standards. For specific warranty details, please refer to the warranty card included with your purchase or contact Psisuvry customer support directly. If you require assistance with your safe, including lost keys (please provide the unique number on the keyhole), troubleshooting, or general inquiries, please reach out to our customer service team. Contact information can typically be found on the product packaging or the official Psisuvry website.
Ask a question about this manual
Ask about setup, troubleshooting, compatibility, parts, safety, or missing instructions. Manuals+ will review the question and use this page’s manual context to help answer it.