
Introduction
This manual provides instructions for the assembly, operation, and maintenance of your Aoxun 10' x 10' Aluminum Louvered Pergola. This outdoor structure features independent adjustable roofs, an integrated drainage system, and includes privacy curtains and breathable netting for enhanced comfort and versatility.
Please read all instructions carefully before assembly and use. Keep this manual for future reference.
Safety Information
- Always follow the installation instructions provided.
- Do not assemble or use in winds exceeding 31-38 mph or in snow conditions exceeding 10 inches.
- Keep children and pets away from the assembly area during installation.
- Ensure the pergola is securely anchored to a flat, stable surface.
- Regularly inspect all components for wear or damage. Replace damaged parts immediately.
- Do not hang heavy objects from the pergola frame or louvers.
Package Contents
Verify that all components are present before beginning assembly. Refer to the parts list included with your product packaging.
- Aluminum Frame Components (posts, beams, connectors)
- Louvered Roof Panels
- Drainage System Components (gutters, downspouts)
- Curtains and Netting
- Fasteners and Hardware (including anchor bolts)
- Assembly Tools (if provided, otherwise standard tools are required)
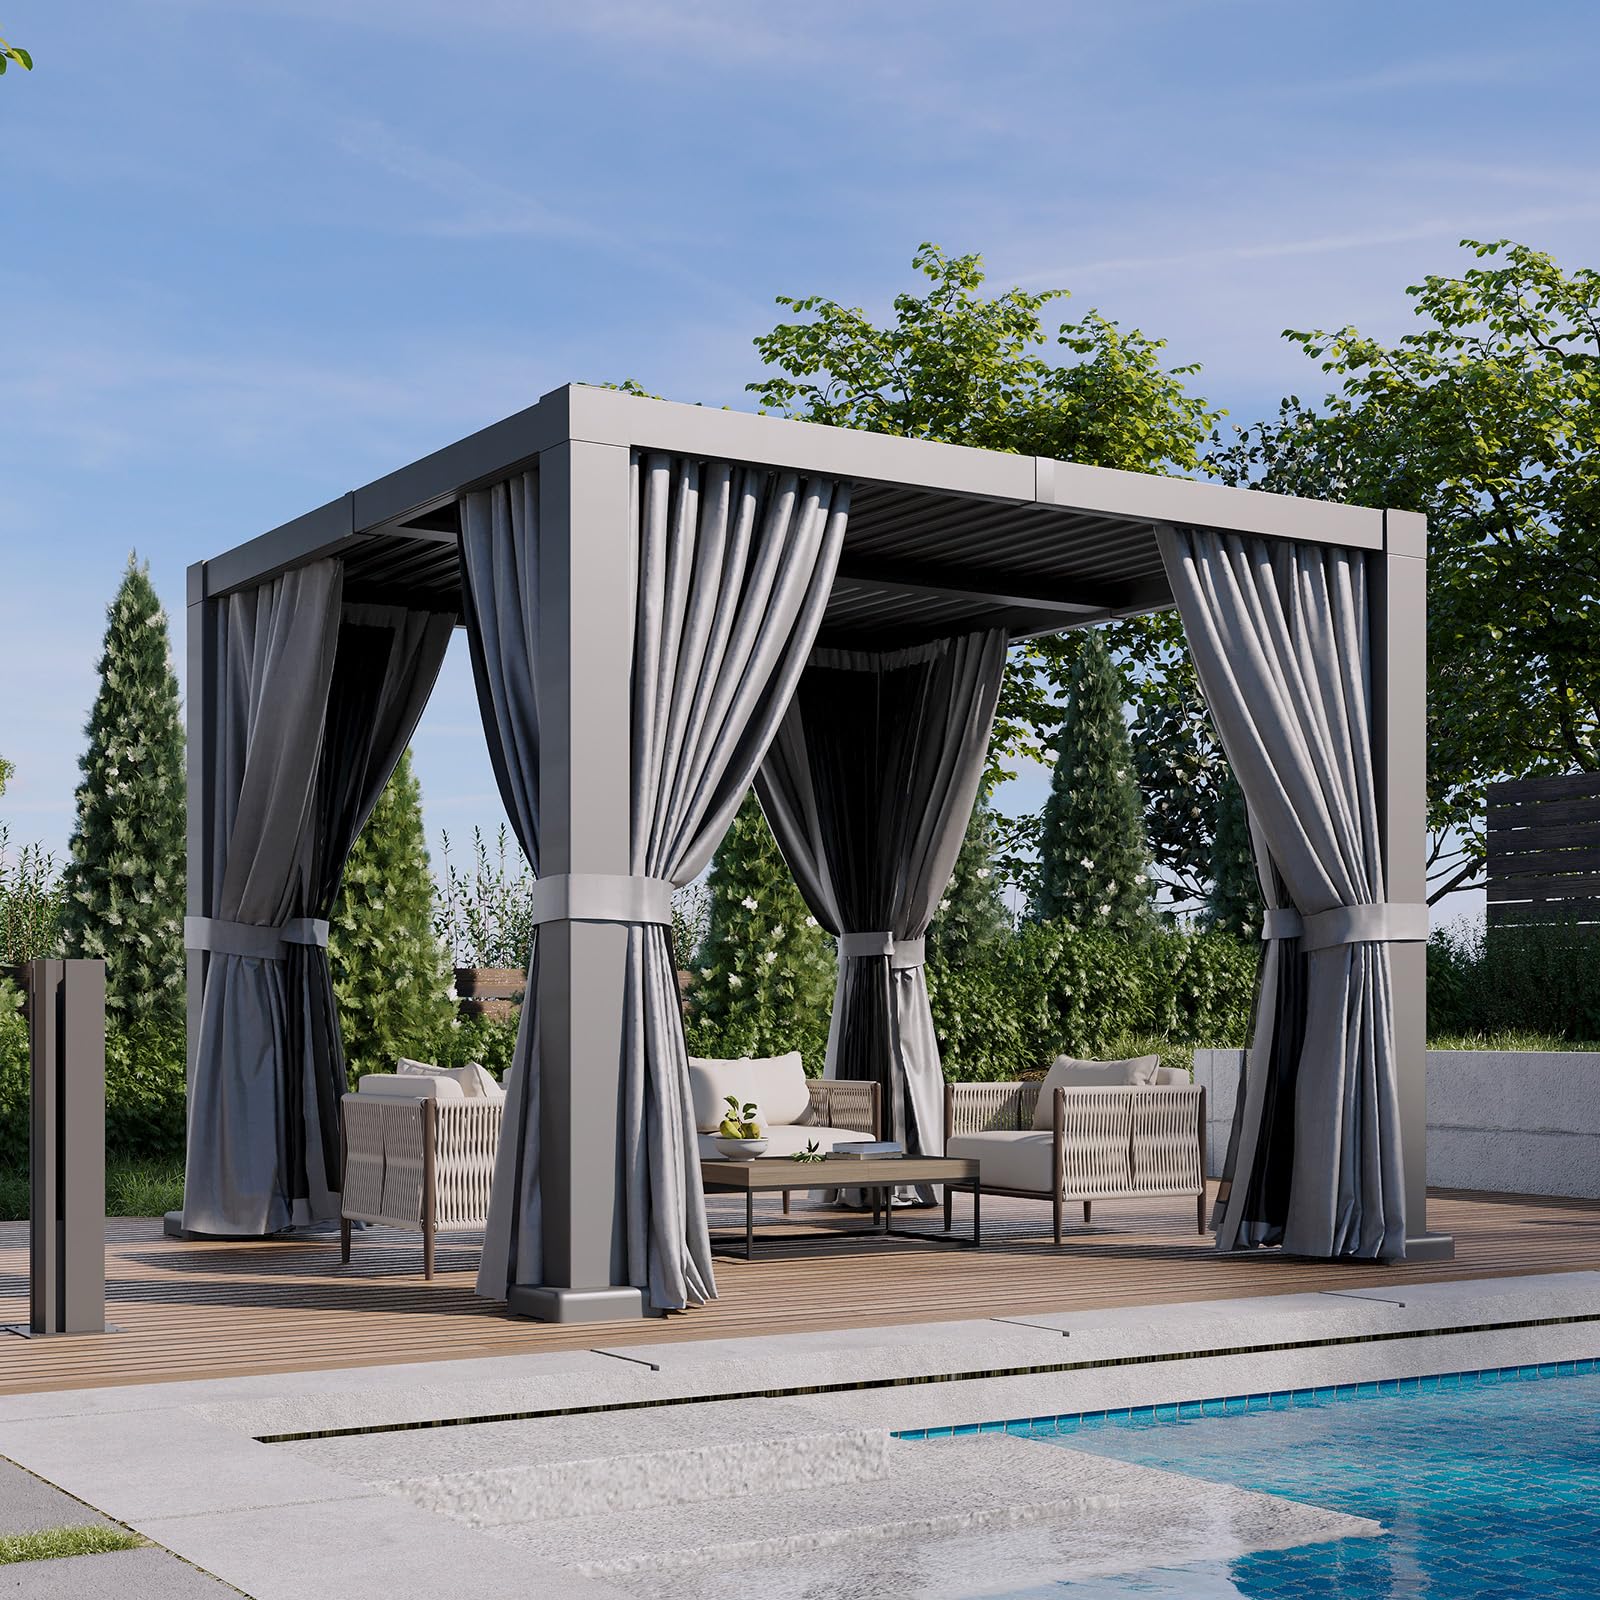
Image: The Aoxun Louvered Pergola 10' x 10' with curtains and netting, showcasing its overall design and features.
Setup and Assembly
Before You Begin
- Choose a level and stable location for your pergola.
- Clear the assembly area of any obstructions.
- Two or more people are recommended for assembly.
- Wear appropriate safety gear (gloves, eye protection).
Assembly Steps (General Outline)
- Unpack all components and verify against the parts list.
- Assemble the main aluminum frame, connecting posts and beams securely.
- Install the louvered roof panels. Ensure proper alignment for independent operation of each section.
- Connect the integrated drainage system components, ensuring all seals are tight.
- Attach the curtains and netting to the frame's designated tracks or hooks.
- Secure the pergola to the ground using the provided anchor bolts for stability.

Image: An illustration highlighting the structural stability of the pergola frame and its components during assembly.

Image: Close-up of the sturdy aluminum frame, emphasizing its rust-resistant properties and robust construction.

Image: Diagram illustrating the proper use of anchor bolts to secure the pergola to a flat concrete surface.
Operating Instructions
Adjustable Louvered Roofs
The pergola features two independently adjustable louvered roof sections. Use the integrated crank mechanism to open or close the louvers for desired light and weather protection.
- To allow sunlight and airflow: Rotate the crank to open the louvers.
- To provide shade and rain protection: Rotate the crank to close the louvers. Ensure they are fully closed during rain to activate the drainage system.
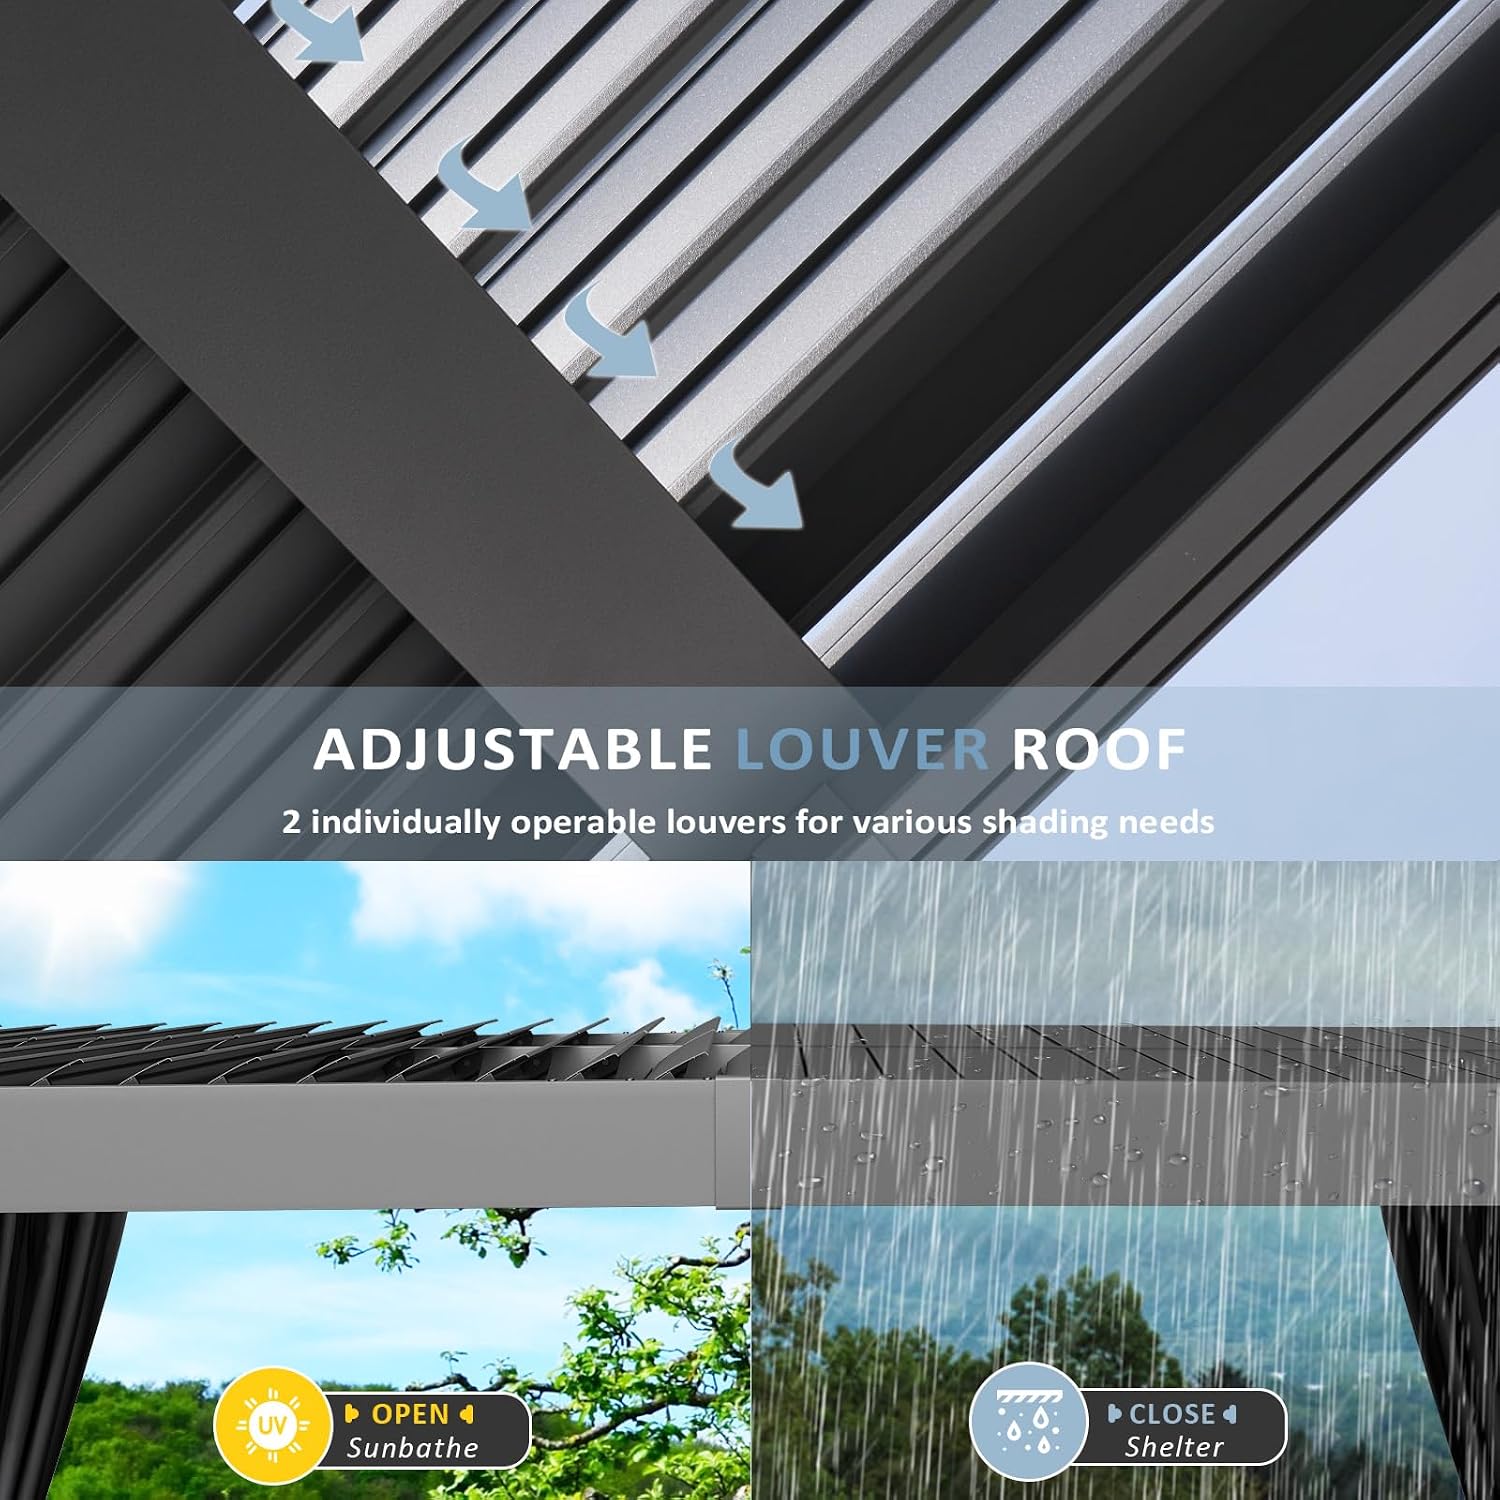
Image: Diagram showing the adjustable louver roof, illustrating open positions for sun exposure and closed positions for shelter from rain.

Image: A hand operating the crank mechanism to adjust the louvered roof, demonstrating the control over sunlight and shade.
Curtains and Netting
The pergola includes privacy curtains and breathable mesh netting for added comfort and protection.
- To use curtains for privacy or shade: Draw the curtains around the perimeter. Use the integrated straps to secure them to the posts.
- To use netting for insect protection: Draw the netting around the perimeter.
- To open up the space: Tie back the curtains and netting using the provided straps.

Image: The pergola with curtains and netting deployed, illustrating how they provide privacy and insect protection.

Image: Close-up view of the curtain fabric and mesh netting, showing their textures and quality.

Image: Detail of the straps used to secure curtains and netting to the pergola posts, preventing movement.
Drainage System
The integrated drainage system is designed to efficiently channel rainwater through the pergola posts, preventing water pooling on the roof. Ensure louvers are fully closed during rain for effective water management.

Image: Diagram illustrating the built-in drainage system, showing the path of water from the louvered roof through the posts to the ground.
Maintenance
- Cleaning the Frame: Wipe the aluminum frame with a soft cloth and a solution of mild soap and water. Rinse thoroughly and dry to prevent water spots. Avoid abrasive cleaners or harsh chemicals.
- Cleaning Louvers: Periodically clean the louver panels to ensure smooth operation and prevent debris buildup. Check for any obstructions in the louver mechanism.
- Cleaning Curtains and Netting: Hand wash or machine wash curtains and netting on a gentle cycle with cold water. Air dry completely before reattaching or storing.
- Seasonal Care: In areas with heavy snow, ensure snow load does not exceed 10 inches. Consider clearing snow from the roof to prevent structural damage. During strong winds, ensure louvers are open to reduce wind resistance or closed to protect the area, and secure curtains and netting.
- Inspection: Regularly check all bolts and fasteners for tightness. Inspect the frame for any signs of damage, corrosion, or wear. Address any issues promptly.
Troubleshooting
| Issue | Possible Cause | Solution |
|---|---|---|
| Louvers not operating smoothly | Debris in mechanism, loose parts | Clean debris from tracks. Check and tighten any loose fasteners. |
| Water pooling on roof | Louvers not fully closed, drainage system clogged | Ensure louvers are completely closed. Clear any blockages in the drainage channels or posts. |
| Curtains/Netting not staying in place | Straps not secured, strong winds | Ensure all straps are properly fastened. Consider additional securing methods in high winds. |
| Pergola feels unstable | Loose anchor bolts, uneven ground | Check and tighten all anchor bolts. Ensure the pergola is installed on a level and stable surface. |
Specifications
| Feature | Detail |
|---|---|
| Model Number | PA403GR01-YC |
| Dimensions (L x W x H) | 114"L x 114"W x 88.9"H (approx. 10' x 10' x 7.4') |
| Frame Material | Aluminum |
| Roof Type | Independent Adjustable Louvers |
| Water Resistance | Waterproof (with closed louvers) |
| UV Protection | Yes |
| Item Weight | 285 Pounds |
| Assembly Required | Yes |
| Included Accessories | Curtains, Netting, Anchor Bolts |
| UPC | 799413422478 |

Image: Detailed diagram showing the dimensions of the 10' x 10' Aoxun Louvered Pergola.
Warranty Information
For specific warranty details, please refer to the documentation included with your purchase or contact Aoxun customer support directly. Keep your proof of purchase for any warranty claims.
Customer Support
If you have any questions, require assistance with assembly, or need to report missing or damaged parts, please contact Aoxun customer service.
Manufacturer: Aoxun
Contact Information: Refer to the Aoxun official website or the contact details provided with your product packaging.
Product Overview Video
Video: An official overview of the Aoxun Aluminum Louvered Pergola, demonstrating its features such as privacy curtains, all-aluminum structure, and adjustable louvers. This video is provided by the seller, Aclumsy.


