
1. Product Overview
The SI4732 Shortwave Radio Receiver is a compact and portable full-band radio designed for enthusiasts and casual listeners alike. Featuring a 1.9-inch IPS high-definition color screen and the advanced SI4732 DSP chip, it supports a wide range of frequencies and modes, including LSB, USB, AM, and FM. This manual provides detailed instructions for both the "Ring version" (with a loop antenna) and the "Trolley version" (with a pull rod antenna).
Its small size and lightweight design make it ideal for travel, outdoor activities, or simply enjoying radio broadcasts on the go. The built-in 800mAh battery ensures extended listening pleasure.
2. Key Features
- Compact and Lightweight Design: Measuring approximately 7.3 x 3.2 x 1.2 cm and weighing only 54g, this radio is highly portable.
- Long-Lasting Battery: Equipped with an 800 mAh built-in battery, providing approximately 10 hours or more of continuous operation.
- High-Definition IPS Display: Features a 1.9-inch IPS color screen (170*320 resolution) for clear visibility and easy navigation.
- Full Band Broadcasting: Utilizes the SI4732 DSP chip to support FM, AM, LSB, and USB modes across various frequency bands.
- Versatile Antenna Options: Available with either a portable loop antenna (Ring version) or a 70cm portable pull rod antenna (Trolley version) for enhanced reception.
- ESP32-S3 Master Control: Powered by an ESP32-S3 master control for efficient performance.
3. Package Contents
Please verify that all items are present in your package:
- 1 x MINI SI4732 Radio Receiver (Ring version Blue)
- 1 x Loop Antenna
Note: The specific antenna included depends on the version purchased (Ring version includes a loop antenna, Trolley version includes a pull rod antenna).
4. Specifications
| Parameter | Detail |
|---|---|
| Master Control | ESP-32-S3 |
| Receiving Frequency Band | HF, SW, MW, VHF |
| Screen | 1.9-inch IPS, 170*320 resolution |
| Charging Interface | TYPE-C (Note: Fast charging is not supported) |
| Audio Interface | 3.5mm three-band stereo |
| Battery Capacity | 800 mAh |
| Body Size | 7.3 x 3.2 x 1.2 cm |
| Body Weight | 54g |
| FM Frequency | 64MHz - 108MHz |
| AM Frequency | 520kHz - 1710kHz |
| SW Frequency | 2.3MHz - 26.1MHz |
| LW Frequency | 153kHz - 279kHz |
| Supported Modes | FM, AM, LSB, USB (Note: Does not support aviation band) |
5. Setup
5.1 Initial Charging
Before first use, fully charge the radio. Connect the provided TYPE-C charging cable to the radio's charging interface and plug the other end into a compatible USB power source (e.g., computer USB port, USB wall adapter). The charging indicator on the screen will show charging status. A full charge typically takes a few hours.
Note: This device does not support fast charging.
5.2 Attaching the Antenna
For Ring Version:
- Locate the antenna connector on the top of the radio.
- Carefully screw the loop antenna into the connector until it is secure. Do not overtighten.

Image: Blue SI4732 radio with its loop antenna attached, displaying "VHF 103.9" on its screen.
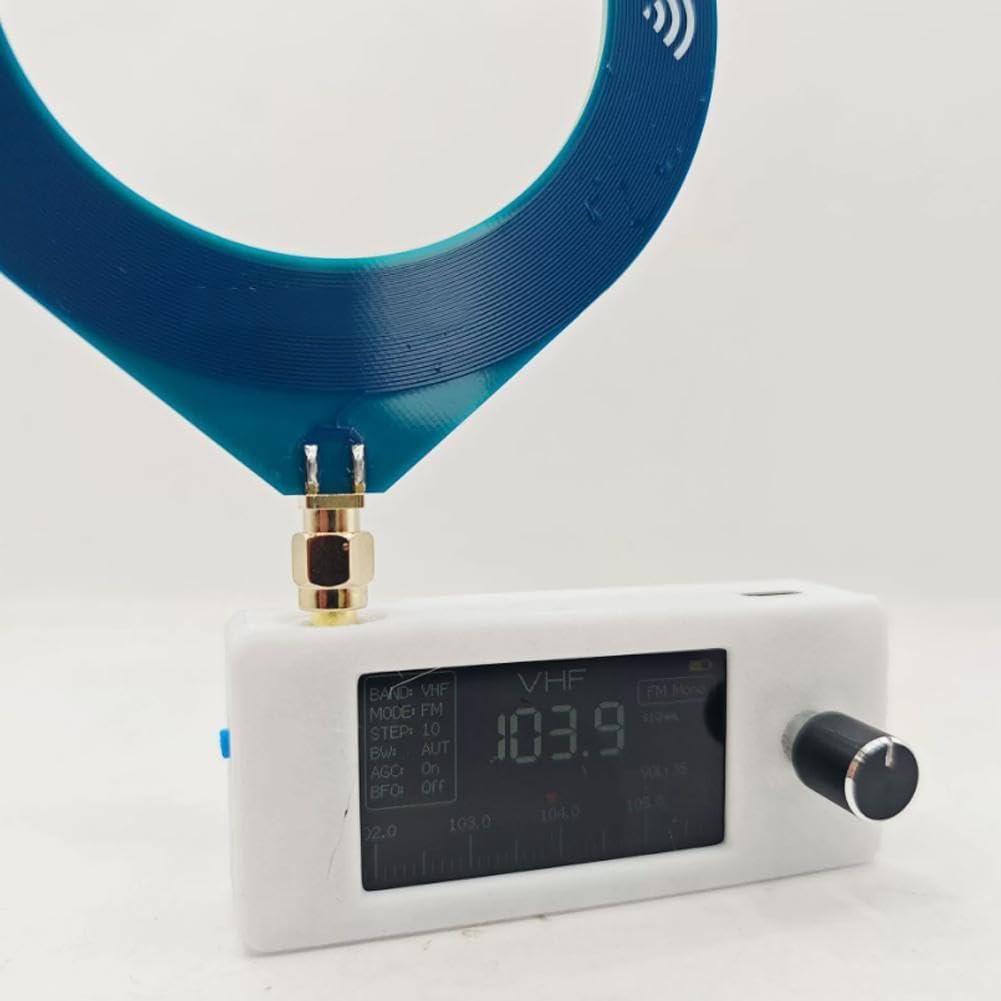
Image: A hand holding the white version of the SI4732 radio with the blue loop antenna, showing the compact size.
For Trolley Version (if applicable):
- Locate the antenna connector on the top of the radio.
- Carefully screw the pull rod antenna into the connector until it is secure.
- Extend the pull rod antenna fully for optimal reception.

Image: The black SI4732 radio body shown alongside its detachable pull rod antenna.

Image: Two blue SI4732 radios, one equipped with a loop antenna and the other with a pull rod antenna, demonstrating the two available versions.
6. Operating Guide
6.1 Basic Navigation
- Power On/Off: Press and hold the knob to power the device on or off.
- Accessing the Menu: From the main interface, double-click the knob to enter the menu.
- Navigating Menus: On any menu page, rotate the knob to scroll through available options and modes. Click the knob once to confirm your selection.
- Changing Frequency Bands: On the main interface, rotate the knob to switch between different frequency bands (e.g., FM, AM, SW). Click the knob once to confirm the selected band.
6.2 Listening with Headphones/External Speakers
The radio features a 3.5mm audio interface for connecting headphones or external speakers. Due to the compact size of the radio, it does not include a powerful internal headphone amplifier. Therefore, the volume output when using headphones directly may be lower than expected. For a higher volume experience, it is recommended to connect external speakers.
7. Maintenance
- Cleaning: Use a soft, dry cloth to clean the radio's exterior. Avoid using abrasive cleaners or solvents.
- Battery Care: To prolong battery life, avoid fully discharging the battery frequently. Charge the radio regularly, even if not in use for extended periods. Store in a cool, dry place.
- Storage: When not in use, store the radio in a dry environment away from direct sunlight, extreme temperatures, and high humidity.
- Antenna Care: Handle the antenna carefully to prevent bending or breaking. For pull rod antennas, retract it when not in use to protect it.
8. Troubleshooting
| Problem | Possible Cause | Solution |
|---|---|---|
| Radio does not power on. | Low battery. | Charge the radio fully using the TYPE-C cable. |
| No sound or very low volume from headphones. | Headphone amplifier limitation. | This is normal due to the radio's compact design. Connect external speakers for higher volume. Ensure headphone plug is fully inserted. |
| Poor reception or static. | Weak signal, antenna not properly connected/extended, interference. | Ensure antenna is securely attached and fully extended (for pull rod). Try repositioning the radio. Move away from electronic devices that may cause interference. |
| Screen is blank or unresponsive. | Device frozen or low battery. | Try pressing and holding the knob for 10 seconds to force a restart. If it doesn't respond, charge the battery. |
9. Warranty and Support
For specific warranty information and customer support, please refer to the documentation provided at the time of purchase or contact the seller directly. Keep your proof of purchase for warranty claims.
This product is manufactured by Generic.