
1. Introduction
Thank you for choosing the VELPAX MIG Welder 160A. This 3-in-1 inverter welding machine supports MIG (Gas/Solid Wire), Gasless MIG (Flux-Cored), Stick (MMA), and Lift TIG welding processes. Designed for versatility and efficiency, it features a large digital LED display for precise data and easy mode selection, making it suitable for various materials and applications.
The welder provides a 160A output current, capable of handling different steel thicknesses. Its micro-adjustment voltage function helps stabilize the arc, reducing spatter and improving weld quality. This manual provides essential information for safe operation, setup, and maintenance of your welding machine.

Image 1.1: VELPAX MIG Welder showing good ventilation performance with side vents and a high-speed cooling fan.
2. Safety Information
Always prioritize safety when operating welding equipment. Failure to follow safety guidelines can result in serious injury or death.
- Electrical Safety: Ensure the welding machine is properly grounded. Do not operate in wet conditions. Always disconnect power before performing maintenance or changing accessories.
- Fume Hazards: Welding fumes and gases can be hazardous to your health. Work in a well-ventilated area or use a fume extractor.
- Arc Rays: Arc rays can injure eyes and burn skin. Always wear a welding helmet with appropriate shade, safety glasses, and protective clothing.
- Fire and Explosion: Welding sparks and hot metal can cause fires. Keep flammable materials away from the welding area. Have a fire extinguisher readily available.
- Burn Hazards: Hot metal and equipment can cause severe burns. Wear protective gloves and clothing.
This welder includes integrated protection against over-current, over-voltage, and overheating to ensure operational safety. In MMA welding mode, Voltage Reduction Device (VRD) selection is available to enhance safety, prevent accidental electric shocks, reduce arc loss, and extend equipment lifespan.

Image 2.1: The VELPAX MIG Welder features multiple security protections including over-heat, over-current, over-load, and over-voltage protection.
3. Setup and Installation
The VELPAX MIG Welder is designed for simple and easy installation. Follow the steps below for your desired welding method.
3.1 Component Identification
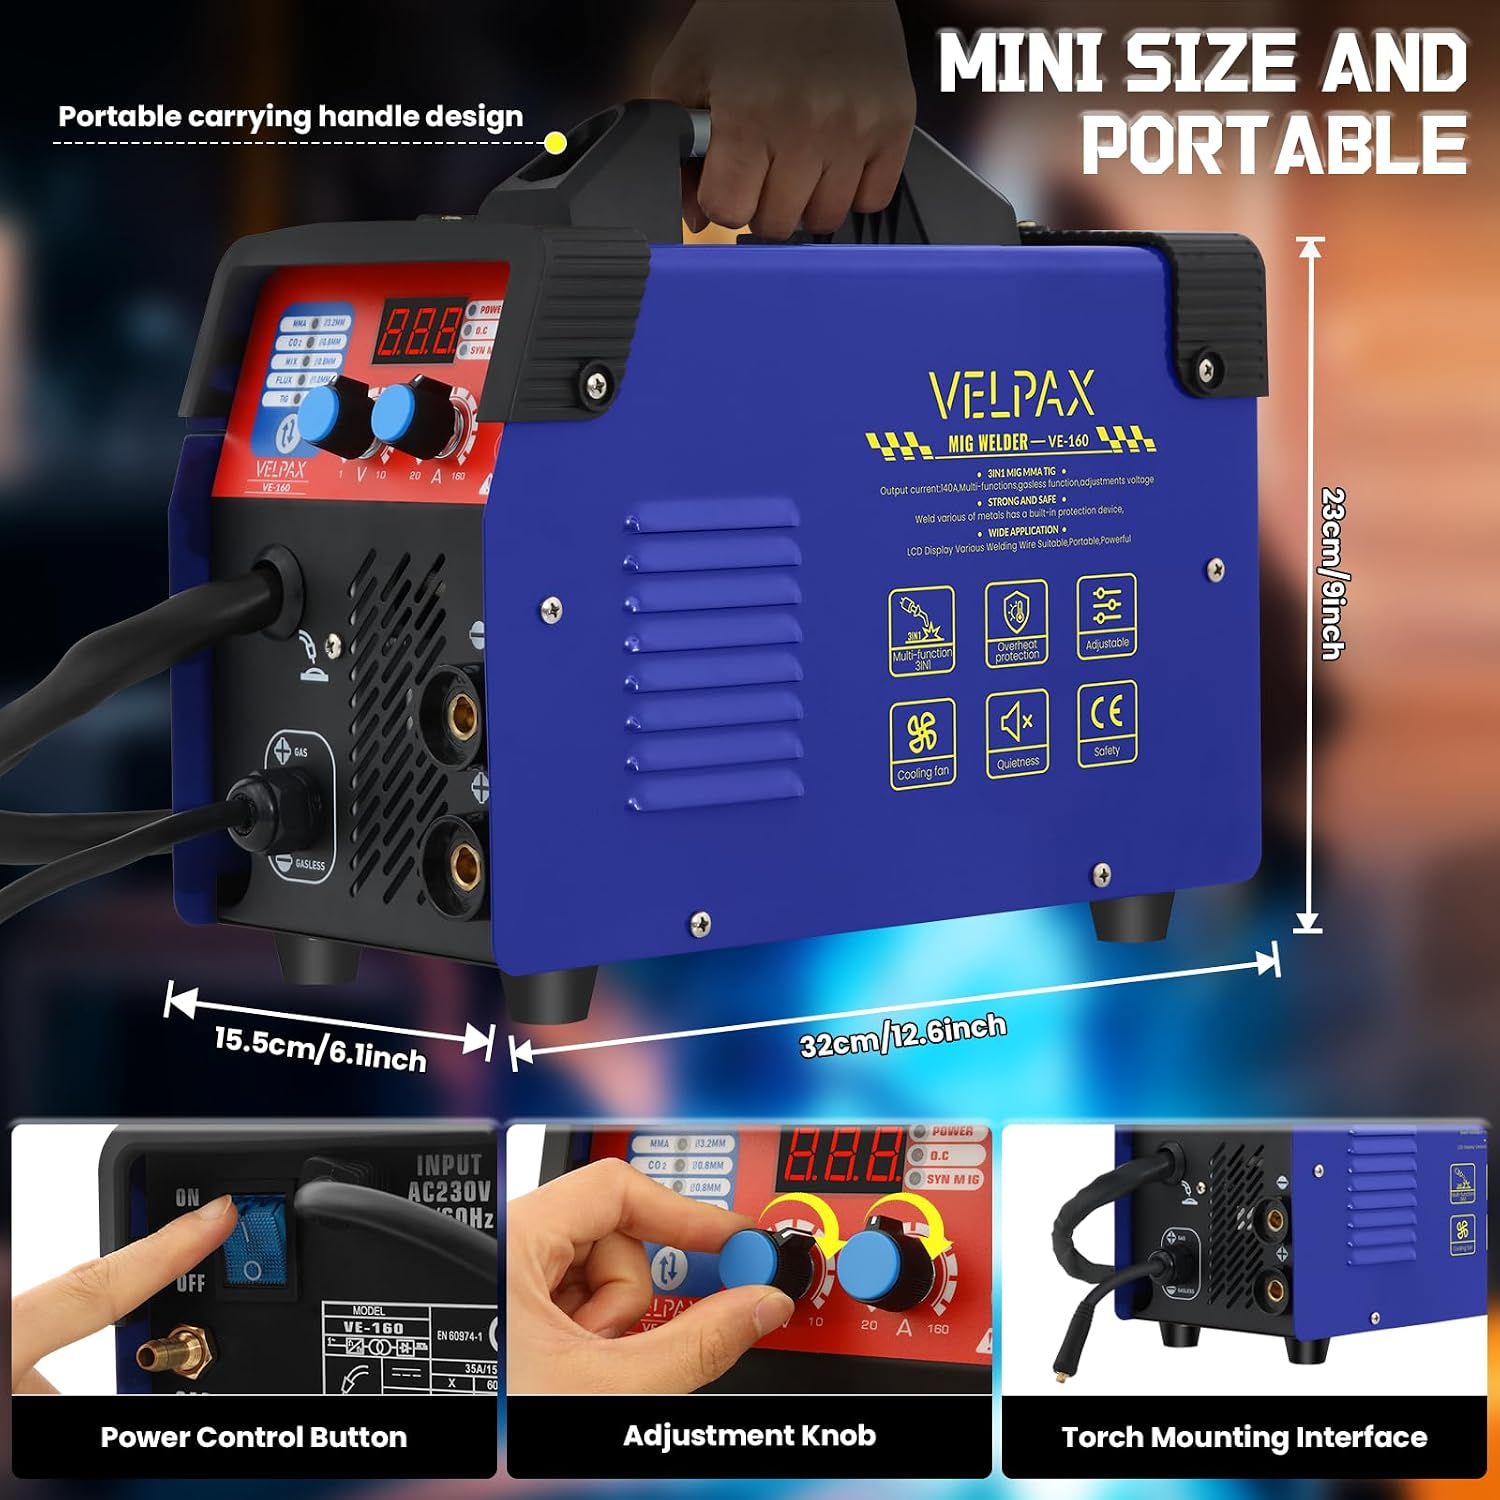
Image 3.1: Front and rear view of the VELPAX MIG Welder, highlighting the Power Control Button, Adjustment Knob, and Torch Mounting Interface.
3.2 Connection Methods
Refer to the diagram below for connecting your welding accessories based on the welding process.

Image 3.2: Connection methods for Gas MIG, Gasless MIG, Lift TIG, and MMA welding. (1) Work Clamp, (2) Electrode Holder/TIG Torch, (3) MIG Torch.
- Gas MIG Welding: Connect the work clamp to the negative (-) terminal and the MIG torch to the positive (+) terminal. Ensure gas shielding is properly set up.
- Gasless MIG Welding: Connect the work clamp to the positive (+) terminal and the MIG torch to the negative (-) terminal. Use flux-cored wire.
- Lift TIG Welding: Connect the work clamp to the positive (+) terminal and the TIG torch (not included) to the negative (-) terminal.
- MMA (Stick) Welding: Connect the work clamp to the negative (-) terminal and the electrode holder to the positive (+) terminal.
4. Operating Instructions
The VELPAX MIG Welder offers multiple welding processes. Select the appropriate mode and settings for your task.
4.1 Welding Modes

Image 4.1: Examples of Stick Welding, Flux Welding (Gasless MIG), and Lift TIG Welding processes.
- MIG (GMAW): For welding with solid wire and shielding gas. Provides clean welds and high deposition rates.
- Flux-Cored (FCAW): For welding with flux-cored wire, typically without external shielding gas. Suitable for outdoor use and thicker materials.
- MMA (Stick): For welding with coated electrodes. Versatile for various metals and conditions.
- Lift TIG: For precise welding of thin materials. Requires a TIG torch and shielding gas (argon).
4.2 Control Panel and Settings
The digital LED display provides accurate data, allowing for easy reading and adjustment without removing your helmet. Use the adjustment knobs to set welding parameters such as current (A) and voltage (V).
- Power Control Button: Turns the machine ON/OFF.
- Adjustment Knobs: Used to fine-tune welding current and voltage for optimal arc stability and weld quality.
- Mode Selection: Use the dedicated button or switch to select between MIG, MMA, and TIG modes.
4.3 General Welding Tips
- Always clean the workpiece thoroughly before welding.
- Maintain a consistent travel speed and arc length.
- Practice on scrap material to find optimal settings.
5. Maintenance
Regular maintenance ensures the longevity and optimal performance of your VELPAX MIG Welder.
- Cleaning: Periodically clean the machine's exterior and ventilation openings to prevent dust and debris buildup. Use compressed air to clear internal components if necessary, ensuring the machine is unplugged.
- Cable Inspection: Regularly inspect all welding cables, torch, and work clamp for damage, cuts, or loose connections. Replace damaged components immediately.
- Wire Feeder: Keep the wire feeder mechanism clean and free of debris. Ensure the drive rollers are correctly tensioned for smooth wire feeding.
- Consumables: Check and replace MIG nozzles, contact tips, and TIG collets/tungstens as they wear out.
- Storage: Store the welder in a dry, clean environment when not in use.
6. Troubleshooting
If you encounter issues with your welder, refer to the following common problems and solutions.
- No Power: Check the power cable connection, wall outlet, and circuit breaker. Ensure the ON/OFF switch is in the 'ON' position.
- No Arc: Verify all connections (work clamp, torch, electrode holder). Check for proper grounding. Ensure welding parameters are set correctly for the material and process.
- Poor Weld Quality (e.g., excessive spatter, porosity): Adjust welding current and voltage. Check wire feed speed. Ensure proper shielding gas flow (for MIG/TIG). Clean the workpiece. Replace worn consumables.
- Wire Feeding Issues: Check wire spool installation and tension. Inspect the liner for blockages or kinks. Ensure the contact tip is not clogged.
- Overheat Protection Activated: Allow the machine to cool down. Ensure ventilation openings are clear and the cooling fan is functioning. Reduce duty cycle if continuously welding at high currents.
If problems persist after attempting these solutions, contact VELPAX customer support.
7. Specifications
| Feature | Specification |
|---|---|
| Manufacturer | VELPAX |
| Model Number | HJ-MIG-160-UK |
| Input Voltage | 230V AC |
| Output Current | 160 A |
| Welding Processes | MIG (Gas/Gasless), Stick (MMA), Lift TIG |
| Display | Digital LED |
| Protection Features | Over-current, Over-voltage, Over-heat, VRD (MMA mode) |
| Package Dimensions | 44.5 x 34.9 x 24.8 cm |
| Item Weight | 7.45 kg |
| Included Components | MIG Welder |
| ASIN | B0DZNLFPH6 |
8. Warranty and Support
For warranty information, please refer to the documentation included with your purchase or contact VELPAX customer service. If you require technical assistance or have questions regarding the operation or maintenance of your welder, please reach out to VELPAX support through their official website or the retailer where the product was purchased.