
1. Introduction
The Saris All Star 2-Bike Hitch Rack provides a secure and convenient method for transporting up to two bicycles. This platform-style rack is designed for ease of use, featuring wide wheel trays and ratchet straps for stable bike loading without frame contact. It is compatible with both 1 1/4" and 2" hitch receivers.
This manual provides essential information for the proper assembly, installation, operation, and maintenance of your Saris All Star hitch rack.
2. What's in the Box
- Saris All Star 2-Bike Hitch Rack Assembly
- Hitch Pin and Clip
- 2" Hitch Adapter Block (if applicable)
- Instruction Manual
3. Safety Information
- Always ensure the rack is securely attached to the vehicle's hitch receiver before loading bikes.
- Do not exceed the maximum weight capacity of 90 lbs (45 lbs per bike).
- Verify all straps and hooks are tightened and bikes are stable before driving.
- Drive cautiously, especially over bumps or during turns, as the vehicle's length and handling characteristics will change.
- Regularly inspect the rack for wear, damage, or loose components.
- Ensure proper lighting and license plate visibility as required by local regulations.
4. Setup and Installation
Follow these steps to install the Saris All Star hitch rack onto your vehicle.

Image: Saris All Star 2-Bike Hitch Rack components before assembly.
- Assemble the Rack: Follow the included assembly instructions to connect the main components of the rack. Ensure all bolts are tightened according to the manufacturer's specifications.
- Insert into Hitch Receiver: Slide the rack's hitch bar into your vehicle's 1 1/4" or 2" hitch receiver. If your vehicle has a 2" receiver and the rack is configured for 1 1/4", attach the provided 2" hitch adapter block first.
- Secure with Hitch Pin: Align the hitch pin hole on the rack with the hole on your vehicle's hitch receiver. Insert the threaded locking hitch pin and secure it with the clip. Tighten the hitch pin to eliminate wobble.

Image: Universal hitch compatibility and adjustable arms.
For specific vehicle fitment information, please visit: saris.com/pages/findmyfit
5. Operating Instructions
5.1. Loading Bicycles
The Saris All Star rack is designed for easy and secure bike loading.

Image: Demonstrating easy bike loading onto the platform.
- Position the Rack: Ensure the rack's arms are in the upright, ready-to-load position.
- Place Bike on Trays: Lift your bicycle and place its wheels into the wide wheel trays.
- Secure Wheels: Use the ratcheting wheel straps to firmly secure both the front and rear wheels to the trays. Ensure the straps are tight and the wheels cannot move.
- Adjust and Secure Frame: Position the adjustable arms with padded hooks over the bike's frame. Lower the hooks until they firmly grip the frame, providing additional stability. The padded hooks protect your bike's finish.
- Verify Security: Gently shake each bike to confirm it is securely held and does not wobble excessively. Repeat for the second bike.
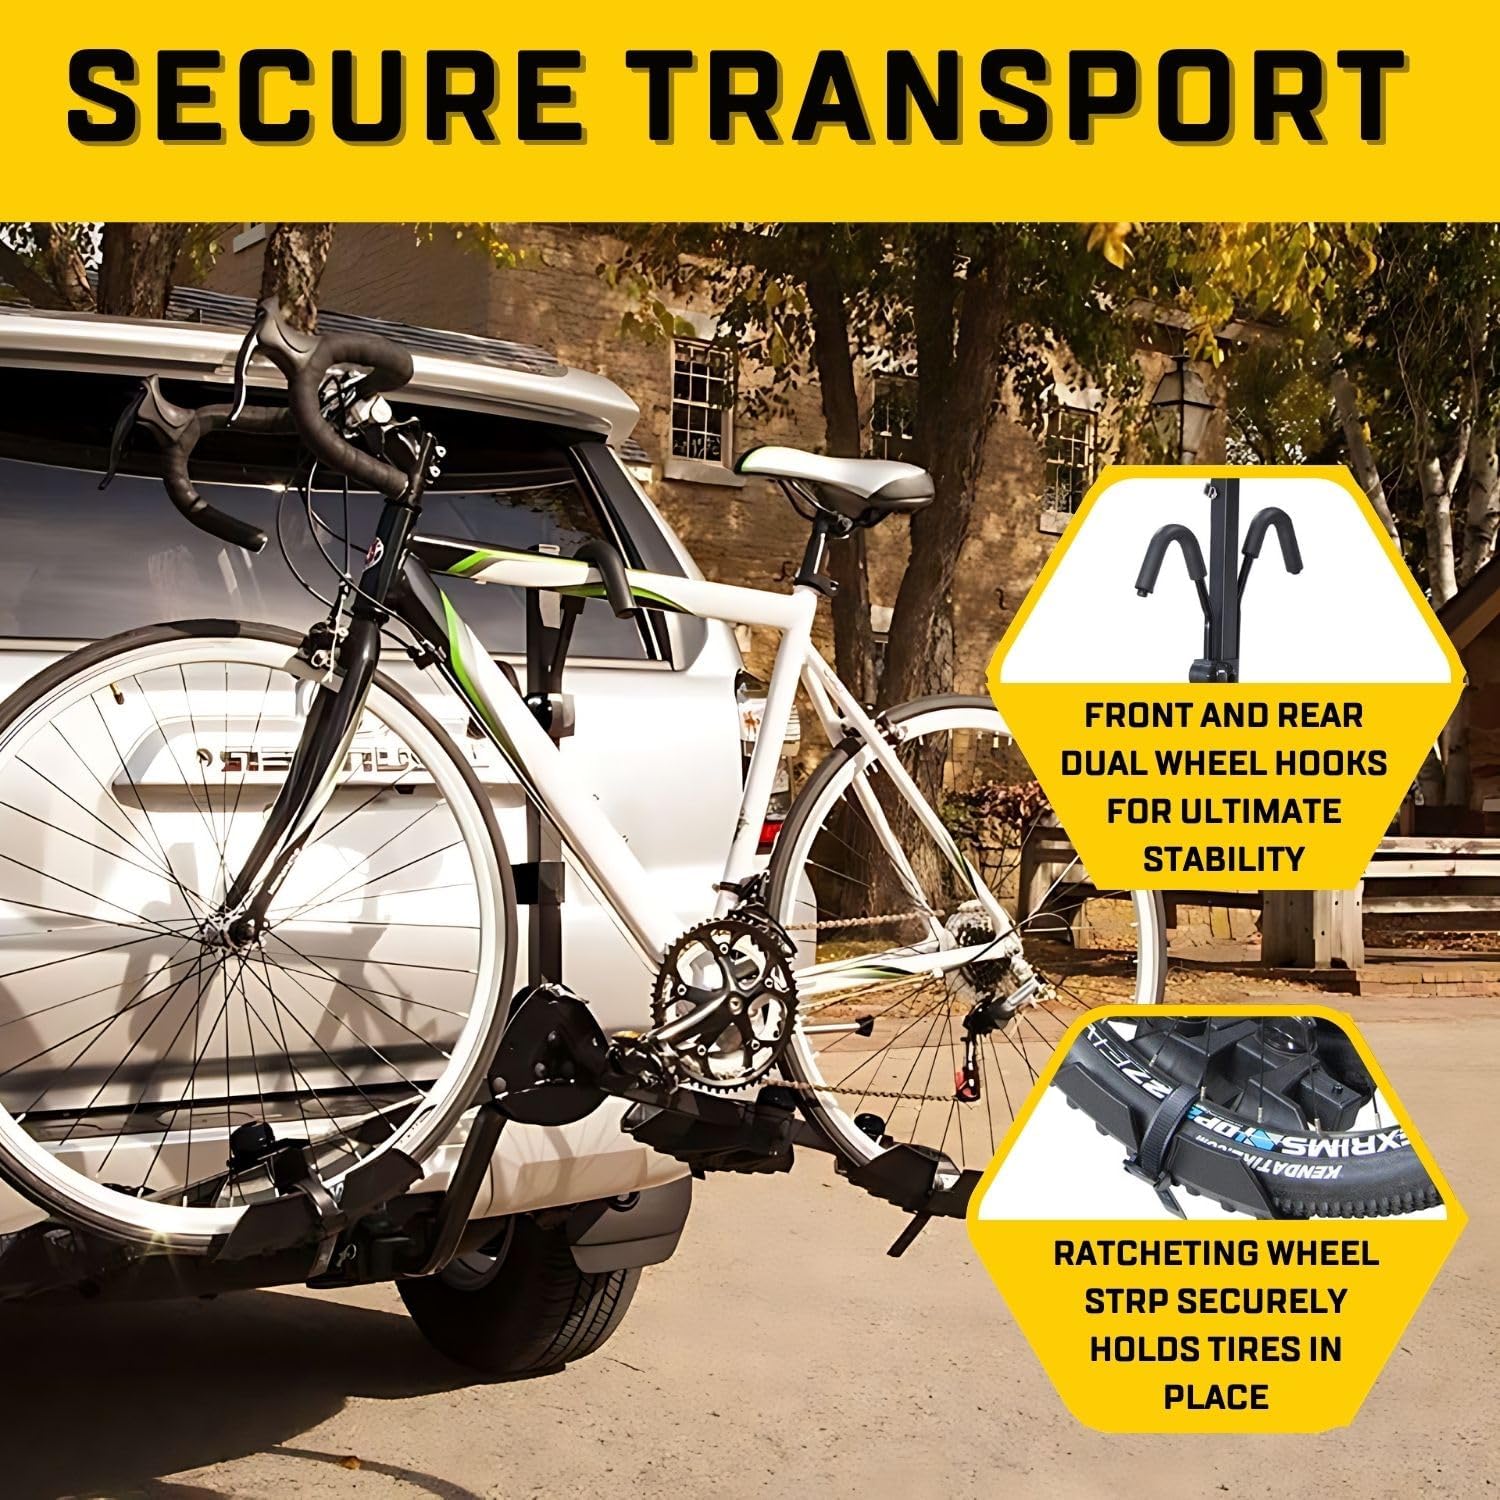
Image: Close-up of ratcheting wheel straps and dual wheel hooks for secure transport.
5.2. Accessing Vehicle Hatch
The Saris All Star features a fold-down mast to allow access to your vehicle's rear hatch or trunk when bikes are not loaded.

Image: The rack's 2-position arms, showing ready-to-load and folded-down states.
- Ensure No Bikes are Loaded: The fold-down feature is intended for use when the rack is empty.
- Release Locking Mechanism: Locate the release mechanism (usually a pin or lever) at the base of the vertical mast.
- Fold Down Mast: Carefully lower the mast until it rests in the horizontal position, providing clearance for your vehicle's hatch.
- Return to Upright: After accessing your hatch, raise the mast back to the upright position and ensure the locking mechanism re-engages securely before driving.
6. Maintenance
- Cleaning: Clean the rack regularly with mild soap and water to remove dirt, road grime, and salt. Rinse thoroughly and dry.
- Lubrication: Periodically lubricate moving parts, such as the pivot points and hitch pin threads, with a silicone-based lubricant to ensure smooth operation and prevent corrosion.
- Inspection: Before each use, inspect all straps, hooks, bolts, and the hitch connection for signs of wear, damage, or looseness. Replace any worn or damaged parts immediately.
- Storage: When not in use, store the rack in a dry, protected area to prolong its lifespan.
7. Troubleshooting
- Rack Wobbles in Hitch: Ensure the threaded locking hitch pin is fully tightened. If using a 2" adapter, confirm it is properly seated. A small amount of grease on the hitch bar can sometimes aid insertion into a tight receiver.
- Bikes Feel Loose/Straps Come Undone: Double-check that all ratcheting wheel straps are fully tightened and engaged. Ensure the adjustable padded hooks are firmly pressing down on the bike frames. Verify that the bike's weight does not exceed the 45 lbs per bike limit.
- Difficulty Folding Down Mast: Check for any obstructions or debris in the pivot mechanism. Ensure the release lever/pin is fully disengaged. Lubricate the pivot points if stiff.
- Rust on Components: While designed for durability, exposure to elements can cause rust. Regular cleaning and lubrication, especially after exposure to salt or moisture, can prevent this. Address minor rust with rust remover and protective coating.
8. Specifications
| Feature | Detail |
|---|---|
| Model Name | All Star |
| Model Number | 178S |
| Bike Capacity | 2 Bicycles |
| Max Weight Per Bike | 45 lbs (20.4 kg) |
| Total Load Capacity | 90 lbs (40.8 kg) |
| Hitch Compatibility | 1 1/4" and 2" Receivers |
| Rack Weight | 22.4 lbs (10.16 kg) |
| Product Dimensions (L x W x H) | 24.25 x 15 x 8.5 inches (61.6 x 38.1 x 21.6 cm) |
| Wheel Tray Width | Accommodates tires up to 3" wide |
| Wheelbase Compatibility | Up to 50" wheelbases |
| Color | Black |
| Manufacturer | Saris |
9. Warranty and Support
The Saris All Star 2-Bike Hitch Rack is proudly manufactured in the USA and comes with a lifetime warranty. This warranty reflects Saris' commitment to quality and durability, ensuring performance for years to come.
For warranty claims, technical support, or replacement parts, please contact Saris customer service directly. Refer to the official Saris website for the most current contact information and detailed warranty terms.


