
1. Introduction
Thank you for choosing the ODK White Dressing Table with LED Mirror and Stool. This manual provides essential information for the safe assembly, operation, and maintenance of your new dressing table. Please read these instructions carefully before assembly and retain them for future reference.
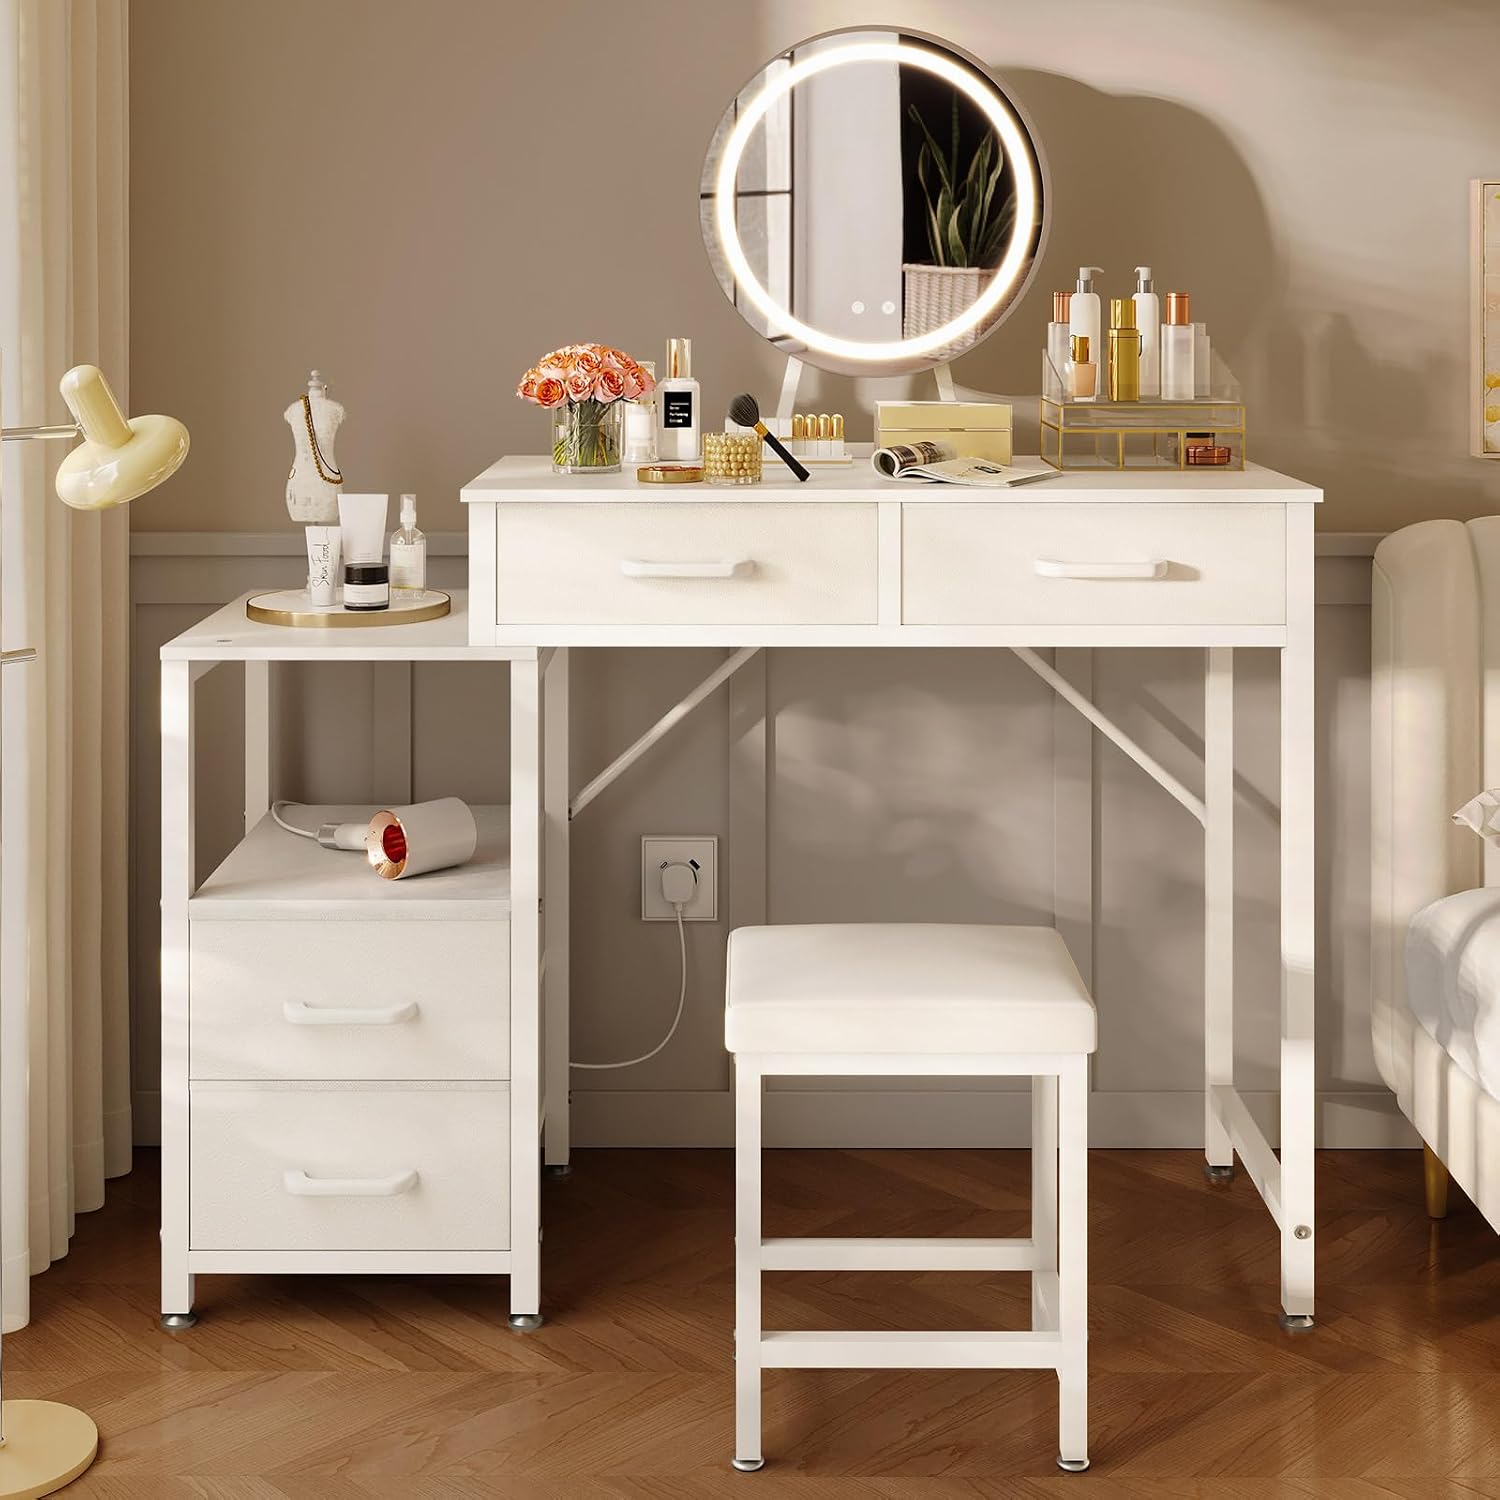
Image 1.1: The ODK White Dressing Table with LED Mirror and Stool, showcasing its modern design and functional components in a bedroom setting.
Safety Warnings
- Exercise caution during assembly. It is recommended that two people assemble this product, especially when handling the mirror, to ensure safety and prevent damage.
- Keep liquids away from the dressing table surface to prevent damage to the material and electrical components.
- Ensure the dressing table is placed on a stable, level surface. The non-slip feet are designed to prevent sliding, but proper placement is crucial for stability.
- Do not overload drawers or shelves. Refer to specifications for weight limits if available.
- Keep small parts and packaging materials away from children to avoid choking hazards.
2. Product Components
Before beginning assembly, verify that all parts listed below are present and undamaged. If any parts are missing or damaged, please contact customer support.

Image 2.1: A detailed diagram illustrating the dimensions and various components of the dressing table, including the main desk, side cabinet, mirror, and drawers.
Parts List:
- Dressing Table Main Frame
- Round LED Adjustable Mirror
- Side Cabinet with Shelf
- Fabric Drawers (4 units)
- Padded Stool
- Assembly Hardware (screws, connectors, tools if provided)
- Power Adapter for LED Mirror
3. Setup and Assembly
The ODK Dressing Table is designed for quick assembly with pre-drilled holes and numbered parts. Please follow the instructions provided in the packaging for detailed step-by-step guidance. Assembly typically takes around 30 minutes with two people.
Key Assembly Points:
- Unpacking: Carefully unpack all components and lay them out on a clean, soft surface to prevent scratches.
- Identify Parts: Match all parts with the provided parts list and diagrams.
- Main Frame Assembly: Assemble the main desk frame first, ensuring all connections are secure.
- Side Cabinet Placement: The side cabinet is reversible and can be attached to either the left or right side of the main dressing table, depending on your preference and room layout.
- Mirror Attachment: Securely attach the LED mirror to the designated area on the desktop. Ensure the mirror is stable before connecting power.
- Drawer Insertion: Insert the fabric drawers into their respective slots.
- Stool Assembly: Assemble the stool according to its separate instructions, ensuring the padded seat is firmly attached to the robust metal base.

Image 3.1: This image demonstrates the flexible design of the dressing table, highlighting how the side cabinet can be positioned on either the left or right side of the main desk to suit different room layouts.
4. Operating Instructions
LED Mirror Operation
The integrated LED mirror offers adjustable lighting to suit various makeup needs and environments.
- Power On/Off: Connect the mirror's power adapter to a suitable electrical outlet. The mirror typically has a touch sensor on its surface. Tap the sensor once to turn the light on or off.
- Adjusting Light Modes: The mirror features 3 lighting modes: Warm, Neutral, and Cool. Short press the touch sensor to cycle through these modes.
- Adjusting Brightness: The mirror offers 10 brightness levels. Long press the touch sensor to continuously adjust the brightness. Release when the desired brightness is achieved.

Image 4.1: A close-up view of the LED mirror, illustrating the touch controls for switching between three light modes (Cool White, Warm White, Warm Yellow) and adjusting brightness levels.
Fabric Drawers
The four fabric drawers provide ample and organized storage. They are designed to be dust-resistant and waterproof for easy maintenance.
- Simply pull the handles to open and push to close.
- Organize cosmetics, brushes, and accessories within the compartments.

Image 4.2: An aerial view of the dressing table, highlighting the spacious desktop, the four open fabric drawers filled with beauty products, and the functional side cabinet with an additional shelf.
5. Maintenance
Proper care will ensure the longevity and appearance of your ODK Dressing Table.
- Cleaning the Surface: The desktop features a waterproof and scratch-resistant surface. Wipe clean with a soft, damp cloth. Avoid abrasive cleaners or harsh chemicals that may damage the finish.
- Cleaning the Mirror: Use a glass cleaner specifically designed for mirrors and a lint-free cloth. Spray cleaner onto the cloth, not directly onto the mirror, to prevent liquid from seeping into the electrical components.
- Fabric Drawers: The fabric drawers are waterproof. For minor spills, wipe with a damp cloth. For deeper cleaning, the fabric inserts can typically be removed and spot cleaned according to fabric care instructions.
- Regular Checks: Periodically check all screws and connections to ensure they remain tight. Retighten if necessary.
- Avoid Direct Sunlight: Prolonged exposure to direct sunlight may cause fading or discoloration of the finish.
6. Troubleshooting
If you encounter any issues with your dressing table, refer to the following common problems and solutions:
| Problem | Possible Cause | Solution |
|---|---|---|
| LED Mirror does not light up. | Power adapter not connected or faulty. | Ensure the power adapter is securely plugged into both the mirror and a working electrical outlet. Check the outlet with another device. |
| Mirror light flickers or is dim. | Loose connection or power fluctuation. | Check power connections. Try a different outlet. If the issue persists, contact customer support. |
| Drawers are difficult to open/close. | Obstruction or improper assembly. | Check for items blocking the drawer path. Ensure the fabric drawers are correctly inserted and not overfilled. Verify the main frame is assembled squarely. |
| Dressing table feels unstable. | Loose connections or uneven surface. | Ensure all assembly screws are tightened. Place the table on a flat, level surface. Adjust the non-slip feet if they are adjustable. |
If these solutions do not resolve the issue, please contact ODK customer support for further assistance.
7. Specifications
| Feature | Detail |
|---|---|
| Model Number | B21020201001GG9088GP34980 |
| Brand | ODK |
| Product Dimensions (Overall) | 40 x 80 x 130 cm (Depth x Width x Height) |
| Item Weight | 18.2 Kilograms |
| Color | White |
| Material | Metal (Frame), Fabric (Drawers) |
| Number of Drawers | 4 |
| Mirror Type | Round LED Adjustable Mirror |
| LED Mirror Features | 3 Lighting Modes (Warm/Neutral/Cool), 10 Brightness Levels |
| Assembly Required | Yes |
8. Warranty and Support
ODK products are manufactured to high-quality standards. For information regarding warranty coverage, please refer to the warranty card included with your purchase or visit the official ODK website.
For technical support, missing parts, or any other inquiries, please contact ODK customer service through the retailer where the product was purchased or via the contact information provided on the ODK website.
Please have your model number (B21020201001GG9088GP34980) and purchase date ready when contacting support.