1. Introduction
Thank you for choosing the ssontong M50 Dash Cam. This manual provides detailed instructions for the installation, operation, and maintenance of your new dash camera system. Please read this manual thoroughly before use to ensure proper functionality and to maximize your driving safety.
1.1 Product Overview
The ssontong M50 is an advanced dual dash camera system designed to provide comprehensive recording of your driving environment. It features 4K Ultra HD front recording and 1080P Full HD rear recording, equipped with 5.8G WiFi for fast data transfer, built-in GPS for accurate location and speed tracking, and ADAS (Advanced Driver Assistance Systems) for enhanced safety alerts. Additional features include G-Sensor, Loop Recording, WDR technology, and superior night vision capabilities.
1.2 Package Contents
Please check the box for the following items:
- 1 x M50 4K WiFi Dash Cam (Front Unit)
- 1 x 1080P Rear Camera
- 1 x Rear Camera Cable (19.69 ft / 6 meters)
- 1 x Car Charger Head
- 1 x Car Charging Cable (USB-C 11.48 ft / 3.5 meters)
- 1 x 32GB Memory Card
- 2 x 3M Adhesive Stickers
- 2 x Electrostatic Stickers
- 1 x Dust Free Cloth
- 1 x User Manual
- 1 x Pry Tool

Image: The ssontong M50 Dash Cam system, including the front camera, rear camera, power cables, and memory card.

Image: A detailed view of the ssontong M50 Dash Cam front unit, highlighting its compact design and lens.

Image: An illustration detailing all components included in the product box, such as the dash cam, rear camera, cables, and accessories.
2. Safety Information
To ensure safe operation and prevent damage to the device or vehicle, please observe the following safety guidelines:
- Do not operate the dash cam while driving. Adjust settings or review footage only when the vehicle is safely parked.
- Ensure the dash cam is securely mounted and does not obstruct the driver's view or interfere with vehicle controls.
- Avoid exposing the device to extreme temperatures, direct sunlight for prolonged periods, or excessive moisture.
- Use only the provided power cables and accessories. Using incompatible accessories may damage the device and void the warranty.
- Keep the device away from strong magnetic fields.
- Do not attempt to disassemble, repair, or modify the device yourself. Contact customer support for assistance.
- Ensure all cables are routed safely and do not interfere with airbags or other safety features.
3. Setup and Installation
Follow these steps to properly install your ssontong M50 Dash Cam system in your vehicle.
3.1 Mounting the Front Dash Cam
- Clean the windshield area where you intend to mount the dash cam. Ensure it is free of dust and grease.
- Apply an electrostatic sticker to the cleaned area on the windshield. This helps in easy removal and prevents residue.
- Attach the 3M adhesive sticker to the dash cam mount.
- Press the dash cam mount firmly onto the electrostatic sticker on the windshield for at least 30 seconds to ensure a secure bond.
- Adjust the camera angle to ensure a clear view of the road ahead. The mount features a 100° rotating design for optimal positioning.

Image: Illustrations demonstrating the detachable mount pad, 100° rotating design for angle adjustment, and the compact, hidden placement of the dash cam to avoid obstructing view.
3.2 Connecting the Rear Camera
- Mount the rear camera on the rear windshield using the adhesive sticker, ensuring a clear view.
- Connect the rear camera cable to the AV-IN port on the main dash cam unit.
- For reversing assistance functionality, connect the red wire of the rear camera cable to the positive pole of your car's reversing light. This step is optional but recommended for parking assistance.
- Route the rear camera cable neatly along the vehicle's interior trim to avoid interference and maintain a clean appearance.

Image: A diagram illustrating the complete installation process, including connecting the rear camera to the main unit and the power supply.
3.3 Powering the Device
The dash cam offers flexible power supply options:
- Using the Car Charger: Plug the car charger head into your vehicle's cigarette lighter socket. Connect the USB-C charging cable from the car charger head to the USB-C port on the dash cam. The car charger head also includes an additional USB port for charging other devices.
- Using a USB Port: If your car has a built-in USB port, you can connect the USB-C charging cable directly from the car's USB port to the dash cam's USB-C port.
The dash cam will automatically power on and begin recording when the vehicle's ignition is turned on.

Image: Visual guide on connecting the dash cam to power using the included car charger and a vehicle's cigarette lighter socket.

Image: An illustration demonstrating how to connect the dash cam directly to a vehicle's USB port for power.
3.4 Inserting the Memory Card
Insert the provided 32GB memory card (or another compatible card up to 512GB) into the memory card slot on the dash cam until it clicks into place. Ensure the card is inserted in the correct orientation. The dash cam will automatically format the card upon first use or if a new card is detected.
4. Operating Instructions
4.1 Basic Operation
The dash cam will automatically power on and begin recording when connected to power and the vehicle's ignition is on. It will power off automatically when the ignition is turned off.
4.1.1 Display Modes
The 3.2" IPS screen allows you to view footage from the front camera, rear camera, or both simultaneously. Press the "UP" button on the dash cam to cycle through the display modes:
- Default Display: Shows both front and rear camera views.
- Full Front Camera: Displays only the front camera view.
- Full Rear Camera: Displays only the rear camera view.

Image: Visual representation of the three available display modes on the dash cam screen.
4.2 Recording Functions
4.2.1 Video Resolution and Wide Angle Coverage
- Front Camera: Records in 4K Ultra HD (2160P) with a 170° wide-angle lens.
- Rear Camera: Records in 1080P Full HD with a 140° wide-angle lens.
This dual recording setup ensures comprehensive coverage of the road ahead and behind your vehicle, capturing important details like license plates and road signs.

Image: An illustration detailing the 4K front and 1080P rear recording capabilities, along with the wide-angle views of 170° for the front camera and 140° for the rear camera.

Image: A visual representation of the extensive wide-angle coverage provided by both the front (170°) and rear (140°) dash cameras.
4.2.2 Loop Recording
The dash cam features loop recording, which automatically overwrites the oldest unlocked video files when the memory card reaches its full capacity. This ensures continuous recording without the need for manual deletion. Locked emergency files are protected from being overwritten.
| Memory Card Size | Recording Time |
|---|---|
| 32GB (Included) | 2 Hours |
| 64GB | 4 Hours |
| 128GB | 8 Hours |
| 256GB | 16 Hours |
| 512GB (Max Support) | 32 Hours |

Image: An illustration demonstrating how the G-Sensor locks important footage and the continuous nature of loop recording.

Image: A visual explanation of loop recording, showing how older files are overwritten and providing a table of recording durations based on memory card size.
4.2.3 G-Sensor (Emergency Lock)
The built-in G-Sensor automatically detects sudden impacts or collisions. When triggered, it locks the current video file, preventing it from being overwritten by loop recording. This ensures critical incident footage is preserved. The G-Sensor sensitivity can be adjusted (Off, Low, Medium, High) in the settings.

Image: A visual explanation of the G-sensor's role in detecting collisions and automatically locking video files to prevent overwriting.
4.2.4 Time-Lapse Recording (24-Hour Parking Monitoring)
The M50 Dash Cam supports time-lapse recording, which efficiently compresses 30 minutes of video into a shorter file. This feature is ideal for 24-hour parking monitoring, conserving memory while providing continuous surveillance of your parked vehicle. An ACC hardwire kit (sold separately, ASIN: B0CZDMML9Y2) is required to enable 24-hour parking monitoring.

Image: An illustration demonstrating how time-lapse recording works, compressing footage to optimize storage for continuous parking monitoring.

Image: Details on the 24-hour time-lapse recording function, highlighting its efficiency for parking surveillance and the need for a separate hardwire kit.
4.2.5 WDR (Wide Dynamic Range)
WDR technology enhances video quality by balancing exposure in scenes with high contrast, such as bright sunlight and deep shadows. This ensures clear and detailed recordings both day and night.

Image: A visual comparison demonstrating the improved clarity and balanced exposure achieved when WDR technology is enabled.
4.2.6 Super Night Vision
Equipped with an F1.8 aperture and a 6-layer glass lens, the dash cam provides superior night vision capabilities. It accurately captures information like road signs and license plates even in low-light conditions, ensuring clear recordings during nighttime driving.
Image: An illustration showcasing the Super Night Vision feature, demonstrating its effectiveness in various lighting conditions, including very dark environments.

Image: A detailed graphic explaining the components contributing to the Super Night Vision, including the F1.8 aperture, WDR technology, and 6-layer glass lens.

Image: A visual comparison highlighting the superior clarity of the 4K dash cam's night vision in total darkness compared to other dash cams.
4.3 Smart Features
4.3.1 WiFi and App Control
The built-in 5.8G WiFi allows for fast and convenient connection to your smartphone via the free "Viidure" APP. With the app, you can:
- View real-time footage from the dash cam.
- Download recorded videos to your phone at speeds up to 10MB/s.
- Manage and adjust dash cam settings.
- Share your driving moments or evidence instantly.
Download the "Viidure" APP by scanning the QR code below or visiting https://www.6zhentan.com/app/d0001/index.html.

Image: An illustration demonstrating the 5.8GHz WiFi connectivity and the various functions available through the mobile application, such as easy download, fast connection, app control, and video editing.

Image: A graphic highlighting the 5.8G WiFi and app control features, including a QR code for easy download of the "Viidure" app.

Image: A step-by-step guide on how to connect the dash cam to WiFi and utilize the Viidure app for previewing, downloading, sharing, and editing videos.
4.3.2 GPS Function
The built-in GPS system accurately records your vehicle's location, speed, and route in real-time. This data can be viewed on the "Viidure" APP, providing important evidence in case of an accident or dispute. It also helps you understand your driving behavior and improve safety.

Image: An illustration demonstrating the GPS data recording and route tracking capabilities, showing how location, speed, and driving trajectory are logged and viewable on a map.
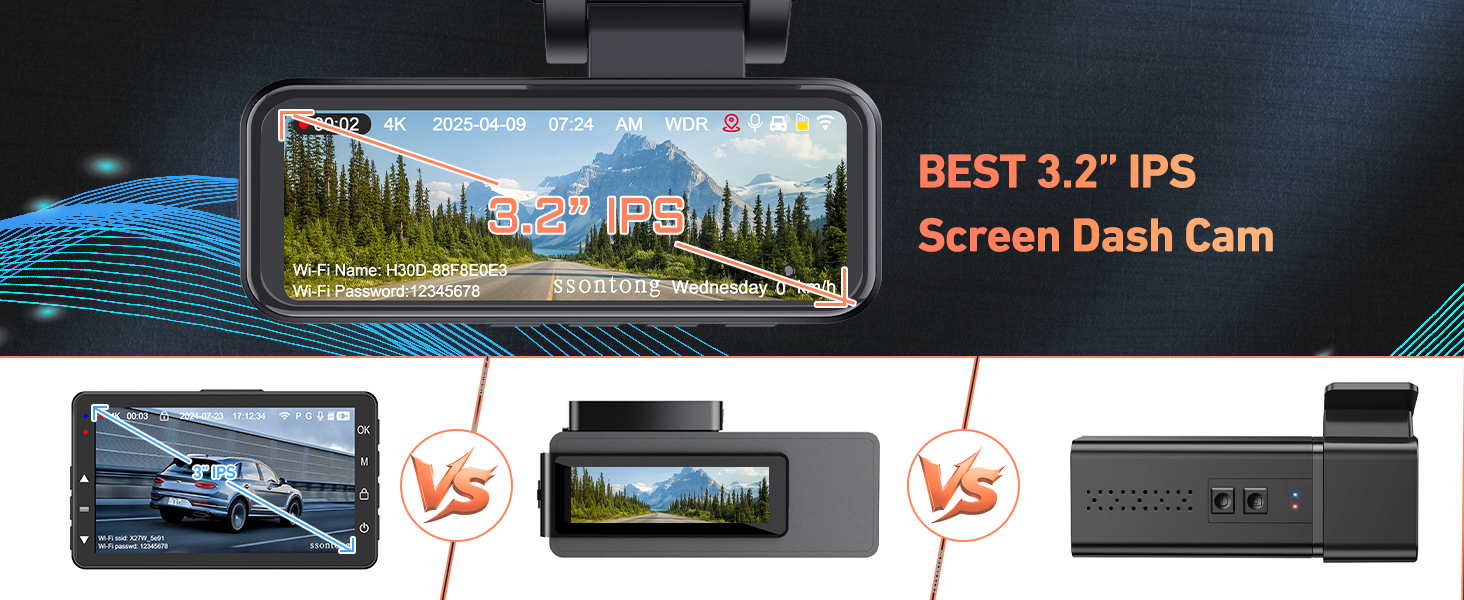
Image: A graphic illustrating the built-in GPS tracking feature, displaying real-time location, speed, and driving trajectory on a map interface.
4.3.3 ADAS (Advanced Driver Assistance Systems)
The ADAS function provides intelligent alerts to enhance driving safety. These include:
- Forward Collision Warning (FCW): Alerts you if you are approaching a vehicle too quickly.
- Lane Changing Alarm (LCA): Notifies you if you drift out of your lane without signaling.
- Blind Spot Detection (BSD): Helps detect vehicles in your blind spots.
- Pedestrian Collision Alarm: Warns of potential collisions with pedestrians.
- Forward Vehicle Start Warning: Alerts you when the vehicle in front starts moving after a stop.
- Too Close Distance Warning: Informs you if you are following the vehicle ahead too closely.

Image: A comprehensive diagram illustrating various ADAS functions such as Forward Collision Warning, Lane Changing Alarm, Blind Spot Detection, Pedestrian Collision Alarm, and Forward Vehicle Start Warning.

Image: A visual representation of the Forward Collision Warning (FCW) system, indicating a potential collision with a vehicle ahead.

Image: A visual representation of the Lane Changing Alarm (LCA) system, showing how it detects unintentional lane departures.

Image: A visual representation of the Blind Spot Detection (BSD) system, indicating a vehicle in the driver's blind spot.

Image: A visual representation of the Pedestrian Collision Alarm system, showing detection of pedestrians in the vehicle's path.

Image: A visual representation of the Forward Vehicle Start Warning system, indicating when the vehicle ahead has begun to move.

Image: A visual representation of the Too Close Distance Warning system, alerting the driver to an insufficient following distance.
4.3.4 Reversing Assistance
When the red wire of the rear camera is connected to your car's reversing light, the dash cam screen will automatically display a reversing assistance line when you shift into reverse. This helps you park and reverse more safely, especially in tight spaces or low-visibility conditions.
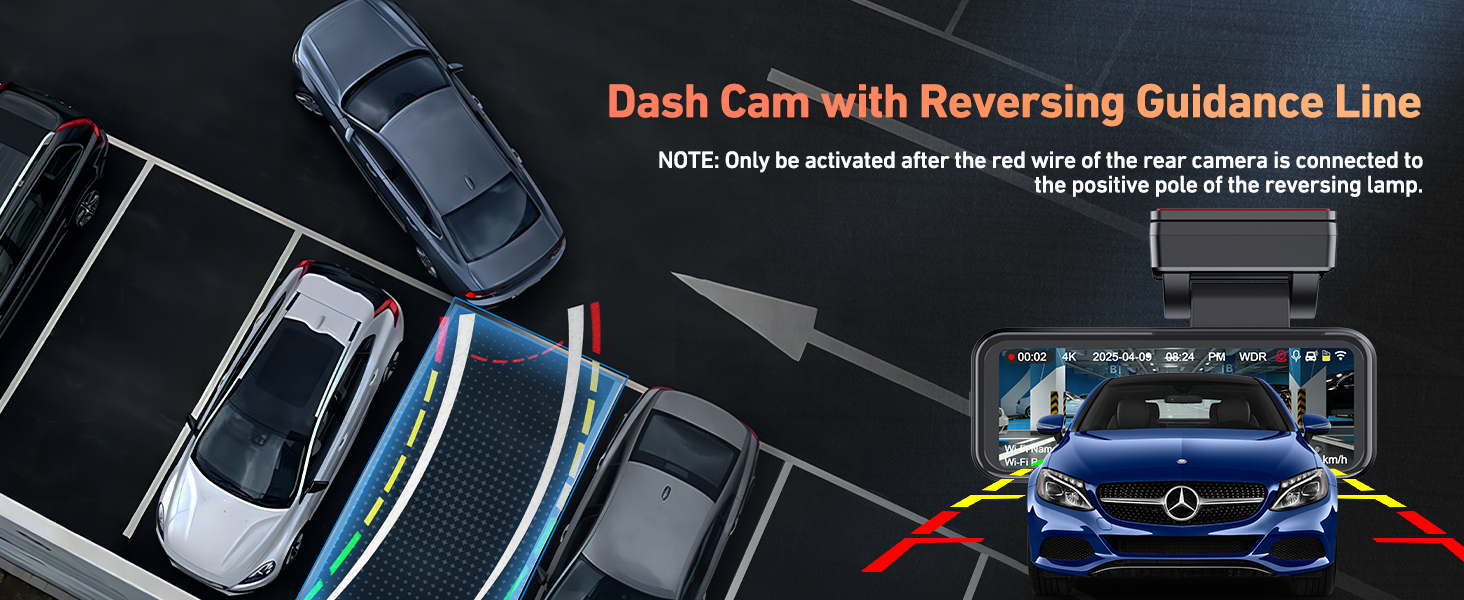
Image: The dash cam screen displaying reversing guidance lines, aiding in safe parking and maneuvering.
5. Maintenance
5.1 Cleaning the Device
- Use the provided dust-free cloth to gently wipe the camera lenses and screen.
- Do not use chemical cleaners or abrasive materials, as they may damage the device.
- Ensure the device is powered off before cleaning.
5.2 Memory Card Care
- Regularly format the memory card (at least once a month) through the dash cam's settings to maintain optimal performance and prevent data corruption.
- Use a high-quality Class 10 or U3 (UHS Speed Class 3) microSD card for reliable recording.
- Avoid removing the memory card while the device is powered on or recording, as this may damage the card or corrupt files.
6. Troubleshooting
If you encounter issues with your ssontong M50 Dash Cam, please refer to the following common problems and solutions:
6.1 Rear Camera Not Working
- Check Cable Connection: Ensure the rear camera cable is fully and securely inserted into the AV-IN port on the front dash cam unit. A loose connection is a common cause.
- Verify Cable Integrity: Inspect the entire length of the rear camera cable for any kinks, cuts, or damage.
- Test Reversing Light Connection (if applicable): If you connected the red wire for reversing assistance, ensure it is correctly wired to the positive pole of the reversing light.
Image: A visual troubleshooting guide illustrating common issues with rear camera connection, such as improperly inserted or connected cables.
6.2 WiFi Connection Issues
- Restart Dash Cam and Phone: Sometimes a simple restart of both devices can resolve connectivity problems.
- Check App Permissions: Ensure the "Viidure" app has necessary permissions on your smartphone (e.g., location, local network access).
- Forget Network: On your phone, forget the dash cam's WiFi network and try reconnecting.
- Proximity: Ensure your phone is within the 6-meter (19.69 ft) WiFi range of the dash cam.
6.3 Recording Problems
- Memory Card Full: If loop recording is not enabled or locked files fill the card, recording may stop. Format the card.
- Memory Card Error: Try formatting the memory card in the dash cam's settings. If the issue persists, try a different, high-quality memory card.
- Power Supply: Ensure the dash cam is receiving continuous power. Check the power cable and car charger connection.
6.4 Device Freezing or Unresponsive
- Soft Reset: If the device freezes, press and hold the power button for 10-15 seconds to force a restart.
- Factory Reset: If issues persist, perform a factory reset through the dash cam's settings menu. Note that this will erase all settings and require re-configuration.
7. Specifications
| Feature | Description |
|---|---|
| Model Name | M50 Dashcam Front and Rear Camera |
| Front Camera Resolution | 4K (2160P) |
| Rear Camera Resolution | 1080P |
| Front Camera Angle | 170° Wide Angle |
| Rear Camera Angle | 140° Wide Angle |
| Display Screen | 3.2" IPS Screen |
| Connectivity | Built-in 5.8G WiFi, Built-in GPS, USB |
| Special Features | ADAS, G-Sensor, Loop Recording, WDR, Super Night Vision, Time-Lapse Recording, App Control, Reversing Assistance |
| Storage | Supports up to 512GB (32GB card included) |
| Power Supply | Built-in Supercapacitor (for instant power off data preservation) |
| Operating Temperature | -14°F to 140°F (-25°C to 60°C) |
| Product Dimensions | 3.35 x 1.97 x 1.57 inches |
| Item Weight | 1.37 pounds |
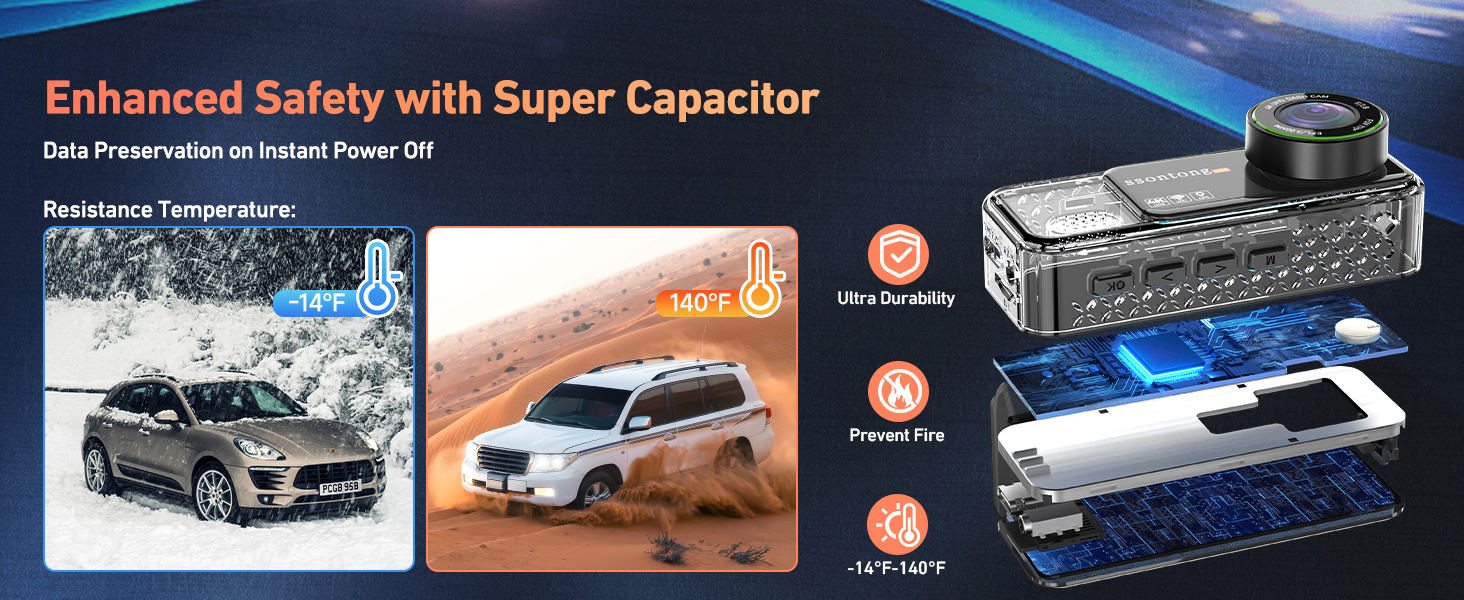
Image: Details on the supercapacitor, highlighting its ability to preserve data on instant power off and its resistance to extreme temperatures (-14°F to 140°F).

Image: A chart illustrating the approximate recording durations for various memory card capacities, from 32GB up to 512GB.
8. Warranty and Support
ssontong is committed to providing a satisfying shopping experience and reliable after-sales service for our customers.
- Quality Protection: The dash cam comes with a 1-year quality protection period.
- Money-Back Guarantee: Enjoy a 30-day return and money-back guarantee.
- Lifetime After-Sales Support: We provide lifetime after-sales support for your product.
- Customer Service: Our professional support team is available 7/24H to provide timely assistance if you encounter any problems or have questions during use.
For further assistance, please visit the official ssontong store on Amazon: ssontong Store.


