1. Introduction
The Newgoal Smart Life WiFi 4-Channel Relay Module (Model TYB4CH-B1) is a versatile smart switch designed for DIY home automation. It enables remote control of electrical devices via Wi-Fi using the Tuya Smart Life app, a 433MHz RF remote control, and voice commands through Amazon Alexa or Google Home. This module supports three operating modes: Inching (Momentary), Self-locking (Toggle), and Interlock, making it suitable for various applications such as garage door openers, smart lighting, and other home appliances.
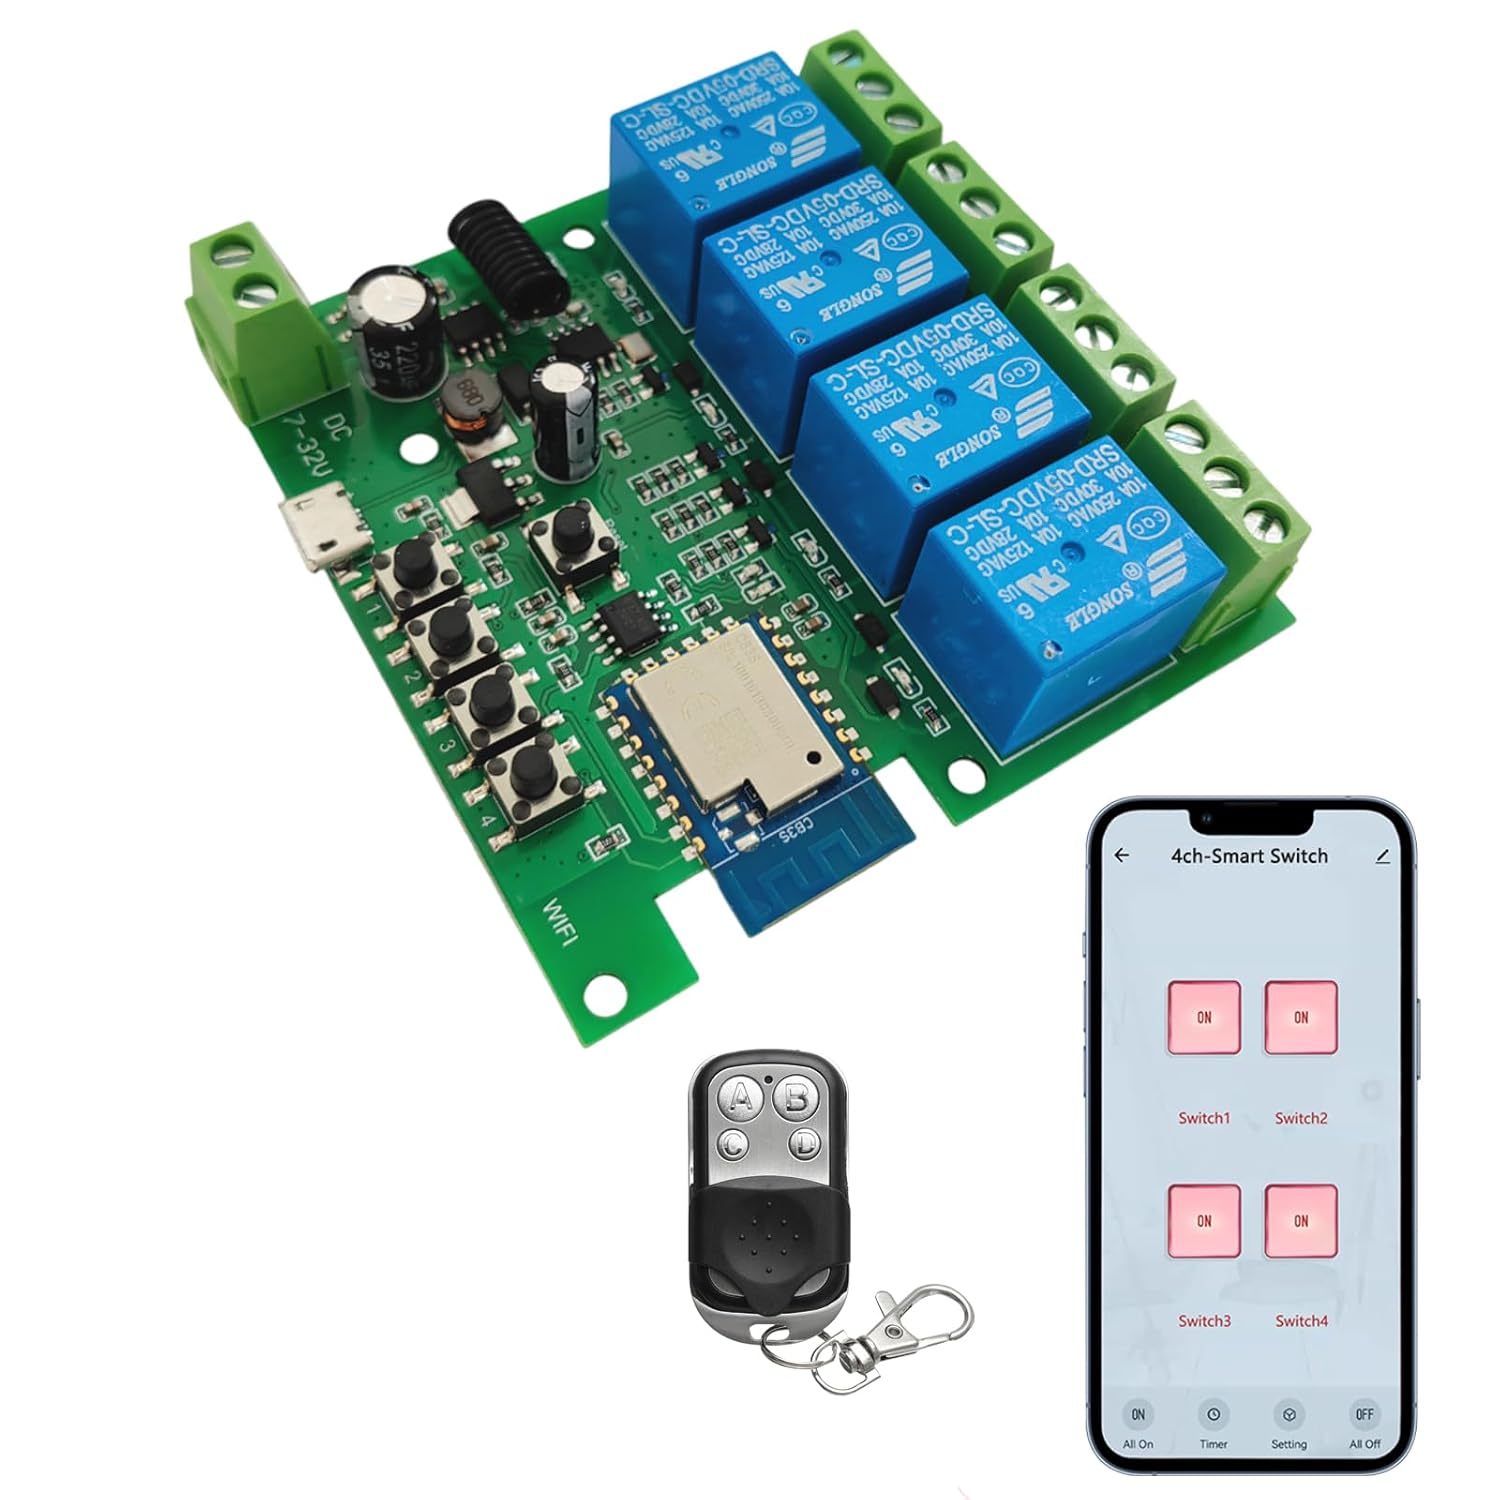
Image 1.1: Newgoal Smart Life WiFi 4-Channel Relay Module with included RF remote and a smartphone displaying the control interface.
2. Safety Information
Please read and understand all safety instructions before installation and operation. Failure to follow these instructions may result in electric shock, fire, or other hazards.
- Disconnect Power: Always ensure the main power supply is disconnected before performing any installation, wiring, or maintenance on the module.
- Qualified Installation: If you are not confident with electrical wiring, seek assistance from a qualified electrician.
- Voltage and Current Limits: Do not exceed the specified maximum voltage (AC/DC 7-32V or USB 5V) and current rating (10A per relay). Overloading can cause damage or fire.
- Proper Wiring: Ensure all wire connections are secure and correctly matched to the terminals to prevent short circuits.
- Environment: Install the module in a dry environment, away from moisture, extreme temperatures, and flammable materials.
- Wi-Fi Compatibility: This device supports 2.4GHz Wi-Fi networks only. It is not compatible with 5GHz Wi-Fi or Mesh Wi-Fi systems.
3. Product Overview
The Newgoal Smart Life WiFi 4-Channel Relay Module is a compact circuit board equipped with four independent relays, allowing control of up to four separate electrical circuits. It integrates Wi-Fi connectivity for smart app control and an RF receiver for the included 433MHz remote control.
3.1 Components

Image 3.1: Detailed view of the relay module with labeled components.
- Power Input 1 (5V Micro USB): For powering the module via a standard USB cable.
- Power Input 2 (DC/AC 7-32V): Alternative power input via screw terminals.
- RF Pairing Buttons / Manual Switches (1-4): Buttons for manual control of each relay and for pairing the 433MHz RF remote.
- Wi-Fi LED: Indicates Wi-Fi connection status.
- 433RF Receiver: Integrated module for receiving signals from the RF remote.
- Relays (1-4): Four independent relays, each with Normally Open (NO), Common (COM), and Normally Closed (NC) terminals for connecting electrical loads.
- M/S/I Modes Toggle Button: Button to cycle through Inching, Self-locking, and Interlock operating modes.
3.2 Package Contents
- 1 x Newgoal Smart Life WiFi 4-Channel Relay Module
- 1 x 433MHz RF Remote Control
- 1 x User Manual
4. Setup
4.1 Powering the Module
The module can be powered using one of two methods:
- USB 5V: Connect a Micro USB cable to the 5V Micro USB port and a compatible 5V power adapter.
- AC/DC 7-32V: Connect your AC or DC power supply (within the 7-32V range) to the screw terminals labeled 'AC/DC 7-32V'. Ensure correct polarity for DC input.
4.2 App Installation (Tuya Smart Life)
- Download the Tuya Smart or Smart Life app from the Apple App Store (iOS) or Google Play Store (Android).
- Register or log in to your account.
4.3 Wi-Fi Pairing
To connect the module to your Wi-Fi network:
- Ensure your smartphone is connected to a 2.4GHz Wi-Fi network. The module does not support 5GHz Wi-Fi.
- Power on the relay module. The Wi-Fi LED should blink rapidly, indicating it's in pairing mode. If not, press and hold the 'M/S/I Modes Toggle Button' for approximately 5 seconds until the LED blinks rapidly.
- Open the Tuya Smart Life app, tap '+' to add a device.
- Select 'Electrical' > 'Switch (Wi-Fi)' or 'Relay Switch'.
- Follow the on-screen instructions in the app to complete the pairing process. This typically involves confirming the Wi-Fi LED status and entering your Wi-Fi password.
4.4 RF Remote Pairing
The included 433MHz RF remote control can be paired with the module:
- To pair a button on the remote with a specific relay: Press and hold the corresponding manual switch button (1-4) on the module for approximately 3 seconds. The LED on the module will indicate pairing mode. Then, press the desired button on the 433MHz remote. The LED will confirm successful pairing. Repeat for other buttons/relays.
- To clear all paired RF codes: Press and hold any manual switch button on the module for approximately 15 seconds. The LED will indicate that all RF codes have been cleared.
5. Operating Modes
The module supports three distinct operating modes: Inching (Momentary), Self-locking (Toggle), and Interlock. All four channels operate in the same mode; individual channels cannot be set to different modes. You can switch between modes by pressing the 'M/S/I Modes Toggle Button' on the module.
5.1 Inching (Momentary) Mode

Image 5.1: Inching (Momentary) mode application examples.
In Inching mode, when a relay is activated (via app, remote, or manual button), it will remain active for a brief, predetermined duration (e.g., 1 second) and then automatically deactivate. This mode is ideal for applications requiring a short pulse, such as triggering a garage door opener or a momentary switch.
5.2 Self-locking (Toggle) Mode

Image 5.2: Self-locking (Toggle) mode application examples.
In Self-locking mode, each relay acts as a toggle switch. When activated, the relay turns ON and stays ON until it is activated again, at which point it turns OFF. This is suitable for controlling lights, fans, or other devices that need to be switched ON or OFF and remain in that state.
5.3 Interlock Mode

Image 5.3: Interlock mode application examples.
In Interlock mode, only one relay can be active at any given time. When one relay is activated, any other currently active relay will automatically deactivate. This mode is commonly used for controlling motors with forward/reverse functions or other applications where only one output should be active at a time.
5.4 Smart Control Features
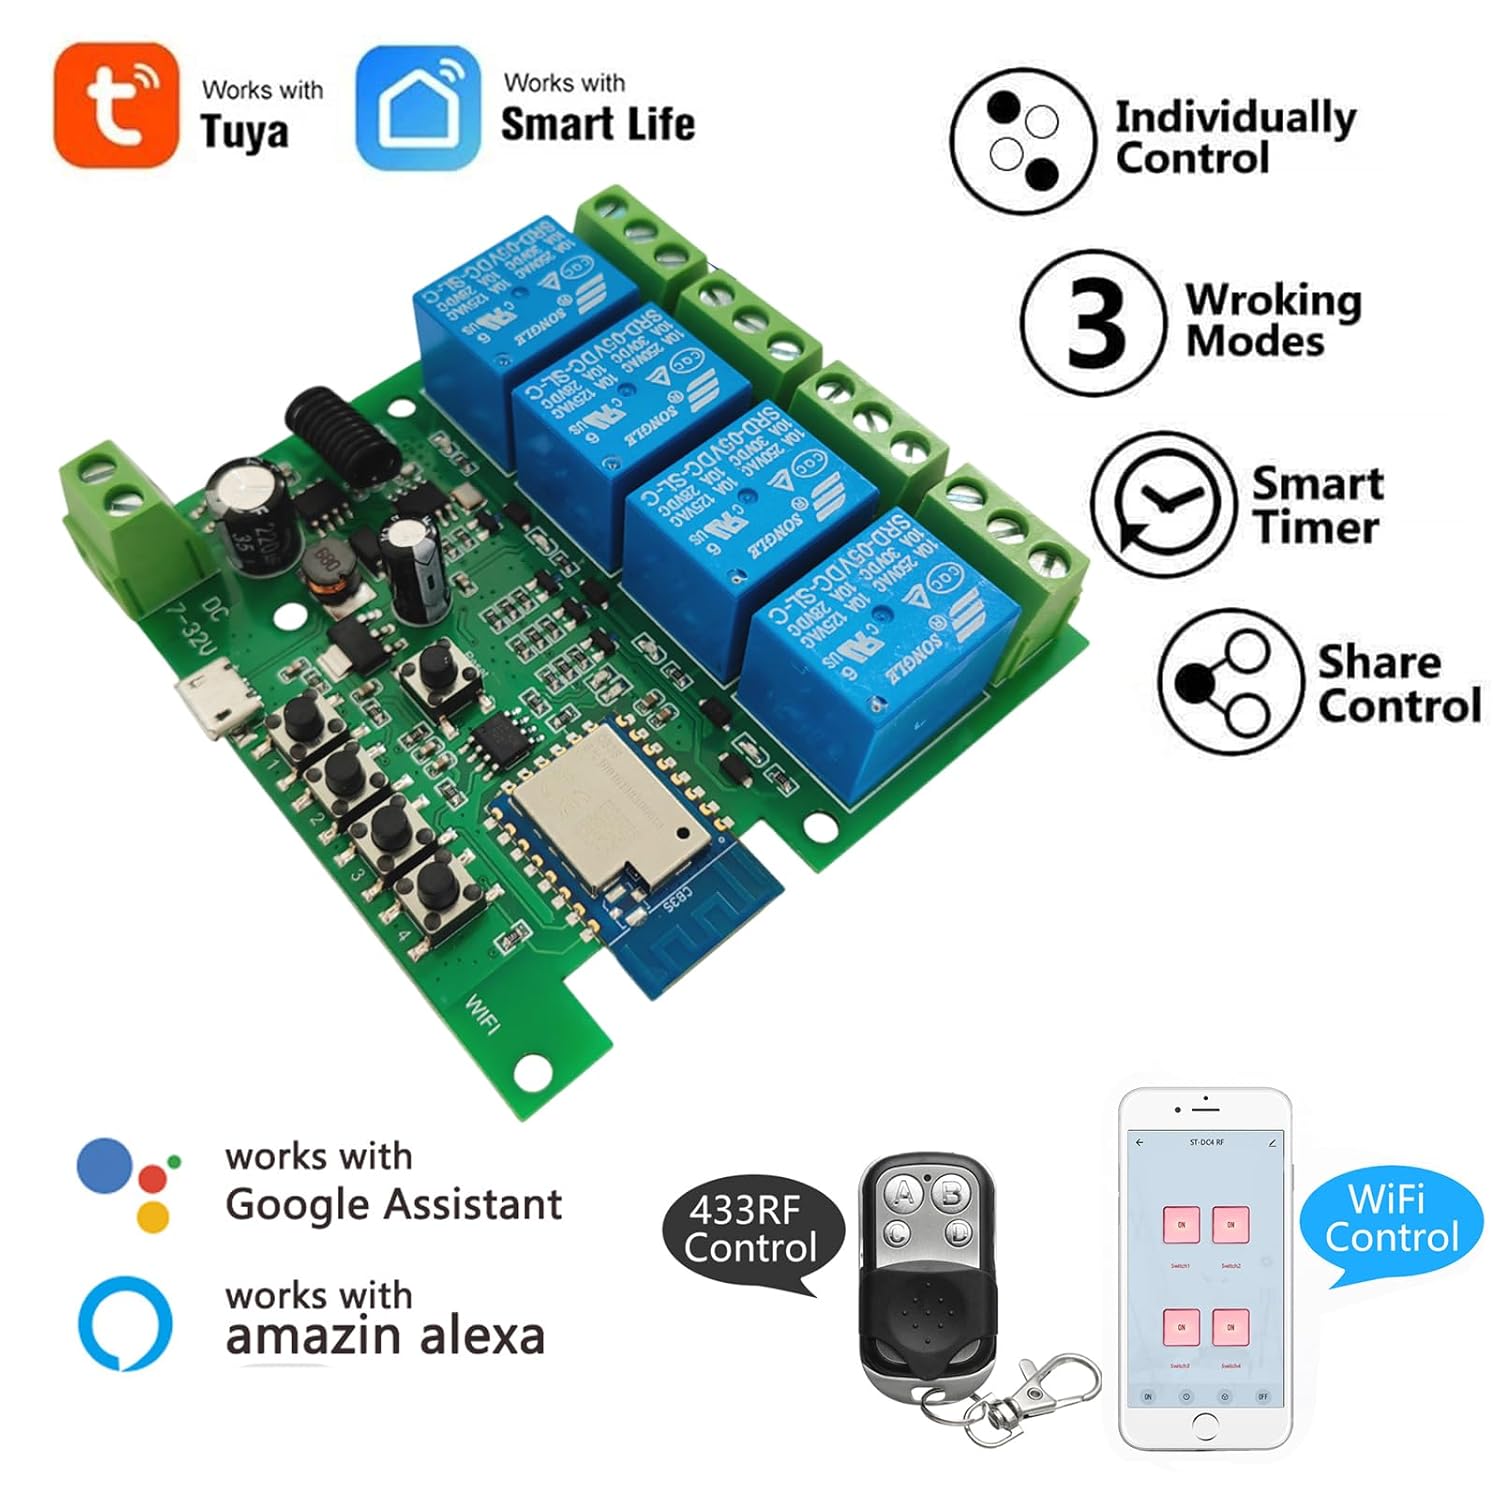
Image 5.4: Overview of smart control features.

Image 5.5: Remote control, scheduling, and countdown functions.
Image 5.6: Hands-free voice control with Alexa.
- Remote Control: Control connected devices from anywhere using the Tuya Smart Life app on your smartphone (Android/iOS).
- Voice Control: Compatible with Amazon Alexa and Google Home. Use voice commands to turn devices ON/OFF (e.g., "Alexa, turn off baby room light").
- Scheduling & Timers: Set schedules or countdown timers within the app to automatically turn devices ON/OFF at specific times.
- Device Sharing: Share control of your devices with family members through the app.
- Group Management: Organize multiple smart devices into groups for simultaneous control.
6. Maintenance
To ensure optimal performance and longevity of your relay module:
- Cleaning: Keep the module clean and free from dust. Use a dry, soft cloth for cleaning. Do not use liquid cleaners.
- Connections: Periodically inspect all wiring connections to ensure they are secure and free from corrosion.
- Environment: Ensure the module remains in a dry, well-ventilated area, away from direct sunlight, high humidity, and extreme temperatures.
- Firmware Updates: Check the Tuya Smart Life app for any available firmware updates for the module. Updates can improve performance and add new features.
7. Troubleshooting
If you encounter issues with your Newgoal Smart Life WiFi 4-Channel Relay Module, refer to the following common problems and solutions:
| Problem | Possible Cause | Solution |
|---|---|---|
| Module not powering on. | No power supply or incorrect voltage. | Check power connections (USB 5V or AC/DC 7-32V). Ensure power source is active. |
| Cannot connect to Wi-Fi. | Incorrect Wi-Fi band (5GHz), wrong password, module too far from router. | Ensure your router is broadcasting a 2.4GHz Wi-Fi network. Verify Wi-Fi password. Move module closer to the router. Reset module to pairing mode. |
| RF remote not working. | Not paired, remote battery low, interference. | Re-pair the RF remote following Section 4.4. Replace the remote control battery. Ensure no strong RF interference sources nearby. |
| Connected device not responding. | Incorrect wiring, relay mode mismatch, device fault. | Verify wiring to the load (NO/COM/NC terminals). Check if the module's operating mode (Inching, Self-locking, Interlock) is appropriate for the device. Test the connected device independently. |
| Relay clicks but device doesn't activate. | Load wiring issue, device power issue, overloaded relay. | Check the wiring between the relay terminals and the device. Ensure the device itself is functional and powered. Confirm the device's current draw does not exceed 10A. |
8. Specifications
| Feature | Specification |
|---|---|
| Model Number | TYB4CH-B1 |
| Dimensions (L x W x H) | 7.4 x 7.4 x 1.9 cm |
| Weight | 98 grams |
| Operating Voltage | USB 5V or AC/DC 7-32V |
| Current Rating (per relay) | 10 A |
| Contact Type | Normally Open (NO) |
| Circuit Type | 4-way |
| Connectivity | 2.4GHz WiFi, 433MHz RF |
| Material | Copper, Brass |
| Operating Modes | Inching (Momentary), Self-locking (Toggle), Interlock |

Image 8.1: Module dimensions.
9. Warranty Information
Warranty information for this product is not explicitly provided by the manufacturer in the available documentation. Please refer to the retailer's return policy or contact the seller directly for details regarding warranty coverage.
10. Support
For further assistance or technical support, please refer to the following:
- Manufacturer's Website: Check the official Newgoal website for product updates, FAQs, or additional support resources.
- Seller Support: Contact the seller through the platform where the product was purchased for direct assistance.
- Tuya Smart Life App: The app often includes a 'Help & Feedback' section for common issues related to app functionality and device connectivity.


