
1. Product Overview
The VEVOR Bike Tent is designed for outdoor storage of bicycles and other equipment. It features a durable construction with 210D silver-coated Oxford fabric and PU4000 waterproof coating, ensuring protection against various weather conditions. The semicircle-top design helps prevent water accumulation, and UV-resistant material contributes to its longevity. This model is suitable for storing 3-4 bikes.
Key features include a thickened 9.5mm fiberglass frame for stability, a portable and foldable design for easy transport, and a tool-free quick setup process. Ventilation windows are integrated to prevent condensation, keeping stored items dry.

Image 1.1: VEVOR Bike Tent offering full and all-weather protection.
2. Safety Information
This bike shed serves as a versatile outdoor storage shelter for cycling gear, garden tools, camping equipment, and patio furniture. It provides all-weather protection, keeping belongings dry from rain, snow, and UV exposure.
Warning:
- Disassemble the bike shelter for safety during strong windstorms or extreme weather conditions to prevent damage or injury.
- Ensure the tent is securely anchored to the ground using the provided ground stakes and wind ropes.
- Do not use near open flames or heat sources.
3. Package Contents
Verify that all components are present before beginning assembly:
- 1 x Tent Body
- 2 x Tent Support Poles
- 5 x Horizontal Support Poles
- 4 x Ground Stakes
- 1 x Support Poles Storage Bag
- 1 x Tent Storage Bag
- 1 x Ground Stakes Storage Bag
- 1 x User Manual
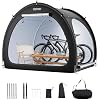
Image 3.1: Included components of the VEVOR Bike Tent.
4. Setup Instructions
Follow these steps for quick and easy assembly. It is recommended to have two people for initial setup.
- Unfold the Tent Body: Lay the tent body flat on a clean, level surface.
- Assemble Support Poles: Connect the sections of the 2 tent support poles and 5 horizontal support poles.
- Insert Tent Support Poles: Carefully slide the two main tent support poles into the reserved gaps along the curved top of the tent body. Ensure they are fully inserted and secured.
- Raise the Tent: With assistance, lift the tent structure, forming its curved shape.
- Insert Horizontal Support Poles: Insert the 5 horizontal support poles into their designated sleeves or attachment points to provide additional stability and structure.
- Secure the Base: Pull out the bottom and sides of the tent to ensure it is fully extended.
- Anchor the Tent: Use the provided ground stakes to secure the tent to the ground through the loops at the base. Attach wind ropes to the designated points and stake them into the ground for added stability, especially in windy conditions.

Image 4.1: Visual guide for quick installation.
Video 4.2: Official VEVOR guide on how to set up the bike storage tent.
5. Operating Instructions
Using your VEVOR Bike Tent is straightforward:
- Accessing Contents: Unzip the double doors to open the tent. The zippers are designed for smooth operation.
- Securing Contents: Zip the doors completely to protect your bikes and other stored items from weather and dust.
- Ventilation: The tent features a ventilation window. Ensure this window is clear to allow for air circulation, which helps prevent condensation buildup inside the tent.

Image 5.1: Detail of the ventilation window for moisture control.
6. Maintenance
Proper maintenance will extend the life of your bike tent:
- Cleaning: Clean the tent fabric with a soft cloth and mild soap solution. Rinse thoroughly with water and allow it to air dry completely before folding and storing. Do not use harsh chemicals or abrasive cleaners.
- Drying: Always ensure the tent is completely dry before packing it away to prevent mold and mildew growth.
- Storage: When not in use, store the tent in its storage bag in a cool, dry place away from direct sunlight.
- Pole Inspection: Periodically check the fiberglass poles for any signs of damage or splintering. Replace damaged poles as necessary.
7. Troubleshooting
Here are solutions to common issues:
- Water Accumulation Inside:
- Ensure all zippers are fully closed and the waterproof tape along seams is intact.
- Verify the tent is set up on level ground to prevent water pooling.
- Check that the semicircle-top design is properly formed to shed water effectively.
- Ensure the ventilation window is not obstructed to reduce condensation.
- Tent Instability:
- Confirm all ground stakes are firmly inserted into the ground.
- Properly deploy and tension all wind ropes.
- Ensure the fiberglass poles are correctly assembled and fully seated in their sleeves.
- Difficulty with Pole Insertion:
- Ensure the tent fabric is fully unfolded and not twisted.
- Gently guide the poles through the sleeves, avoiding excessive force. Lubricating the pole ends slightly can help.
8. Specifications
| Feature | Detail |
|---|---|
| Brand | VEVOR |
| Model Number | BYSKU8 |
| Material | Oxford Fabric + Fiberglass Support Poles |
| Color | Black- Curved top |
| Capacity | 3-4 Bikes |
| Item Weight | 9.5 pounds |
| Dimensions (L x W x H) | 84"L x 60"W x 67.2"H (5.6 x 7 x 5 ft) |
| Floor Area | 35 square feet |
| Water Resistance Level | Waterproof (PU4000 coating) |
| Ultraviolet Light Protection | Yes (UPF 50+) |
| Frame Material | Fiberglass (9.5mm thickened) |
| Closure Type | Zipper |

Image 8.1: Dimensions and key features of the VEVOR Bike Tent.
9. Warranty Information
VEVOR products are manufactured to high-quality standards. For specific warranty details, including coverage period and terms, please refer to the warranty card included with your product or visit the official VEVOR website. Keep your purchase receipt as proof of purchase for any warranty claims.
10. Customer Support
For further assistance, technical support, or inquiries regarding your VEVOR Bike Tent, please visit the official VEVOR website or contact their customer service department. Contact information can typically be found on the product packaging or the VEVOR brand store online.


