
DURATECH DT105150
Duratech Cordless 12V Electric Polisher DT105150 User Manual
Model: DT105150 | Brand: DURATECH
Introduction
Thank you for choosing the Duratech Cordless 12V Electric Polisher. This manual provides essential information for the safe and effective operation, maintenance, and troubleshooting of your polisher. Please read it thoroughly before first use and keep it for future reference.
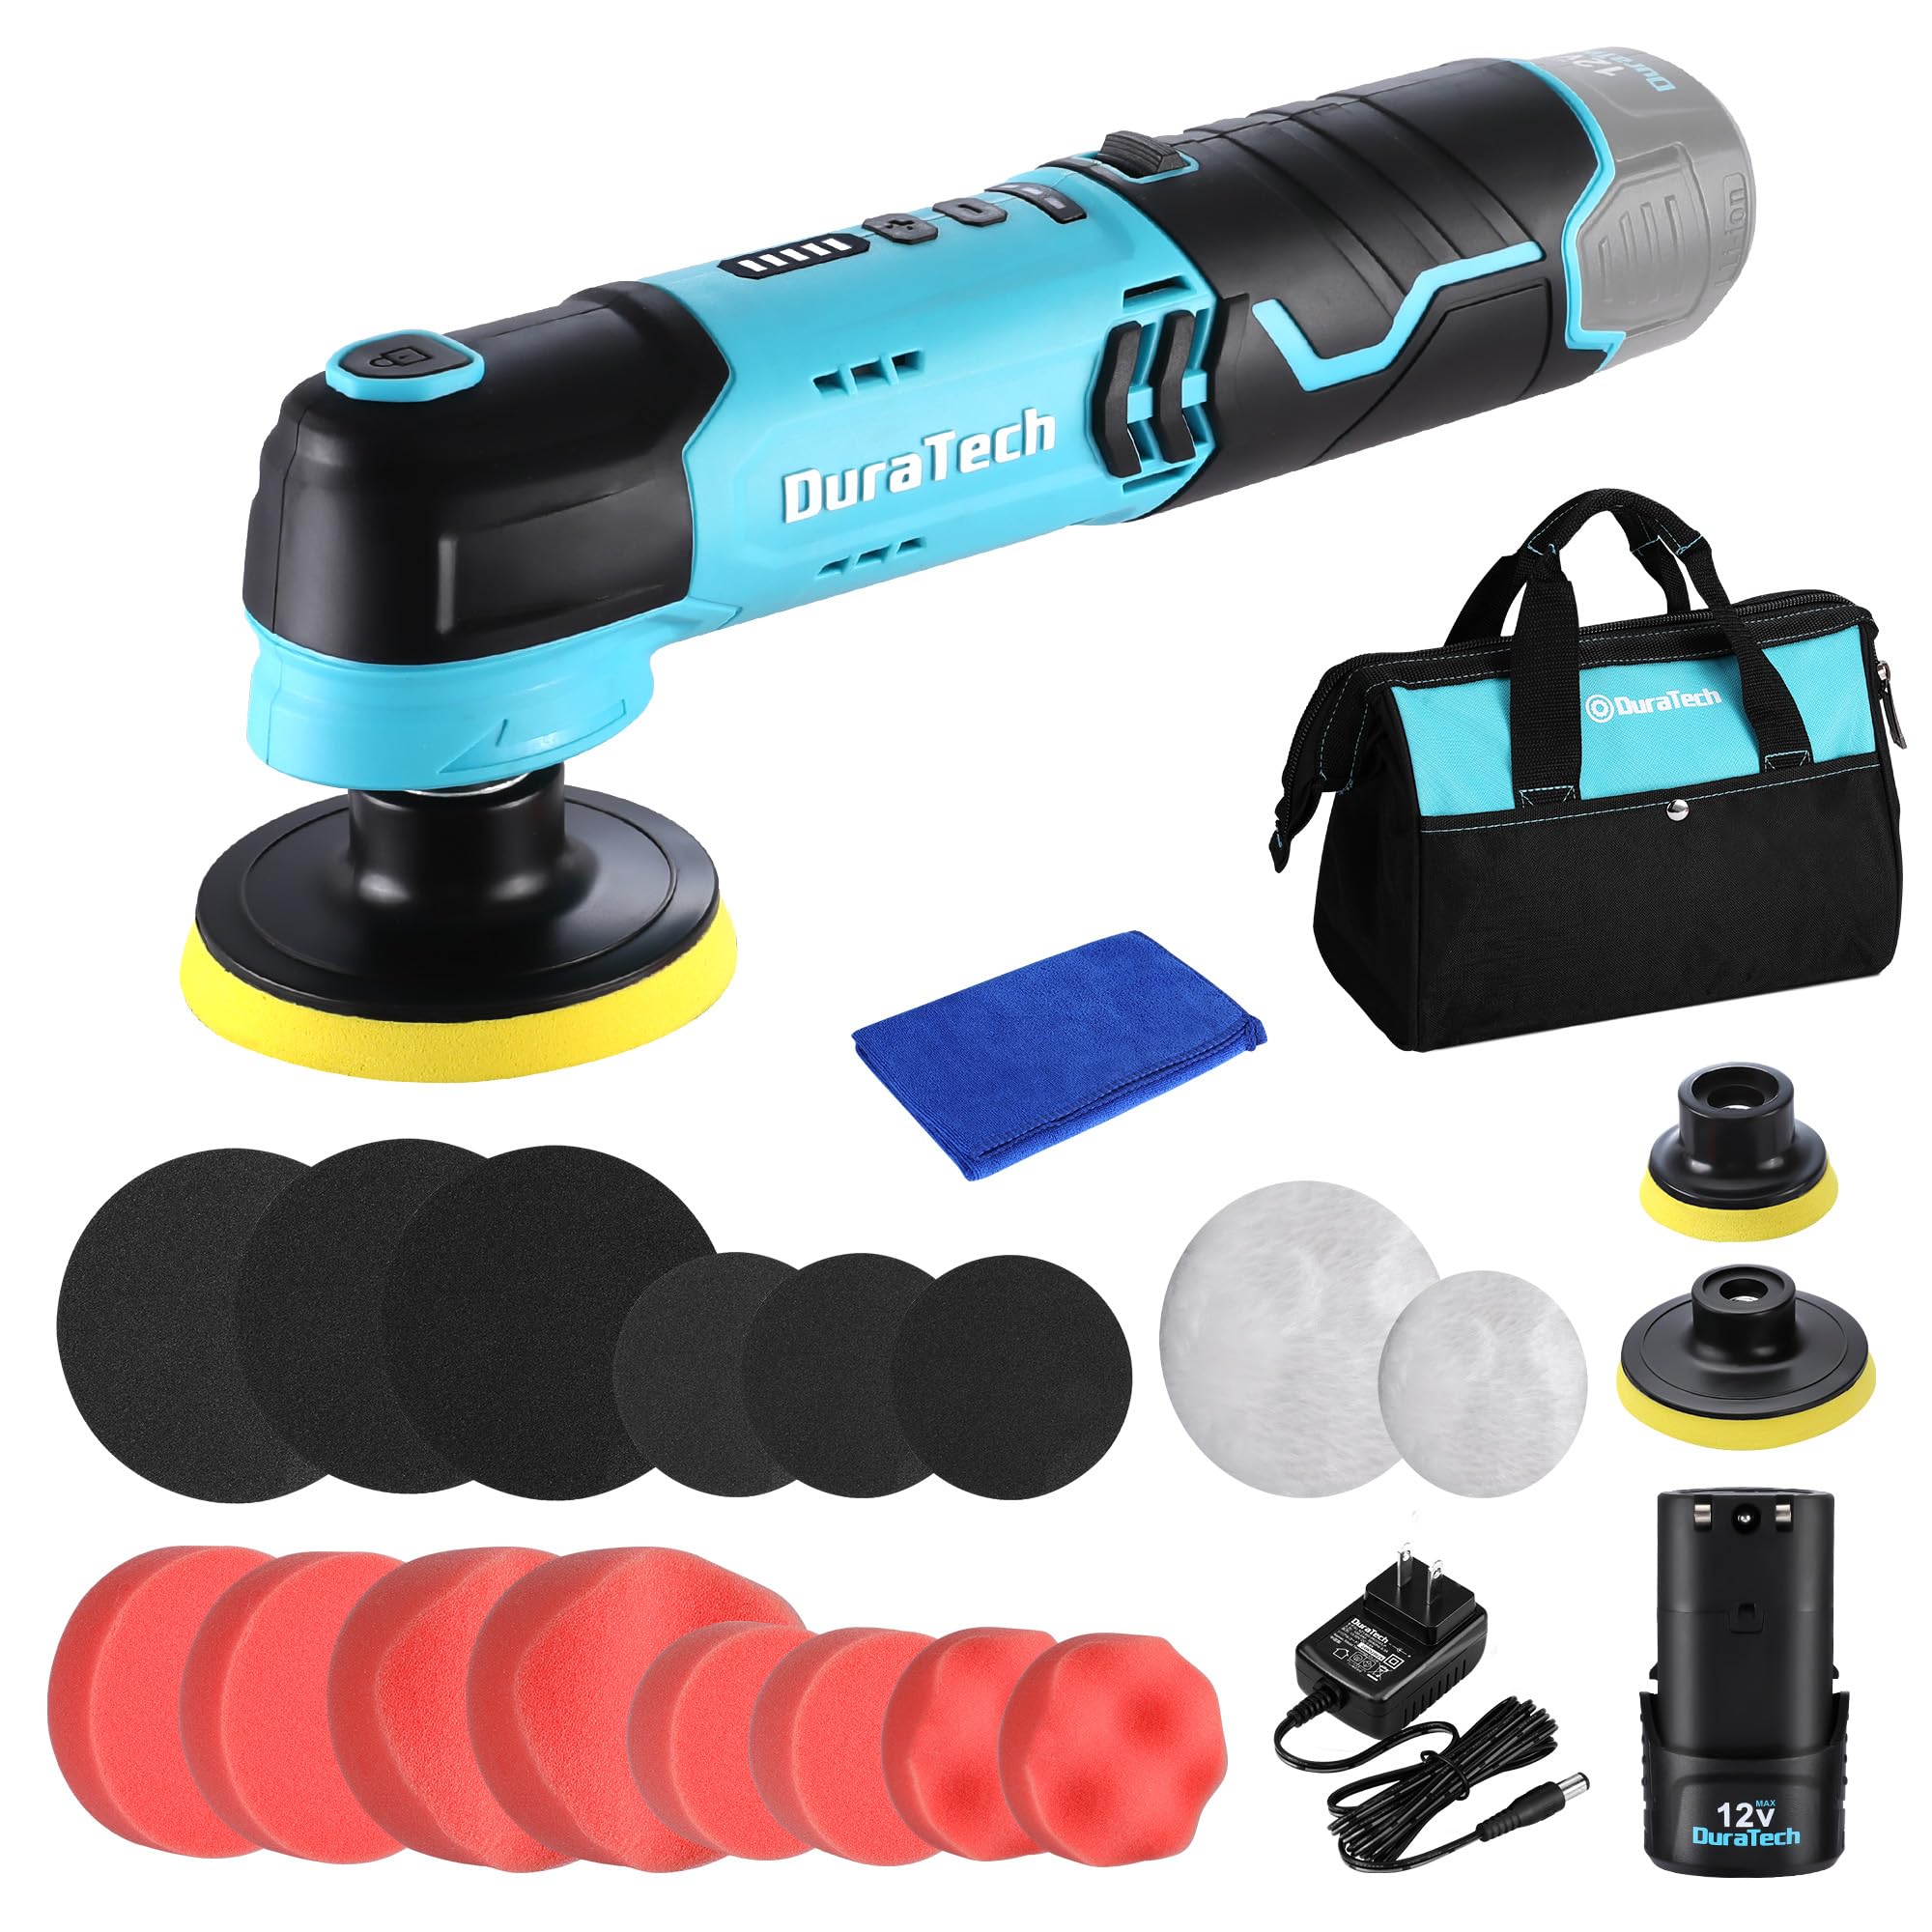
Figure 1: Duratech Cordless 12V Electric Polisher
Important Safety Instructions
Always follow basic safety precautions to reduce the risk of fire, electric shock, and personal injury when using this power tool.
General Safety
- Keep the work area clean and well-lit. Cluttered or dark areas invite accidents.
- Do not operate power tools in explosive atmospheres, such as in the presence of flammable liquids, gases, or dust. Power tools create sparks which may ignite the dust or fumes.
- Keep children and bystanders away while operating a power tool. Distractions can cause you to lose control.
- Dress properly. Do not wear loose clothing or jewelry. Keep your hair and clothing away from moving parts.
- Use safety equipment. Always wear eye protection. Dust mask, non-skid safety shoes, hard hat, or hearing protection must be used for appropriate conditions.
- Avoid accidental starting. Ensure the switch is in the off-position before inserting the battery pack.
- Do not overreach. Keep proper footing and balance at all times.
- Disconnect the battery pack from the tool before making any adjustments, changing accessories, or storing power tools.
- Store idle power tools out of the reach of children and do not allow persons unfamiliar with the power tool or these instructions to operate the power tool.
- Maintain power tools. Check for misalignment or binding of moving parts, breakage of parts, and any other condition that may affect the power tool’s operation. If damaged, have the power tool repaired before use.
Battery Safety
- Recharge only with the charger specified by the manufacturer.
- Use power tools only with specifically designated battery packs.
- When battery pack is not in use, keep it away from other metal objects.
- Under abusive conditions, liquid may be ejected from the battery; avoid contact. If contact accidentally occurs, flush with water. If liquid contacts eyes, additionally seek medical help.
- Do not use a battery pack or tool that is damaged or modified.
- Do not expose a battery pack or tool to fire or excessive temperature.

Figure 2: 1500mAh Lithium-Ion Battery with built-in safety protections against short circuit, over-temperature, over-voltage, over-load, and over-current.
Package Contents
Before use, please verify that all items listed below are included in your package:
- 1x Duratech Cordless Electric Polisher
- 1x 80mm Base Pad
- 2x 80mm Wavy Sponges
- 2x 80mm Flat Sponges
- 1x 80mm Wool Buff
- 3x 80mm Sandpapers
- 2x 50mm Wavy Sponges
- 2x 50mm Flat Sponges
- 1x 50mm Wool Buff
- 3x 50mm Sandpapers
- 1x 50mm Base Pad
- 1x Battery Pack (12V 1500mAh Lithium-Ion)
- 1x Charger
- 1x Towel (40x40cm)
- 1x Storage Bag
- 1x Instruction Manual (Japanese)

Figure 3: Overview of all included accessories and components.
Setup
1. Charging the Battery
- Ensure the battery is fully charged before first use.
- Connect the charger to a power outlet and then to the battery pack.
- The charging time is approximately 3-4 hours.
- The battery indicator lights will show the charging status.
2. Attaching Base Pads and Accessories
- The polisher comes with two base pad sizes: 50mm and 80mm. Select the appropriate size for your task.
- To attach a base pad, press the lock button on the polisher head.
- Insert the base pad onto the spindle and rotate clockwise until it is securely fastened.
- Accessories such as sponges, wool buffs, and sandpaper attach to the base pad using a hook-and-loop (magic tape) system. Simply press the accessory firmly onto the base pad.

Figure 4: Easy attachment and switching between 50mm and 80mm base pads.

Figure 5: Accessories like wavy sponges, wool buffs, sandpaper, and flat sponges attach easily via hook-and-loop.
Video 1: Demonstrates how to easily change polishing pads and adjust speed settings on a similar mini polisher.
Operating Instructions
1. Powering On and Speed Adjustment
- Insert the charged battery pack into the polisher.
- Press the power button to turn on the device.
- The polisher features 5-speed adjustment settings, ranging from 600 RPM to 3000 RPM. Use the speed adjustment buttons to select the desired rotation speed.
- An LED display indicates the current speed setting.
- The continuous operating time with a fully charged 1500mAh battery is approximately 35-40 minutes.

Figure 6: The LED display shows the selected speed setting (600 RPM to 3000 RPM).

Figure 7: Key features including cooling holes for heat dissipation, easy hook-and-loop attachment, battery level indicator, and single-action polishing for effective scratch removal.
2. Polishing Techniques and Applications
Select the appropriate accessory based on the task:
- Wavy Sponge: Ideal for waxing and wiping on flat or slightly uneven surfaces.
- Flat Sponge: Suitable for general waxing, wiping, and cleaning dirt from cars, bikes, tiles, and sinks.
- Wool Buff: Used for fine polishing and removing dirt and minor scratches from painted surfaces.
- Sandpaper: Effective for removing rust from surfaces, burrs from wood, and for chamfering.
Important Note: The motor has an overload protection device. Do not press too hard during operation. Excessive pressure may cause the pad to stop rotating. If this happens, restart the power to restore rotation.

Figure 8: Detailed guide on which accessory to use for specific polishing tasks.
Application Examples:
- Car Polishing: Use appropriate sponges for waxing and buffing to achieve a glossy finish.
- Scratch Removal: Utilize sandpaper or wool buffs for minor scratch removal.
- Household Cleaning: Effective for cleaning tiles, sinks, and polishing furniture.
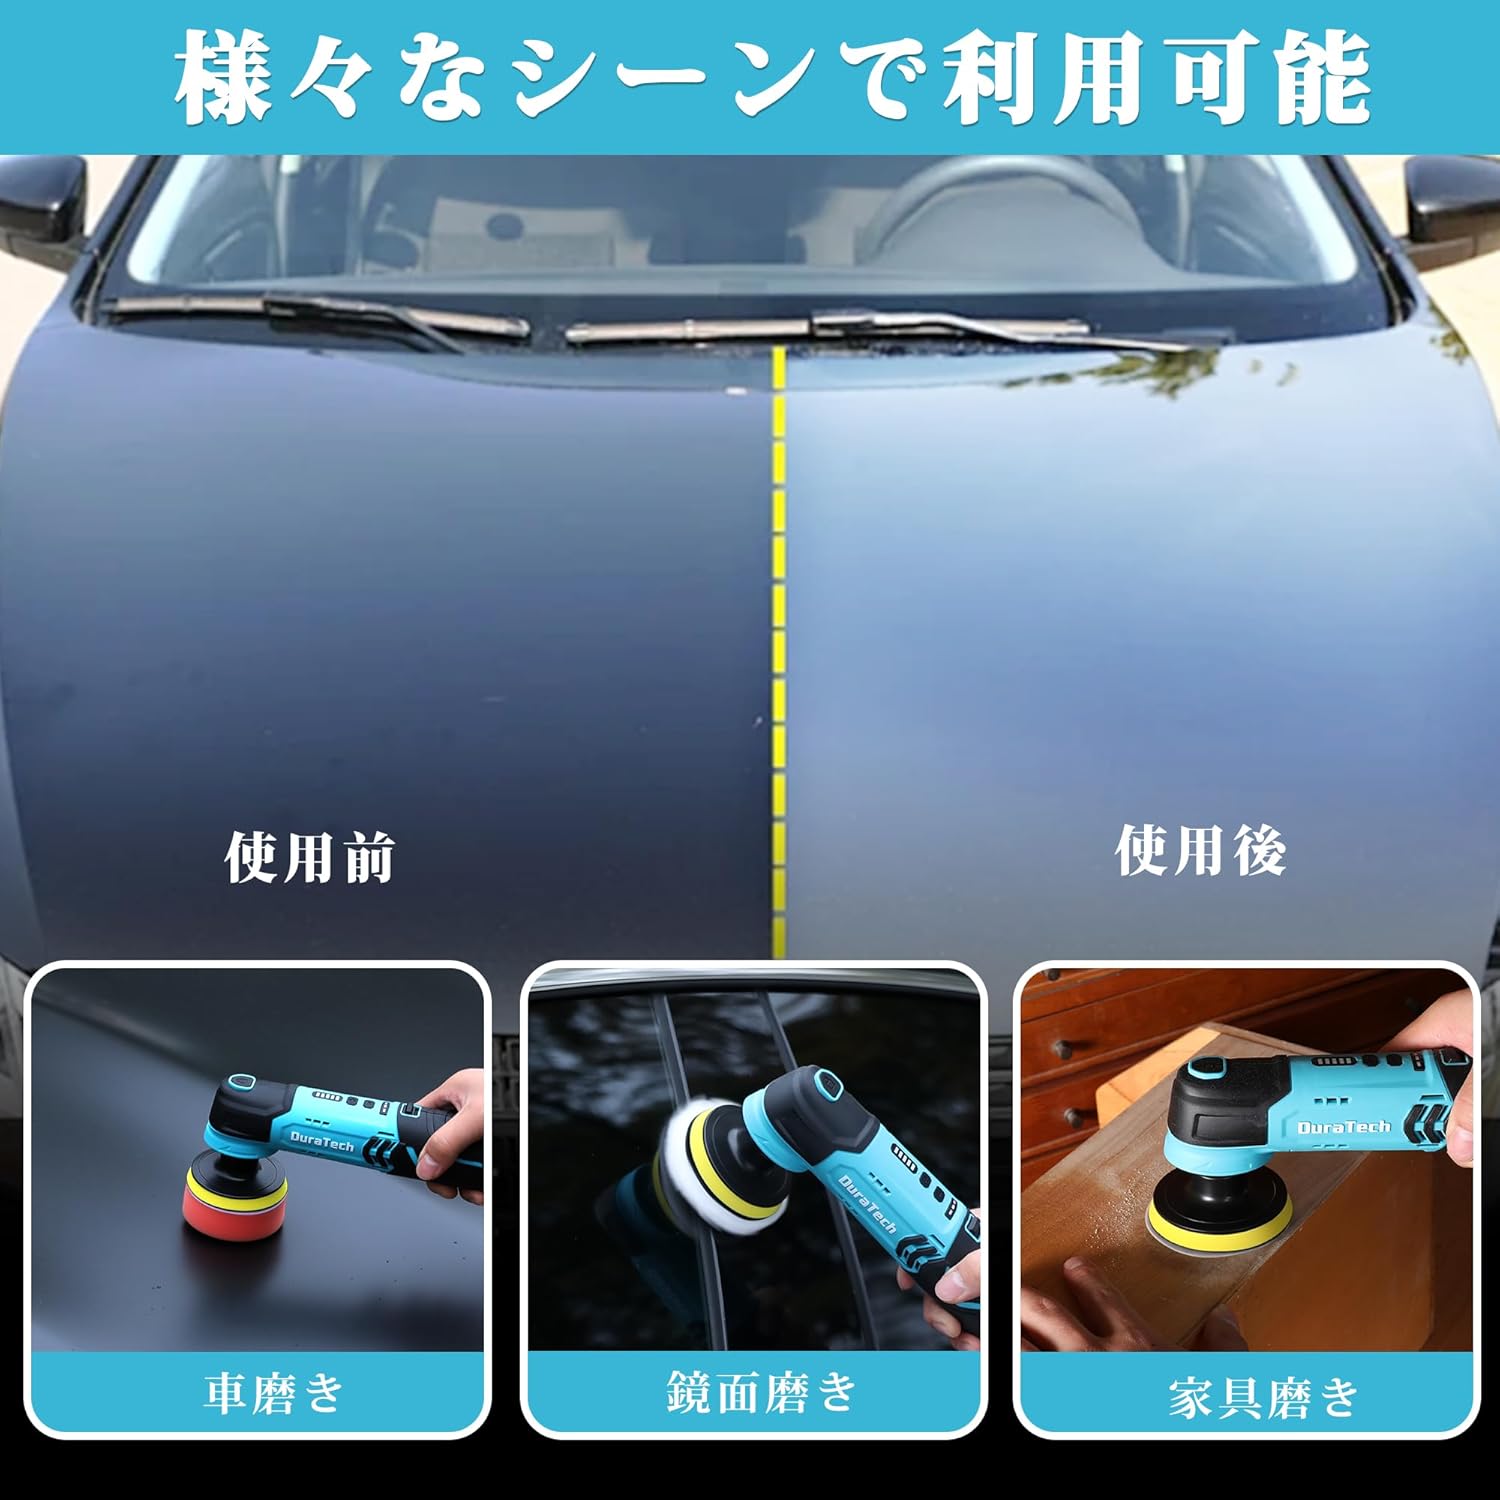
Figure 9: Examples of the polisher being used for car polishing, mirror polishing, and furniture polishing.
Video 2: Demonstrates detailed polishing of car parts like grilles and wheels using various attachments on a ZOTA mini polisher.
Video 3: Shows the polisher being used to clean a bathtub, highlighting its versatility for household tasks.
Video 4: Demonstrates the application of wax and polishing on a car surface using a similar mini polisher.
Maintenance
1. Cleaning
- Always remove the battery pack before cleaning.
- Wipe the polisher body with a clean, damp cloth. Do not use harsh chemicals or abrasive cleaners.
- Clean used pads and accessories thoroughly with water and mild soap. Allow them to dry completely before storage.
- Ensure the cooling vents are free from dust and debris to maintain optimal performance.
2. Storage
- Store the polisher and its accessories in the provided storage bag in a dry, cool place, away from direct sunlight and moisture.
- Keep out of reach of children.
- For long-term storage, it is recommended to partially charge the battery (around 50%) and recharge it every few months to prolong battery life.
Troubleshooting
| Problem | Possible Cause | Solution |
|---|---|---|
| Polisher does not turn on. | Battery not charged or not inserted correctly. | Ensure battery is fully charged and properly inserted. |
| Pad stops rotating during use. | Excessive pressure applied; motor overload protection activated. | Release pressure, turn off and restart the polisher. Apply less pressure. |
| Reduced operating time. | Battery not fully charged or battery life degrading. | Ensure full charge. If issue persists, consider replacing the battery pack. |
| Excessive vibration or noise. | Accessory not properly attached or damaged. | Check if the pad/accessory is securely attached. Replace if damaged. |
Product Specifications
| Feature | Detail |
|---|---|
| Model Number | DT105150 |
| Brand | DURATECH |
| Power Source | Battery Powered |
| Battery Type | 12V 1500mAh Lithium-Ion |
| Speed Settings | 5-stage (600-3000 RPM) |
| Continuous Operating Time | Approx. 35-40 minutes |
| Charging Time | Approx. 3-4 hours |
| Product Weight | 0.78 kg (Polisher only), 1.62 kg (Package) |
| Base Pad Sizes | 50mm, 80mm |
| Color | Black |
| UPC | 820909617860 |
Warranty and Support
For warranty information, technical support, or service inquiries, please refer to the contact information provided with your purchase or visit the official DURATECH website. Keep your purchase receipt as proof of purchase for warranty claims.
DURATECH Official Store: Visit Store
Ask a question about this manual
Ask about setup, troubleshooting, compatibility, parts, safety, or missing instructions. Manuals+ will review the question and use this page’s manual context to help answer it.