1. Introduction
This manual provides detailed instructions for the installation, operation, and maintenance of your POWLSOJX MPPT Solar Controller. Designed for 12V-48V auto-sensing solar systems, this controller maximizes energy harvest from your solar panels and ensures efficient charging for various battery types, including Li, AGM, and Gel batteries. Please read this manual thoroughly before installation and operation to ensure optimal performance and safety.
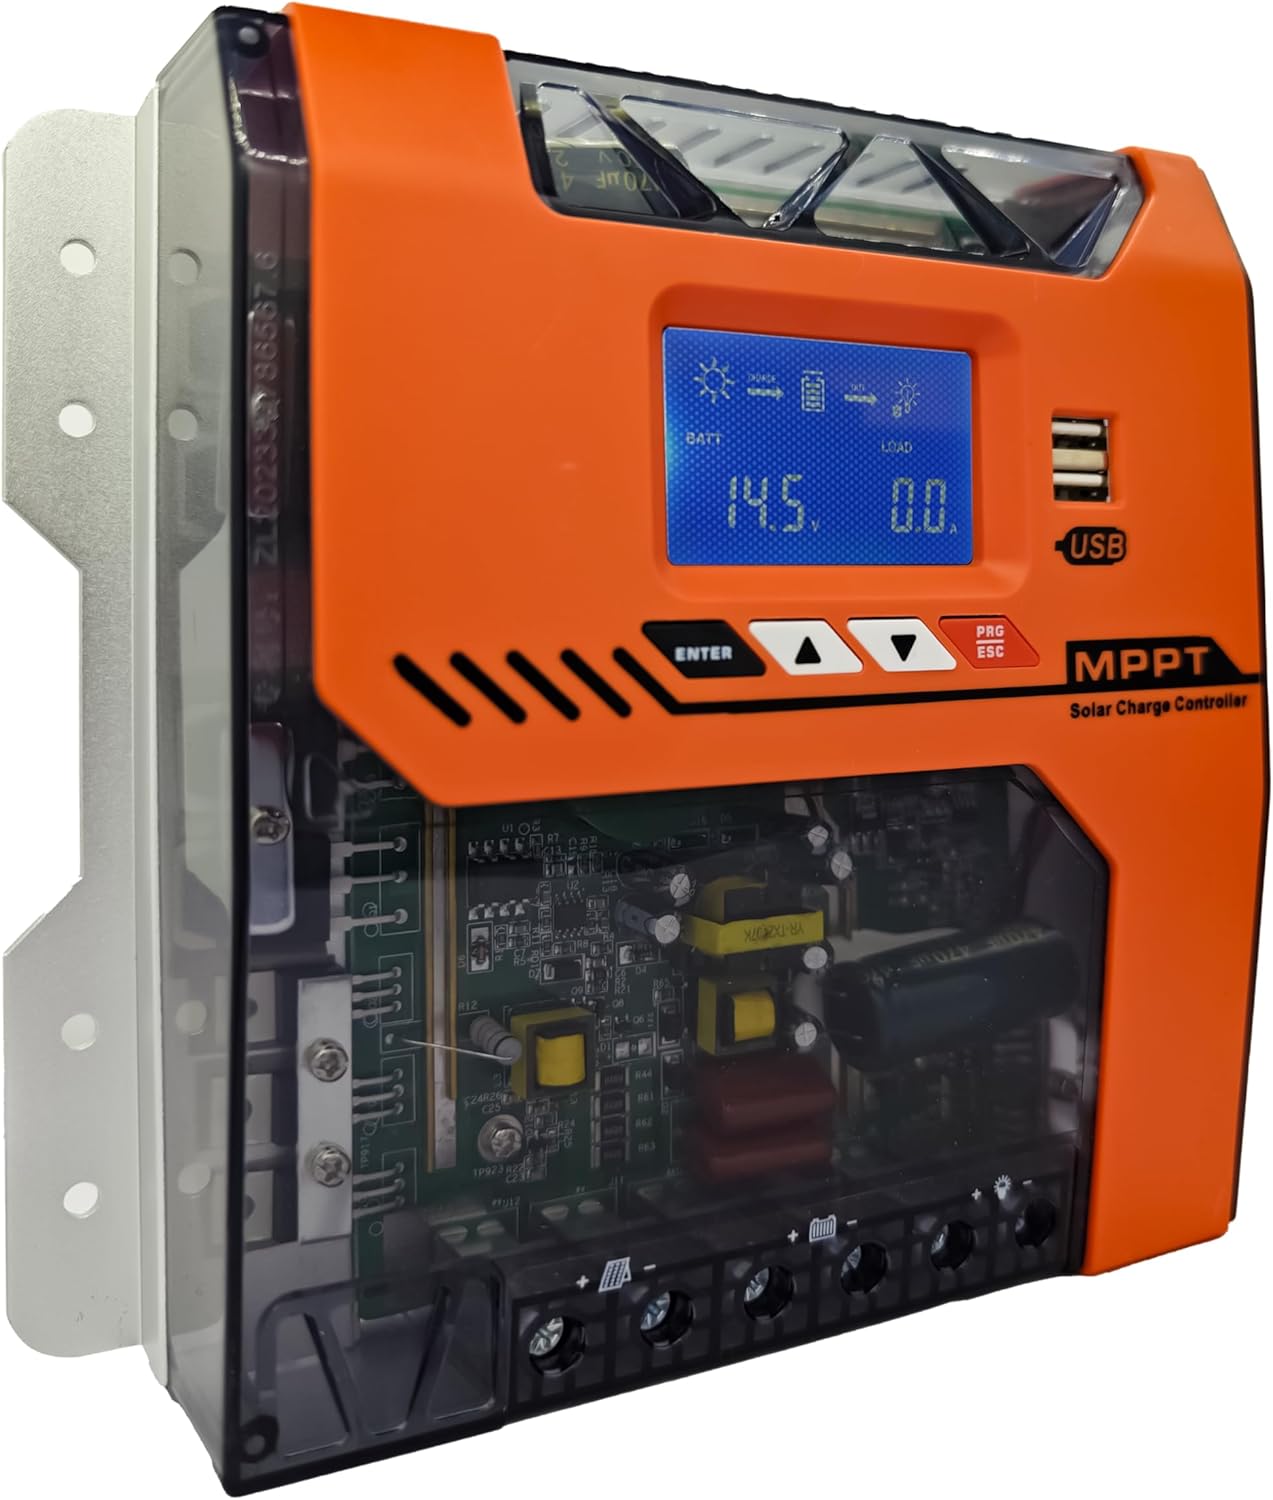
Figure 1: Front view of the POWLSOJX MPPT Solar Controller, showing the LCD display, control buttons, and USB ports.
2. Key Features
- 97% MPPT Conversion Efficiency: Utilizes true MPPT technology with a DSP chip for up to 97% energy conversion, even in low-light conditions. Continuously tracks solar panel voltage/current curves to maximize output for various applications.
- 3-Stage Smart Charging: Features Bulk-Absorption-Float Charging to extend battery lifespan for lead-acid, GEL, and lithium batteries.
- Auto-Voltage Detection: Automatically recognizes 12V, 24V, 36V, and 48V battery bank voltages without manual switching. Compatible with solar arrays from 150W to 2000W.
- Plug & Play Customization: Offers one-touch battery presets via the LCD menu for optimized charging. Allows discharge scheduling for loads and provides LED indicators for error diagnostics.
- Industrial-Grade Durability: Constructed with an aluminum alloy housing and IP32 waterproof rating, designed to withstand dust, humidity (-25℃ to +55℃), and voltage spikes. Includes an emergency disconnect sequence for safe maintenance.

Figure 2: Internal view highlighting the pure copper MPPT coils, designed for high energy output and efficient heat dissipation.
3. Setup & Installation
Follow these steps carefully to ensure correct and safe installation. The correct connection order is crucial for preventing damage to the controller and batteries.
- Connect to the Battery: First, connect the battery to the controller's battery terminals. Ensure correct polarity (positive to positive, negative to negative).
- Connect to the DC Load Terminal: Next, connect your DC loads (e.g., lights, pumps) to the controller's load terminals.
- Connect to the Solar Panel: Finally, connect the solar panels to the controller's PV input terminals. Ensure correct polarity.
Important: Always connect the battery first and disconnect the solar panel first when disassembling the system.

Figure 3: Connection diagram illustrating the correct sequence for connecting the battery, DC load, and PV panel to the solar charge controller.
4. Operating Instructions
The controller features an LCD display and intuitive buttons for monitoring and configuration.
4.1. LCD Display and Buttons
The LCD display shows real-time system parameters such as battery voltage, charging current, load status, and error codes. Use the ENTER, UP, and DOWN buttons to navigate menus and adjust settings.
4.2. Charging Modes
The controller employs a 3-stage smart charging algorithm to optimize battery health and longevity:
- Bulk Charge: Charges the battery at maximum current until it reaches the absorption voltage.
- Absorption Charge: Maintains a constant voltage while the current gradually decreases, ensuring the battery is fully charged without overcharging.
- Float Charge: Reduces the voltage to a lower level to maintain the battery at full charge, compensating for self-discharge.

Figure 4: Diagram showing the 4-stage MPPT charging process (Bulk, Constant, Float, Equalize Boost) which improves battery life and prolongs its lifecycle.
5. Protection Features
The POWLSOJX MPPT Solar Controller is equipped with multiple safeguards to protect your system and ensure safe operation:
- Overcharge Cutoff
- PV Reverse Polarity Auto-Shutdown
- Thermal Throttling (above 75℃/167℉)
- Current Limiting (prevents overloads)
- Reverse Current Protection
- Short-Circuiting Protection
- Overtemperature Protection
- Overpower Protection
- Overcharging Protection
- Overload Protection
- Over-discharging Protection
- TVS Lightning Protection
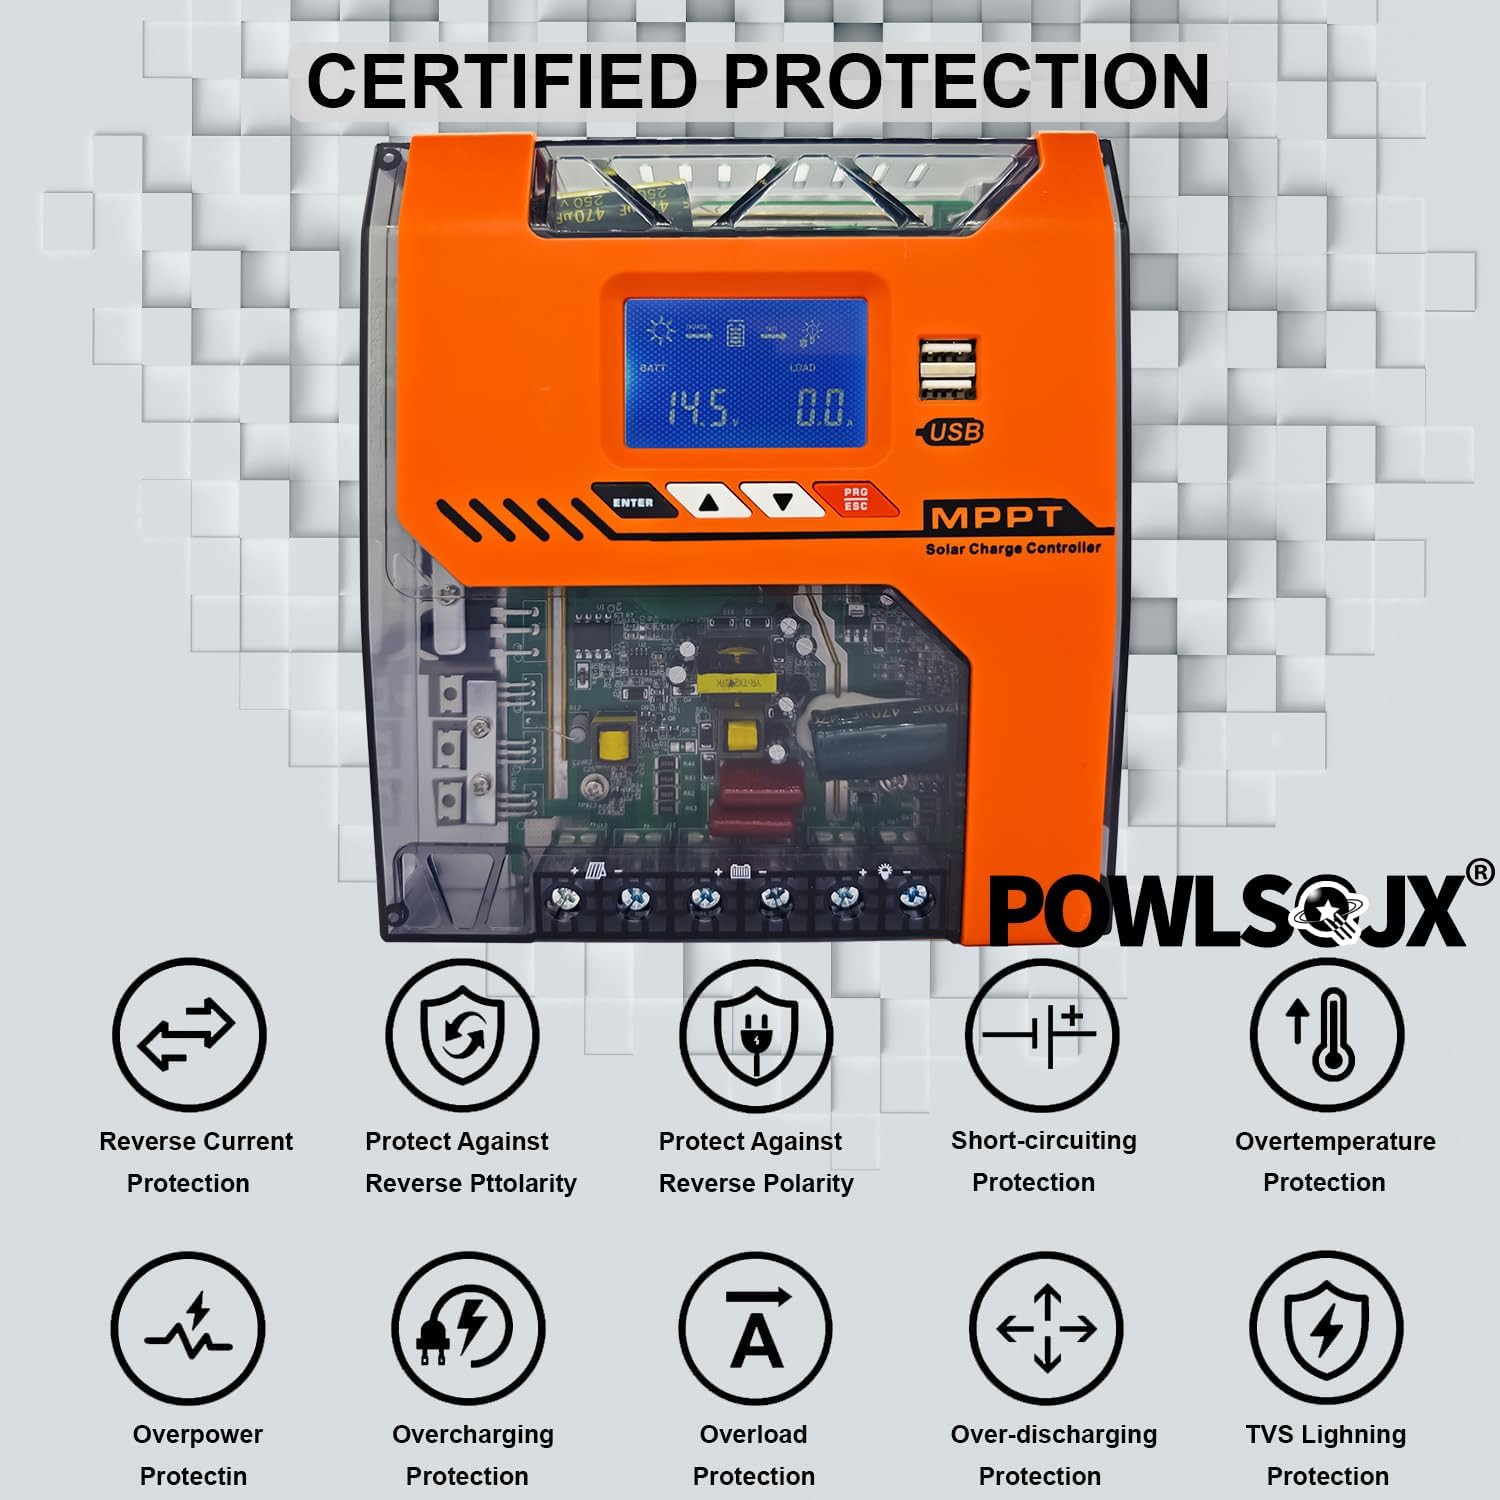
Figure 5: Visual representation of the certified protection features, including reverse current, reverse polarity, short-circuiting, and overtemperature protection.
6. Maintenance
To ensure the longevity and optimal performance of your solar charge controller, periodic maintenance is recommended:
- Clean Terminals: Periodically check and clean all connection terminals to ensure they are tight and free from corrosion.
- Inspect Wiring: Verify that all wiring is intact and not damaged. Replace any frayed or damaged cables immediately.
- Ventilation: Ensure the controller's ventilation openings are clear of dust and debris to allow for proper heat dissipation.
- Environmental Check: Confirm the installation environment remains within the specified temperature and humidity ranges.
7. Troubleshooting
Most issues can be resolved by checking the installation order and parameter settings. Refer to the following common problems and solutions:
7.1. Frequently Asked Questions
- Problem: Controller not functioning or unexpected behavior.
Solution: Most problems are mainly caused by an incorrect installation order. Please ensure your installation order is correct: 1. Connect to the battery → 2. Connect to the DC load terminal → 3. Connect to the solar panel. - Problem: Cannot save data or battery damage.
Solution: After setting parameters, press the leftmost black save button to confirm and save your settings.
8. Specifications
| Specification | Value |
|---|---|
| Brand | POWLSOJX |
| Model Number | TN |
| Item Weight | 2.5 Pounds |
| Product Dimensions | 9.25"L x 2.75"W x 8.26"H |
| Display Type | LCD |
| Voltage | 48 Volts (Auto-sensing 12V/24V/36V/48V) |
| Material | Metal, Plastic |
| Charging Port Type | USB |
| Included Components | Solar Charge Controller |
| Batteries Required | Yes |
| UPC | 085353091547 |
9. Warranty & Support
For warranty information and technical support, please refer to the product packaging or contact POWLSOJX customer service directly. Keep your purchase receipt for warranty claims.


