
AYWHP B0DYXHSC8F
AYWHP 4-Channel 18650 Battery Capacity and Resistance Tester User Manual
Model: B0DYXHSC8F
1. Introduction
The AYWHP 4-Channel 18650 Battery Capacity and Resistance Tester is a precision instrument designed for evaluating the performance of 18650 lithium-ion batteries. It accurately measures battery capacity (mAh), internal resistance (mΩ), and accumulated energy (mWh) through charge and discharge cycles. Featuring four independent channels, it allows simultaneous testing of multiple batteries without interference. The integrated high-definition LCD provides real-time data display, making it suitable for laboratories, repair shops, and DIY enthusiasts.
2. Safety Information
- Power Supply: Use only a DC5V external power supply via the Type-C interfaces. Ensure the power adapter can provide at least 2A per channel for optimal performance.
- Battery Compatibility: This tester is designed for 18650 lithium-ion batteries with a discharge stop voltage range of 2.5V to 3.5V and a charge voltage of 4.2V. It is not suitable for LiFePO4 (lithium iron phosphate) batteries.
- Polarity: Always observe correct battery polarity when inserting batteries into the holders. Incorrect polarity can damage the device and the battery.
- Ventilation: Ensure adequate ventilation around the device during operation, especially during discharge cycles, as the cooling fan will be active.
- Damaged Batteries: Do not test visibly damaged, leaking, or swollen batteries.
- Short Circuits: Avoid short-circuiting the battery terminals or external test points.
- Environmental Conditions: Operate the device in a dry, well-ventilated area, away from flammable materials and direct sunlight.
3. Package Contents
Please check the package for the following items:
- 1 x AYWHP 4-Channel 18650 Battery Capacity and Resistance Tester
Note: USB-C power cables and power adapters are not included and must be supplied by the user.
4. Product Overview
4.1 Device Dimensions
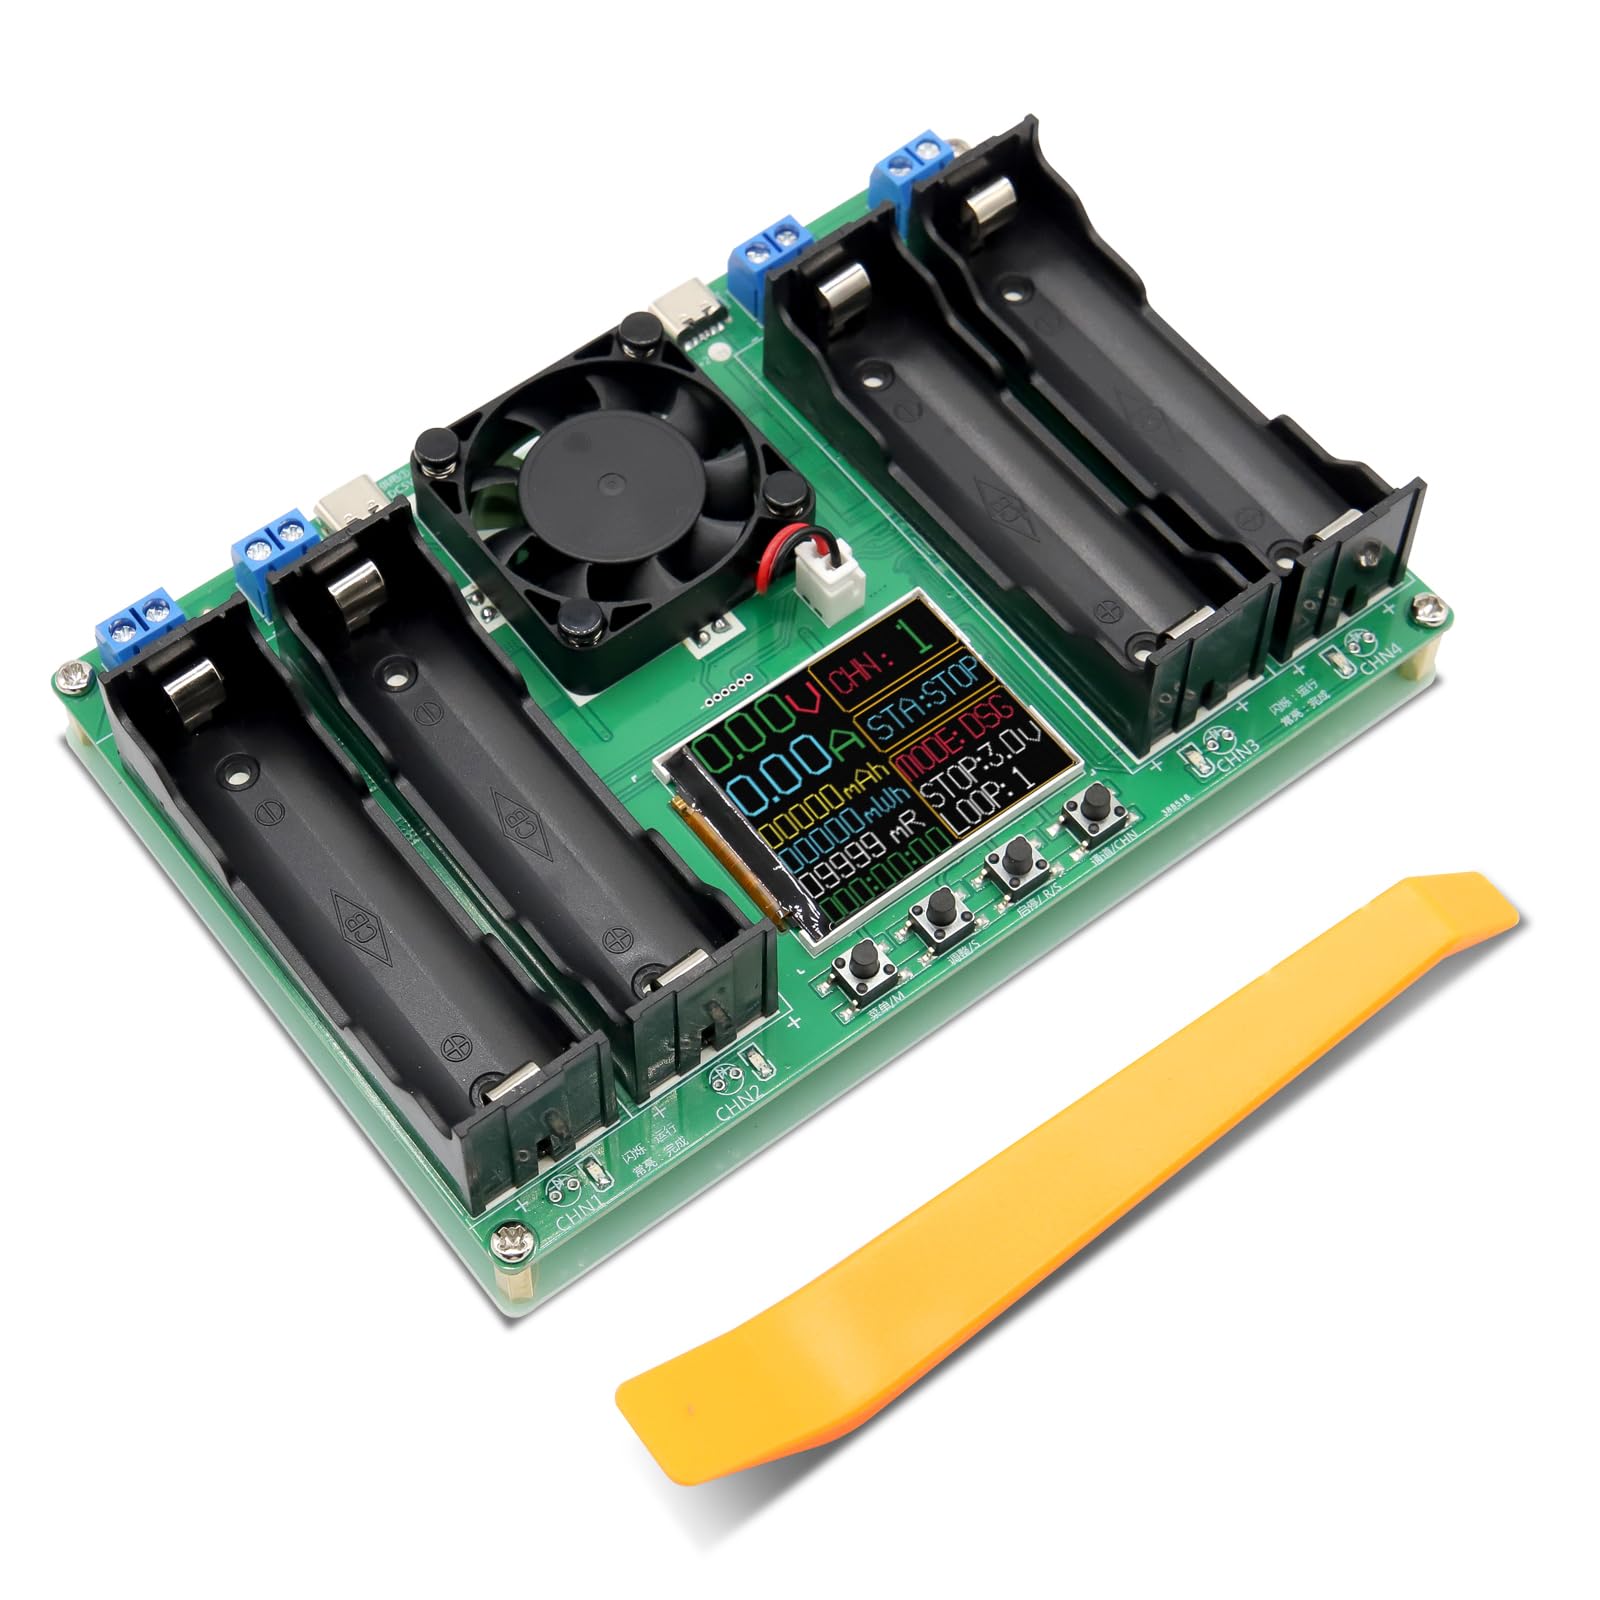
Image: Overall dimensions of the 4-Channel 18650 Battery Capacity Tester. The device measures approximately 149mm (5.86 inches) in length, 110mm (4.33 inches) in width, and 35mm (1.37 inches) in height.
4.2 Component Identification

Image: Detailed view of the tester with key components labeled. This includes Type-C 5V power supply interfaces (1, 2), 18650 battery holders (3, 4, 5, 6), external terminals (7, 8, 9, 10), cooling fan (11), LCD display (12), and control buttons (13-16). Status indicators (17-20) show the activity of each channel.
- 1/2: Type-C 5V Power Supply Interface: Connect external DC5V power. Each interface powers two channels.
- 3-6: 18650 Channel Battery Holder: Slots for inserting 18650 batteries.
- 7-10: Channel External Terminal: Screw terminals for connecting batteries externally, useful for custom setups or other battery types (within voltage limits).
- 11: Cooling Fan: Activates during discharge to dissipate heat.
- 12: Display: LCD screen showing real-time test data and settings.
- 13: Menu/M Button: Used to navigate menus or select modes.
- 14: Adjustment/S Button: Used to adjust parameters or settings.
- 15: Start/Stop/R/S Button: Initiates or terminates a test process.
- 16: Channel/CHN Button: Switches between the four independent channels.
- 17-20: Channel Status Indicators: LEDs indicating the active status of each channel.
4.3 Display Interface

Image: The LCD display showing various real-time data points during a test. These include real-time voltage, real-time current, cumulative capacity (mAh), accumulated energy (mWh), internal resistance (mR), accumulated running time, cycle times, stop discharge voltage, mode menu, status indication, and channel indication.
- 1: Real-time voltage (V): Current voltage of the battery.
- 2: Real-time current (A): Current flowing into or out of the battery.
- 3: Cumulative Capacity (mAh): Total capacity measured during discharge.
- 4: Accumulated Energy (mWh): Total energy measured during discharge.
- 5: Internal Resistance (mR): Measured internal resistance of the battery.
- 6: Accumulated Running Time (h:m:s): Duration of the current test.
- 7: Cycle times (LOOP): Current cycle number in Auto mode.
- 8: Stop Discharge Voltage (STOP): The voltage at which discharge will terminate.
- 9: Mode menu (MODE): Indicates the current operating mode (CHG, DSG, AUTO).
- 10: Status Indication (STA): Shows the current status (e.g., STOP, RUN).
- 11: Channel Indication (CHN): Displays the currently selected channel (1-4).
5. Setup
- Connect Power: Connect two Type-C 5V power adapters to the power supply interfaces (1 and 2). Ensure each adapter provides sufficient current (e.g., 2A) for stable operation.
- Set Language (if necessary): If the display is in Chinese, press and hold the Menu/M button (13) while connecting the power supply. Continue holding until the device powers on and the language switches to English. This setting may need to be repeated if the device is fully powered off.
- Insert Batteries: Carefully insert 18650 batteries into the battery holders (3-6), observing the correct polarity (+ and - markings). Alternatively, connect batteries to the external terminals (7-10) if using custom setups.
6. Operating Instructions
6.1 Channel Selection
Press the Channel/CHN button (16) to cycle through channels 1, 2, 3, and 4. The display will show "CHN: X" to indicate the currently selected channel.
6.2 Mode Selection
With a channel selected, press the Menu/M button (13) to cycle through the available operating modes:
- CHG (Charge): The tester will charge the battery at approximately 1A until it reaches 4.2V, then automatically stop.
- DSG (Discharge): The tester will discharge the battery at approximately 1A until it reaches the set stop discharge voltage. During this process, the cumulative capacity (mAh) and accumulated energy (mWh) are measured.
- AUTO (Automatic Charge-Discharge-Charge): This mode performs a full cycle: charges the battery, then discharges it to measure capacity, and finally recharges it. This mode is ideal for comprehensive battery evaluation.
Note: The CHG and AUTO modes are not suitable for LiFePO4 batteries.
6.3 Parameter Adjustment

Image: The tester's display indicating that channels are independent, an 'ERROR' status for over-temperature protection, the 11 adjustable stop discharge voltage options (2.5V to 3.5V), and the 1-9 cycle settings for auto mode.
- Stop Discharge Voltage: In DSG or AUTO mode, after selecting the mode, press the Adjustment/S button (14) to highlight the "STOP: X.XV" parameter. Use the Adjustment/S button (14) again to cycle through the 11 available stop discharge voltages (2.5V, 2.6V, 2.7V, 2.8V, 2.9V, 3.0V, 3.1V, 3.2V, 3.3V, 3.4V, 3.5V).
- Cycle Count (AUTO mode only): In AUTO mode, after selecting the mode, press the Adjustment/S button (14) to highlight the "LOOP: X" parameter. Use the Adjustment/S button (14) again to set the number of cycles from 1 to 9.
6.4 Starting and Stopping a Test
Once the desired mode and parameters are set for a channel, press the Start/Stop/R/S button (15) to begin the test. The "STA" indicator on the display will change from "STOP" to "RUN". To stop an ongoing test, press the Start/Stop/R/S button (15) again.
6.5 Internal Resistance Measurement
The device supports internal resistance measurement using a two-wire DC method. This value is displayed in real-time as "mR" on the screen.
6.6 Independent Channel Operation
Each of the four channels operates independently. You can set different modes and parameters for each channel and start/stop them individually without affecting other channels.
7. Maintenance
- Cleaning: Use a soft, dry cloth to clean the device. Do not use liquid cleaners or solvents.
- Storage: Store the tester in a cool, dry place away from direct sunlight and extreme temperatures.
- Fan Maintenance: Ensure the cooling fan (11) is free from dust and obstructions to maintain proper heat dissipation.
8. Troubleshooting
| Problem | Possible Cause | Solution |
|---|---|---|
| Display shows Chinese characters. | Default language setting. | Press and hold the Menu/M button (13) while connecting power. Keep holding until the device powers on and the language switches to English. |
| Tester does not power on. | No power or insufficient power supply. | Ensure two Type-C 5V power adapters are correctly connected. Verify power adapters provide at least 2A each. Avoid using fast-charging adapters that may not provide a stable 5V output. |
| "STATUS: ERROR" displayed. | Over-temperature protection activated or battery fault. | Check if the cooling fan is obstructed. Ensure the ambient temperature is not too high. Remove and re-insert the battery. If the error persists, the battery may be faulty. |
| Inaccurate capacity/resistance readings. | Poor battery contact, incorrect settings, or faulty battery. | Ensure batteries are securely inserted with correct polarity. Verify the stop discharge voltage setting. Test with a known good battery for comparison. |
| Test process is very slow. | Large battery capacity or full charge/discharge cycle. | A full charge-discharge-charge cycle for high-capacity batteries (e.g., 3000mAh) can take 11 hours. To speed up capacity measurement, pre-charge batteries externally before starting a discharge (DSG) cycle. |
9. Specifications
- Working Power Supply: External DC5V (via dual Type-C interfaces)
- Applicable Batteries: 18650 Lithium-ion batteries (Discharge stop voltage 2.5V ~ 3.5V, Charge voltage 4.2V)
- Test Channels: 4 independent channels
- Internal Resistance Measurement: Supported (Two-wire DC method)
- Charge Function: Max. 1A per channel, auto-stop at 4.2V (Not for LiFePO4)
- Discharge Function: Max. 1A per channel, auto-stop at set voltage
- Automatic Mode: Charge > Discharge > Charge cycle (Not for LiFePO4)
- Cyclic Charge/Discharge: 1-9 cycles adjustable (in Auto mode)
- Discharge Stop Voltage: 2.5V, 2.6V, 2.7V, 2.8V, 2.9V, 3.0V, 3.1V, 3.2V, 3.3V, 3.4V, 3.5V (11 adjustable levels)
- Dimensions: Approximately 150 mm x 103 mm x 36 mm
- Weight: Approximately 200g
- Safety Standards: UL 61010-1, IEC 61010-2-030, CE Marked, RoHS Compliant
10. Warranty and Support
For any questions, technical assistance, or warranty claims, please contact the seller or manufacturer directly through your purchase platform. Please provide your order number and a detailed description of the issue for prompt support.
Ask a question about this manual
Ask about setup, troubleshooting, compatibility, parts, safety, or missing instructions. Manuals+ will review the question and use this page’s manual context to help answer it.