
1. Introduction
This manual provides detailed instructions for the safe and effective operation of your Walfront 1000A AC/DC Clamp Multimeter. Please read this manual thoroughly before use and retain it for future reference. This device is designed for measuring AC and DC current, voltage, resistance, frequency, and features Non-Contact Voltage (NCV) detection.
2. Product Overview
2.1 Key Features
- 1000A High Current Measurement: Capable of measuring up to 1000A AC and DC current without stripping wires, suitable for various single-core wires.
- Sensing Clamp: The jaw opens up to 28mm (1.1 inches) for clamping single-strand wires, ensuring accurate and real-time AC current measurement.
- NCV Non-Contacting Induction: Detects nearby AC current with screen display, flashing LED red light, and an audible alarm.
- LCD and Flashlight: Features an LCD HD backlight and a flashlight for clear readings in dark environments.
- Low Power Consumption: Powered by 2 x 1.5V AAA batteries (not included) with an automatic shut-off function after 15 minutes of inactivity.
2.2 Package Contents
Verify that all items listed below are present and in good condition upon unpacking:
- 1 x Walfront Clamp Multimeter
- 2 x Test Pens (Red and Black)
- 1 x Temperature Line
- 1 x User Manual (This document)
- 1 x Carrying Case

Image: The Walfront 1000A AC/DC Clamp Multimeter shown with its included accessories: test leads, temperature probe, and a protective carrying case.

Image: A clear front view of the Walfront 1000A AC/DC Clamp Multimeter, displaying its clamp jaw, rotary dial, LCD screen, and input terminals.
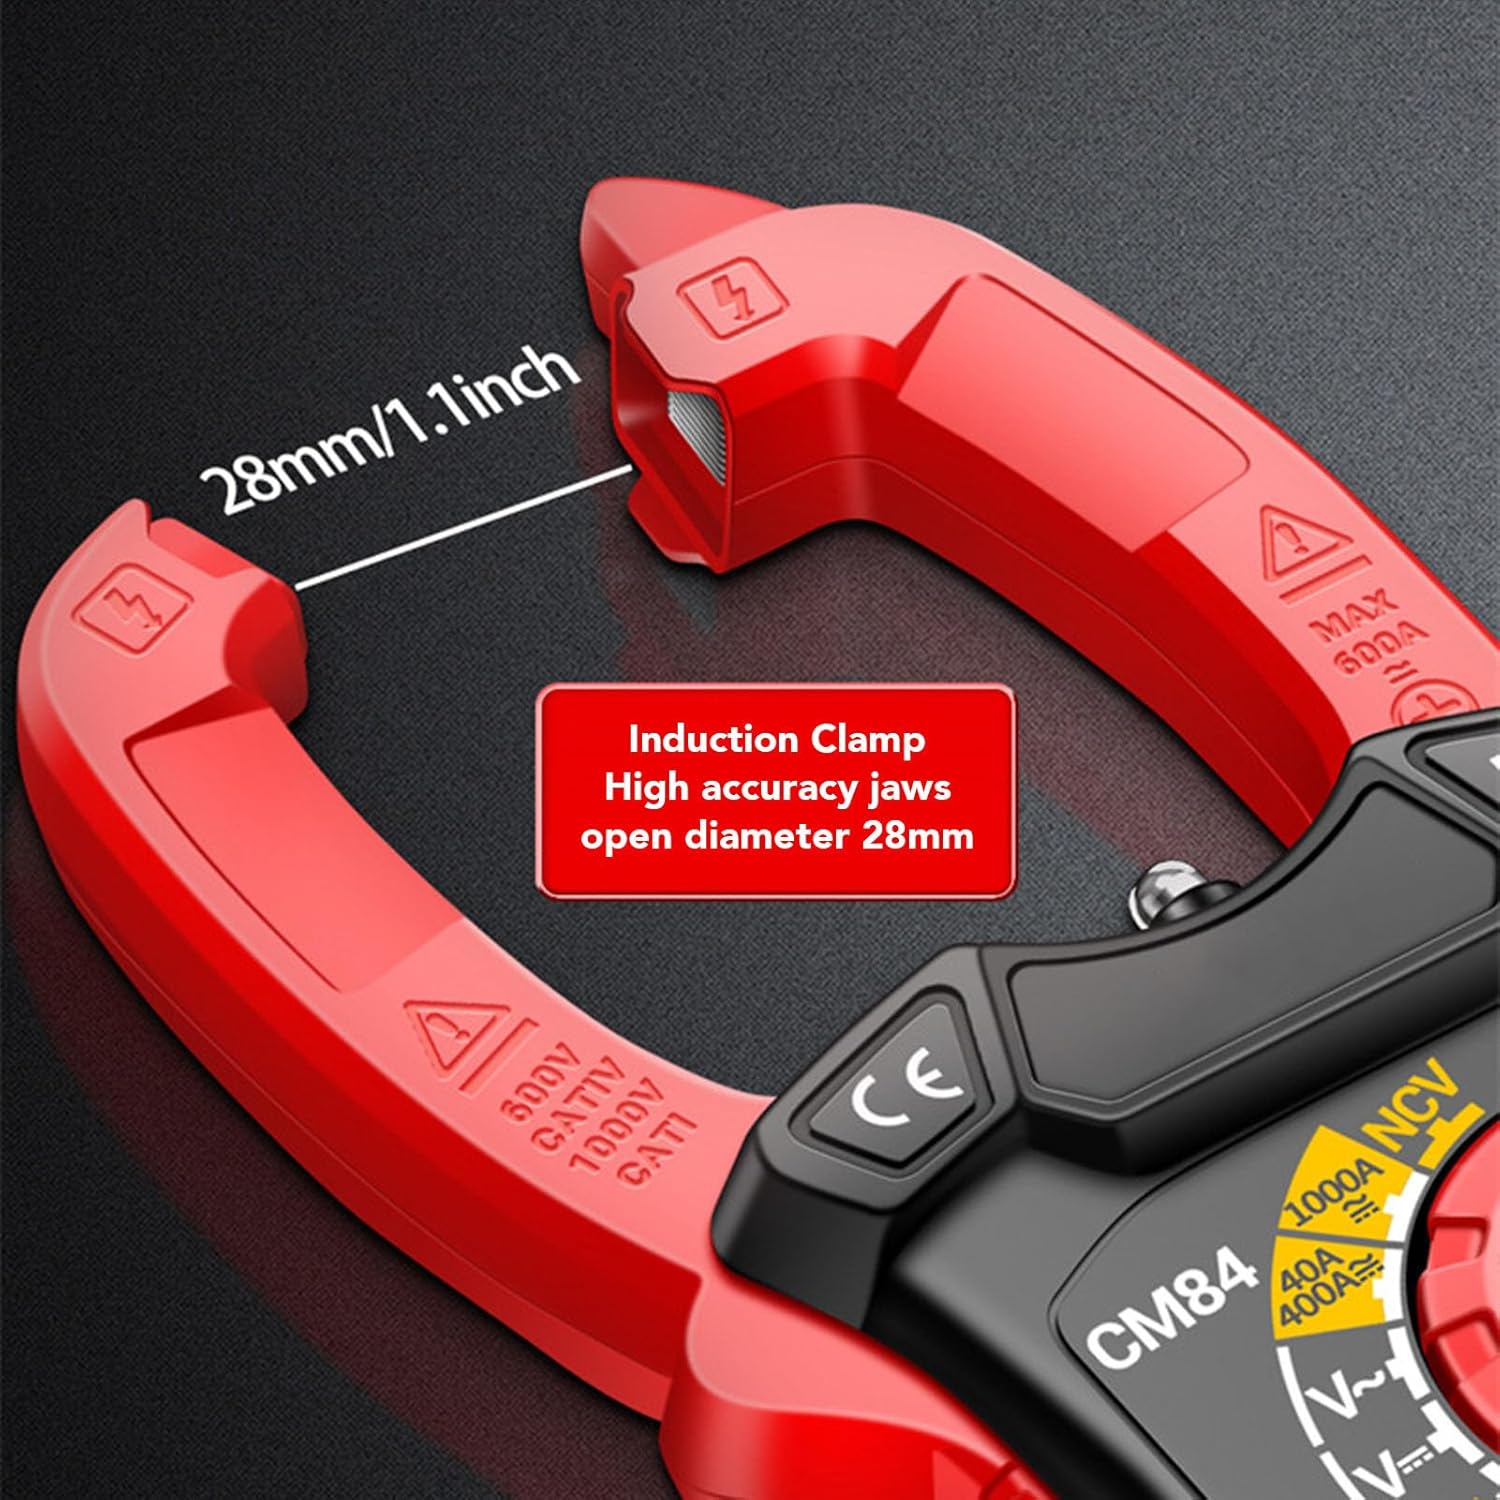
Image: A close-up view highlighting the induction clamp jaw, demonstrating its 28mm (1.1 inch) maximum opening diameter for accommodating various wire sizes.
3. Safety Information
WARNING: To avoid electric shock or personal injury, read and understand all safety information before using this product.
- Always ensure the multimeter is in the correct function mode before making measurements.
- Do not measure voltages or currents exceeding the specified maximum limits.
- Inspect test leads for damage before each use. Do not use if insulation is compromised.
- Do not operate the multimeter if it appears damaged or if the case is open.
- Exercise extreme caution when working with live circuits.
- Keep fingers behind the finger guards on the test probes.
- Replace batteries immediately when the low battery indicator appears to ensure accurate readings.
4. Setup
4.1 Battery Installation
- Locate the battery compartment cover on the back of the multimeter.
- Use a screwdriver to open the battery compartment.
- Insert two 1.5V AAA batteries, ensuring correct polarity (+ and -).
- Replace the battery compartment cover and secure it with the screw.
4.2 Powering On
To power on the device, rotate the central rotary dial from the "OFF" position to any desired measurement function. The LCD screen will illuminate.
5. Operating Instructions
5.1 AC/DC Current Measurement (Clamp Function)
- Rotate the dial to the "1000A AC/DC" current measurement range (e.g., 40A, 400A, 1000A).
- Press the clamp trigger to open the jaw.
- Place the single conductor wire to be measured within the clamp jaw. Ensure the jaw is fully closed around the wire.
- Read the current value displayed on the LCD screen.

Image: A hand holding the clamp multimeter, with its jaw clamped around a single electrical wire to measure current.

Image: The clamp multimeter being used to measure current on wiring inside an electrical distribution panel.
5.2 NCV (Non-Contact Voltage) Detection
- Rotate the dial to the "NCV" position.
- Bring the top part of the multimeter (where the NCV sensor is located) close to the AC voltage source or wire.
- If AC voltage is detected, the screen will display an indication, the red LED light will flash, and an audible alarm will sound.

Image: The clamp multimeter performing Non-Contact Voltage (NCV) detection near an electrical outlet, with visual and audible indicators shown.
5.3 Other Measurement Functions
The multimeter supports various other measurements. Rotate the dial to the corresponding function:
- Voltage (V~ / V=): Measure AC or DC voltage using the test leads. Insert the red test lead into the VΩHz terminal and the black test lead into the COM terminal.
- Resistance (Ω): Measure resistance using the test leads.
- Frequency (Hz): Measure frequency using the test leads.
- Continuity: Check for circuit continuity.
- Diode Test: Test diodes.
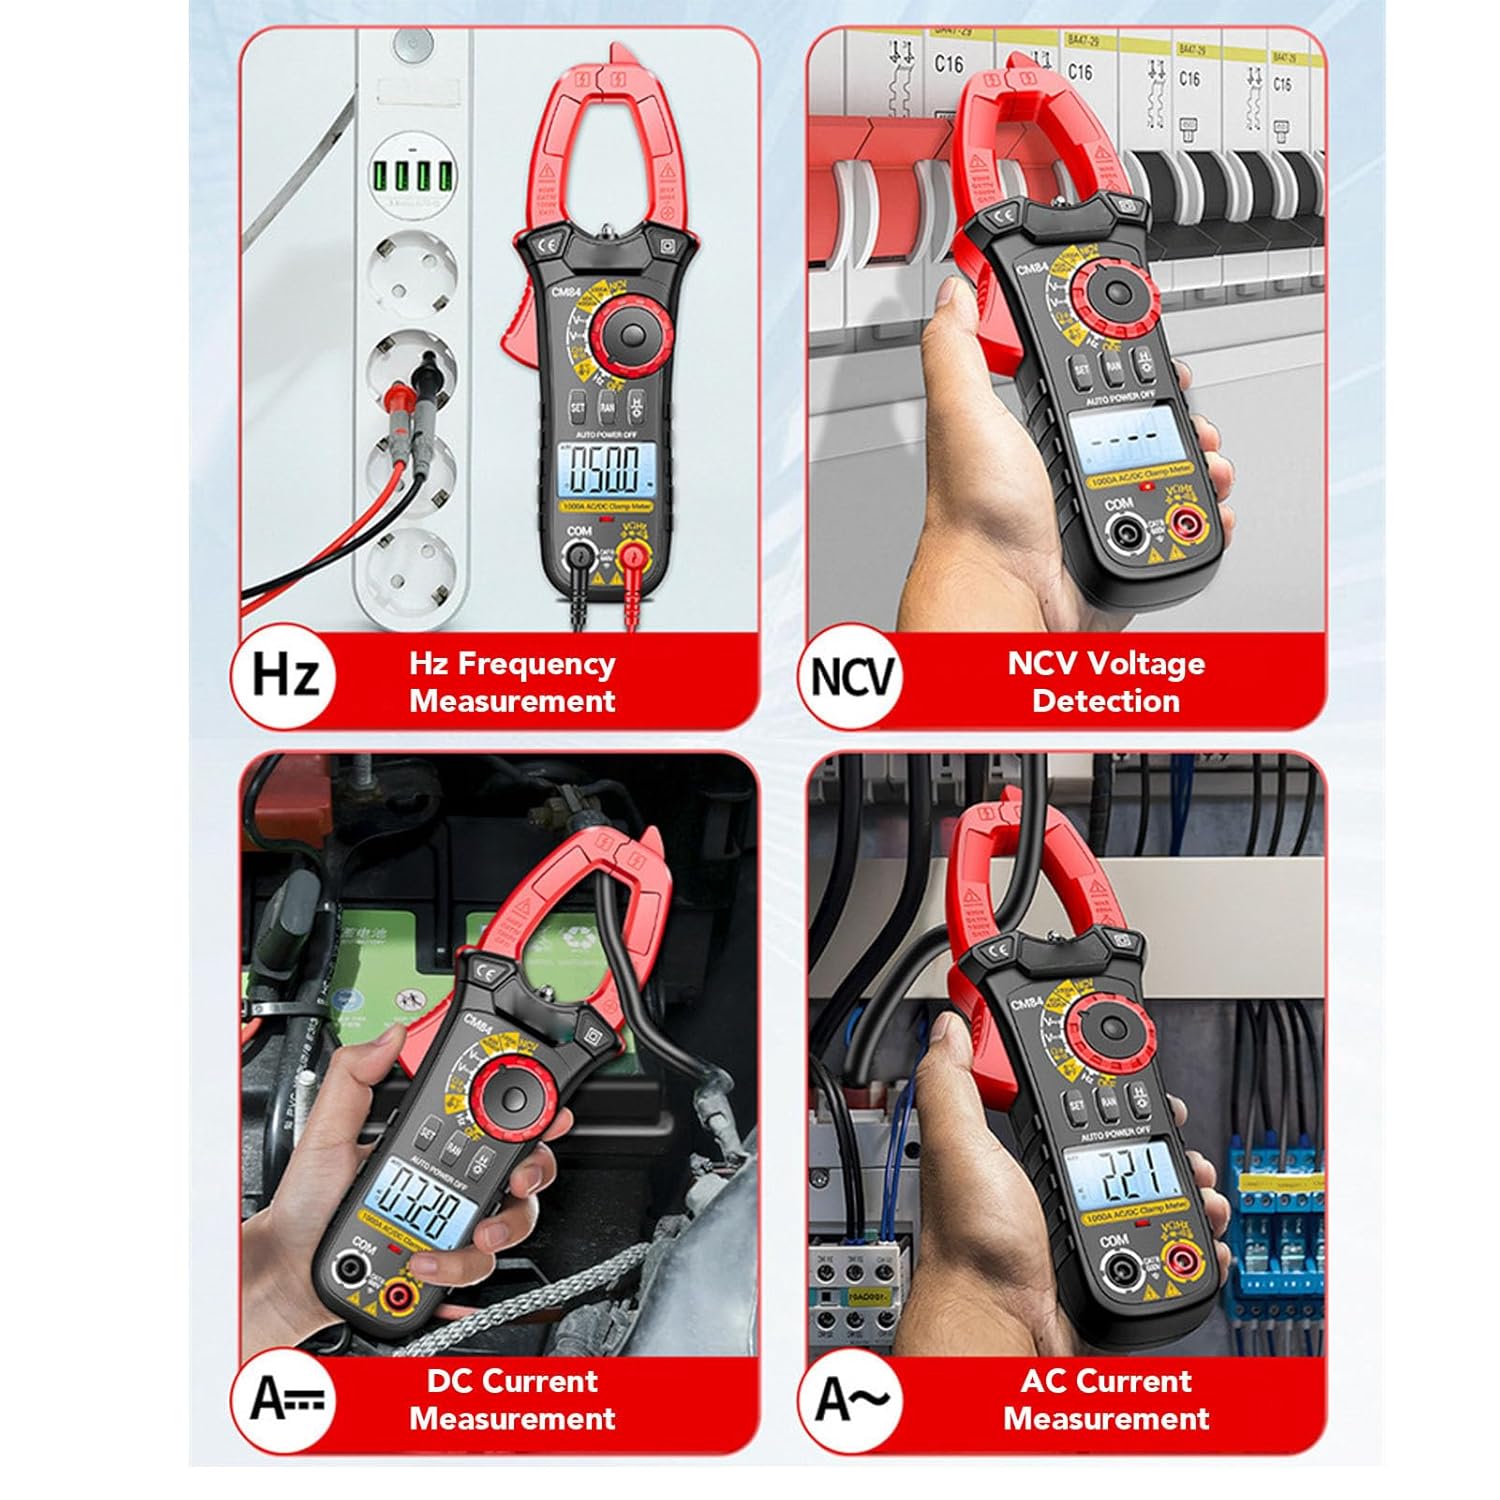
Image: A collage illustrating the multimeter's capabilities, including Hz frequency measurement, NCV voltage detection, DC current measurement, and AC current measurement.
5.4 LCD Backlight and Flashlight
Long press the H/* key to activate the LCD backlight and the integrated flashlight. This feature enhances visibility in dimly lit environments. Press again to turn off.
5.5 Auto Shut-off
The multimeter is equipped with an automatic shut-off feature to conserve battery life. If no operation is performed for approximately 15 minutes, the device will power off automatically. To reactivate, rotate the dial to the OFF position and then back to the desired function.
6. Maintenance
6.1 Cleaning
To clean the multimeter, wipe the case with a damp cloth and a mild detergent. Do not use abrasives or solvents. Ensure the device is powered off and disconnected from any circuits before cleaning.
6.2 Storage
When not in use for extended periods, remove the batteries to prevent leakage and store the multimeter in its carrying case in a cool, dry place, away from direct sunlight and extreme temperatures.
7. Troubleshooting
- No Power: Check battery installation and ensure batteries are not depleted. Replace if necessary.
- Inaccurate Readings: Ensure the correct function mode is selected. Check test lead connections. Verify battery level.
- NCV Not Detecting: Ensure the NCV function is selected and the sensor is close enough to the AC source.
- Display Not Clear: Activate the LCD backlight using the H/* key.
If problems persist, contact customer support.
8. Specifications
- Item Model Number: WALFRONTq1i9u7enrm
- Manufacturer: WALFRONT
- Package Dimensions: 9.84 x 4.72 x 1.97 inches
- Item Weight: 14.29 ounces
- Power Source: 2 x 1.5V AAA Battery (not included)
- Clamp Jaw Opening: Up to 28mm
- Current Measurement: Up to 1000A AC/DC
9. Warranty and Support
For warranty information or technical support, please refer to the contact details provided with your purchase or visit the official Walfront website. Keep your purchase receipt as proof of purchase.