
Important Safety Information
Please read and understand all safety warnings and operating instructions before using this wet/dry vacuum. Failure to follow these instructions may result in electric shock, fire, or serious injury. Keep this manual for future reference.
General Safety Precautions:
- Do not leave the vacuum unattended when plugged in. Unplug from outlet when not in use and before servicing.
- Do not use outdoors or on wet surfaces.
- Do not allow to be used as a toy. Close attention is necessary when used by or near children.
- Use only as described in this manual. Use only manufacturer's recommended attachments.
- Do not use with damaged cord or plug. If vacuum is not working as it should, has been dropped, damaged, left outdoors, or dropped into water, return it to a service center.
- Do not pull or carry by cord, use cord as a handle, close a door on cord, or pull cord around sharp edges or corners. Do not run vacuum over cord. Keep cord away from heated surfaces.
- Do not unplug by pulling on cord. To unplug, grasp the plug, not the cord.
- Do not handle plug or vacuum with wet hands.
- Do not put any object into openings. Do not use with any opening blocked; keep free of dust, lint, hair, and anything that may reduce airflow.
- Keep hair, loose clothing, fingers, and all parts of body away from openings and moving parts.
- Do not pick up anything that is burning or smoking, such as cigarettes, matches, or hot ashes.
- Do not use to pick up flammable or combustible liquids, such as gasoline, or use in areas where they may be present.
- Do not use without filters in place.
- Turn off all controls before unplugging.
- Use extra care when cleaning on stairs.
- Use only proper grounded outlets.
Product Overview and Components
The Dapper Supply 26.5 Gallon 11 Peak HP Wet/Dry Vacuum is designed for versatile cleaning tasks, featuring a powerful motor and a durable stainless steel tank. It is suitable for both wet and dry debris pickup in various environments.

Figure 1: Dapper Supply 26.5 Gallon Wet/Dry Vacuum. This image displays the complete vacuum unit with its stainless steel tank, motor head, hose, and floor nozzle attached.
Key Features:
- Powerful Suction: 8100W peak motor, 26Kpa suction power, 206 CFM airflow, and 80.4 inches of Water Lift for effective cleaning.
- Durable Tank: 26.5-gallon rust-resistant stainless steel tank.
- 2-in-1 Functionality: Capable of both wet and dry vacuuming.
- Extended Reach: 13.2 ft power cord and 8.2 ft flexible hose.
- Dual Filtration System: Includes a wide filter for carpet/pet hair and a cylinder filter for fine particles.
- Built-in Drain Port: For convenient liquid disposal.
- Low-Noise Operation: Engineered for 78-80 dBA.
- Mobility: Smooth-rolling wheels and ergonomic carry handle.
Included Accessories:

Figure 2: Included Accessories. This image shows the various attachments and filters that come with the vacuum, including a utility nozzle, round dust brush, extension wands, car nozzle, wide filter, dust collection bag, cylinder filter, and the EVA hose.
- Utility Nozzle
- Round Dust Brush
- Extension Wands
- Car Nozzle
- Wide Filter (for carpet and pet hair)
- Dust Collection Bag
- Cylinder Filter (for fine particles and dust)
- 1-7/8" x 7' EVA Hose
Setup Instructions
Follow these steps to assemble your Dapper Supply Wet/Dry Vacuum before initial use.
- Unpack Components: Carefully remove all parts from the packaging. Verify that all listed accessories are present.
- Attach Wheels: Securely attach the smooth-rolling wheels to the base of the vacuum tank. Ensure they are firmly in place for stability and mobility.
- Install Motor Head: Place the motor head onto the stainless steel tank, aligning it correctly. Secure the motor head with the latches provided on the sides of the tank.
- Connect Hose: Insert the 1-7/8" x 7' EVA hose into the suction port on the tank. For blowing functions, connect the hose to the exhaust port.
- Attach Extension Wands and Nozzle: Connect the extension wands to the hose, then attach the desired cleaning nozzle (e.g., floor brush, utility nozzle, crevice tool) to the end of the wands.
- Filter Installation:
- For dry vacuuming, install the cylinder filter over the float cage and secure it with the filter cap. A dust collection bag can also be used for easier disposal of dry debris.
- For wet vacuuming, remove the cylinder filter and dust collection bag. Ensure the wide filter is in place if specified for wet use, or use without a filter if the wide filter is for dry use only (refer to filter instructions).

Figure 3: Assembled Vacuum with Key Features. This image highlights the drain system, 11 Peak HP motor, and dual filtration system, indicating the vacuum's readiness for operation after assembly.
Operating Instructions
This section details how to use your Dapper Supply Wet/Dry Vacuum for various cleaning tasks.
1. Dry Vacuuming:
- Ensure the cylinder filter is properly installed over the float cage. For fine dust, a dust collection bag is recommended for easier disposal and to protect the filter.
- Connect the desired dry cleaning attachment (e.g., floor brush for large areas, crevice tool for tight spaces).
- Plug the power cord into a grounded electrical outlet.
- Turn the vacuum ON using the power switch.
- Begin vacuuming the dry debris.
- When finished, turn the vacuum OFF and unplug it.

Figure 4: Dual Filtration System. This image illustrates the two types of filters: a wide filter suitable for carpet and pet hair, and a cylinder filter for fine particles and dust, emphasizing the vacuum's versatility for different dry cleaning needs.
2. Wet Vacuuming:
- Important: Remove the cylinder filter and any dust collection bag before wet vacuuming. The wide filter may remain if it is designed for wet use; otherwise, remove all filters.
- Connect the appropriate wet cleaning attachment.
- Plug the power cord into a grounded electrical outlet.
- Turn the vacuum ON.
- Begin vacuuming liquids. The internal float mechanism will shut off suction when the tank is full to prevent overflow.
- When the tank is full or you are finished, turn the vacuum OFF and unplug it.
- Empty the tank using the built-in drain port.
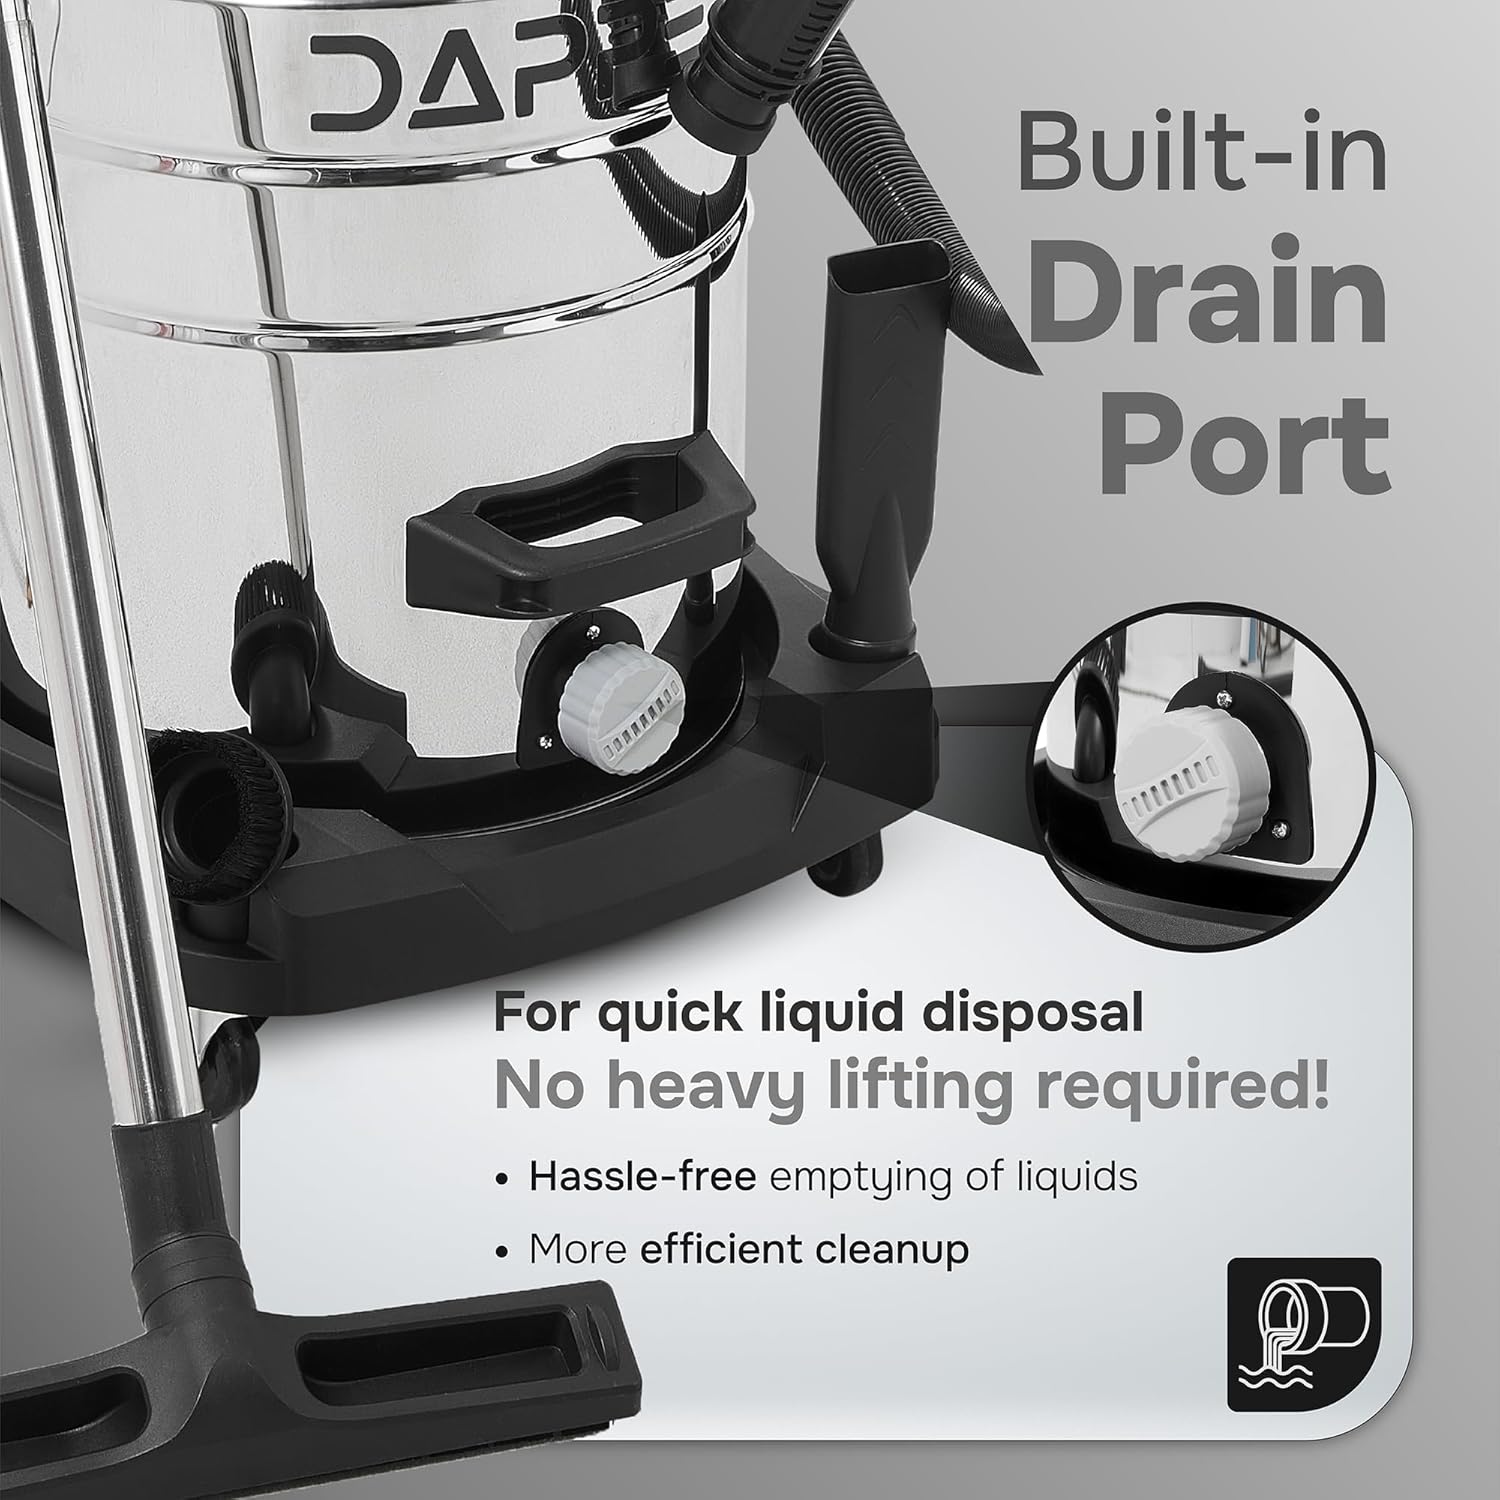
Figure 5: Built-in Drain Port. This image shows the integrated drain port at the bottom of the vacuum tank, designed for quick and hassle-free disposal of collected liquids without heavy lifting.
3. Blower Function:
- Locate the exhaust port on the motor head.
- Connect the vacuum hose to the exhaust port.
- Plug the power cord into a grounded electrical outlet.
- Turn the vacuum ON. The vacuum will now function as a blower, useful for clearing leaves or debris from driveways and workshops.
- When finished, turn the vacuum OFF and unplug it.

Figure 6: Versatile Cleaning Applications. This image demonstrates the vacuum's ability to clean various surfaces and environments, including garages, car interiors, homes, and workspaces, highlighting its adaptability for both wet and dry tasks.
Maintenance
Regular maintenance ensures optimal performance and extends the lifespan of your Dapper Supply Wet/Dry Vacuum. Always unplug the vacuum before performing any maintenance.
1. Emptying the Tank:
- For dry debris, unlatch the motor head and carefully lift it off the tank. Dispose of the contents of the dust collection bag or directly from the tank.
- For liquids, position the vacuum over a drain or suitable receptacle. Unscrew the cap of the built-in drain port at the bottom of the tank to allow liquids to flow out. Once empty, securely replace the cap.
2. Filter Cleaning and Replacement:
Reduced suction power often indicates a clogged filter. Clean or replace filters as needed.

Figure 7: Filter Cleaning Guide. This image provides visual instructions on how to clean the vacuum's filter to restore suction power, showing steps for removing and cleaning the filter element.
- Remove Filter: Unlatch the motor head and remove it. Carefully detach the cylinder filter from the float cage.
- Clean Filter:
- For dry filters, gently tap the filter against a hard surface to dislodge dust. A soft brush can also be used.
- For washable filters (check filter type), rinse under running water until clean. Allow to air dry completely before reinstallation.
- Reinstall Filter: Once clean and dry, place the filter back onto the float cage and secure the motor head.
- Replace Filter: If the filter is damaged or excessively dirty and cannot be cleaned effectively, replace it with a new Dapper Supply compatible filter.
3. Hose and Accessory Cleaning:
- Inspect the hose and attachments for blockages. Clear any obstructions.
- Wipe down the exterior of the vacuum, hose, and accessories with a damp cloth. Do not use harsh chemicals.
Troubleshooting
Before contacting customer support, refer to the following table for common issues and their solutions.
| Problem | Possible Cause | Solution |
|---|---|---|
| Vacuum does not turn on. | No power to the outlet; Power cord not securely plugged in; Faulty power switch. | Check power outlet with another appliance; Ensure plug is fully inserted; Contact customer support if switch is faulty. |
| Reduced suction power. | Clogged filter; Full tank; Blockage in hose or attachments; Motor head not sealed properly. | Clean or replace filter (refer to Maintenance section); Empty tank; Clear any blockages; Ensure motor head latches are secured. |
| Motor stops during wet vacuuming. | Tank is full (float mechanism activated). | Turn off vacuum, unplug, and empty the tank. |
| Dust escapes from vacuum. | Filter not installed correctly or damaged; Dust collection bag full or improperly installed. | Check filter installation; Clean or replace filter; Ensure dust bag is correctly seated and not overfilled. |
| Unusual noise during operation. | Blockage in hose or motor; Damaged motor components. | Check for and clear blockages; If noise persists, discontinue use and contact customer support. |
Product Specifications
| Brand | Dapper Supply |
| Model | 26.5 Gallon 11 Peak HP Wet/Dry Vacuum |
| Capacity | 26.5 Gallons |
| Motor Peak Horsepower | 11 Peak HP |
| Suction Power | 26Kpa |
| Airflow | 206 CFM |
| Water Lift | 80.4 inches |
| Tank Material | Stainless Steel |
| Power Source | Corded Electric |
| Voltage | 120 Volts |
| Power Cord Length | 13.2 ft |
| Hose Length | 8.2 ft |
| Noise Level | 78-80 dBA |
| Item Weight | 36 Pounds |
| Filter Type | HEPA Filter (Cylinder Filter) and Wide Filter |
| Certifications | UL Certified |
Warranty and Customer Support
This Dapper Supply Wet/Dry Vacuum is backed by a 1-year warranty, ensuring reliability and customer satisfaction. The product is UL certified for safety.
For warranty claims, technical assistance, or any questions regarding your product, please contact Dapper Supply customer support. Responsive customer support is available to assist you.
Please have your model number and purchase date available when contacting support.


