
Introduction
This document provides comprehensive instructions for the installation, operation, and maintenance of the Sakugi Clothes Rack Accessories G, which consist of two short vertical tubes. These tubes are specifically designed as replacement or extension parts for the Sakugi US661 clothes rack model. Please read this manual carefully before proceeding with installation or use to ensure proper function and safety.
Product Overview
The Sakugi Clothes Rack Accessories G are essential components for the US661 clothes rack, providing vertical support and structural integrity. Each pack contains two short vertical tubes, crafted from durable iron with a black finish.
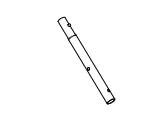
This image displays the two short vertical tubes, labeled as part G, which are designed as accessories for the Sakugi US661 clothes rack. They are black and made of iron.
Setup and Installation
Follow these steps to properly install the short vertical tubes:
- Identify Your Rack: Ensure you have the Sakugi US661 clothes rack model. These tubes are specifically designed for this model.
- Locate Connection Points: On your US661 clothes rack, identify the designated slots or connection points where vertical tubes are intended to be inserted. These are typically at the base or intermediate levels of the rack structure.
- Insert Tubes: Carefully insert one short vertical tube (Part G) into each of the identified connection points. Apply gentle pressure and twist slightly if necessary to ensure a snug fit.
- Secure Connections: Verify that both tubes are fully seated and securely connected to the rack frame. There should be no wobbling or looseness.
- Final Check: Once installed, gently test the stability of the rack before loading any items.
Operating Instructions
Once installed, the short vertical tubes function as integral structural components of your Sakugi US661 clothes rack. They provide vertical support for hanging garments and other rack accessories. Ensure that the weight of items placed on the rack is distributed evenly to maintain stability and prevent damage to the tubes or the rack itself.
Maintenance
To ensure the longevity and optimal performance of your Sakugi short vertical tubes, follow these maintenance guidelines:
- Cleaning: Wipe the tubes periodically with a soft, damp cloth to remove dust and dirt. Avoid using abrasive cleaners or harsh chemicals, as these can damage the finish.
- Inspection: Regularly inspect the tubes for any signs of wear, damage, or loose connections. Tighten any loose fittings if applicable.
- Storage: If the clothes rack or tubes are disassembled for storage, keep them in a dry environment to prevent rust or corrosion.
Troubleshooting
If you encounter any issues with the short vertical tubes, refer to the following troubleshooting tips:
- Issue: Tubes do not fit into the rack.
Solution: Double-check that your clothes rack is indeed the Sakugi US661 model. These tubes are designed for specific compatibility. Ensure you are inserting them into the correct connection points. - Issue: The rack feels unstable after tube installation.
Solution: Verify that both short vertical tubes are fully inserted and securely fastened into their respective slots. Ensure all other components of the clothes rack are also properly assembled and tightened.
Specifications
| Attribute | Detail |
|---|---|
| Brand | Sakugi |
| Model Compatibility | US661 Clothes Rack |
| Part Name | Short Vertical Tube (Part G) |
| Quantity | 2 per pack |
| Material | Iron |
| Color | Black |
Warranty and Support
For information regarding product warranty, returns, or technical support, please refer to the original purchase documentation or contact Sakugi customer service directly through their official website or the retailer where the product was purchased. Please have your product model (US661) and accessory part (Short Vertical Tube G) information ready when contacting support.