
1. Product Overview
The Huepar 7211CGA is a self-leveling green cross line laser level designed for various leveling and alignment tasks. It features a 360° horizontal line, a 140° vertical line, and two green plumb dots for precise point transfer. This tool is suitable for both indoor and outdoor applications, offering multiple operating modes and installation options.
Key Features:
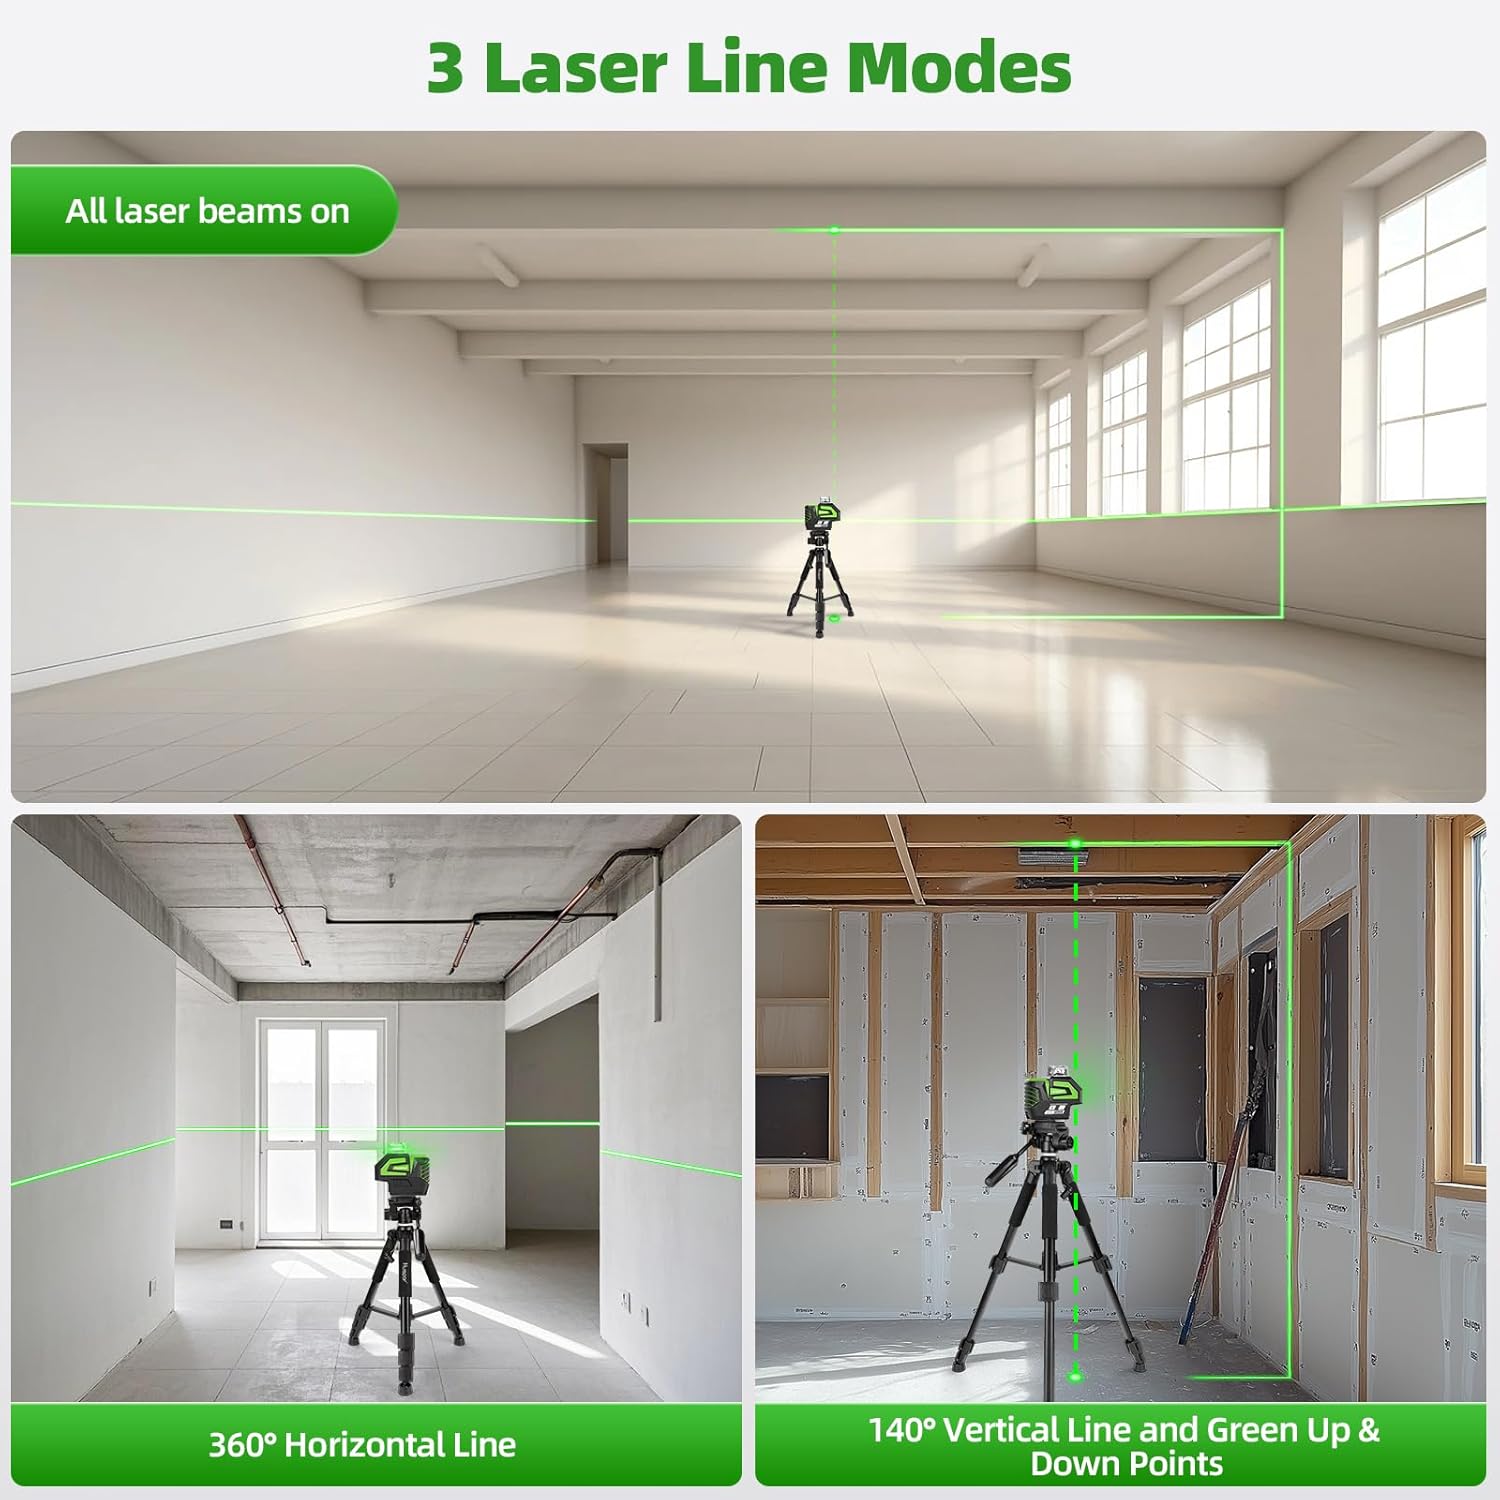
- 360° Horizontal Line & Two Plumb Dots: Provides comprehensive leveling coverage with a full 360° horizontal line and distinct up/down plumb dots for accurate point transfer.
- Outdoor Pulse Mode & Visibility Adjustment: Extends the laser range up to 200 feet with a compatible Huepar laser receiver (LR-6RG/LR-5RG/LR-8RG) and offers three brightness levels for optimal visibility in various lighting conditions.
- Multiple Installation Methods: Equipped with a 1/4"-20 thread for tripods or mounting poles, and includes a 360° magnetic bracket for attachment to metal surfaces.
- 7-Hour Run-time: Operates for up to 7 hours with all laser beams on using 3 x AA batteries. Features a battery indicator for convenience.
- Durable Design: IP54 water/dust proof rating ensures reliability in challenging working environments. Comes with a hard carry case for protection and portability.
2. Setup and Installation
2.1 Battery Installation
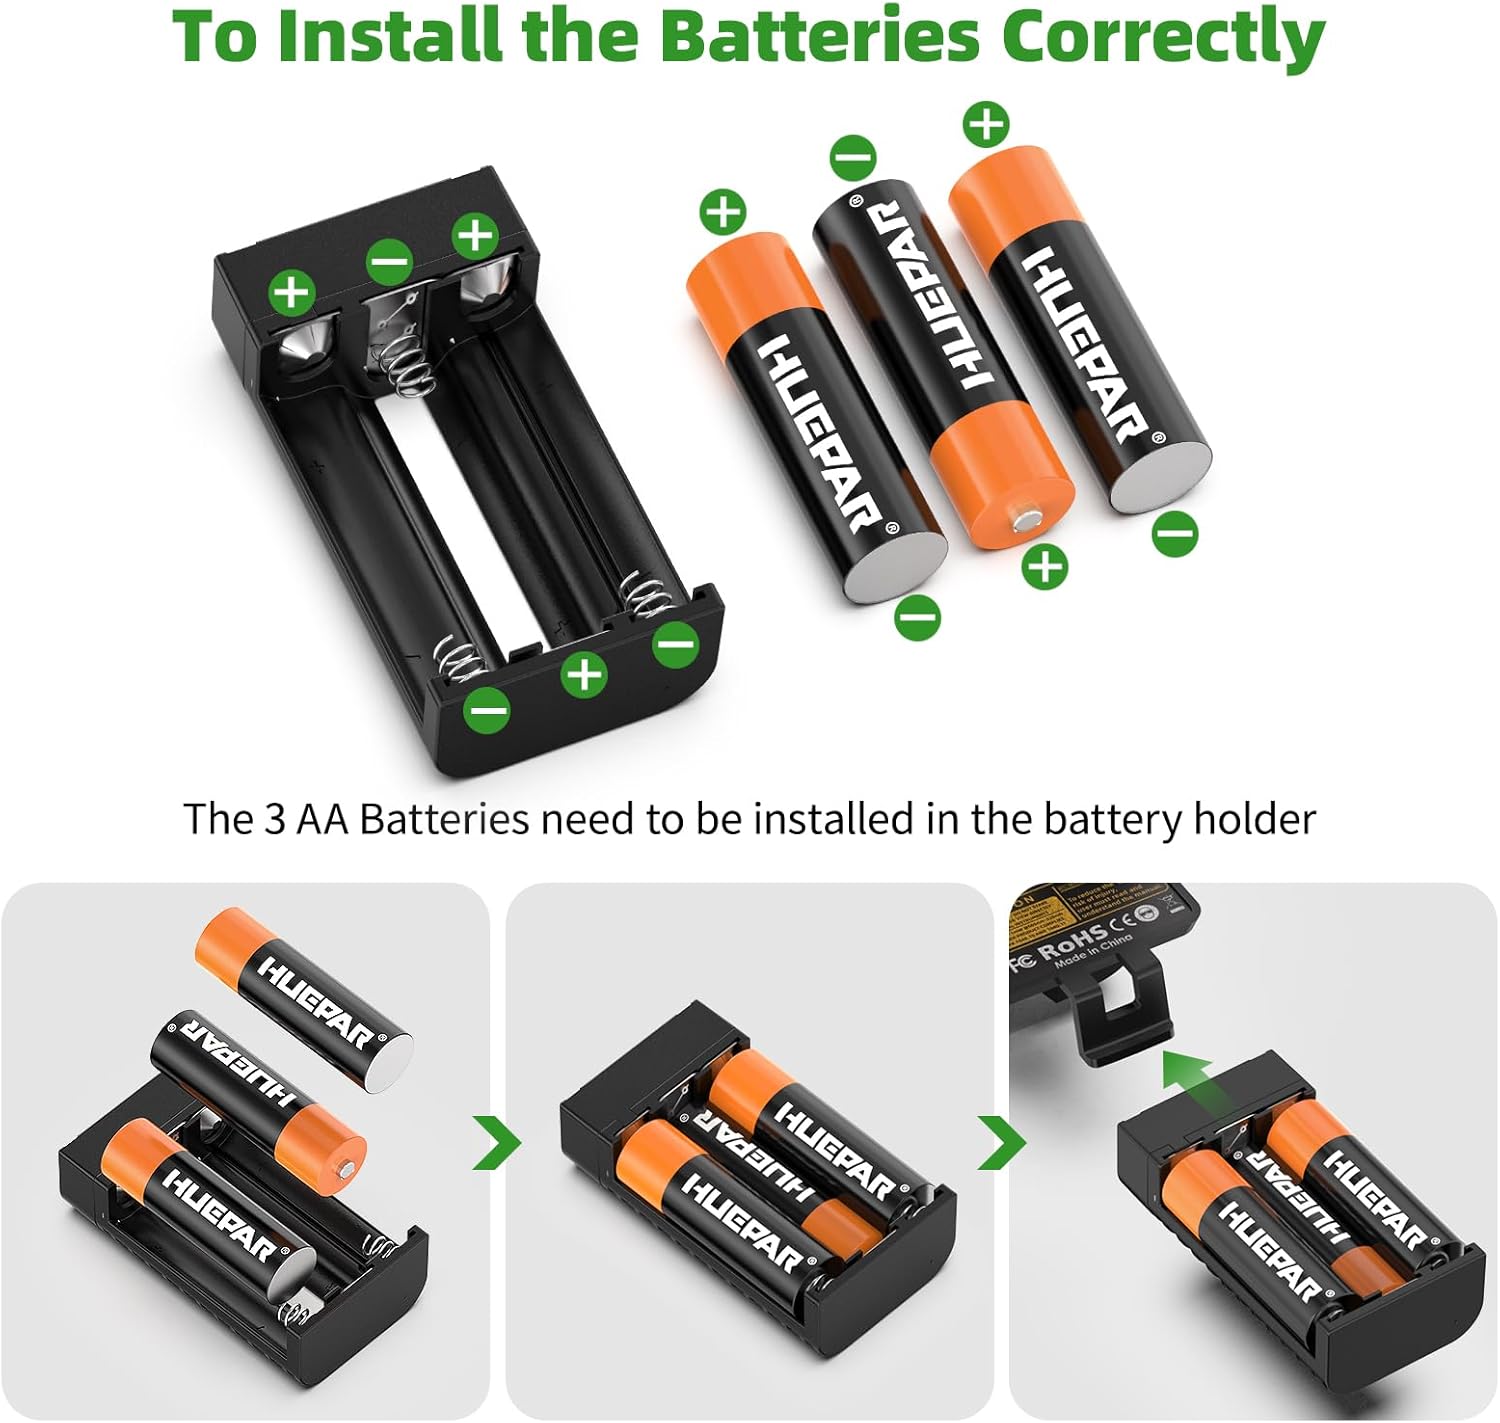
The Huepar 7211CGA laser level operates on 3 x AA batteries. Follow these steps to install them correctly:
- Open the battery compartment cover.
- Insert the 3 AA batteries into the provided battery holder, ensuring correct polarity (+ and -).
- Place the battery holder with batteries into the compartment.
- Close the battery compartment cover securely.
2.2 Mounting Options
The laser level offers versatile mounting options:
- Tripod/Mounting Pole: Use the 1/4"-20 thread located at the bottom of the unit to attach it to a standard tripod or laser mounting pole.
- Magnetic Bracket: The included 360° strong magnetic bracket allows for secure attachment to metal surfaces such as metal tracks or steel beams. The bracket features a knob for height adjustment and a locking clasp to prevent slippage. It also has a 1/4"-20 mounting thread for tripod compatibility.
- Integrated Magnets: The laser tool itself has integrated magnets to hold it flush against metal stud walls.


3. Operation
3.1 Powering On/Off and Mode Selection
To power on the device, slide the ON/OFF switch. The device will typically start in self-leveling mode. Press the H button for horizontal line, V button for vertical line, and the plumb dot button for plumb dots. Pressing the buttons repeatedly cycles through the available laser line combinations.

3.2 Operating Modes
- Self-leveling Mode: When the pendulum is unlocked, the laser tool will self-level within ±3.5°. If the tool is outside this range, the laser lines will flash rapidly to indicate an out-of-level condition.
- Manual Mode: To use the tool at any angle, lock the pendulum. This disables the self-leveling function, allowing you to project tilted lines.
- Pulse Mode: For outdoor use or in bright conditions, activate pulse mode. This mode extends the working range up to 200 feet when used with a compatible Huepar laser receiver (sold separately).

3.3 Brightness Adjustment
The laser level features three levels of laser brightness adjustment to suit different light environments. To adjust the brightness, turn on the laser tool and short press the dedicated brightness adjustment button.

4. Maintenance
Proper maintenance ensures the longevity and accuracy of your Huepar laser level.
- Cleaning: Regularly clean the laser windows and the device body with a soft, dry cloth. Avoid using abrasive cleaners or solvents that could damage the plastic components or laser optics.
- Storage: When not in use, store the laser level in its hard carry case to protect it from dust, moisture, and impact. Remove batteries if the device will not be used for an extended period to prevent leakage.
- Environmental Protection: The device has an IP54 rating, making it water and dust resistant. However, avoid submerging it in water or exposing it to heavy rain.

5. Troubleshooting
If you encounter issues with your Huepar 7211CGA laser level, refer to the following common problems and solutions:
| Problem | Possible Cause | Solution |
|---|---|---|
| Laser lines are flashing rapidly. | The device is out of its self-leveling range (±3.5°). | Place the laser level on a more level surface or adjust its position until the lines stabilize. |
| Laser lines are dim or not visible outdoors. | Bright ambient light or pulse mode is not activated. | Activate pulse mode and use a compatible Huepar laser receiver. Adjust brightness settings. |
| Device does not power on. | Low or dead batteries, or incorrect battery installation. | Replace batteries with fresh ones and ensure they are installed with correct polarity. |
| Laser lines are not straight or accurate. | Device is in manual mode, or has been dropped/damaged. | Ensure the pendulum is unlocked for self-leveling. If accuracy issues persist after a fall, contact support for calibration or repair. |
6. Specifications
| Feature | Detail |
|---|---|
| Laser Class | Class II (IEC/EN60825-1/2014), <1mW power output |
| Laser Wavelength | 505-520nm |
| Horizontal/Vertical Accuracy | ±1/9" at 33 Ft. |
| Plumb Dot Accuracy | 1/9" at 33 Ft. |
| Leveling/Compensation Range | ±3.5° |
| Working Distance (Line) | 130Ft. (100 LUX), 200Ft with Huepar Laser Receiver |
| Operating Time | 6 hours with all laser beams on |
| Power Source | 3xAA (LR6) Batteries |
| IP Rating | IP54 Waterproof/Dustproof |
| Operation Temperature Range | 32°F ~ 104°F (0°C ~ 40°C) |
| Mount Size | 1/4"-20, 5/8"-11 with stand |
7. Warranty and Support
7.1 Warranty Information
Huepar offers a comprehensive warranty for its laser tools:
- 5-Year Warranty: All laser tools are covered by a 5-year warranty (battery 2 years, non-user damage).
- Year 1: Brand-new full set replacement for covered issues.
- Years 2-5: Free refurbished or equivalent replacement if non-repairable.
7.2 Technical Support
Huepar provides lifetime technical support to assist with setup, troubleshooting, and general inquiries.
- Email Support: support@huepar.com (12-hour response time).
- WhatsApp Support: For direct assistance, contact Lisa Support via WhatsApp: wa.me/16262545609.

8. Product Video Demonstration
Video: An official demonstration of the Huepar Green Laser Level with Plumb Dots, showcasing its features and applications.


