
1. General Safety Instructions
Always observe basic safety precautions when using electric tools to reduce the risk of fire, electric shock, and personal injury.
- Work Area Safety: Keep your work area clean and well-lit. Cluttered or dark areas invite accidents. Do not operate power tools in explosive atmospheres, such as in the presence of flammable liquids, gases, or dust.
- Electrical Safety: Avoid body contact with earthed or grounded surfaces such as pipes, radiators, ranges, and refrigerators. Do not expose power tools to rain or wet conditions.
- Personal Safety: Always wear eye protection. Use appropriate safety equipment such as dust masks, non-skid safety shoes, hard hats, or hearing protection when necessary. Dress properly; avoid loose clothing or jewelry.
- Tool Use and Care: Do not force the power tool. Use the correct power tool for your application. Disconnect the plug from the power source and/or the battery pack from the power tool before making any adjustments, changing accessories, or storing power tools.
- Battery Tool Use and Care: Recharge only with the charger specified by the manufacturer. Use power tools only with specifically designated battery packs.
2. Product Overview
The TOTAL TDLI16682 is a 16V compact brushless cordless drill designed for various drilling and fastening tasks. It features a powerful brushless motor, adjustable torque, and a keyless chuck for easy bit changes.
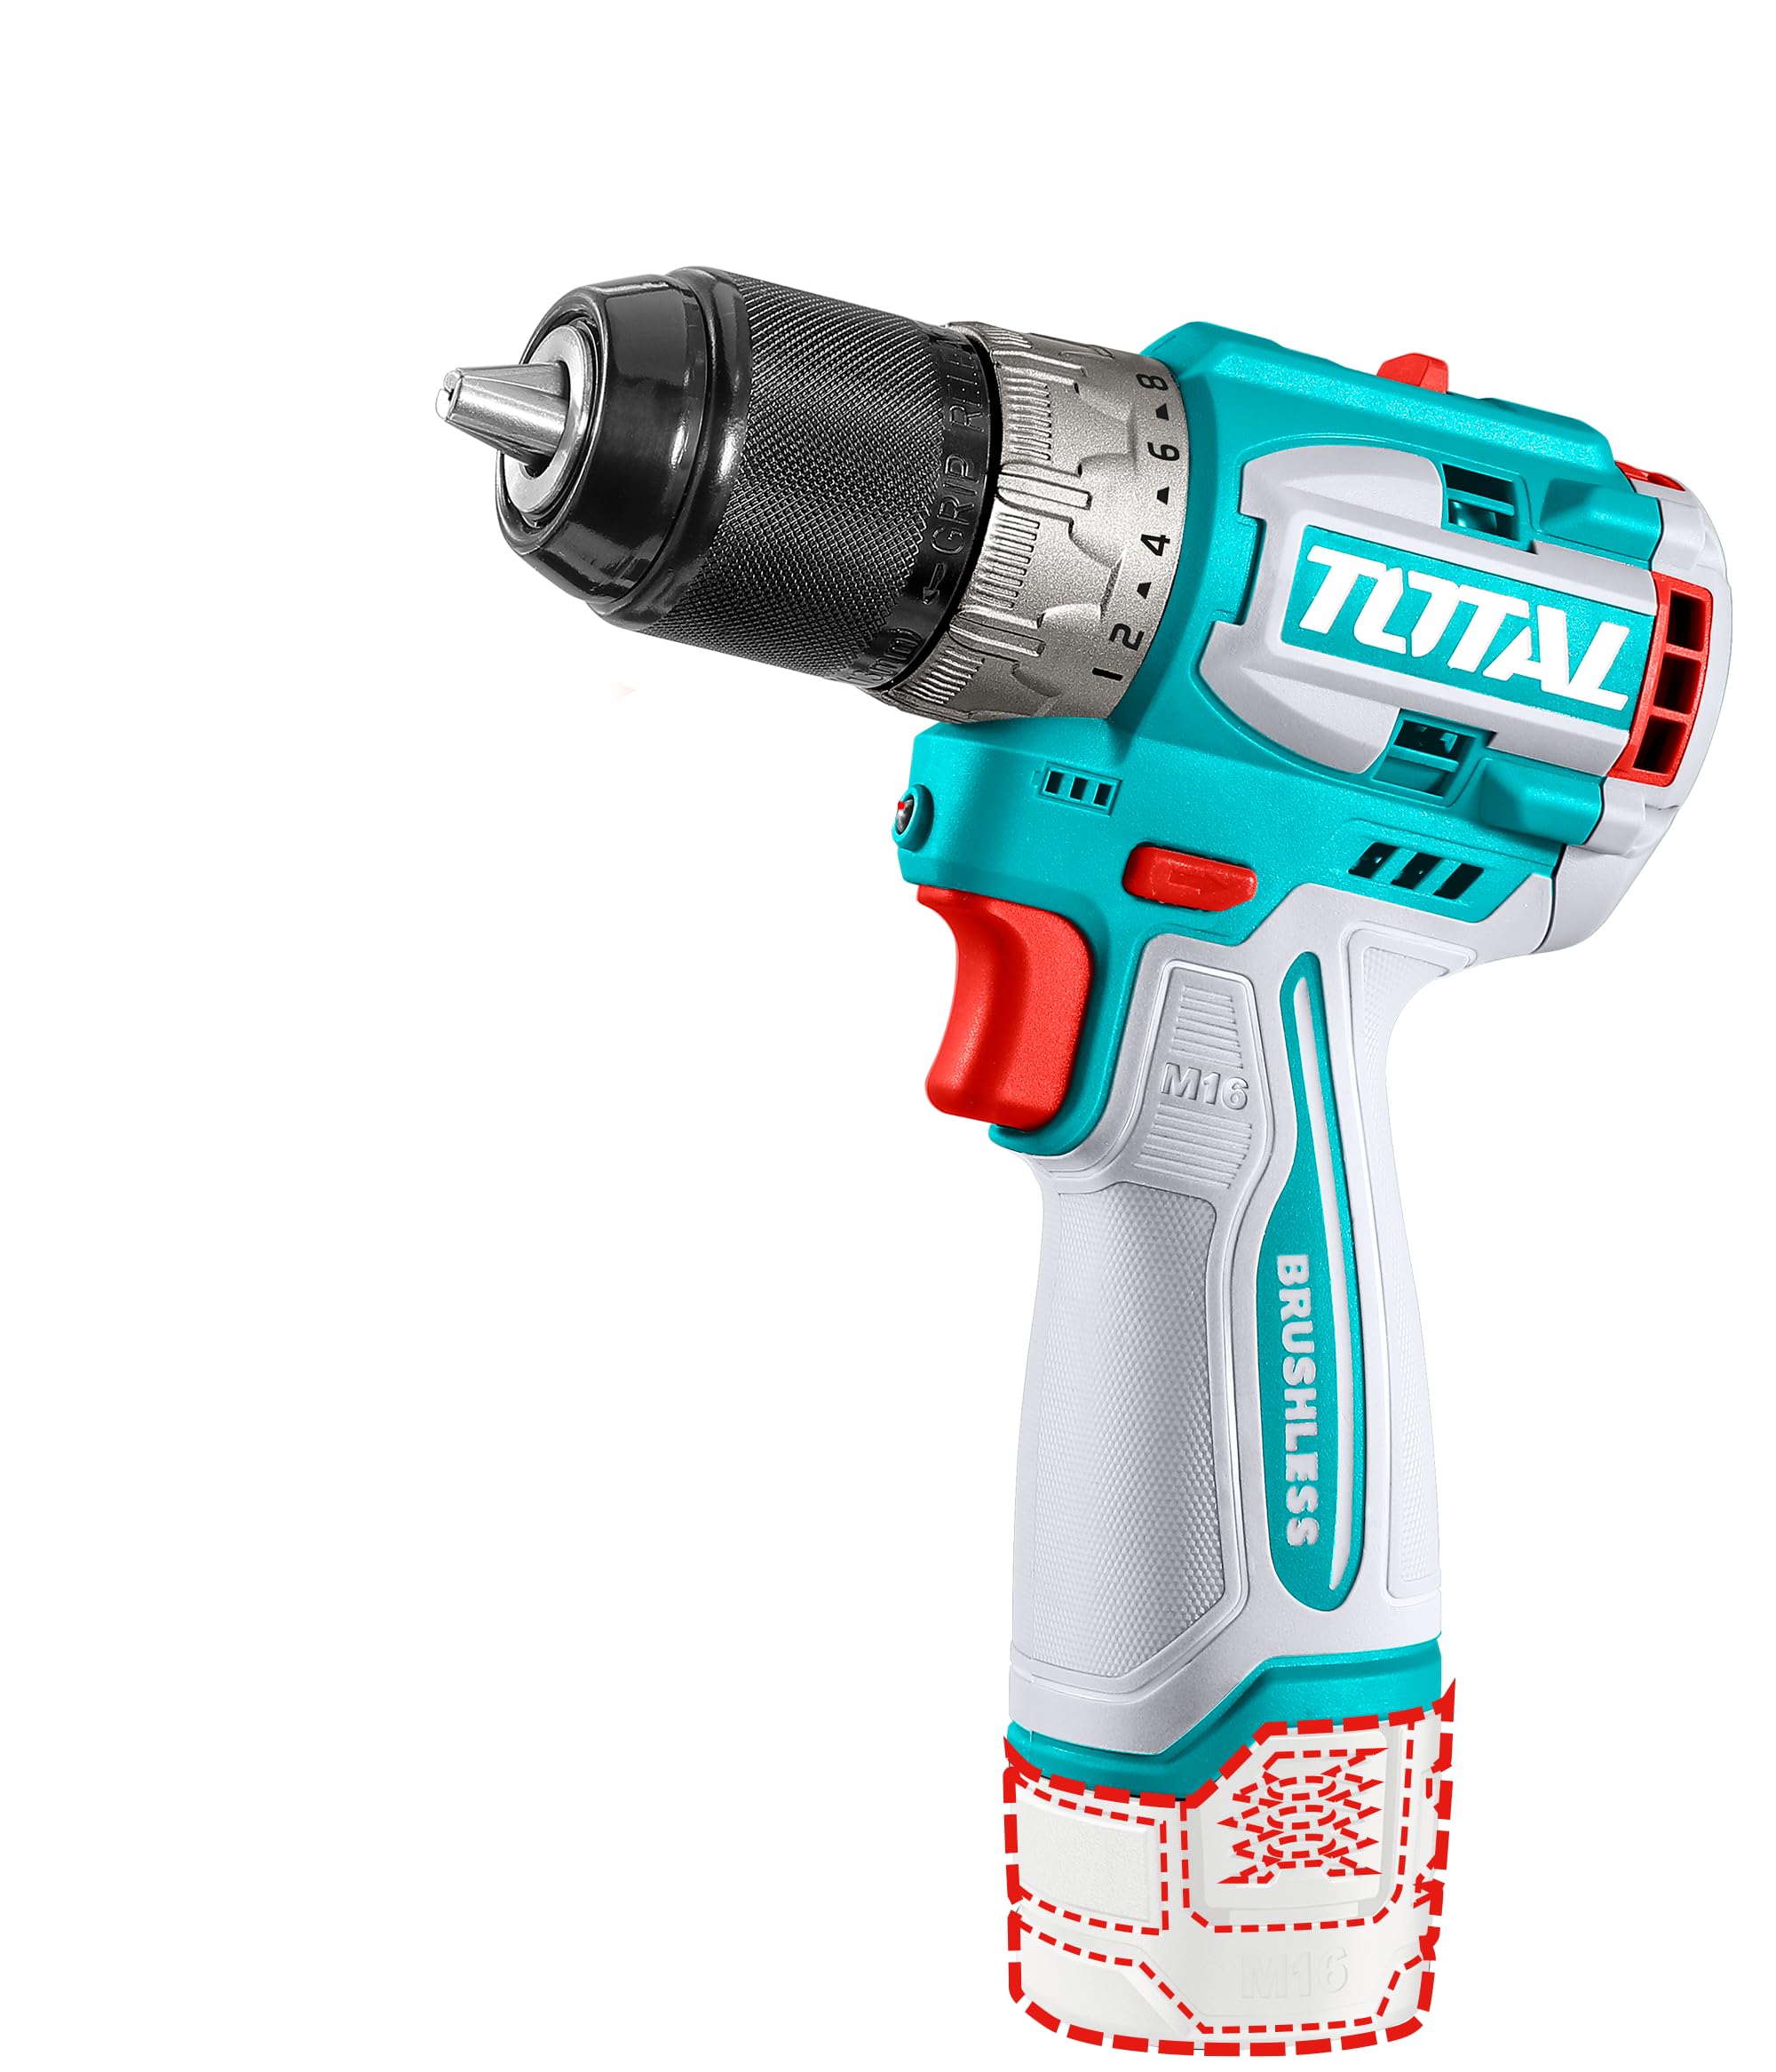
Image 1: TOTAL TDLI16682 16V Compact Brushless Cordless Drill kit. This image displays the drill unit, two 2.0Ah Lithium-ion batteries, a battery charger, a double-ended screwdriver bit, and a durable carrying case.
Key Components:
- Keyless Chuck: For quick and easy bit changes.
- Torque Adjustment Ring: To select the desired torque setting.
- Speed Selector: For high or low-speed operation.
- Forward/Reverse Switch: Controls rotation direction.
- Trigger Switch: Activates the drill and controls variable speed.
- LED Work Light: Illuminates the work area.
- Battery Pack: 16V Lithium-ion (2.0Ah).
- Battery Charger: For recharging battery packs.
3. Setup
3.1. Battery Charging
- Ensure the battery pack is clean and dry before charging.
- Connect the charger to a standard power outlet.
- Insert the battery pack into the charger, ensuring it clicks into place.
- The charger indicator light will show the charging status. Refer to the charger's specific instructions for light indications.
- Once fully charged, remove the battery pack from the charger and disconnect the charger from the power outlet.
3.2. Battery Installation and Removal
- Installation: Align the battery pack with the base of the drill handle and slide it in until it locks securely.
- Removal: Press the battery release button (usually located on the side of the battery pack) and slide the battery pack out of the handle.
3.3. Bit Installation and Removal
- Installation: Rotate the chuck counter-clockwise to open the jaws. Insert the drill bit or screwdriver bit into the chuck as far as it will go. Rotate the chuck clockwise to tighten the jaws firmly around the bit.
- Removal: Rotate the chuck counter-clockwise to loosen the jaws and remove the bit.
4. Operating Instructions
4.1. Forward/Reverse Rotation
The forward/reverse switch is located above the trigger. Push it to the left for forward rotation (drilling/tightening) and to the right for reverse rotation (removing screws). Ensure the switch is in the center position when not in use to prevent accidental starting.
4.2. Speed Control
The drill features a variable speed trigger. Pressing the trigger lightly will result in lower speeds, while pressing it further will increase the speed. Use the speed selector switch (usually on top of the drill) to choose between high-speed (for drilling) and low-speed (for driving screws) settings.
4.3. Torque Adjustment
The torque adjustment ring, located behind the chuck, allows you to set the desired torque for driving screws. Higher numbers indicate higher torque. For drilling, set the ring to the drill symbol for maximum power. Adjust the torque to prevent over-tightening screws or damaging the workpiece.
4.4. LED Work Light
The integrated LED work light automatically illuminates the work area when the trigger is pressed, providing better visibility in dimly lit conditions.
5. Maintenance
5.1. Cleaning
Regularly clean the ventilation openings of the drill to prevent overheating. Use a soft, damp cloth to wipe down the tool. Do not use harsh chemicals or abrasive cleaners. Keep the chuck jaws free of debris.
5.2. Battery Care
Store batteries in a cool, dry place away from direct sunlight and extreme temperatures. Do not store fully discharged batteries for extended periods. Recharge batteries before they are completely depleted to prolong their lifespan.
5.3. Storage
When not in use, store the drill, batteries, and charger in their carrying case in a secure, dry place out of reach of children.
6. Troubleshooting
| Problem | Possible Cause | Solution |
|---|---|---|
| Drill does not start. | Battery not charged or improperly installed. Forward/reverse switch in center (lock) position. | Charge battery. Reinstall battery correctly. Move forward/reverse switch to desired direction. |
| Reduced power or speed. | Low battery charge. Overload. | Recharge battery. Reduce pressure on the tool or use a sharper bit. |
| Battery not charging. | Charger not plugged in. Faulty battery or charger. | Check power connection. Contact customer support if problem persists. |
7. Specifications
- Model: TDLI16682
- Voltage: 16 Volts
- Maximum Torque: 60 Newton Meters
- Motor Type: Brushless
- Battery Capacity: 2.0Ah Lithium-ion (x2 included)
- Chuck Type: Keyless
- Item Weight: Approximately 209 g (tool only, without battery)
- Product Dimensions: 32 x 25 x 10 cm (packaging dimensions)
- Included Components: Drill Attachment, 2 Batteries, 1 Charger, Carrying Case
8. Warranty and Support
For warranty information, service, or technical support, please refer to the warranty card included with your product or contact TOTAL customer service through their official website or authorized service centers. Keep your purchase receipt as proof of purchase.


