1. Introduction
Welcome to the PGST A108F-4G-A Wireless Home Alarm System. This comprehensive manual provides detailed instructions for the installation, operation, and maintenance of your new security system. Designed for ease of use and robust protection, this system integrates advanced features such as dual network connectivity (Wi-Fi and 4G LTE), smart home compatibility, and multi-user management to ensure your home or office is secure 24/7.
Please read this manual thoroughly before setting up and operating the device to ensure proper functionality and safety.
2. Safety Information
Always adhere to the following safety guidelines to prevent damage to the device or personal injury:
- Do not expose the main panel or sensors to extreme temperatures, direct sunlight, or high humidity. The system is designed to operate between -10°C and 55°C with a maximum humidity of 75%.
- Ensure the power adapter is connected to a suitable power outlet.
- Keep the device away from water or other liquids.
- Do not attempt to disassemble or repair the device yourself. Refer all servicing to qualified personnel.
- Dispose of batteries according to local regulations.
- Ensure all components are securely mounted to prevent accidental falls.
3. Package Contents
Verify that all items are present in your package:

Figure 3.1: Complete PGST A108F-4G-A Home Alarm System Kit including main panel, PIR motion sensor, door/window sensor, remote controls, RFID tags, and siren.
- 1x PGST A108F-4G-A Main Control Panel
- 1x PIR Motion Detector
- 1x Door/Window Contact Sensor
- 2x Remote Controls
- 2x RFID Tags
- 1x Wired Siren
- 1x Power Adapter
- Mounting Hardware (screws, 3M adhesive tape)
- User Manual (this document)
4. Product Overview
4.1 Main Control Panel
The main control panel is the central hub of your alarm system. It features a 4.3-inch TFT color touchscreen display for easy navigation and control.
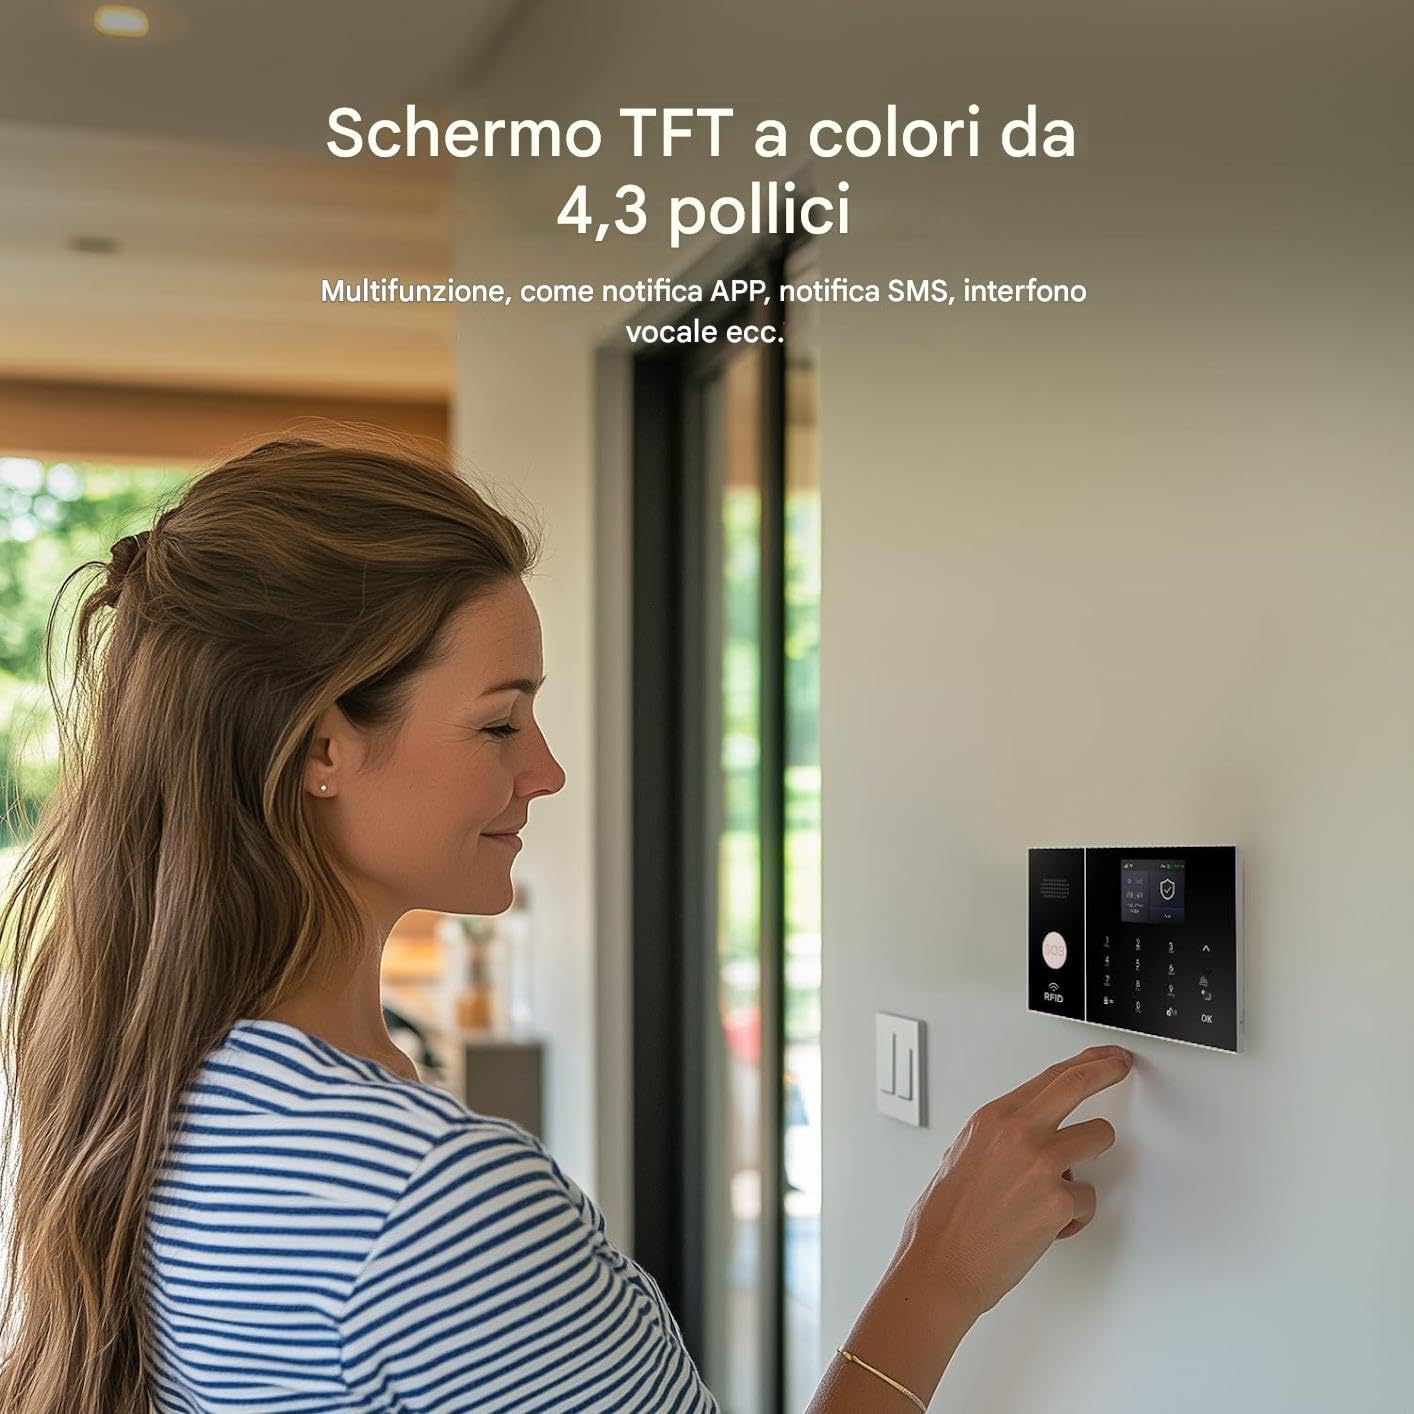
Figure 4.1: User interacting with the 4.3-inch TFT color display of the main control panel.
- Display: 4.3-inch TFT color screen for real-time status, temperature, humidity, and notifications.
- Connectivity: Integrated Wi-Fi 2.4GHz and 4G LTE Dual SIM for reliable connection, even during power outages.
- Control Options: Touchscreen, RFID tags, remote controls, and mobile application.
- SOS Button: Dedicated button on the panel for immediate emergency alerts.
- Multi-Language Support: Supports 11 languages for menu display, voice operation, and alarm SMS settings.
- Anti-Demolition Alarm: Triggers an alarm if the main panel is tampered with or removed from its mounting.
4.2 Sensors and Accessories
The system includes various sensors and accessories to provide comprehensive coverage:
- PIR Motion Detector: Detects movement within its range.
- Door/Window Contact Sensor: Detects when a door or window is opened.
- Remote Controls: For arming, disarming, and SOS functions.
- RFID Tags: For quick arming/disarming without needing the app or keypad.
- Siren: Emits a loud 120dB alarm sound when triggered.
5. Setup and Installation
The PGST A108F-4G-A system is designed for easy DIY installation, typically taking about 15 minutes for basic configuration.
5.1 Initial Setup of the Main Panel
- Power On: Connect the power adapter to the main control panel and plug it into a wall outlet. The panel will power on automatically.
- SIM Card Installation (Optional): If you plan to use 4G LTE connectivity, insert a compatible 4G SIM card into the designated slot on the main panel. Ensure the SIM card is active and has sufficient credit/data.
- Wi-Fi Connection:
- On the main panel's display, navigate to the Wi-Fi settings.
- Select your 2.4GHz Wi-Fi network from the list.
- Enter your Wi-Fi password and confirm. The panel will connect to your network.
- App Download: Download the "Tuya Smart" or "Smart Life" app from your smartphone's app store (iOS/Android).
- Pairing with App: Follow the in-app instructions to add your PGST A108F-4G-A system. This usually involves scanning a QR code on the panel or manually adding the device.
5.2 Sensor Installation
All sensors come with pre-applied 3M industrial adhesive tape for easy, damage-free installation. They can be repositioned up to 5 times without losing adhesion.
- PIR Motion Detector:
- Choose a location where the PIR can cover the desired area without obstructions. Avoid placing it directly facing heat sources or windows where direct sunlight might cause false alarms.
- Mount it at a height of approximately 2-2.2 meters (6.5-7.2 feet) from the floor.
- Peel off the adhesive backing and firmly press the sensor onto a clean, dry surface.
- Door/Window Contact Sensor:
- Mount the two parts of the sensor on the door/window frame and the door/window itself, ensuring they are aligned and within 1 cm (0.4 inches) of each other when the door/window is closed.
- Peel off the adhesive backing and firmly press both parts onto clean, dry surfaces.
- Siren:
- Connect the wired siren to the main panel's siren port.
- Place the siren in a location where its sound can be clearly heard throughout the property.

Figure 5.1: Illustration of the anti-demolition alarm feature, showing a screw securing the panel to its mount.
Note: The main panel includes an anti-demolition alarm function. Ensure the panel is securely mounted using the provided hardware to activate this feature. If the panel is removed from its mount, it will trigger an alarm and send a notification.
6. Operating Instructions
6.1 Arming and Disarming the System
You can arm or disarm your system using the control panel, remote controls, RFID tags, or the mobile app.
- Arm (Away Mode): Activates all sensors. Any triggered sensor will activate the siren and send notifications.
- Panel: Press the "Arm" button on the touchscreen.
- Remote: Press the lock icon button.
- App: Select "Arm" in the app interface.
- Disarm: Deactivates all sensors, allowing free movement without triggering alarms.
- Panel: Enter your PIN and press "OK" or press the unlock icon.
- Remote: Press the unlock icon button.
- RFID Tag: Tap the RFID tag on the designated area of the panel.
- App: Select "Disarm" in the app interface.
- Home Arm (Stay Mode): Activates perimeter sensors (e.g., door/window sensors) while allowing movement within the property (e.g., disabling PIR sensors).
- Panel: Press the "Home Arm" button (house icon).
- Remote: Press the house icon button.
- App: Select "Home Arm" in the app interface.

Figure 6.1: Example of setting automatic arming and disarming schedules via the app.
The system supports scheduled arming and disarming, which can be configured through the mobile application to automate your security routine.
6.2 Alarm Notifications and Calls
When an alarm is triggered, the system will activate the siren and send notifications according to your settings.
- App Notifications: You will receive instant push notifications on your smartphone via the Tuya Smart/Smart Life app.
- SMS Alerts: If a SIM card is installed, the system can send SMS alerts to pre-programmed numbers.
- Alarm Calls: The system can dial up to 5 preset phone numbers in sequence until the alarm is acknowledged.

Figure 6.2: The system's process for making alarm calls to preset numbers.
6.3 Special Modes and Features
- Child Safe Mode: This mode allows you to disable the 120dB siren for specific zones (e.g., a child's room) when motion is detected, sending only an app notification to prevent panic.
- SOS Function: Pressing the SOS button on the panel or remote control will immediately trigger an emergency alarm and notify pre-set contacts.
- Multi-User Management: Create up to 8 customizable profiles with differentiated permissions for family members or staff via the app. Temporary access can also be granted via RFID tags.
- Smart Home Integration: Compatible with Tuya/Smart Life, allowing connection to external cameras, smart lights, and electronic locks. Features like "Vacation Scenario" can simulate occupancy by activating lights and video recording.

Figure 6.3: The alarm system supports voice control via Amazon Alexa and Google Assistant.
The system supports voice control through Amazon Alexa and Google Assistant, allowing you to arm or disarm your home with simple voice commands.
7. Maintenance
7.1 Battery Monitoring and Replacement
The system features intelligent battery monitoring for wireless sensors. You will receive an early warning notification (at 15% charge) on the host panel and via the app (e.g., "Zone: PIR detector 03 - Low Battery").

Figure 7.1: Notification flow for low battery alerts from wireless sensors.
- Sensor Batteries: Wireless sensors use CR2032 batteries, which typically last up to 3 years. Replace them promptly when a low battery alert is received.
- Main Panel Battery: The main panel has a built-in lithium polymer backup battery that provides power for up to 48 hours during a power outage.
7.2 Firmware Updates
The system supports Over-The-Air (OTA) firmware updates to ensure you always have the latest features and security enhancements. Check the mobile app regularly for available updates.
8. Troubleshooting
| Problem | Possible Cause | Solution |
|---|---|---|
| System not connecting to Wi-Fi. | Incorrect Wi-Fi password, 5GHz network, or weak signal. | Ensure correct 2.4GHz Wi-Fi password. Move panel closer to router. Check router settings. |
| Sensors not triggering alarm. | Low sensor battery, sensor out of range, or incorrect zone settings. | Check sensor battery status. Ensure sensor is within 50m (urban) or 150m (open field) of panel. Verify zone settings in app. |
| No app notifications. | App permissions not granted, internet connection issue, or notification settings disabled. | Check app notification permissions on your phone. Verify panel's internet connection. Ensure notifications are enabled in the app. |
| False alarms. | Improper sensor placement, environmental factors (pets, drafts), or sensitive settings. | Adjust PIR sensitivity. Reposition sensors away from heat sources or direct drafts. Use "Child Safe Mode" for specific zones if needed. |
| Main panel not responding. | Power issue, system crash. | Check power connection. If unresponsive, perform a soft reset by unplugging and replugging the power adapter. |
9. Specifications
| Feature | Detail |
|---|---|
| Model Number | A108F-4G-A |
| Dimensions (Main Panel) | 22 x 15 x 10 cm |
| Weight (Main Panel) | 600 grams |
| Connectivity | Wi-Fi 2.4GHz, 4G LTE (Dual SIM), Wireless (868MHz/2.4GHz for sensors) |
| Power Source | Battery powered (Main panel: Lithium Polymer, Sensors: CR2032) |
| Battery Life (Sensors) | Up to 3 years (CR2032) |
| Backup Battery Life (Main Panel) | Up to 48 hours |
| Siren Output | 120dB |
| Operating Temperature | -10°C to 55°C |
| Operating Humidity | Up to 75% |
| Max Devices Supported | 64+ wireless devices |
| Encryption | AES-128 |
| Certifications | EN 301 489, CE |
| Compatible Apps | Tuya Smart, Smart Life |
| Voice Assistants | Amazon Alexa, Google Assistant |
10. Warranty and Support
PGST products are certified EN 50131 and come with a 3-year warranty. For technical support, troubleshooting assistance, or warranty claims, please contact PGST customer service.
- Customer Service: Refer to the contact information provided on the PGST official website or within the Tuya Smart/Smart Life app.
- Online Resources: Visit the PGST brand store on Amazon or their official website for FAQs, video tutorials, and additional product information.
- Extended Warranty: An extended warranty of up to 5 years may be available with the PGST Care+ plan (check availability and terms).
PGST offers 24/7 telephone assistance with Italian/English speaking technicians and has 20 service centers in Italy. You can find the nearest center via the app or website.


