
1. Introduction
This manual provides detailed instructions for the installation, operation, and maintenance of the RAB Lighting B17 LED Bollard Light. This outdoor luminaire features field-adjustable wattage and selectable color temperature (CCT), designed for various outdoor applications.
Key features include:
- Energy-efficient LED with a 50,000-hour lifespan.
- Adjustable wattage: 24W, 19W, or 14W.
- Selectable CCT: 3000K (Warm White), 4000K (Neutral White), or 5000K (Cool White).
- 0-10V dimming capability.
- UL Listed for wet locations.
- Durable metal construction with a glass shade.
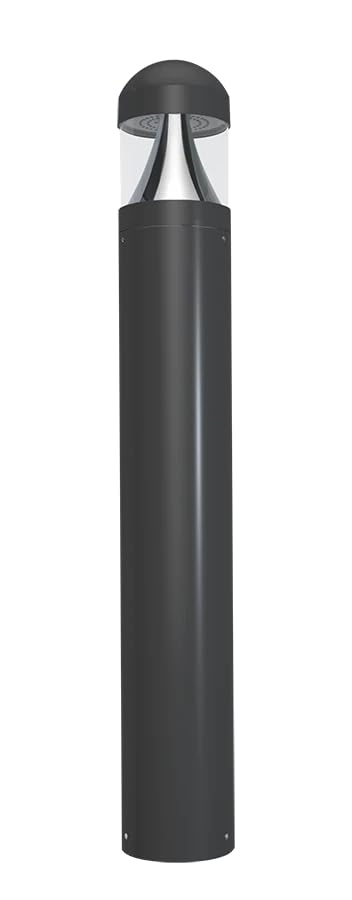
Figure 1: RAB Lighting B17 LED Bollard Light (Model B17D shown).
2. Safety Information
WARNING: Risk of electric shock. Disconnect power before installation or servicing. Installation should be performed by a qualified electrician in accordance with all applicable national and local electrical codes.
- Ensure the supply voltage is correct for the fixture.
- Do not handle live components.
- Wear appropriate personal protective equipment (PPE).
- This fixture is suitable for wet locations. Ensure all connections are properly sealed to prevent water ingress.
- Do not modify the fixture. Any modifications may void the warranty and create safety hazards.
3. Package Contents
Verify that all components are present before beginning installation:
- B17 LED Bollard Light Fixture
- On-Off Switch (Included Components)
- Installation Hardware (e.g., mounting bolts, gaskets) - (Assumed, not explicitly listed but typical for such products)
- Instruction Manual (this document)
4. Setup and Installation
Follow these steps for proper installation of the B17 LED Bollard Light:
- Prepare the Installation Site: Ensure the mounting surface is stable and level. Run electrical conduit and wiring to the desired location according to local codes.
- Disconnect Power: Turn off power at the circuit breaker before starting any electrical work.
- Mount the Bollard: Secure the bollard base to the mounting surface using appropriate hardware. Ensure a watertight seal if required by local codes.
- Make Electrical Connections: Connect the fixture's wires to the supply wires. Follow standard wiring practices:
- Black to Line (L)
- White to Neutral (N)
- Green/Ground to Ground (G)
- Purple to Dimming (+) (for 0-10V dimming)
- Gray to Dimming (-) (for 0-10V dimming)
- Select Wattage and CCT: Before closing the fixture, adjust the wattage and CCT switches located inside the fixture head. Refer to Section 5 for details.
- Secure the Fixture Head: Attach the fixture head to the bollard body, ensuring all seals are properly seated to maintain the wet location rating.
- Restore Power: Turn on power at the circuit breaker and test the light.

Figure 2: The B17 Bollard Light is UL Listed and rated for wet locations, ensuring durability in outdoor environments.
5. Operating Instructions
5.1. Field-Adjustable Wattage
The B17 bollard light allows you to select the desired wattage output to optimize brightness and energy consumption. A switch located inside the fixture head enables selection between 24W, 19W, and 14W.
- 24W: Maximum brightness.
- 19W: Medium brightness, reduced energy use.
- 14W: Lower brightness, maximum energy savings.
To adjust: Disconnect power. Open the fixture head. Locate the wattage selection switch and move it to the desired setting. Close the fixture head and restore power.
5.2. Selectable Color Temperature (CCT)
The fixture offers three color temperature options to suit different aesthetic preferences and applications. A separate switch inside the fixture head allows selection between 3000K, 4000K, and 5000K.
- 3000K: Warm White, ideal for creating a cozy and inviting atmosphere.
- 4000K: Neutral White, suitable for general illumination and task lighting.
- 5000K: Cool White, provides bright, crisp light, often used for security or modern aesthetics.
To adjust: Disconnect power. Open the fixture head. Locate the CCT selection switch and move it to the desired setting. Close the fixture head and restore power.

Figure 3: Visual representation of adjustable wattage and selectable CCT settings.
5.3. 0-10V Dimming
The B17 bollard light is compatible with 0-10V dimming systems. Connect the purple and gray dimming wires to a compatible 0-10V dimmer control. This allows for smooth adjustment of light output from 100% down to 10% (or lower, depending on dimmer specifications).
Ensure the dimmer is rated for LED loads and is compatible with 0-10V dimming protocols.
6. Maintenance
The B17 LED Bollard Light is designed for minimal maintenance due to its long LED lifespan of 50,000 hours.
- Cleaning: Periodically clean the exterior of the fixture with a soft, damp cloth to remove dirt and debris. Do not use abrasive cleaners or solvents. Ensure power is off before cleaning.
- Inspection: Annually inspect the fixture for any signs of damage, loose connections, or wear. Ensure all seals remain intact to maintain weather resistance.
- LED Replacement: LEDs are integrated and not user-replaceable. The long lifespan minimizes the need for replacement.

Figure 4: The B17 LED Bollard Light offers a long 50,000-hour operational lifespan.
7. Troubleshooting
| Problem | Possible Cause | Solution |
|---|---|---|
| Light does not turn on. | No power supply. Loose wiring connection. Incorrect wattage/CCT setting. | Check circuit breaker. Ensure power is on. Verify all wire connections are secure (power off first). Confirm wattage/CCT switches are set correctly. |
| Light flickers or dims unexpectedly. | Incompatible dimmer. Loose dimming wire connection. Voltage fluctuations. | Ensure 0-10V dimmer is compatible with LED loads. Check purple and gray dimming wire connections. Consult an electrician to check power supply stability. |
| Light output is too low/high. | Incorrect wattage setting. | Adjust the wattage selection switch inside the fixture head (power off first). |
| Light color is not desired. | Incorrect CCT setting. | Adjust the CCT selection switch inside the fixture head (power off first). |
8. Specifications
| Feature | Detail |
|---|---|
| Model Name | B17 |
| Brand | RAB Lighting |
| Wattage | Field-Adjustable: 24W / 19W / 14W |
| Color Temperature (CCT) | Selectable: 3000K / 4000K / 5000K |
| Dimming | 0-10V Dimmable |
| Lifespan | 50,000 hours |
| Material | Metal body, Glass shade |
| Environmental Rating | UL Listed for Wet Locations |
| Included Components | On-Off Switch |
| UPC | 192552028424 |
| ASIN | B0DY2FPPNS |
9. Warranty and Support
For warranty information and technical support, please contact RAB Lighting directly. Refer to the official RAB Lighting website or your purchase documentation for specific warranty terms and contact details.
RAB Lighting Contact: www.rablighting.com


