
Povanje safe fireproof waterproof 60EE
Povanje 5.0 Cuft Fireproof Safe User Manual
Model: safe fireproof waterproof 60EE
Introduction
This user manual provides essential information for the safe and effective operation of your Povanje 5.0 Cuft Fireproof Safe. Please read this manual thoroughly before setup and use, and retain it for future reference.
Safety Information
- Always keep emergency keys in a secure location away from the safe and out of reach of children.
- Do not store the emergency keys inside the safe.
- Ensure the safe is securely mounted to prevent unauthorized removal.
- Avoid exposing the safe to extreme temperatures or humidity.
- Do not attempt to force the safe open if the keypad malfunctions or batteries are depleted. Use the emergency keys.
- The safe itself is not water resistant; use the included fireproof/waterproof bag for sensitive documents.
Package Contents
Verify that all items are present in your package:
- 1 x Povanje 5.0 Cuft Fireproof Safe
- 1 x Fireproof waterproof document bag
- 2 x Backup keys
- 4 x Mounting Screws
- 1 x User manual (this document)
- 1 x Lock Protective Cover
- 1 x Mat

Figure 1: Included Accessories. This image displays the various components that come with your safe, such as the backup keys, user manual, mounting screws, a fireproof and waterproof document bag, a protective cover for the lock, and a mat for the interior.
Setup
1. Battery Installation
The digital keypad requires 4 AA batteries (not included). The external battery installation design allows for easy replacement.
- Locate the battery compartment on the keypad unit.
- Open the compartment cover.
- Insert 4 AA batteries, ensuring correct polarity (+/-).
- Close the compartment cover securely.

Figure 2: External Battery Compartment. This image illustrates the external battery compartment on the safe's keypad, designed for convenient battery replacement without needing to open the safe.
2. Setting Your Passcode
Your safe comes with a default factory code of "1234#". It is highly recommended to change this immediately.
- Open the safe using the default code or emergency key.
- Locate the red reset button inside the door, near the hinge.
- Press the red reset button. The keypad display will show "SET".
- Enter your desired 1-8 digit personal password on the keypad.
- Press the "#" key to confirm. The display will show "DONE".
- To set a master password (optional): Enter "100" then press the setting button inside the door. Enter the 1-8 digit master password and press "#" to confirm.

Figure 3: Setting Passcode. This diagram illustrates the process of setting both a personal and an optional master password for your safe's electronic keypad.
3. Mounting the Safe
The safe features pre-drilled holes in the back and bottom for secure mounting to a wall or floor, preventing theft.
- Choose a suitable location for your safe.
- Mark the drilling points through the pre-drilled holes on the safe's back or bottom.
- Drill holes into the wall or floor using an appropriate drill bit.
- Align the safe with the drilled holes.
- Insert the provided mounting screws and anchors, and tighten them securely.
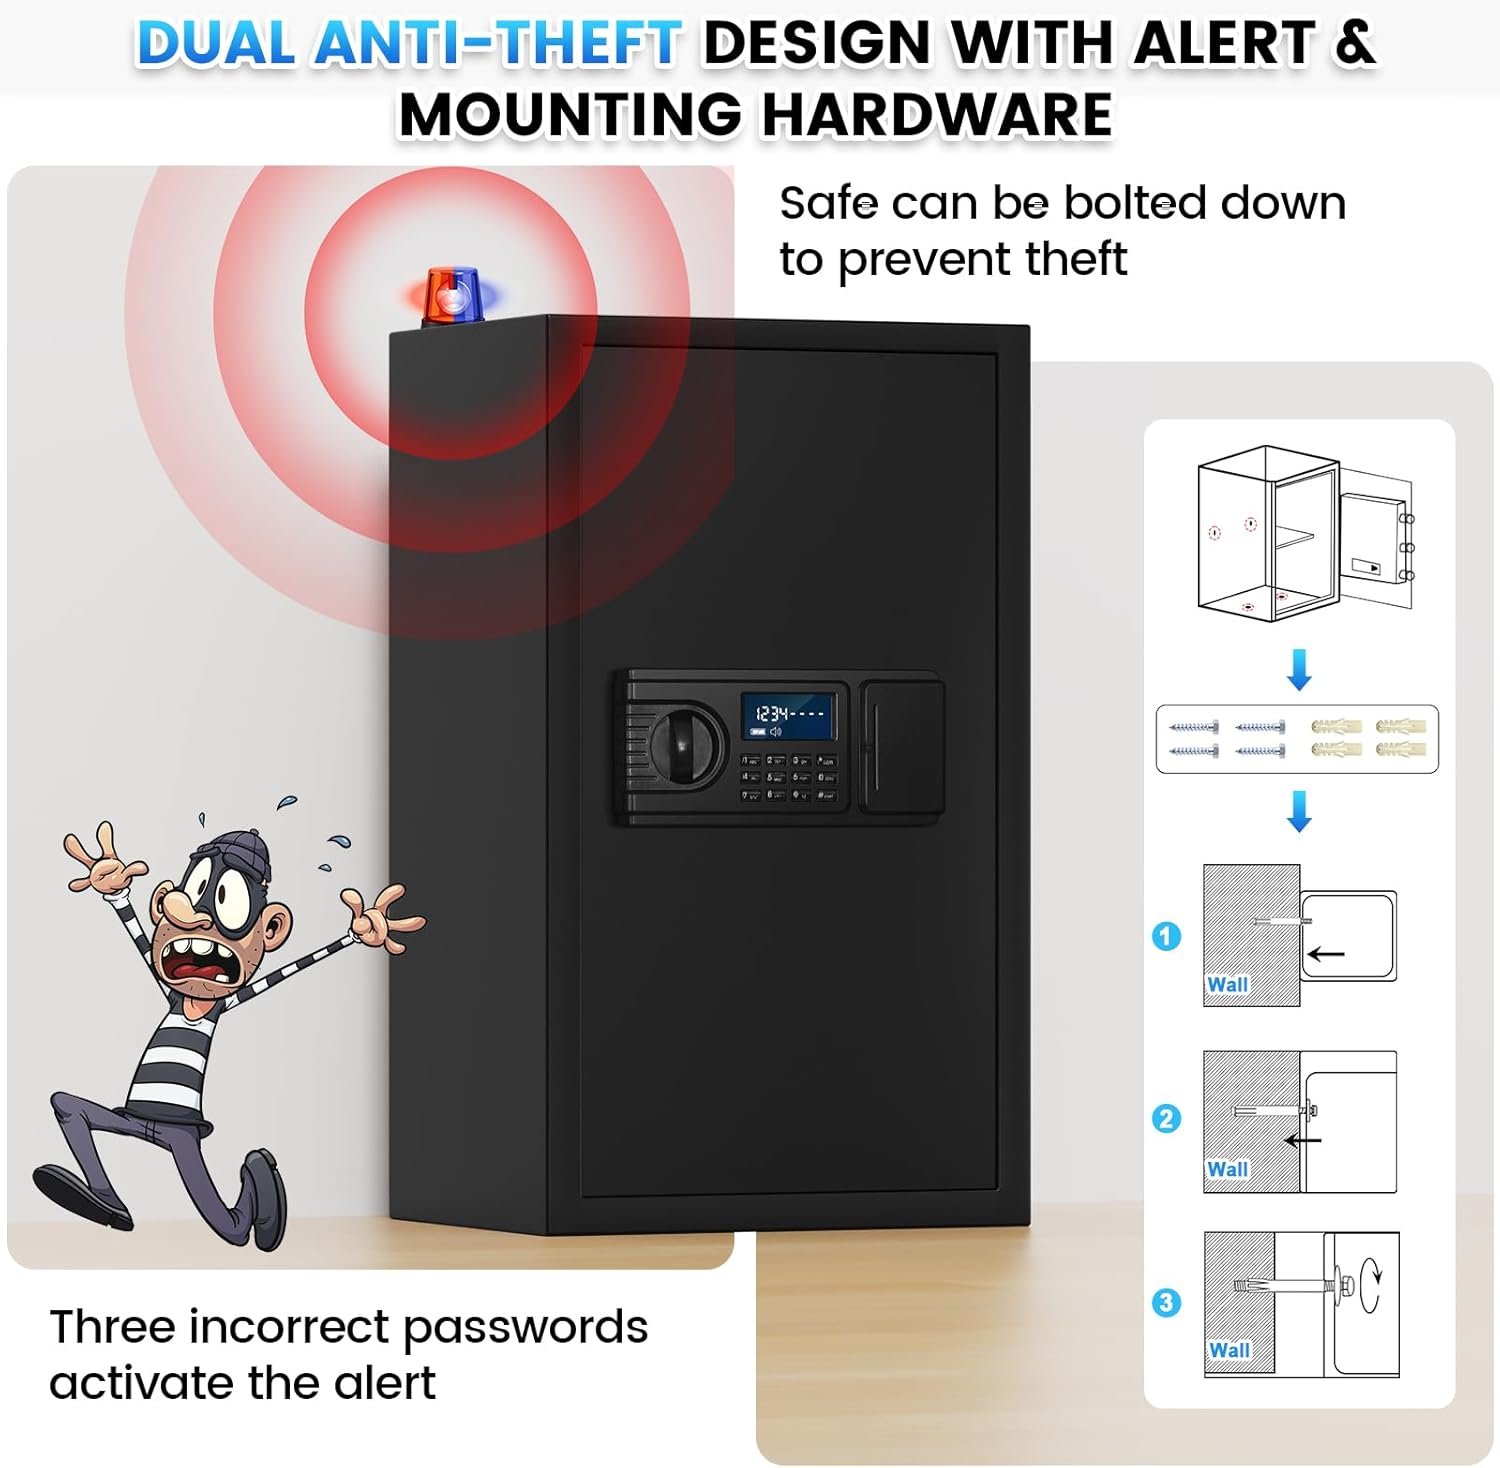
Figure 4: Mounting Instructions. This image demonstrates the anti-theft alert system and provides a visual guide for securely mounting the safe to a wall using the pre-drilled holes and included hardware.
Operating the Safe
1. Opening with Personal Code (Daily Use)
- Enter your 1-8 digit personal password on the keypad.
- Press the "#" key to confirm. The display will show "OPEN".
- Turn the knob clockwise to open the safe door.

Figure 5: Two Unlock Ways. This image illustrates both the emergency key and personal code methods for opening the safe, highlighting the convenience of the digital keypad for daily use.
2. Opening with Emergency Keys
Use emergency keys if batteries are depleted or you forget your passcode.
- Locate the emergency keyhole, usually hidden behind a cover on the keypad unit.
- Insert the emergency key and turn it counter-clockwise.
- Simultaneously turn the knob clockwise to open the safe door.
3. Hidden Code Mode
To prevent others from seeing your entered password, you can activate hidden code mode.
- Before entering your password, press the "*" key.
- Enter your password. The display will show "00000000" instead of the actual digits.
- Press the "#" key to confirm and open the safe.

Figure 6: Keypad Features. This image highlights the large LCD screen, low battery reminder, hidden password function, and keyhole serial number for backup key replacement.
4. Anti-Theft Alert System
The safe is equipped with an anti-theft alarm system for enhanced security.
- If an incorrect password is entered 3 consecutive times, the system will lock and activate an audible alarm for 1 minute.
- To stop the alarm, remove the batteries from the keypad compartment.
Video 1: LCD Digital Keypad Fireproof Safe Box Features. This video demonstrates various features of the safe, including the large interior, reinforced lock latches, thickened steel door, one-piece all-steel structure, anti-prying design, wall/floor mounting, large LCD screen, hidden password mode, smart anti-theft alert, and dual opening methods (backup keys and personal code).
Maintenance
1. Battery Replacement
When the LCD screen displays a low battery reminder, replace the batteries promptly to ensure continuous operation.
- Follow the battery installation steps outlined in the "Setup" section.
- Always use new, high-quality AA batteries.
2. Cleaning
- Wipe the exterior of the safe with a soft, damp cloth.
- Avoid using abrasive cleaners or solvents that could damage the finish.
- Ensure the keypad and internal components remain dry.
Troubleshooting
| Problem | Possible Cause | Solution |
|---|---|---|
| Safe does not open with passcode. | Incorrect passcode entered; low batteries. | Re-enter passcode carefully. Replace batteries. Use emergency key. |
| Alarm sounds after multiple attempts. | Three incorrect passcode entries. | The alarm will sound for 1 minute. Remove batteries to stop it immediately. Re-enter correct passcode or use emergency key. |
| LCD screen is blank or dim. | Low or dead batteries. | Replace all 4 AA batteries. |
| Cannot set new passcode. | Incorrect procedure followed. | Review "Setting Your Passcode" section carefully and repeat steps. Ensure the reset button is pressed correctly. |
Specifications
- Brand: Povanje
- Model Number: safe fireproof waterproof 60EE
- Product Dimensions: 12.2"D x 14.96"W x 23.6"H
- Capacity: 3.8 Cubic Feet (Internal dimensions: 14.5"D x 14.5"W x 23"H)
- Material: Alloy Steel
- Color: Black
- Lock Type: Electronic Combination Lock, Key
- Special Features: Sensor Light, Combination Lock, Anti-Theft, Scratch Resistant, Removable Shelf
- Mounting Type: Wall & Floor Mount
- Item Weight: 38 Pounds
- Alarm: Vibration & Audible (activates after 3 incorrect password attempts)
- Water Resistance Level: Not Water Resistant (Fireproof/Waterproof bag included for sensitive items)

Figure 7: Safe Dimensions and Features. This image provides a visual representation of the safe's external dimensions and highlights key features such as the included fireproof bag, weight, video guide availability, and upgraded packaging.

Figure 8: Removable Shelf Configuration. This image demonstrates the versatility of the safe's interior, showing how items like cash, documents, jewelry, firearms, and passports can be organized with or without the removable shelves.
Warranty and Support
Povanje offers comprehensive support for your safe:
- Warranty: 5-year return or exchange warranty.
- Technical Support: Lifetime technical support.
- Parts Replacement: All parts can be replaced for free.
- Fire Replacement: In case of fire, provide your order number and picture to get a free new fire safe.
- Customer Service: For any questions, log into your Amazon account, go to "Your orders", find the order ID, and click "Contact seller".

Figure 9: Customer Support and Guarantees. This image highlights Povanje's commitment to customer satisfaction, including quick response times, money-back guarantees, warranty coverage, and lifetime after-sales support.
Related documentssafe fireproof waterproof 60EE


Ask a question about this manual
Ask about setup, troubleshooting, compatibility, parts, safety, or missing instructions. Manuals+ will review the question and use this page’s manual context to help answer it.