
1. Introduction
The CUQI 7 Inch IPS Portable Monitor is a compact display designed for versatility and ease of use. Featuring a 1024 x 600 resolution IPS screen, it offers wide viewing angles and accurate color reproduction. This monitor is compatible with a variety of devices, including Raspberry Pi, laptops, PCs, and gaming consoles, making it suitable for various applications such as dual monitor setups, embedded systems, or portable entertainment.
2. Package Contents
Verify that all items listed below are included in your package. If any items are missing or damaged, please contact customer support.
- 7 inch screen
- Leather stand
- HDMI to Mini HDMI Cable
- Micro HDMI to HDMI Adapter
- Dual Type-A to Type-C Cable
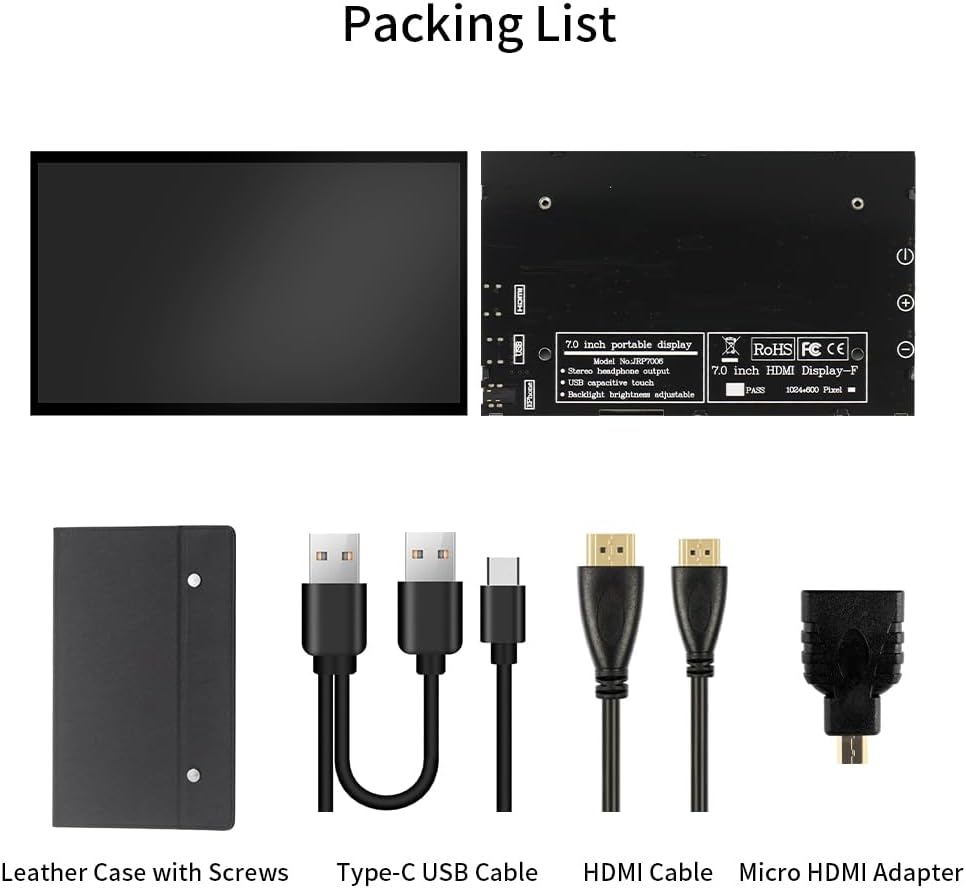
Figure 2.1: Included accessories with the CUQI 7 Inch Portable Monitor.
3. Features
The CUQI 7 Inch IPS Portable Monitor offers a range of features designed for optimal performance and user convenience:
- IPS Screen: Provides a clear and high-quality display with 178-degree full viewing angles, 1024 x 600 resolution, and accurate color reproduction.
- Plug-and-Play: Connects via HDMI and USB ports without requiring driver or software installation.
- Adjustable Brightness: Screen brightness can be adjusted, and a backlight off button allows the screen to be switched off when not in use.
- Portable Leather Stand: Includes a lightweight leather protective case that doubles as a stand with two adjustable angles. The case is removable via two screws.
- Wide Compatibility: Supports Raspberry Pi 5/4/4B/3B+/3B, Banana Pi, Windows 7/8/10 PC, Mac, Microsoft, and systems like Retro Pi, NOOBS, Raspbian, Ubuntu, and Kodi.

Figure 3.1: IPS 178-degree wide viewing angle.
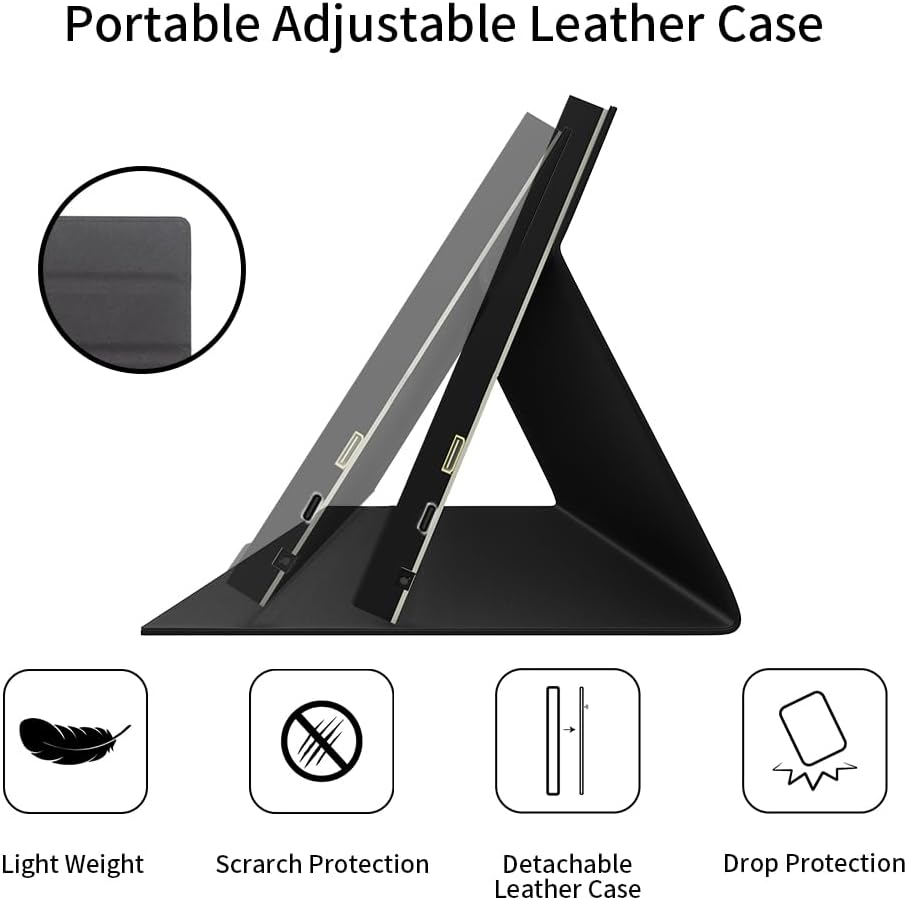
Figure 3.2: Portable adjustable leather case features.
4. Setup Instructions
Follow these steps to set up your CUQI 7 Inch IPS Portable Monitor:
- Attach the Leather Stand: If not already attached, secure the leather stand to the monitor using the two removable screws on the back. The stand allows for two adjustable viewing angles.
- Connect Video Source: Use the provided HDMI to Mini HDMI Cable (and Micro HDMI to HDMI Adapter if needed) to connect the monitor's Mini HDMI interface to your device (e.g., Raspberry Pi, laptop, PC, gaming console).
- Connect Power: Use the provided Dual Type-A to Type-C Cable to connect the monitor's Type-C Power port to a 5V/3A power source (e.g., a USB port on your device or a USB power adapter).
- Power On: Press the power button on the side of the monitor to turn it on. The monitor should automatically detect the video input.

Figure 4.1: Connecting the monitor to a Raspberry Pi.

Figure 4.2: Monitor ports and control buttons.
5. Operating Instructions
Once connected, the monitor operates as a secondary display for your device.
- Power On/Off: Use the dedicated power button on the side of the monitor to turn it on or off.
- Brightness Adjustment: Use the '+' and '-' buttons on the side of the monitor to adjust the screen brightness.
- Backlight Off: The backlight off button allows you to turn off the screen display while keeping the monitor powered, useful for power saving or when the display is not needed temporarily.
- Audio Output: If your source device transmits audio via HDMI, you can connect headphones or external speakers to the 3.5mm Audio Interface for sound output.

Figure 5.1: Monitor in use as a gaming display.
6. Maintenance
To ensure the longevity and optimal performance of your monitor, follow these maintenance guidelines:
- Cleaning: Use a soft, lint-free cloth to gently wipe the screen. For stubborn marks, slightly dampen the cloth with water or a screen-safe cleaning solution. Avoid harsh chemicals or abrasive materials.
- Storage: When not in use, store the monitor in a cool, dry place, preferably in its protective leather case, to prevent dust accumulation and physical damage.
- Handling: Avoid dropping the monitor or subjecting it to strong impacts. Handle it by the edges to prevent fingerprints on the screen.
- Temperature: Do not expose the monitor to extreme temperatures or direct sunlight for extended periods.
7. Troubleshooting
If you encounter issues with your monitor, refer to the following common problems and solutions:
- No Display/Black Screen:
- Ensure both the HDMI (or equivalent video) cable and the USB-C power cable are securely connected.
- Verify that the power source provides sufficient power (5V/3A).
- Check if the monitor is powered on using the power button.
- Confirm your source device is outputting video correctly.
- Flickering/Unstable Image:
- Check the video cable for damage or loose connections.
- Ensure the power supply is stable.
- Try a different video cable or port on your source device.
- Image Retention/Ghosting:
- If static images are displayed for very long periods, temporary image retention may occur. This is common with some display technologies.
- To mitigate, display a dynamic image or turn off the monitor for a period. Avoid displaying static images for extended durations.
- Monitor Disconnecting/Reconnecting:
- Ensure the power cable and video cable connections are firm.
- Test with a different USB power source or cable to rule out power supply issues.
- Check for updated drivers for your source device's graphics card.
If these steps do not resolve the issue, please contact CUQI technical support.
8. Specifications
| Feature | Specification |
|---|---|
| Product Dimensions | 6.58 x 0.39 x 4.06 inches |
| Item Weight | 14.9 ounces |
| Manufacturer | CUQI |
| Item Model Number | 7 inch leather |
| Standing Screen Display Size | 7 Inches |
| Aspect Ratio | 1.60:1 |
| Resolution | 1024 x 600 Pixels |
| Image Brightness | 500 Candela |
| Total USB Ports | 1 (Type-C for power) |
| Screen Surface Description | Matte |
9. Warranty and Support
CUQI provides professional technical support for this product. If you have any questions, require assistance with setup, operation, or troubleshooting that is not covered in this manual, please contact us via email. Refer to your purchase documentation for specific warranty details and contact information.
