
1. Introduction
Thank you for choosing the TRIUMPHKEY Vanity Table with Stool and LED Mirror. This manual provides essential information for the safe assembly, operation, and maintenance of your new vanity table. Please read these instructions carefully before use and retain them for future reference.

Figure 1.1: Fully assembled TRIUMPHKEY vanity table with LED mirror and stool.
This image presents the fully assembled TRIUMPHKEY vanity table, complete with its integrated LED mirror, multiple storage options including drawers and open shelves, and a comfortable matching stool, set in a modern room.
2. Safety Information
- Always follow assembly instructions carefully to prevent injury or damage.
- Ensure all screws and fasteners are securely tightened before use. Periodically check and re-tighten as needed.
- Do not overload drawers or shelves. Distribute weight evenly.
- Keep small parts away from children during assembly to avoid choking hazards.
- Use the provided anti-tip device to secure the vanity to a wall, especially if children are present, to prevent tipping accidents.
- Avoid exposing the LED mirror to excessive moisture or direct water contact.
- Do not attempt to modify or repair the electrical components of the LED mirror yourself. Contact qualified personnel for service.

Figure 2.1: Illustration of the anti-tip device for securing the vanity table.
This image highlights the anti-tip device, which is crucial for safely securing the vanity table to a wall, preventing accidental tipping and ensuring stability.
3. Package Contents
Before assembly, please verify that all parts listed below are present and undamaged. If any parts are missing or damaged, please contact customer support.
- Vanity Table Components (engineered wood panels, hardware)
- LED Mirror Unit
- Stool Components (stool frame, cushion)
- Assembly Hardware (screws, dowels, cam locks, etc.)
- Anti-Tip Device
- Instruction Manual
4. Assembly Instructions
Assembly is required for this product. It is recommended to have two people for assembly. Please follow the detailed instructions provided in the separate assembly guide included in your package. Below are general guidelines and key considerations.
- Prepare Your Workspace: Clear a spacious area and lay out all components on a soft, clean surface to prevent scratches.
- Assemble the Main Table Frame: Connect the side panels and back panel to form the main structure of the vanity table.
- Install Drawers: Assemble the two large drawers and install their respective rails into the main table frame. Ensure smooth operation.
- Attach the LED Mirror Unit: Secure the LED mirror unit to the top of the vanity table. Connect the power cable as instructed.
- Configure Side Storage: The side storage cabinet can be installed on either the left or right side of the vanity table, based on your preference and room layout.
- Assemble the Stool: Put together the stool frame and attach the comfortable linen cushion.
- Secure with Anti-Tip Device: Once the vanity is in its final position, use the provided anti-tip device to secure it to a wall stud.

Figure 4.1: Flexible side storage configuration.
This diagram illustrates how the side storage unit can be positioned on either the left or right side of the vanity table during assembly, offering customizable storage solutions.

Figure 4.2: Organized storage with drawers and shelves.
This image contrasts a cluttered surface with the organized storage provided by the vanity's drawers and open shelves, demonstrating the benefits of proper assembly and utilization of storage compartments.
5. Operating Instructions
5.1 LED Mirror Operation
The integrated LED mirror features adjustable lighting to suit various makeup needs.
- Power On/Off: Touch the power button on the mirror surface to turn the LED lights on or off.
- Change Color Mode: Briefly touch the power button to cycle through the three available color modes:
- Cool White: Ideal for detailed work and bright environments.
- Warm White: Simulates natural outdoor light for everyday makeup.
- Warm Yellow: Suitable for evening makeup or creating a warm ambiance.
- Adjust Brightness: Press and hold the power button to continuously adjust the brightness level within the selected color mode. Release the button when the desired brightness is reached.

Figure 5.1: LED mirror color modes and brightness adjustment.
This illustration demonstrates the three distinct color modes of the LED mirror (Cool White, Warm White, Warm Yellow) and how to adjust brightness by touching and holding the control button.

Figure 5.2: LED mirror control interface.
This graphic provides a visual guide on operating the LED mirror, showing that a short press changes the lighting mode and a long press adjusts the brightness from 0% to 100%.
5.2 Storage Features
- Drawers: Utilize the two large drawers for storing cosmetics, jewelry, and other personal items. The smooth-gliding rails ensure easy access.
- Open Shelves: The four open shelves provide convenient access to frequently used items like perfumes, brushes, and skincare products.
- Stool Storage: The accompanying stool features a hidden storage compartment, ideal for less frequently used items or small accessories.
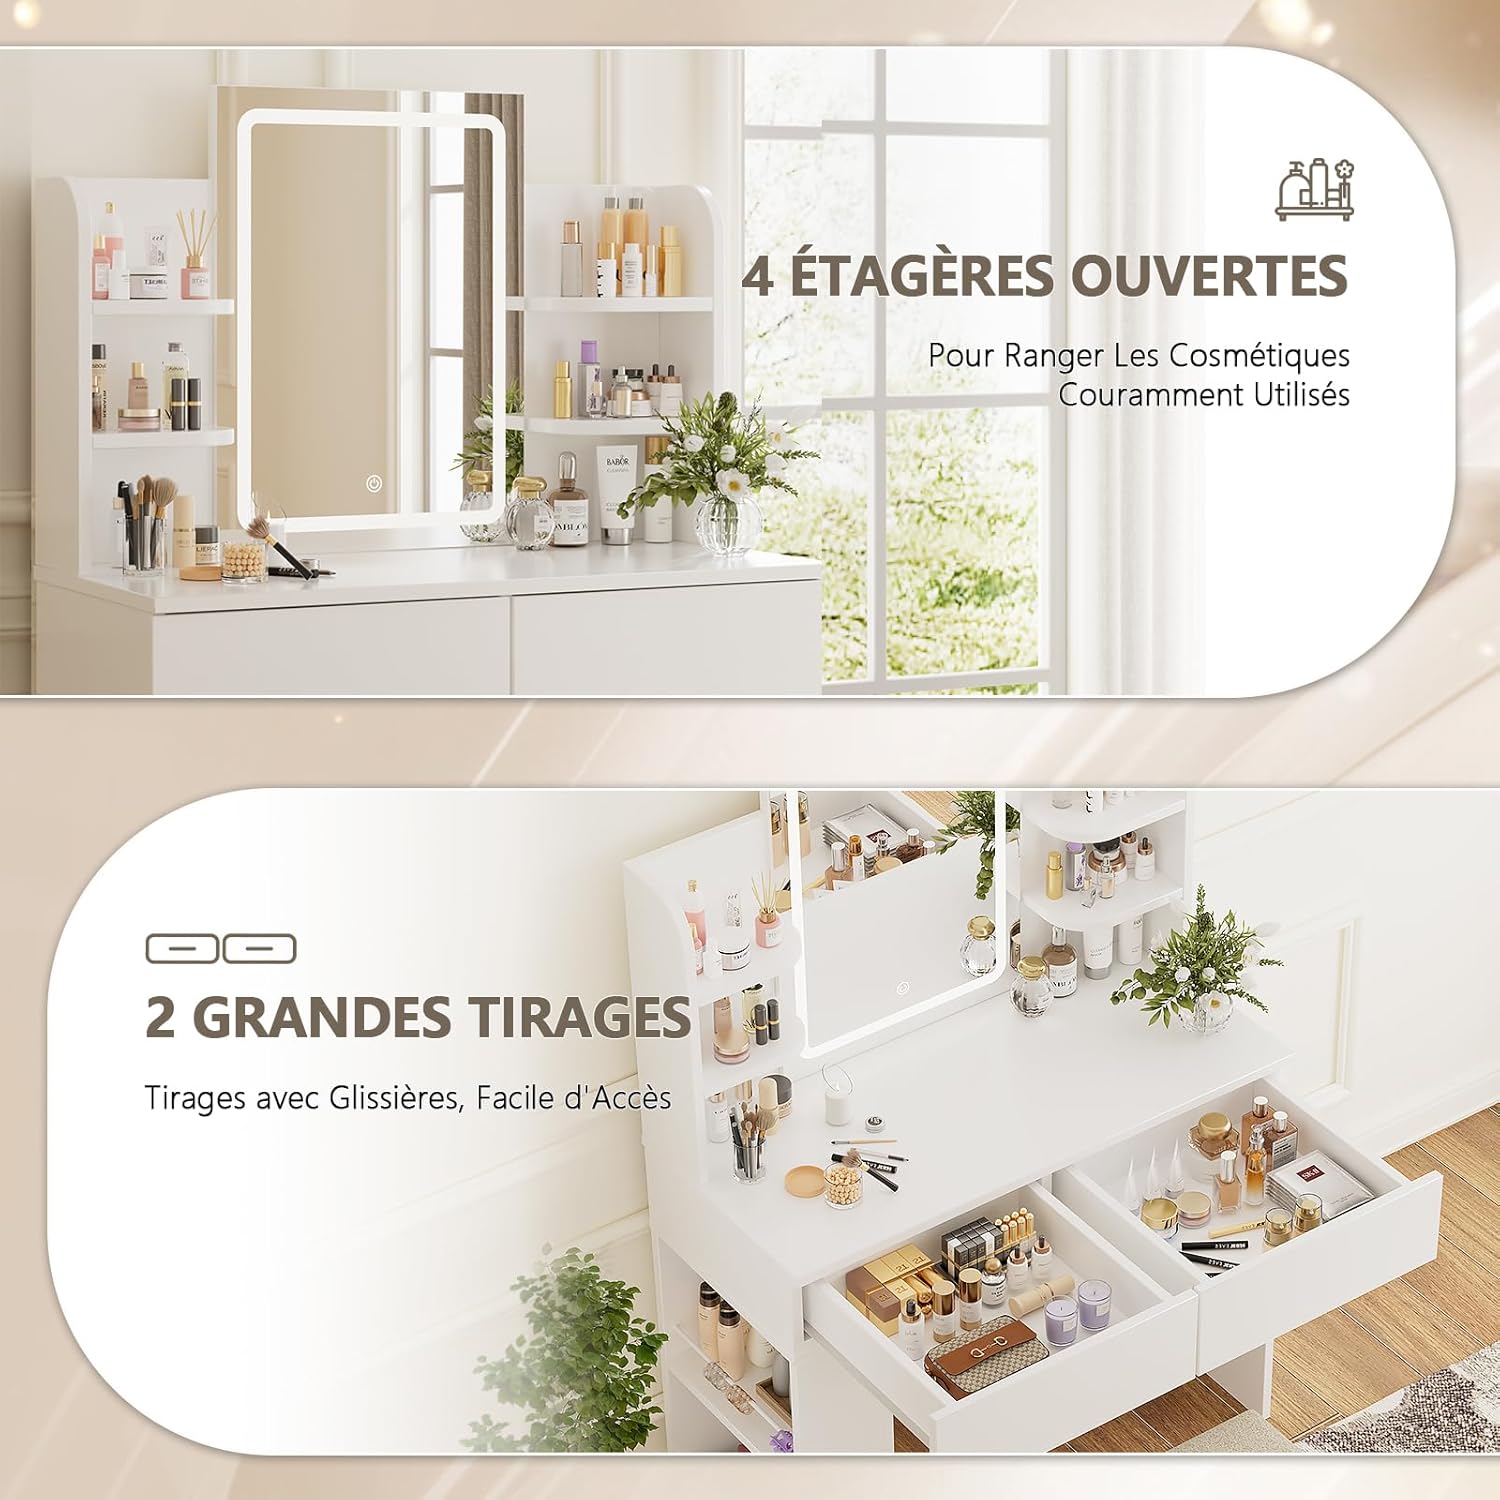
Figure 5.3: Vanity storage compartments.
This image showcases the vanity table's storage capabilities, including four open shelves for display and quick access, and two spacious drawers for organized storage of various beauty products and accessories.
6. Maintenance
- Cleaning: Wipe the vanity table and mirror surfaces with a soft, damp cloth. Avoid abrasive cleaners or harsh chemicals that could damage the finish or mirror coating.
- Dusting: Regularly dust all surfaces to prevent buildup.
- Spills: Clean up spills immediately to prevent staining or damage to the engineered wood.
- Fasteners: Periodically check all screws and connections to ensure they remain tight. Re-tighten if necessary.
Figure 6.1: Easy cleaning of the vanity surface.
This image illustrates the ease of cleaning the vanity table's surface, emphasizing its durable and resistant material that can be wiped with a damp cloth to maintain its appearance.
7. Troubleshooting
| Problem | Possible Cause | Solution |
|---|---|---|
| LED mirror lights do not turn on. |
|
|
| Drawers are stiff or do not slide smoothly. |
|
|
| Vanity table feels unstable. |
|
|
8. Specifications
| Feature | Detail |
|---|---|
| Brand | TRIUMPHKEY |
| Model Number | DT-0501C |
| Product Dimensions (L x W x H) | 90 x 40 x 135 cm |
| Item Weight | 15 Kilograms |
| Color | White |
| Material | Engineered Wood, Glass (mirror) |
| Frame Material | Engineered Wood |
| Number of Drawers | 2 |
| LED Mirror Size | 60 x 45 cm (approx.) |
| LED Mirror Features | 3 Color Modes, Adjustable Brightness |
| Stool Seat Material | Linen |
| Stool Seat Height | 39 Centimeters |
| Assembly Required | Yes |
| Care Instructions | Wipe with a damp cloth |
| Country of Origin | China |

Figure 8.1: Product dimensions overview.
This diagram illustrates the precise measurements of the vanity table (90cm width, 40cm depth, 135cm height), the LED mirror (45cm width, 60cm height), a drawer (45cm width, 33cm depth, 8cm height), and the accompanying stool (37.5cm width, 30cm depth, 44cm height).
9. Warranty Information
TRIUMPHKEY products are manufactured to high-quality standards. For specific warranty details regarding your vanity table, please refer to the warranty card included in your package or contact TRIUMPHKEY customer support. Keep your purchase receipt as proof of purchase for any warranty claims.
10. Customer Support
If you have any questions, require assistance with assembly, or encounter any issues with your TRIUMPHKEY Vanity Table, please do not hesitate to contact our customer support team. You can typically find contact information on the packaging, the warranty card, or by visiting the official TRIUMPHKEY website.
Please have your model number (DT-0501C) and purchase details ready when contacting support.