
Important Safety Information
Please read this manual carefully before assembly and use. Keep these instructions for future reference. Improper assembly or use can result in injury or damage to the product.
- Always use appropriate tools and follow all assembly steps.
- Ensure all connections are secure before use.
- Do not exceed the maximum weight limit of 90.72 kg (200 lbs) for the vanity.
- Keep small parts away from children during assembly.
Setup Guide
Unpacking
Carefully remove all components from the packaging. Inspect all parts for any damage. If any parts are missing or damaged, do not proceed with assembly. Contact customer support for assistance.
Retain packaging materials until assembly is complete to ensure no small parts are discarded.
Assembly
The Giantex Bathroom Vanity GT12038WH-JV is designed for freestanding installation. While specific assembly steps are not detailed here, generally, you will need to:
- Attach the legs to the main vanity body, if they are not pre-assembled.
- Secure the countertop with the integrated ceramic sink to the vanity base.
- Install any drawers or cabinet doors, ensuring they operate smoothly.
- Connect plumbing to the pre-drilled faucet holes and the sink drain.
Refer to the detailed assembly instructions included in your product packaging for step-by-step guidance.
Placement
Choose a level and stable surface in your bathroom for placement. Ensure adequate space for opening the cabinet door and drawers. The vanity features an anti-overflow hole in the sink for safety.
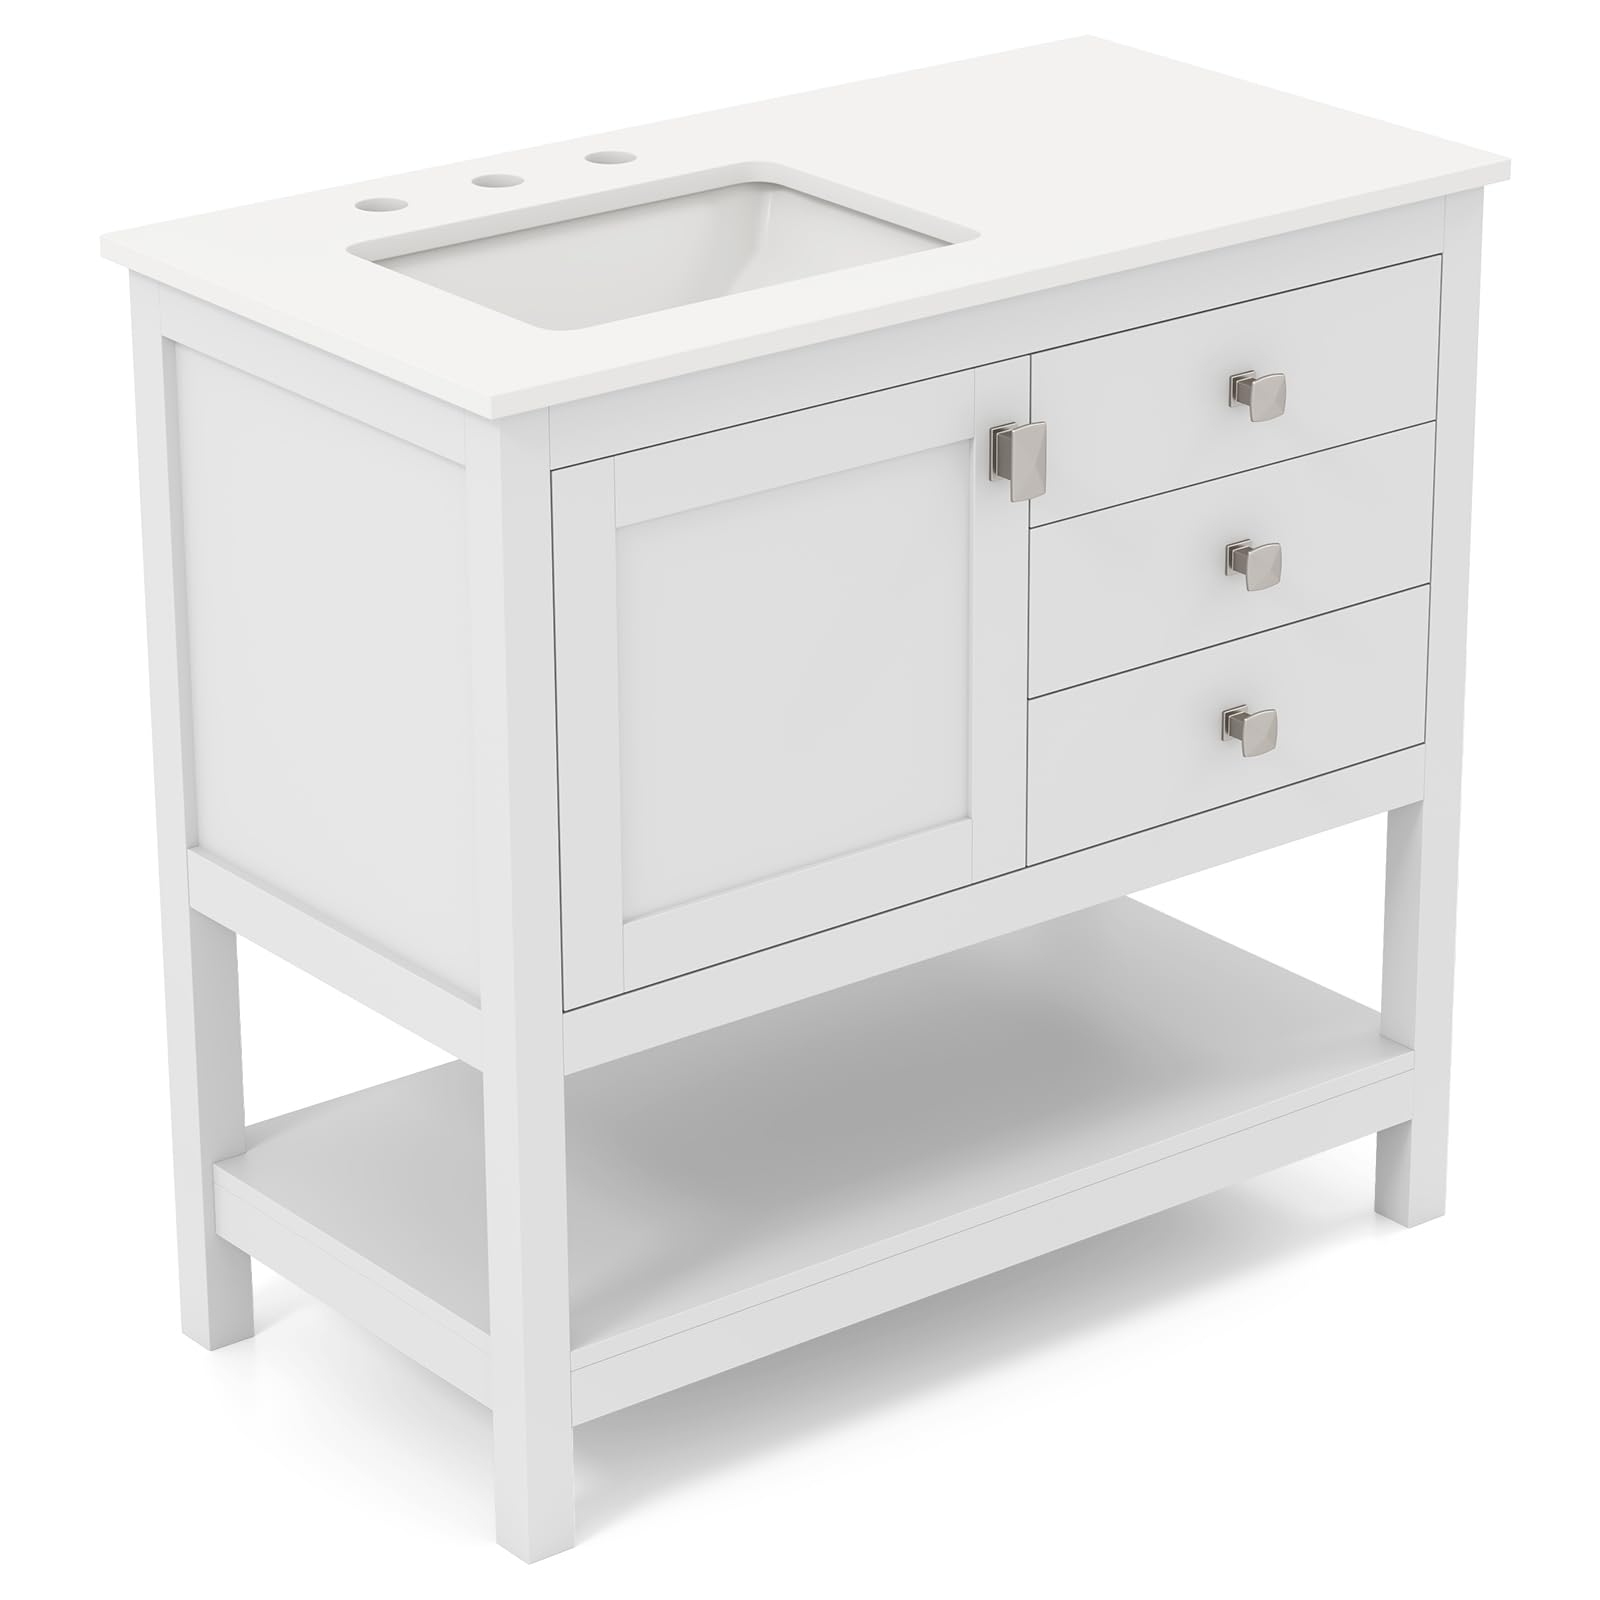
Figure 1: Giantex Bathroom Vanity with key dimensions. The vanity measures approximately 91.44 cm (36 inches) in width, 48.26 cm (19 inches) in depth, and 86.36 cm (34 inches) in height, including the countertop.
Operation
Using the Vanity
The Giantex Bathroom Vanity is designed for bathroom storage and daily use. It features one cabinet door and three drawers for organizing your toiletries and other bathroom essentials.
- Cabinet: Use the cabinet for larger items or plumbing access.
- Drawers: The three drawers provide convenient storage for smaller items, keeping your bathroom tidy.
- Sink: The integrated ceramic sink is equipped with pre-drilled faucet holes and an anti-overflow hole for safe water usage.
Maintenance and Care
Cleaning Instructions
Regular cleaning will help maintain the appearance and longevity of your vanity.
- Vanity Base (MDF + Rubber Wood): Wipe with a soft, damp cloth. Avoid abrasive cleaners or harsh chemicals that can damage the matte finish. Dry immediately with a clean cloth.
- Countertop (Granite): Clean with a pH-neutral cleaner specifically designed for natural stone. Avoid acidic cleaners (like vinegar or lemon juice) or abrasive scrubbers, as these can etch or scratch the granite surface and make it prone to staining. Wipe spills immediately.
- Sink (Ceramic): Clean with a mild, non-abrasive bathroom cleaner and a soft sponge or cloth. Rinse thoroughly after cleaning.
- Hardware: Wipe with a soft, dry cloth. Avoid chemical cleaners that may tarnish the finish.
General Care
To prevent damage and ensure durability:
- Avoid placing extremely hot items directly on the countertop without protection.
- Do not use the vanity as a step stool or apply excessive weight to the drawers or cabinet door.
- Periodically check and tighten any loose hardware.
Troubleshooting
Common Issues and Solutions
| Problem | Possible Cause | Solution |
|---|---|---|
| Stains on Countertop | Exposure to acidic substances, colored liquids, or improper cleaning agents. | Wipe spills immediately. Use a pH-neutral cleaner for granite. For stubborn stains, consult a professional stone cleaner or refer to specialized granite stain removal guides. Avoid abrasive methods. |
| Drawers or Door not closing smoothly | Loose hardware, obstruction, or misalignment. | Check for obstructions. Ensure all screws on hinges and drawer slides are tight. Adjust hinges if necessary for proper alignment. |
| Water leaks from plumbing connections | Loose connections or improper sealing during installation. | Ensure all plumbing connections are securely tightened and properly sealed with plumber's tape or putty as required during installation. If unsure, consult a qualified plumber. |
If you encounter issues not listed here or if the suggested solutions do not resolve the problem, please contact customer support.
Product Specifications
| Feature | Detail |
|---|---|
| Brand | GIANTEX |
| Model Number | GT12038WH-JV |
| Colour | White |
| Material | MDF + Rubber Wood + Granite + Ceramic |
| Product Dimensions (D x W x H) | 48.3D x 91.4W x 86.4H centimetres (19D x 36W x 34H inches) |
| Item Weight | 47.4 kg (104.5 lbs) |
| Weight Limit | 90.72 kg (200 lbs) |
| Mounting Type | Freestanding |
| Room Type | Bathroom |
| Number of Drawers | 3 |
| Number of Shelves | 1 (open bottom shelf) |
| Special Features | Anti-overflow hole, pre-drilled faucet holes |
Warranty and Customer Support
GIANTEX products are manufactured to high-quality standards. For specific warranty information regarding your GT12038WH-JV Bathroom Vanity, please refer to the warranty card included with your purchase or visit the official GIANTEX website.
If you have any questions, require assistance with assembly, or need to report a damaged/missing part, please contact GIANTEX customer support. Have your model number (GT12038WH-JV) and purchase information ready when contacting support.
You can typically find customer support contact details on the GIANTEX official website or through your retailer's customer service portal.