1. Introduction
Thank you for choosing the Hikiddo Licensed Ford Shelby F-150 24V Kids Ride-On Toy. This electric car is designed to provide a realistic and enjoyable driving experience for children aged 3-6 years. It features powerful motors, parental remote control, and various entertainment options. Please read this manual thoroughly before assembly and operation to ensure safe and correct usage.
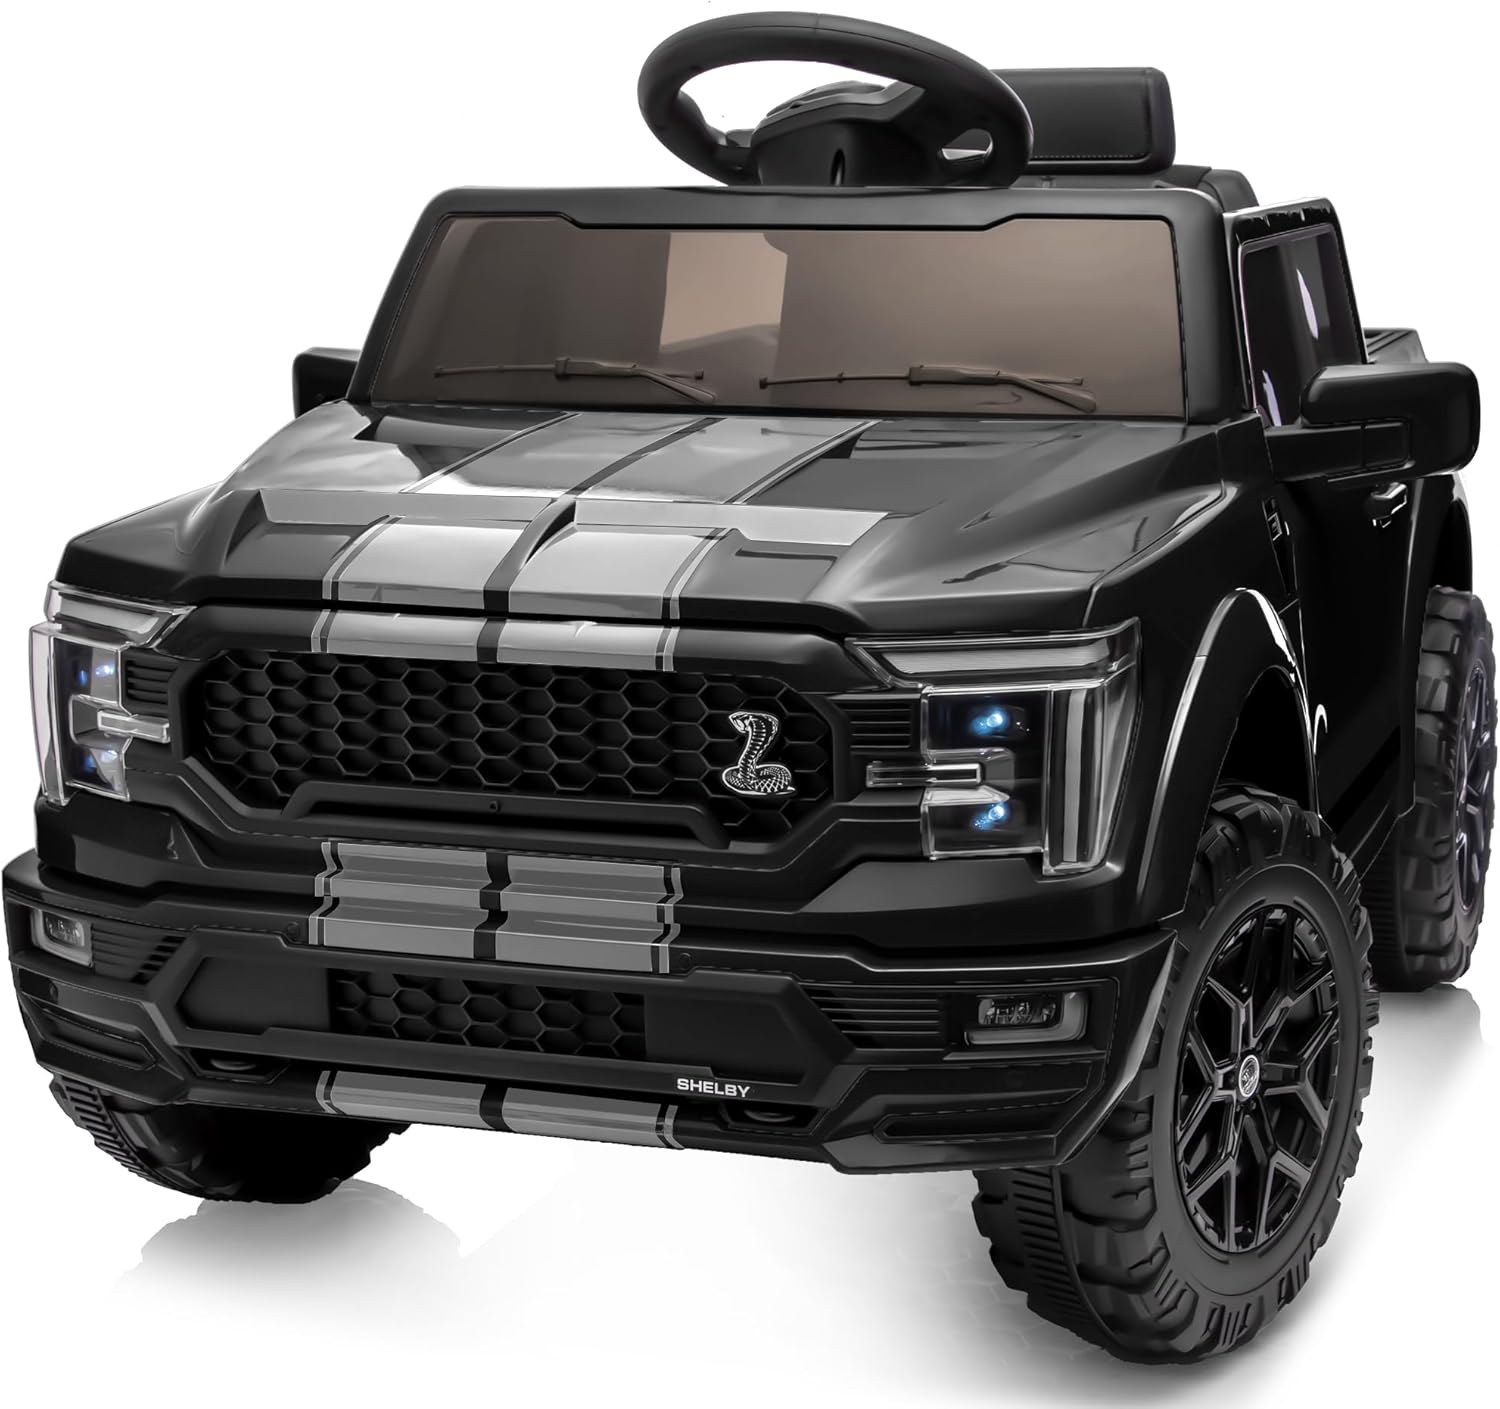
Image 1.1: The Hikiddo Licensed Ford Shelby F-150 24V Kids Ride-On Toy in black.
2. Safety Warnings
- Adult Supervision Required: Always supervise your child while they are operating the ride-on toy.
- Age and Weight Limits: Suitable for children aged 3-6 years. Maximum weight capacity is 66 pounds.
- Safety Standards: This product meets ASTM and CPSIA standards for child safety.
- Seat Belt Usage: Ensure the secure 3-point seat belt is fastened at all times during operation.
- Terrain: Operate on flat, dry surfaces. Avoid steep inclines, rough terrain, or public roads.
- Charging: Use only the provided charger. Do not overcharge the battery.
- Battery Handling: The 24V rechargeable battery is not user-replaceable. Refer to qualified service personnel for battery maintenance.
3. Package Contents
Before beginning assembly, please ensure all parts are present and undamaged. Refer to the parts list in your printed manual for a complete overview.

Image 3.1: Overview of all components included in the package for assembly.
4. Setup and Assembly
Follow these steps carefully to assemble your ride-on toy. An installation video is provided for visual guidance.
Video 4.1: Detailed installation guide for the Ford Shelby F-150 Kids Ride-On Toy. This video demonstrates step-by-step assembly from unboxing to final checks.
4.1. Chassis Assembly
- Attach the plastic reinforcements to the bottom of the car chassis. Secure each with 5 screws.
- Connect the motor wires to the corresponding ports on the chassis.
4.2. Wheel Installation
- Slide each wheel onto its metal bar.
- Place a washer on the bar, then insert the pin through the bar to secure the wheel.
- Use pliers to bend the ends of the pin to prevent it from dislodging.
4.3. Steering Wheel and Windshield
- Connect the steering wheel's electrical wire.
- Push the steering wheel into place and secure it with the included bolt.
- Insert the front windshield into its designated slots and fasten with two screws.
- Connect the front windshield's electrical wire to the main harness.
- Push the rear windshield into place until it clicks. No screws are required for the rear windshield.
4.4. Seat Installation
- Position the seat in the car.
- Fasten the seat with two screws, one on each side.
4.5. Battery Connection
- Ensure all battery wires are securely connected before first use.
- Charge the 24V battery for 8-12 hours before initial operation.
5. Operating Instructions
5.1. Power On/Off
- Press the circular power button on the dashboard to turn the car on. It will emit a realistic engine sound.
- Press the same button to turn the car off.
5.2. Driving Modes
- Manual Operation: Children can drive the car using the foot pedal and steering wheel.
- Parental Remote Control: Parents can guide the car using the included 2.4G remote control for safe and interactive play. Ensure the forward/reverse switch on the car is in the central position for remote control operation.
- Speed Settings: Adjustable speeds from 2 to 3.5 mph.
Video 5.1: Demonstration of the Ford Shelby F-150 Kids Ride-On Toy in action, highlighting its features and suitability for young explorers.
5.3. Lights and Sounds
- LED Headlights: The car features functional LED headlights.
- Horn: Press the horn button on the steering wheel for horn sounds.
- Bluetooth Connectivity: Connect your device via Bluetooth to play music through the car's speakers.
- PA System: The functional PA loudspeaker can be plugged into the left dash area.

Image 5.1: Bluetooth connectivity allows for playing music during rides.
6. Maintenance
- Charging: Recharge the 24V battery after each use. Avoid completely draining the battery.
- Storage: Store the ride-on toy in a dry place away from direct sunlight and extreme temperatures.
- Cleaning: Wipe the car with a damp cloth. Do not use harsh chemicals or abrasive cleaners.
7. Troubleshooting
7.1. Remote Control Pairing
- If the remote control is not synced with the car, press and hold the up and down arrows on the remote simultaneously until the LED blinks fast.
- Then, turn on the car. The remote should now be paired.
- Ensure the forward/reverse switch on the car is in the central position for remote control operation.
7.2. General Issues
- If the car does not move or lights do not work, check all battery connections to ensure they are secure.
- Ensure the battery is fully charged.
- If issues persist, consult the detailed troubleshooting section in your printed manual or contact customer support.
8. Specifications
| Feature | Detail |
|---|---|
| Product Dimensions | 43.3 x 26.8 x 20.5 inches |
| Item Weight | 66 pounds |
| Recommended Age | 3 - 6 years |
| Battery | 24V Rechargeable (Nonstandard Battery) |
| Motors | Dual 200W Motors |
| Speed | Adjustable, 2 to 3.5 mph |
| Safety Features | 3-point seat belt, 4-wheel shock absorption, ASTM and CPSIA standards |
| Connectivity | Bluetooth, PA system |
9. Warranty and Support
Hikiddo offers a 30-day quality guarantee and an easy return policy. For technical assistance, product inquiries, or warranty claims, please contact Hikiddo customer support. Refer to your product packaging or the Hikiddo brand store for specific contact information.

Image 9.1: Hikiddo provides 7x24h customer service and a 30-day quality guarantee.


