
Important Safety Information
Please read this manual thoroughly before using the REDTIGER F77 V2 Dash Cam. Improper use may result in product damage, property damage, or personal injury. Keep the device away from water, moisture, and extreme temperatures. Do not attempt to disassemble or repair the device yourself. Always ensure the dash cam is securely mounted and does not obstruct your view while driving.
Package Contents
Verify that all items listed below are included in your package:
- 1 x REDTIGER F77 V2 4K Front Dash Cam
- 1 x 4K Rear Dash Cam
- 1 x 11.5ft Power Supply Cable with Car Charger
- 1 x Data Transfer USB Cable
- 1 x 21.3ft Rear Camera Cable
- 1 x User Manual
- 1 x Crowbar (Car Wire Trim Tool)
- 1 x Quick Guide
- 2 x Electrostatic Sticker
- 2 x Adhesive Mount
- 5 x Cable Clips

Product Overview
The REDTIGER F77 V2 is a dual 4K dash cam system designed to record both front and rear views of your vehicle. It features a compact design with a 4-inch touchscreen for easy operation.
Front Dash Cam (Main Unit)
- Front Camera Lens: Records 4K video.
- 4-inch Touch Screen: For live view, playback, and settings adjustment.
- Power Button: To turn the device on/off.
- USB-C Ports: For power input and rear camera connection.
- MicroSD Card Slot: For additional storage (device has built-in eMMC).
- GPS Module: Integrated into the mount for location and speed data.
Rear Dash Cam
- Rear Camera Lens: Records 4K video for the rear view.
- USB-C Connector: To connect to the main unit.
Setup
1. Front Dash Cam Installation
- Clean the area on your windshield where you intend to mount the dash cam. Ensure it is free of dust and grease.
- Apply one of the electrostatic stickers to the cleaned area on the windshield. This helps protect your windshield and allows for easier removal.
- Attach an adhesive mount to the dash cam's main unit.
- Firmly press the dash cam with the attached mount onto the electrostatic sticker. Ensure a secure fit.
- Connect the 11.5ft power supply cable to the dash cam's power input (USB-C port).
- Route the power cable along the edge of the windshield and down to your vehicle's 12V power outlet (cigarette lighter) using the provided crowbar and cable clips to hide the cable neatly.
2. Rear Dash Cam Installation
- Choose a suitable location on your rear windshield for the rear dash cam, ensuring it has a clear view and does not obstruct your driving.
- Clean the chosen area and apply an electrostatic sticker, then attach the rear dash cam with an adhesive mount.
- Connect the 21.3ft rear camera cable to the rear dash cam.
- Route the rear camera cable from the rear windshield to the front dash cam, connecting it to the designated USB-C port. Use the crowbar and cable clips for a tidy installation.

3. Power Connection
Plug the car charger into your vehicle's 12V power outlet. The dash cam will automatically power on and begin recording when the vehicle starts.
Operating Instructions
Basic Operation
- Power On/Off: The dash cam powers on/off automatically with your vehicle's ignition. You can also manually power it on/off using the power button.
- Touch Screen: Use the 4-inch touchscreen to navigate menus, view live footage, and play back recordings.
- Voice Control: The F77 V2 supports 12 voice commands for hands-free operation. Examples include: "Lock the video," "Take picture," and "Turn on audio."
- Loop Recording: The dash cam continuously records, overwriting the oldest files when the storage is full. Critical videos are locked and not overwritten.
- G-Sensor: Automatically detects sudden shakes or collisions and locks the current video segment to prevent it from being overwritten.
- Parking Monitor: With an optional hardwire kit (sold separately), the dash cam can monitor your vehicle 24/7. It supports collision sensing and time-lapse video recording when parked.
Wi-Fi & App Connection
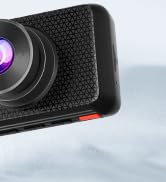
Connect your dash cam to the REDTIGER app for easy setup, live preview, video playback, and sharing.
- Download the "REDTIGER" app from the App Store or Google Play.
- Enable Wi-Fi on your dash cam (via settings or quick toggle).
- On your smartphone, connect to the dash cam's Wi-Fi network (SSID and password displayed on the dash cam screen).
- Open the REDTIGER app and add your device. You can now access live footage, review recordings, and adjust settings.
GPS Functionality
The built-in GPS module accurately records your vehicle's location, speed, and driving route. This data is embedded in your video files and can be viewed via the REDTIGER app or dedicated PC player.
Maintenance
- Formatting eMMC Storage: Periodically format the built-in eMMC storage (or microSD card if used) to ensure optimal performance and prevent data corruption. This can be done through the dash cam's settings menu.
- Cleaning: Regularly clean the camera lenses and touchscreen with a soft, lint-free cloth to ensure clear recordings and responsive touch functionality.
- Firmware Updates: Check the REDTIGER website or app for available firmware updates to ensure your dash cam has the latest features and bug fixes.
Troubleshooting
- Dash Cam Not Powering On: Ensure the power cable is securely connected to both the dash cam and the vehicle's power outlet. Check the vehicle's 12V outlet for power.
- Wi-Fi Connection Issues: Verify that Wi-Fi is enabled on the dash cam and your phone. Ensure you are entering the correct SSID and password. Try restarting both the dash cam and your phone.
- Slow File Transfer/Playback: Ensure your phone has a stable 5.8GHz Wi-Fi connection to the dash cam. Large 4K files may take longer to transfer.
- Video Files Corrupted/Missing: Regularly format the eMMC storage. Ensure you are using a high-quality microSD card if external storage is utilized.
- Parking Monitor Not Working: Confirm that an optional hardwire kit is correctly installed and configured.
For more detailed troubleshooting steps, please refer to the comprehensive User Manual included in your package or visit the REDTIGER support website.
Specifications
| Feature | Specification |
|---|---|
| Front Video Resolution | 4K@30fps (8MP) |
| Rear Video Resolution | 4K@30fps (8MP) |
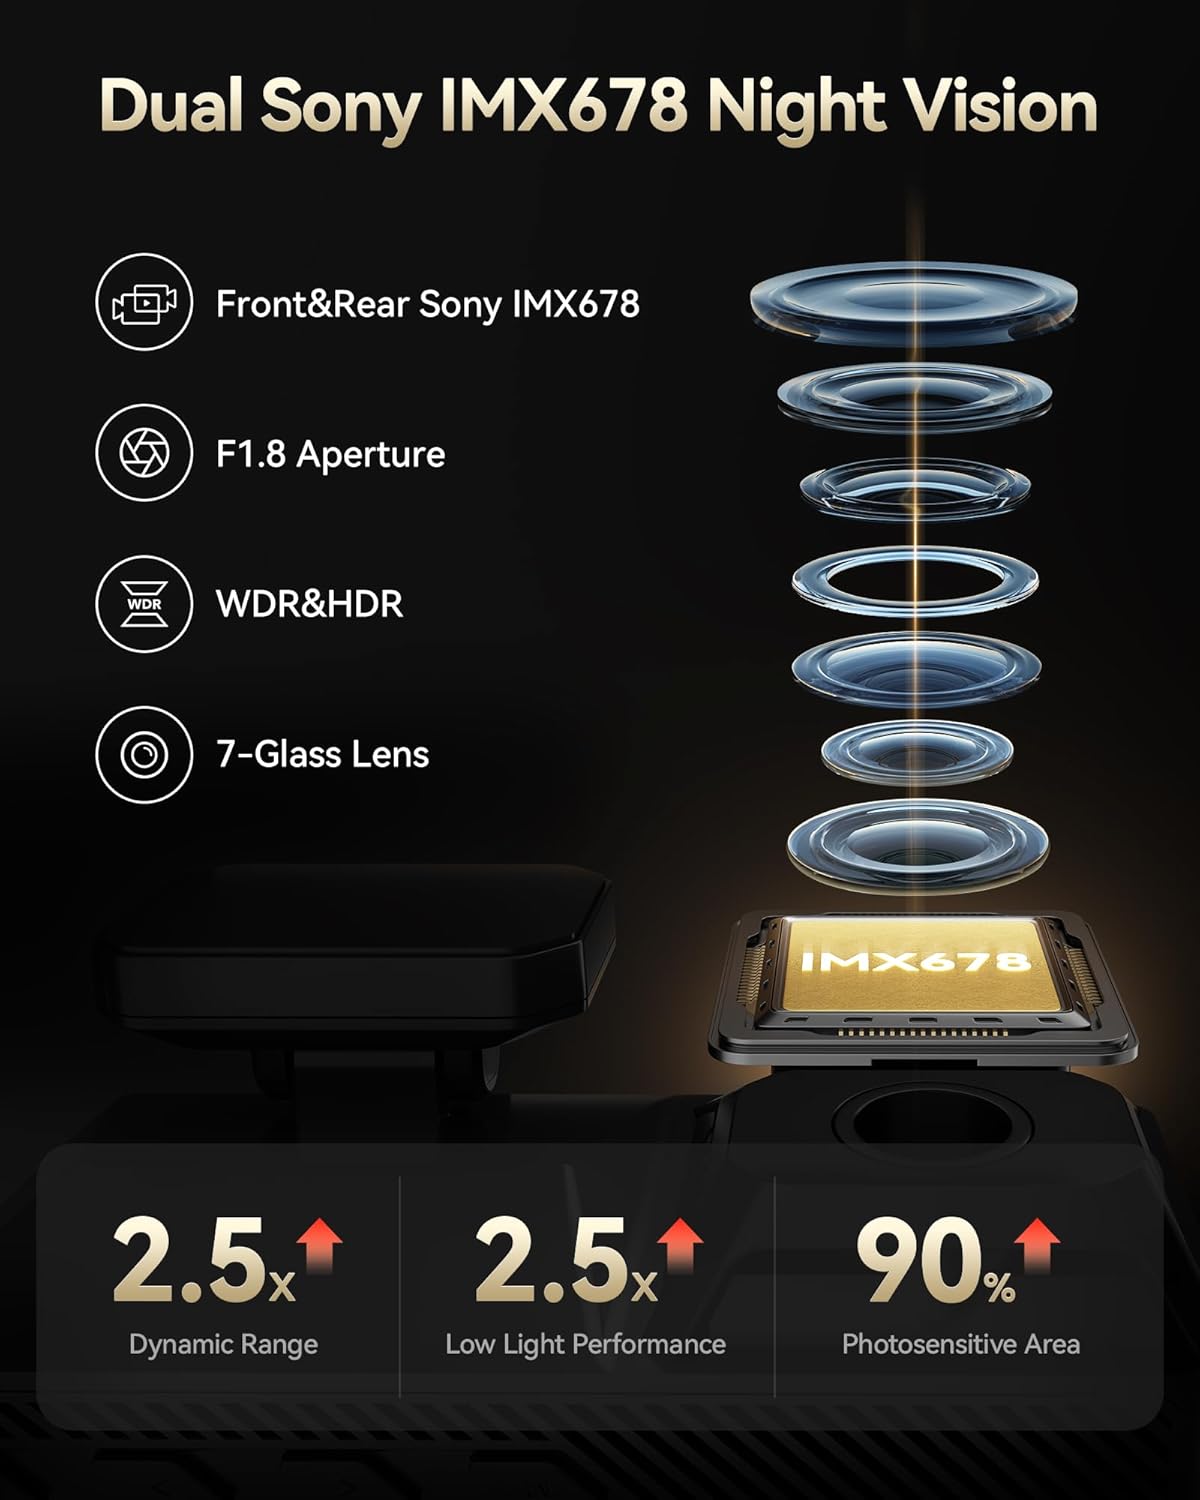
| Image Sensor | Dual Sony STARVIS 2 IMX678 |
| Internal Storage | 256GB eMMC |
| Display | 4-inch Touch Screen |
| Wi-Fi | Built-in 5.8GHz Wi-Fi |
| GPS | Built-in GPS |
| Special Features | Dual HDR, Voice Control, G-Sensor, Parking Monitor (with optional hardwire kit) |
| Connectivity Technology | USB, Wi-Fi |
| Product Dimensions | 1.88 x 1.22 x 0.27 inches |
| Item Weight | 1.92 pounds |
Warranty and Support
- Protection Plan: Enjoy 18 months of protection for your device.
- Return Policy: A 7-day return policy is available for returns on defects.
- Customer Support: REDTIGER offers 24-hour customer support via email and phone for any inquiries or assistance.
For further assistance, please visit the official REDTIGER website or contact customer support directly.


