
1. Introduction
This manual provides essential information for the proper installation, operation, and maintenance of your Generic Core i3-4150 4th Generation Desktop Processor. Please read these instructions carefully before proceeding with installation to ensure optimal performance and system stability.
2. Product Overview
The Generic Core i3-4150 is a 4th Generation Intel processor designed for desktop computers. It features 2 cores and 4 threads, operating at a base clock speed of 3.5 GHz, with 3 MB of Smart Cache. This processor utilizes the LGA 1150 socket, making it compatible with motherboards supporting this socket type, such as the H81 series.
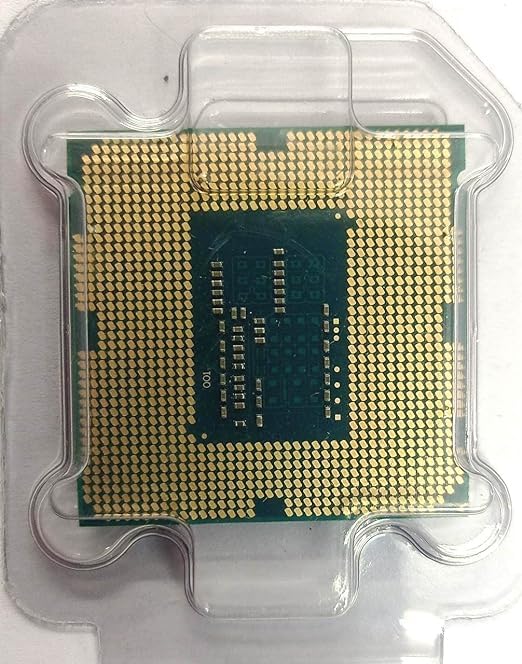
Image 1: Underside of the Core i3-4150 processor, displaying the gold contact pins for motherboard connection.
3. Specifications
| Feature | Detail |
|---|---|
| CPU Manufacturer | Intel |
| CPU Model | Core i3-4150 |
| CPU Speed | 3.5 GHz |
| CPU Socket | LGA 1150 |
| Processor Cores | 2 |
| Processor Threads | 4 |
| Cache Memory | 3 MB Smart Cache |
| Platform | Windows |
| Item Dimensions (L x W) | 5L x 5W Centimeters |
| Item Weight | 0.25 Grams |
4. Setup and Installation
4.1. Preparation
- Ensure your motherboard supports the LGA 1150 socket and is compatible with 4th Generation Intel processors (e.g., H81 chipset).
- Gather necessary tools: Phillips head screwdriver, thermal paste, and a compatible CPU cooler (not included).
- Discharge any static electricity by touching a grounded metal object before handling the processor or motherboard.
- Work in a clean, well-lit environment.
4.2. Processor Installation Steps
- Open the CPU Socket: Locate the CPU socket on your motherboard. Gently push down on the small lever located on the side of the socket and pull it outwards to release the retention frame. Lift the metal load plate.
- Align the Processor: Carefully remove the processor from its packaging. Observe the two notches on the sides of the processor and the corresponding alignment keys on the LGA 1150 socket. Ensure the gold triangle on the corner of the processor aligns with the triangle mark on the socket. Do not force the processor into the socket.
- Place the Processor: Gently lower the processor straight down into the socket. It should sit flush without any pressure.
- Secure the Processor: Lower the metal load plate back over the processor. Push the lever back down and under the retention tab to secure the processor in place.
- Apply Thermal Paste: Apply a small, pea-sized amount of thermal paste to the center of the processor's integrated heat spreader (IHS).
- Install CPU Cooler: Follow the instructions provided with your CPU cooler to properly install it over the processor. Ensure it makes firm contact with the thermal paste and is securely fastened. Connect the CPU cooler's fan cable to the designated header on the motherboard.
5. Operating Instructions
Once the processor is correctly installed and the system is assembled, connect your peripherals and power on the computer. The operating system (e.g., Windows) will typically detect the new processor automatically. Ensure all necessary drivers for your motherboard chipset are installed for optimal performance.
- BIOS/UEFI Settings: Access your motherboard's BIOS/UEFI settings to verify the processor is recognized correctly and to configure any desired settings, such as fan curves or memory profiles.
- System Monitoring: Utilize system monitoring software to keep track of CPU temperature and usage, ensuring it operates within safe limits.
6. Maintenance
Regular maintenance helps prolong the life and maintain the performance of your processor and computer system.
- Dust Removal: Periodically clean dust from the CPU cooler heatsink and fan using compressed air. Accumulation of dust can impede airflow and lead to overheating.
- Thermal Paste: Over time, thermal paste can dry out and lose effectiveness. Consider reapplying thermal paste every 2-3 years, or if you notice consistently high CPU temperatures.
- Temperature Monitoring: Regularly monitor CPU temperatures, especially during heavy workloads, to ensure it remains within safe operating ranges (typically below 80-90°C under load).
7. Troubleshooting
If you encounter issues after installing your processor, consider the following troubleshooting steps:
- No Display/No Boot:
- Ensure the processor is seated correctly in the socket and the retention lever is fully closed.
- Verify that the CPU power cable from the power supply is securely connected to the motherboard.
- Check that RAM modules are properly seated.
- Overheating:
- Confirm the CPU cooler is correctly installed and making good contact with the processor.
- Ensure thermal paste was applied correctly.
- Check that the CPU cooler fan is spinning and connected to the correct header.
- Clean any dust from the heatsink.
- System Instability/Crashes:
- Update motherboard BIOS/UEFI to the latest version.
- Ensure all motherboard chipset drivers are installed.
- Run diagnostic tools to check for other component failures (RAM, storage).
8. Warranty and Support
This Generic Core i3-4150 processor comes with a 1-year warranty from the date of purchase.
For technical support or warranty claims, please contact:
PC Care Solutions Madurai
Refer to your purchase documentation for specific contact details.