
1. Introduction
This manual provides essential information for the safe and efficient operation, maintenance, and troubleshooting of your Dapper Supply DP-RAFS1205 Battery Powered Ride-On Commercial Floor Scrubber Machine. Please read this manual thoroughly before operating the machine to ensure proper usage and to prevent injury or damage.
1.1. Safety Information
- Always wear appropriate personal protective equipment (PPE) during operation and maintenance.
- Ensure the machine is turned off and disconnected from power before performing any maintenance or adjustments.
- Operate the machine only on surfaces designed for its use.
- Do not operate the machine in hazardous environments or near flammable materials.
- Keep hands, feet, and loose clothing away from moving parts.
- Familiarize yourself with all controls and emergency stop procedures.
2. Product Overview
The Dapper Supply DP-RAFS1205 is a battery-powered ride-on commercial floor scrubber designed for efficient cleaning of large floor areas. It features a 22-inch brush width, a 31.5-inch squeegee width, and a dual-tank system for clean and recovery water.

Figure 2.1: Side view of the Dapper Supply DP-RAFS1205 Ride-On Commercial Floor Scrubber Machine.
2.1. Key Components
- Steering Wheel: For directional control.
- Operator Seat: Provides comfortable seating for the user.
- Control Panel: Contains power switch, brush controls, solution flow, and battery indicator.
- Solution Tank: Holds clean water and cleaning solution (18.5-gallon capacity).
- Recovery Tank: Collects dirty water (19.8-gallon capacity).
- Scrub Brush: 22-inch diameter brush for scrubbing floors.
- Squeegee Assembly: 31.5-inch wide squeegee for water and debris collection.
- Front & Back Lights: For improved visibility in dimly lit areas.
- Backup Alarm: Enhances safety during reverse operation.

Figure 2.2: Close-up view of the control panel area, showing the key ignition and brush control.
3. Setup
3.1. Unpacking and Assembly
- Carefully remove the machine from its packaging. Inspect for any shipping damage.
- Ensure all components listed in the packing list are present.
- Attach any unattached components, such as the squeegee assembly, following the diagrams provided in the separate assembly guide (if applicable).
3.2. Initial Battery Charging
Before first use, fully charge the machine's battery. The battery system requires 7-8 hours for a full charge.
- Locate the charging port on the machine.
- Connect the provided charger to the machine and then to a standard 110V AC power outlet.
- Monitor the charging indicator lights. Disconnect the charger once charging is complete.
3.3. Filling the Solution Tank
- Open the lid of the clean water (solution) tank.
- Fill the tank with clean water and an appropriate, manufacturer-approved cleaning solution according to the solution manufacturer's instructions. Do not overfill.
- Securely close the tank lid.
4. Operating Instructions
4.1. Pre-Operation Checklist
- Check battery charge level.
- Ensure solution tank is filled and recovery tank is empty.
- Verify brush and squeegee are properly installed and free of obstructions.
- Clear the area to be cleaned of any large debris or obstacles.
4.2. Starting the Machine
- Sit comfortably in the operator's seat.
- Insert the key into the ignition and turn it to the 'ON' position.
- Engage the main power switch on the control panel.
4.3. Cleaning Procedure
- Lower the scrub brush using the brush control lever/button.
- Lower the squeegee assembly using its respective lever/button.
- Activate the solution flow.
- Begin driving the machine at a consistent, moderate speed. Overlapping passes slightly will ensure thorough cleaning.
- The machine will scrub the floor, dispense solution, and then recover the dirty water through the squeegee into the recovery tank.
- Utilize the front and back lights for enhanced visibility in low-light conditions. The backup alarm will sound when reversing.

Figure 4.1: An operator demonstrating the use of the Dapper Supply Ride-On Floor Scrubber.
4.4. After Operation
- Raise the scrub brush and squeegee.
- Turn off the solution flow.
- Turn off the main power switch and remove the key.
- Empty and rinse the recovery tank.
- Rinse the solution tank if using cleaning chemicals.
- Clean the squeegee blades and brush.
5. Maintenance
Regular maintenance ensures optimal performance and extends the lifespan of your machine.
5.1. Daily Maintenance
- Empty and rinse both solution and recovery tanks thoroughly.
- Clean the squeegee blades and check for wear. Replace if damaged.
- Inspect the scrub brush for debris and wear. Remove any tangled materials.
- Wipe down the exterior of the machine.
- Check battery charge and recharge as needed.
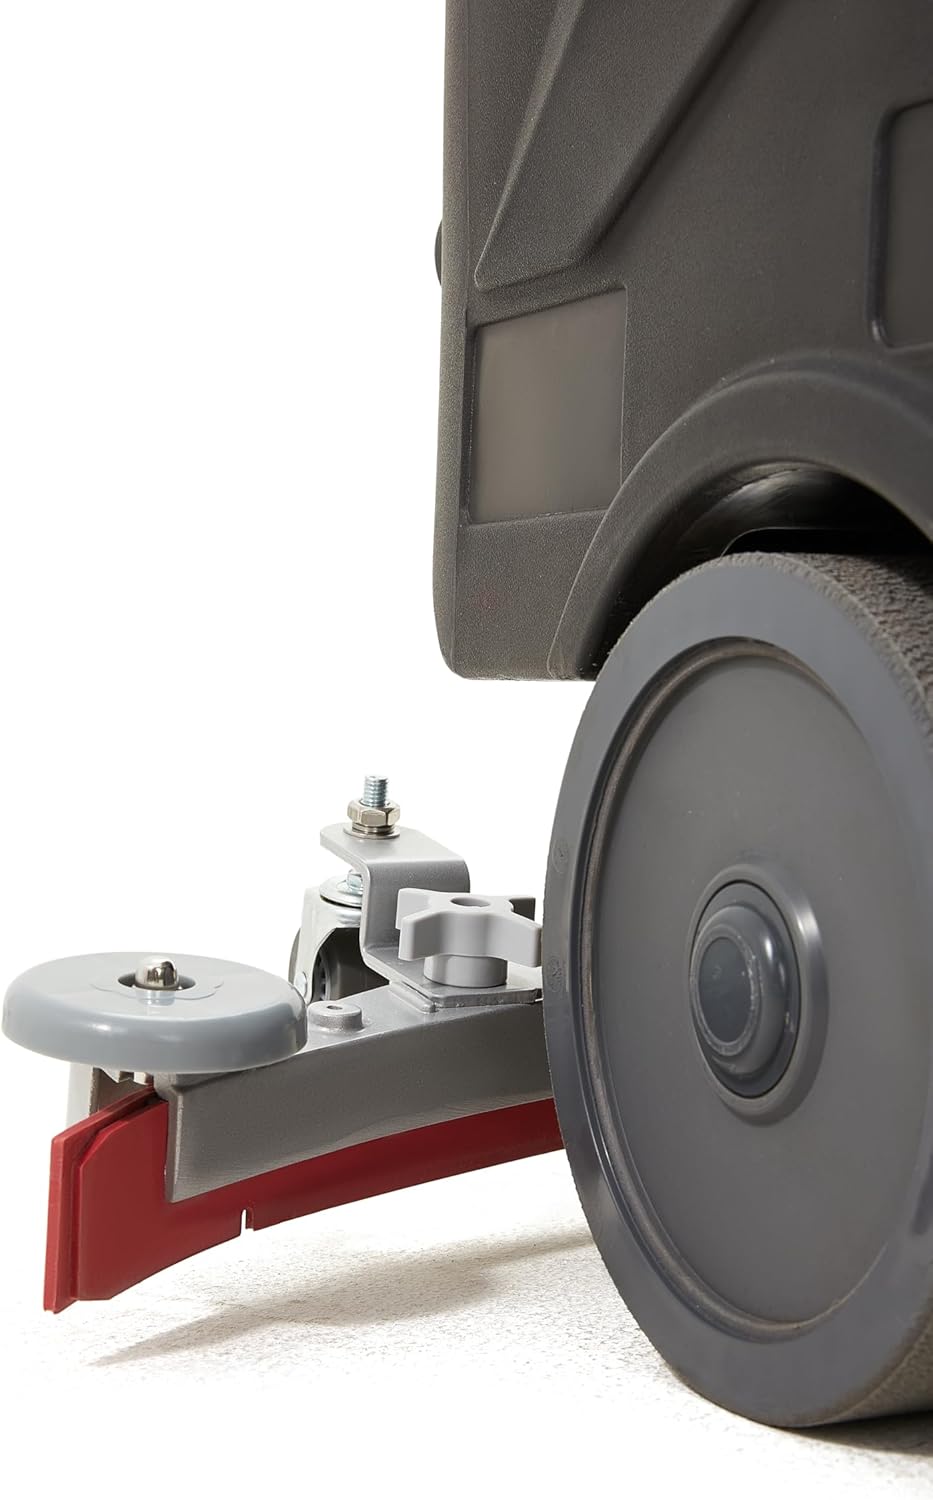
Figure 5.1: Detailed view of the squeegee assembly, showing the blade and adjustment knob.
5.2. Weekly Maintenance
- Inspect all hoses and connections for leaks or damage.
- Check the condition of the wheels and casters.
- Clean the vacuum filter (if applicable).

Figure 5.2: Underside view showing the scrub brush, which should be regularly inspected and cleaned.
5.3. Battery Care
- Always recharge the battery after each use, even if not fully depleted.
- Avoid completely discharging the battery, as this can reduce its lifespan.
- Store the machine in a cool, dry place when not in use, ensuring the battery is charged.
6. Troubleshooting
This section provides solutions to common operational issues. For problems not listed here, contact customer support.
| Problem | Possible Cause | Solution |
|---|---|---|
| Machine does not start | Battery discharged; Key not in 'ON' position; Main power switch off. | Charge battery; Turn key to 'ON'; Engage main power switch. |
| Poor scrubbing performance | Worn brush; Incorrect brush type; Insufficient solution flow. | Replace brush; Use correct brush for floor type; Check solution tank level and flow settings. |
| Water not recovering properly | Worn or damaged squeegee blades; Recovery tank full; Clogged vacuum hose. | Replace squeegee blades; Empty recovery tank; Clear vacuum hose. |
| Machine loses power quickly | Battery not fully charged; Aging battery. | Ensure full charge before use; Consider battery replacement if performance continues to degrade. |
7. Specifications
Technical specifications for the Dapper Supply DP-RAFS1205.
| Feature | Specification |
|---|---|
| Model Number | DP-RAFS1205 |
| Power Source | Battery Powered |
| Cleaning Width | 22 inches |
| Squeegee Width | 31.5 inches |
| Solution Tank Capacity | 18.5 gallons |
| Recovery Tank Capacity | 19.8 gallons |
| Continuous Use Time | 3-4 hours |
| Charge Time | 7-8 hours |
| Cleaning Efficiency | Up to 48,400 sq. ft/hour |
| Brush Speed | 200 RPM |
| Operating Noise Level | 60 dB |
| Item Weight | 242 pounds |
| Product Dimensions (L x W x H) | 49 x 24 x 43 inches |
| Voltage | 110 Volts (AC) |
| Material | Aluminum |
| Included Components | Hard Brush for Hard Floors |
8. Warranty and Support
8.1. Manufacturer's Warranty
The Dapper Supply DP-RAFS1205 Ride-On Commercial Floor Scrubber Machine is covered by a 1-year manufacturer's warranty. This warranty covers defects in materials and workmanship under normal use. Please retain your proof of purchase for warranty claims. The warranty does not cover damage due to misuse, neglect, or unauthorized modifications.
8.2. Customer Support
For technical assistance, parts, or warranty inquiries, please contact Dapper Supply customer support. You can find contact information on the official Dapper Supply website or through your purchase platform.
For more information about Dapper Supply products and support, visit the official Dapper Supply Store.

