
1. Introduction
Welcome to your Waillynice CS08 Mini Body Camera. This manual provides detailed instructions for the setup, operation, and maintenance of your device to ensure optimal performance and longevity. Please read this manual thoroughly before using the product.
2. Product Overview
2.1 Key Features
- 1080P Full-HD Video Recording: Capture clear video at 1920x1080P, 1280x720P, or 640x480P.
- Infrared Night Vision: Equipped with 4pcs 940nm red infrared lights for recording in low-light conditions.
- 180-degree Rotatable Lens: Adjust the lens angle to capture various perspectives with a 120-degree super wide angle.
- Strong Magnetic Back Clip: Allows for secure and versatile attachment to clothing or metal surfaces.
- Loop Recording: Automatically overwrites the oldest files when the memory card is full.
- Simultaneous Recording and Charging: Continue recording while the device is connected to a power source.
- Memory Card Support: Compatible with MicroSD/TF cards from 8GB to 256GB (FAT32 format).
- Long Battery Life: Approximately 7 hours of continuous video recording on a full charge.
- Invisible and Silent Recording: Designed for discreet operation.
- System Time Synchronization: Ensures accurate timestamps on all recordings.
- Compact and Portable Design: Easy to carry and conceal.
- Bracket Screw Hole: Standard 1/4 inch nut interface for mounting on accessories like bicycle brackets.
2.2 Package Contents
- Waillynice CS08 Mini Body Camera
- USB Cable
- User Manual

Figure 1: Front and side view of the Waillynice CS08 Mini Body Camera, showcasing its compact design and controls.

Figure 2: Overview of key features including HD video, nut interface, loop recording, rotating lens, and back clip design.
3. Setup
3.1 Initial Charging
Before first use, fully charge the camera for 3-5 hours. Connect the camera to a power source (e.g., computer USB port, USB wall adapter) using the provided USB cable. The charging indicator light will provide status feedback (refer to device for specific light behavior).
3.2 Memory Card Installation
- Ensure the camera is powered off.
- Locate the MicroSD/TF card slot on the side of the camera.
- Insert a compatible MicroSD/TF card (8GB to 256GB, formatted to FAT32) into the slot until it clicks into place.
- To remove, gently push the card inward until it springs out.
4. Operating Instructions
4.1 Power On/Off
Slide the ON/OFF switch to the 'ON' position to power on the camera. Slide it to 'OFF' to power off.
4.2 Video Recording
- Power on the camera.
- Press the 'OK' button once to start video recording. An indicator light will confirm recording is active.
- Press the 'OK' button again to stop recording. The video file will be saved to the memory card.
4.3 Photo Taking
- Ensure the camera is in standby mode (not recording video).
- Press the 'OK' button once to take a photo. The photo will be saved to the memory card.
4.4 Audio Recording
The camera supports audio recording, typically alongside video. Refer to the device's specific button layout for a dedicated audio-only recording function if available.
4.5 Night Vision
The CS08 camera is equipped with 4 infrared lights that automatically activate in low-light environments to enhance recording visibility. This feature allows for clear capture even in dark conditions.

Figure 3: Demonstration of the lens fill light and night vision capability, showing a scene in both color and monochrome for comparison.
4.6 Loop Recording
When the memory card reaches its full capacity, the camera will automatically begin overwriting the oldest recorded files to continue recording new footage. This ensures continuous operation without manual intervention.
4.7 Time Synchronization
To ensure accurate timestamps on your recordings, synchronize the camera's system time. This is typically done by creating a specific text file (e.g., 'time.txt') on the root directory of the MicroSD card with the current date and time format, then inserting the card into the camera and powering it on. Refer to the device's specific instructions for the exact format.
4.8 Lens Rotation
The camera's lens can be manually rotated 180 degrees, allowing you to adjust the recording angle as needed without repositioning the entire device.
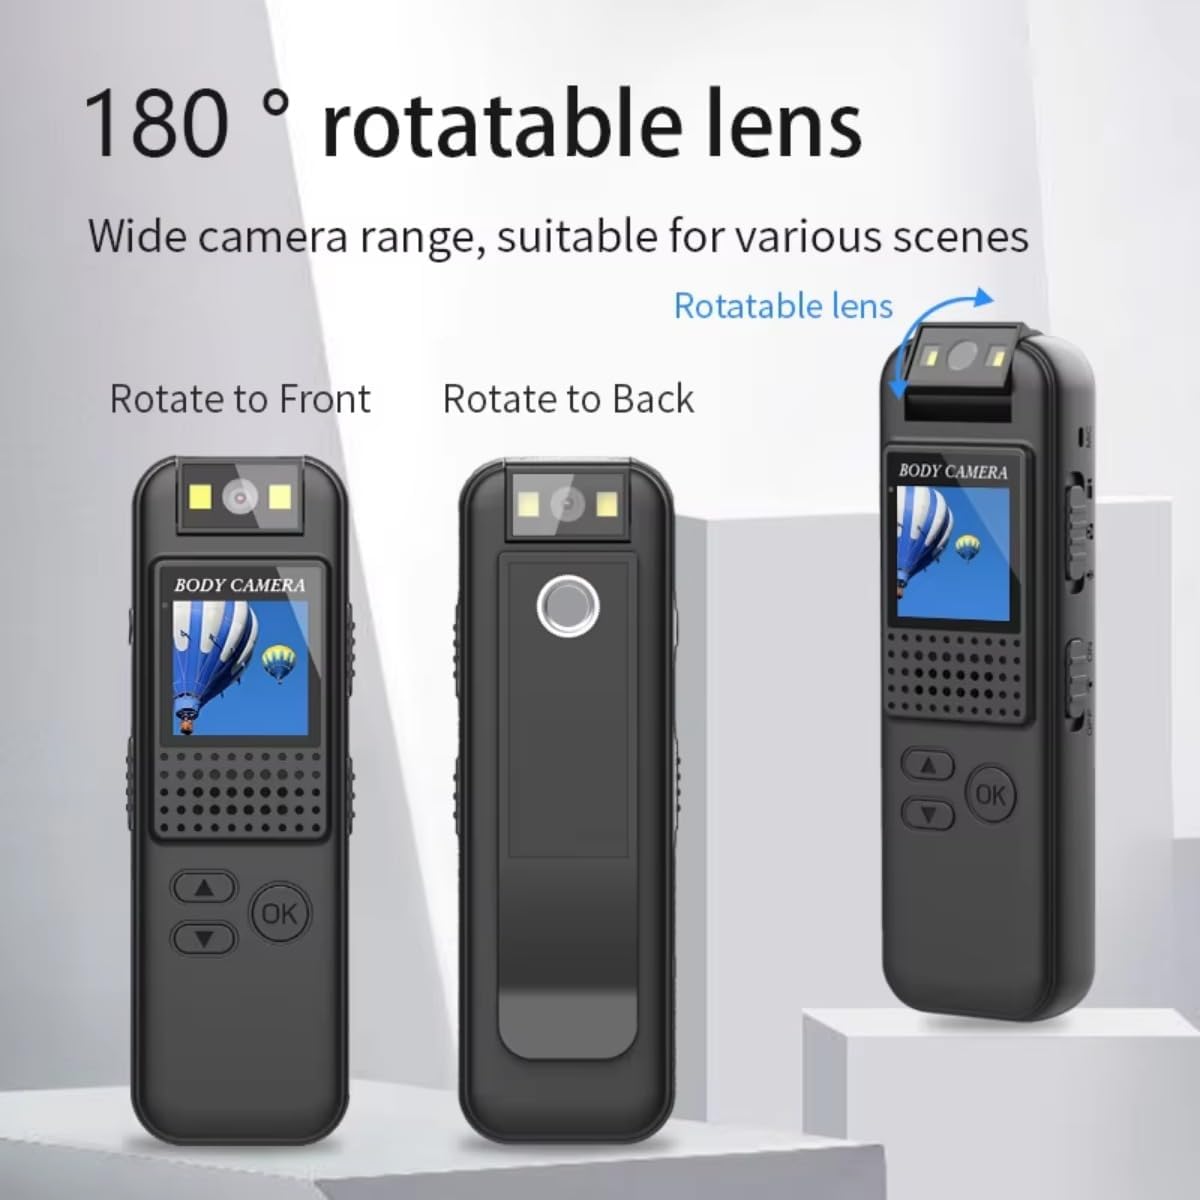
Figure 4: Illustration of the 180-degree rotatable lens, showing its flexibility to point forward or backward.
4.9 Magnetic Back Clip and Mounting
The integrated strong magnetic back clip allows for easy attachment to metal surfaces. Additionally, the camera features a standard 1/4 inch nut interface, enabling it to be mounted on various accessories such as bicycle brackets for outdoor recording.

Figure 5: Depiction of the strong magnetic adsorption feature, highlighting its ability to attach to metal surfaces.

Figure 6: The camera mounted on a bicycle handlebar using its bracket screw hole, demonstrating its outdoor use.
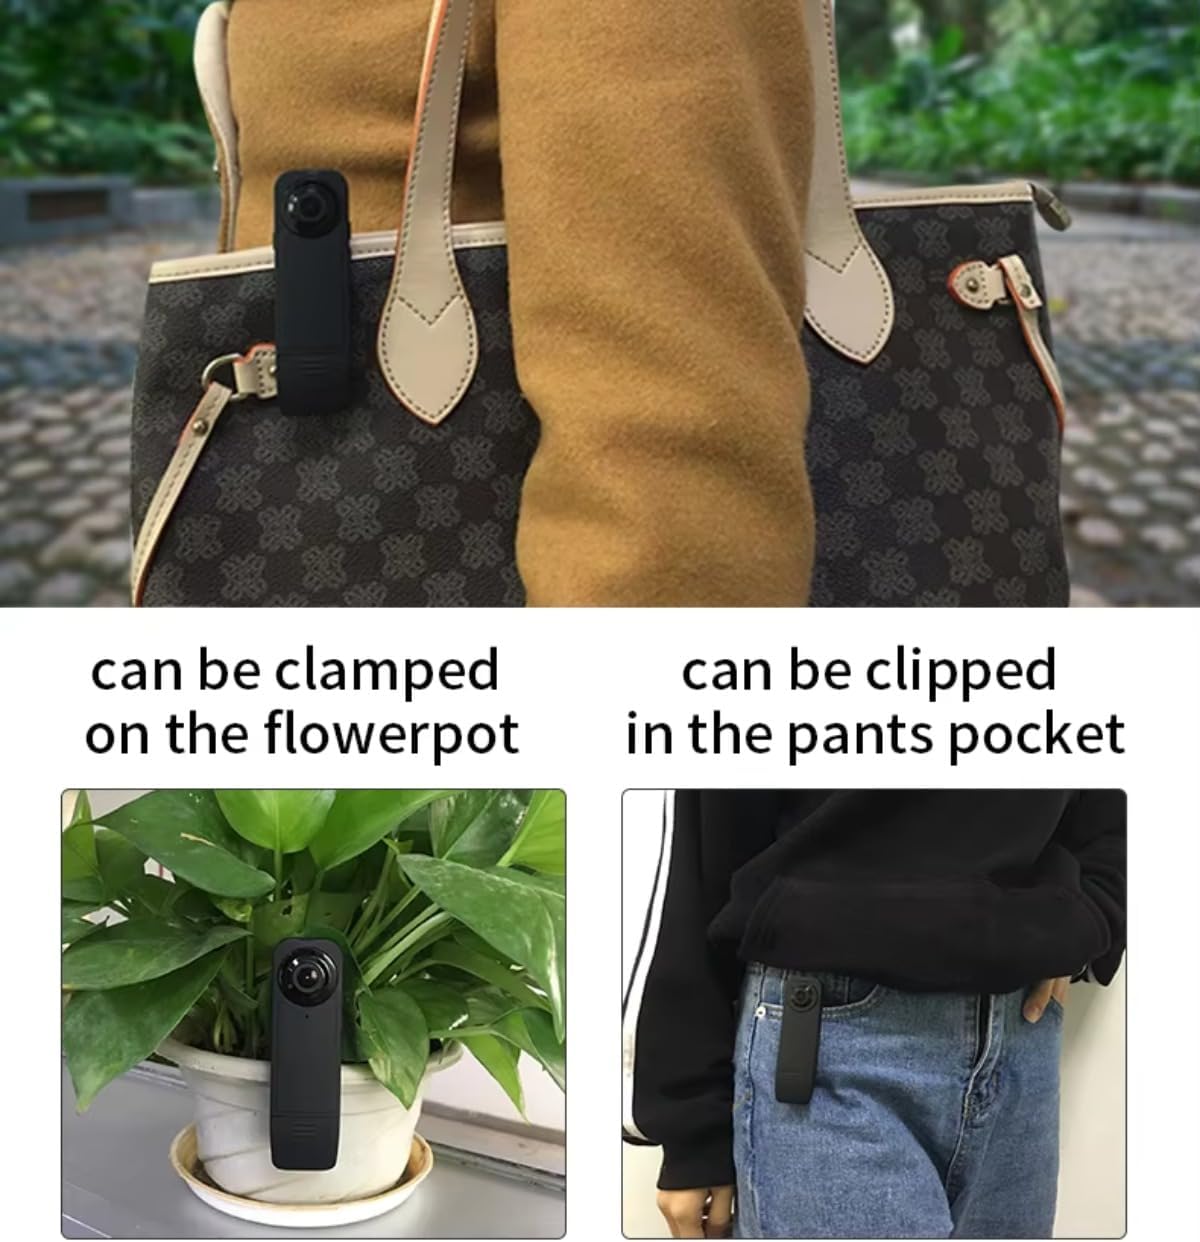
Figure 7: Examples of discreet placement, showing the camera clipped onto a flowerpot and inside a pants pocket.
5. Connecting to Computer
To access and view your recorded videos and photos:
- Connect the camera to your computer using the provided USB cable. The camera should appear as a removable disk drive.
- Alternatively, remove the MicroSD card from the camera and insert it into a compatible card reader connected to your computer.
- Navigate to the removable disk to find your video (AVI) and photo files.
Recommended playback software includes QQPlayer, Kmplayer, VLCmedia, or Windstorm player.
6. Maintenance
- Keep the camera clean and free from dust. Use a soft, dry cloth for cleaning the lens and body.
- Avoid exposing the camera to extreme temperatures, direct sunlight, or high humidity.
- Store the camera in a cool, dry place when not in use.
- Regularly back up important files from your MicroSD card to prevent data loss.
7. Troubleshooting
- Camera not turning on: Ensure the battery is sufficiently charged. Verify the ON/OFF switch is in the 'ON' position.
- Cannot record: Check if a MicroSD card is inserted correctly and has sufficient free space. Ensure the card is formatted to FAT32.
- Poor video quality: Clean the camera lens with a soft cloth. Ensure adequate lighting conditions, or verify night vision is functioning in low light.
- Computer not recognizing camera: Try connecting to a different USB port or using a different USB cable. Ensure the camera is powered on when connected to the computer.
- Incorrect timestamps: Re-synchronize the system time as described in Section 4.7.
8. Specifications
| Feature | Specification |
|---|---|
| Model Number | CS08 (h-A8) |
| Video Resolution | 1920*1080P, 1280*720P, 640*480P |
| Video Format | AVI (Video Code: MJPG) |
| Audio Format | WAV (512kbps) |
| Photo Resolution | 1920*1080 (in standby mode) |
| Sensor Technology | CMOS |
| Lens Angle | 180-degree rotating, 120-degree super wide angle |
| Night Vision | 4pcs 940nm red infrared lights |
| Memory Card Support | MicroSD / TF, 8GB to 256GB (FAT32) |
| Battery | 3.7V/1000MA lithium battery |
| Continuous Recording Time | Approximately 7 hours |
| Initial Charging Time | 3-5 hours |
| USB Connector | Micro USB |
| Working Temperature | -5 to 40 Celsius |
| Dimensions | 13*8.5*4cm (Product); 7.87 x 5.91 x 1.97 inches (Package) |
| Weight | 48g (1 Ounce) |
| Material | Metal |
| Connectivity Technology | USB |
| Included Components | USB Cable, User Manual |
9. Warranty and Support
For detailed warranty information, product registration, or technical support, please refer to the documentation included with your purchase or visit the official Waillynice website. You may also contact Waillynice customer service directly for assistance.