Product Overview
The AIVOLT 40V Cordless Leaf Vacuum Blower Mulcher is a versatile 3-in-1 tool designed for efficient lawn and yard care. It functions as a leaf blower, a leaf vacuum, and a mulcher, providing comprehensive debris management. This unit is powered by two 20V/4.0Ah Li-ion batteries, offering cordless convenience and extended runtime.

Figure 1: AIVOLT 40V Cordless Leaf Vacuum Blower Mulcher with included batteries and collection bag.
Safety Information
Always read and understand all safety warnings, instructions, illustrations, and specifications provided with this power tool. Failure to follow all instructions listed below may result in electric shock, fire, and/or serious injury.
- Wear appropriate personal protective equipment (PPE), including eye protection, hearing protection, and sturdy footwear.
- Keep bystanders, children, and pets at least 50 feet (15 meters) away from the operating area.
- Do not operate the tool in wet conditions or in the presence of flammable liquids or gases.
- Ensure the collection bag is securely attached and properly zipped before operating in vacuum mode.
- Disconnect the battery pack before making any adjustments, changing accessories, or storing the tool.
Package Contents
- 1 x AIVOLT 40V Leaf Blower and Vacuum Combo Unit
- 2 x 20V/4.0Ah Li-ion Batteries
- 1 x Dual Port Charger
- 1 x 40L Collection Bag
- 1 x Carrying Belt
- 1 x Adjustable Wheel Assembly
- 1 x Instruction Manual

Figure 2: All components included in the AIVOLT 40V Leaf Blower and Vacuum Combo package.
Setup
- Battery Charging: Fully charge both 20V/4.0Ah Li-ion batteries using the dual port charger before first use. The charger indicators will show charging status.
- Attach Nozzle/Vacuum Tube: Depending on the desired function (blower or vacuum), attach the appropriate tube to the main unit. Ensure it clicks securely into place.
- Install Collection Bag (Vacuum Mode): For vacuuming, attach the 40L collection bag to the designated port on the unit. Ensure the bag's opening is fully sealed around the port.
- Attach Adjustable Wheels: The adjustable wheel assembly can be attached to the front of the nozzle. For vacuuming, it is suggested to assemble the wheel to the innermost slot (toward the body of the device). For blowing, adjust it to the outermost slot (toward the nozzle).
- Install Batteries: Slide the charged batteries into the battery slots on the back of the unit until they click into place.
- Attach Carrying Belt: Secure the carrying belt to the designated attachment points on the unit for comfortable operation, especially during extended use.

Figure 3: Visual guide for easy installation of the unit components.
Operating Instructions
Control Panel Overview

Figure 4: Detailed view of the control panel with battery indicator, speed controls, and Turbo button.
- Power Button: Press to turn the unit ON/OFF.
- Battery Indicator: Displays the remaining battery life for both batteries.
- Speed Modes (1-4): Use the 'Speed Up' and 'Speed Down' buttons to adjust airflow intensity. Modes 1-2 are suitable for light tasks, while 3-4 are for heavier outdoor debris.
- TURBO Button: Provides a 10-second burst of maximum power (Mode 4) for stubborn debris, then returns to the previous speed setting.
Switching Between Blower and Vacuum/Mulcher Modes
The unit features a convenient function knob to switch between blowing and vacuuming/mulching. Locate the knob near the main housing and rotate it to select the desired mode. Ensure the correct attachment (nozzle for blowing, collection bag for vacuuming) is installed for the selected mode.

Figure 5: The function knob allows easy switching between blower and vacuum modes.
Blowing Operation
For blowing leaves and debris, ensure the blower nozzle is securely attached. Select a suitable speed mode and direct the airflow towards the debris to clear surfaces like decks, driveways, and sidewalks.
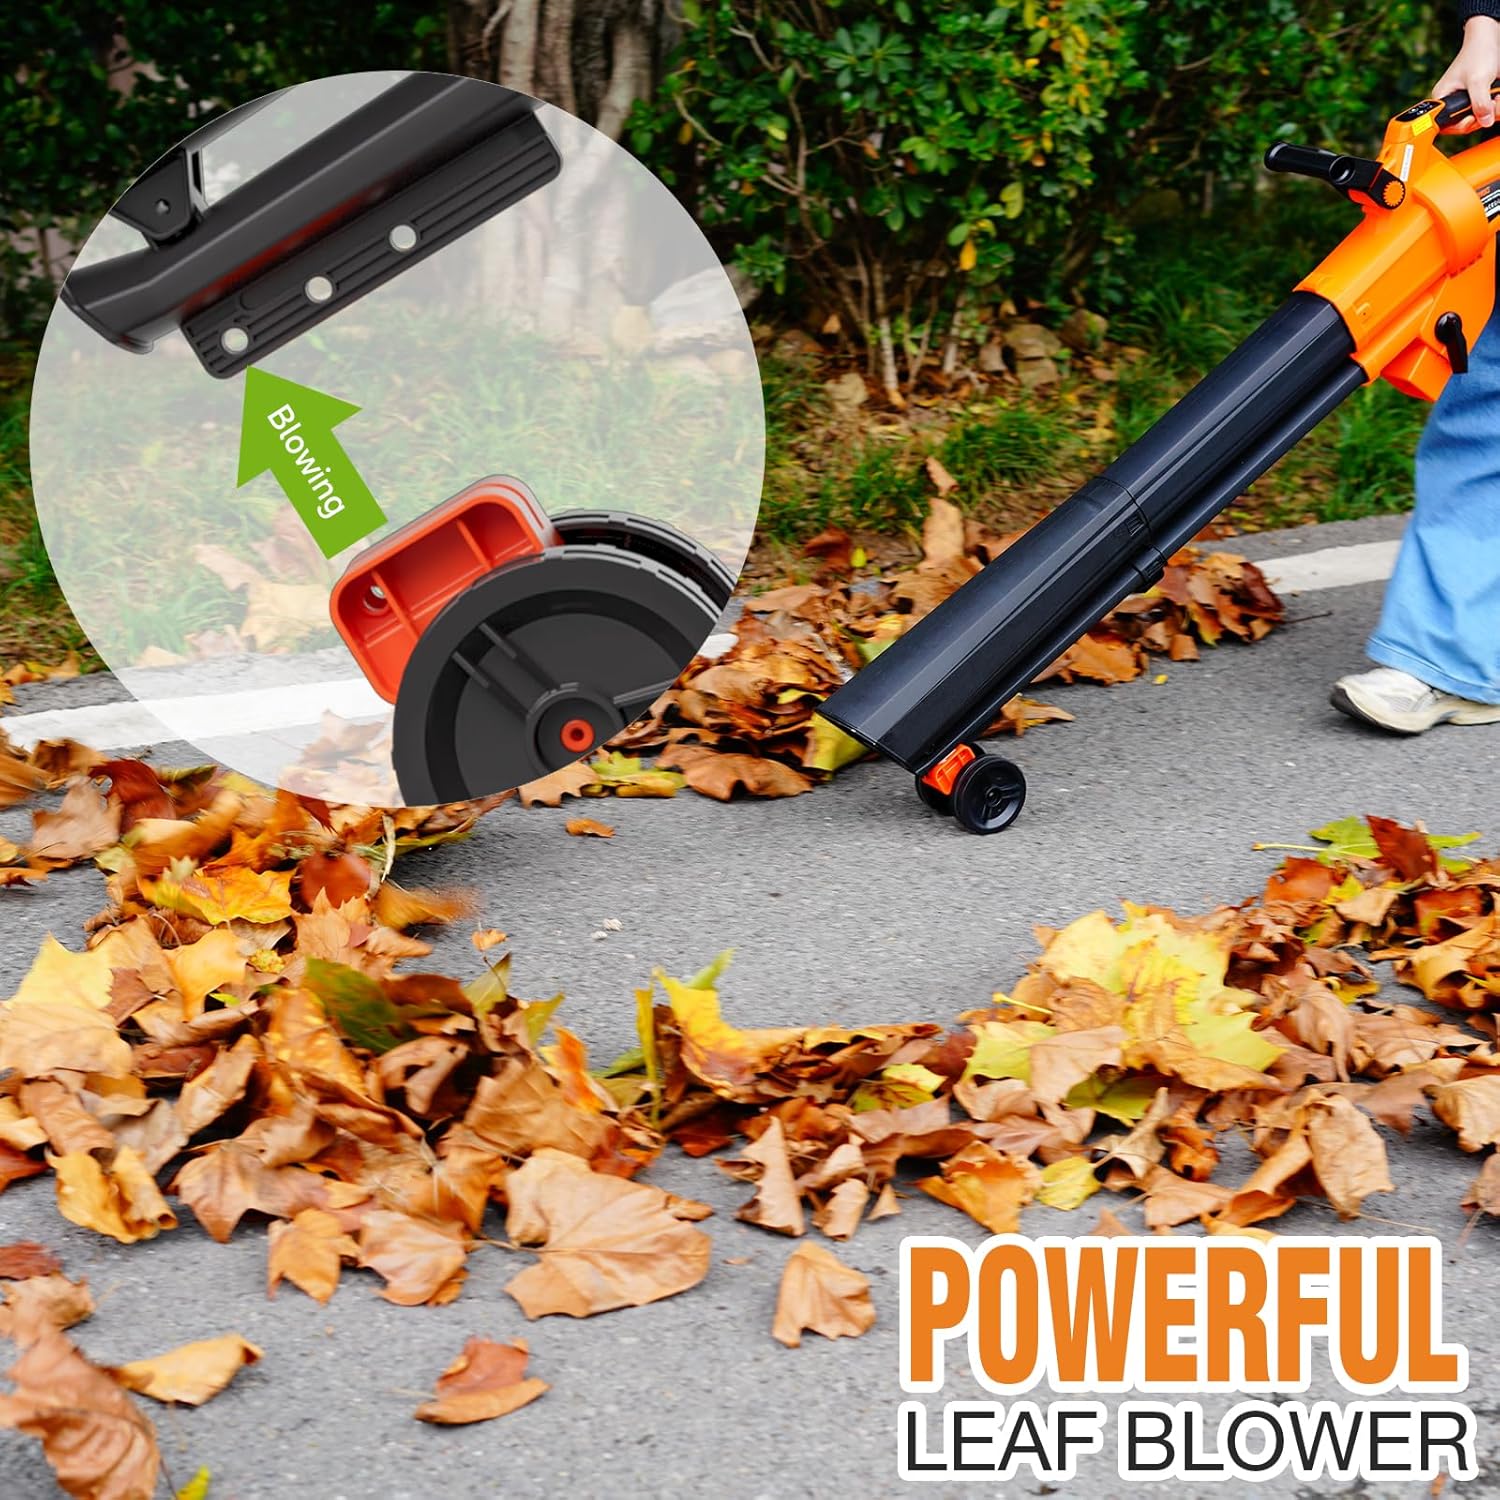
Figure 6: The unit in blower mode, effectively moving leaves.
Vacuuming and Mulching Operation
For vacuuming and mulching, attach the vacuum tube and the 40L collection bag. The unit's internal mulcher will reduce debris volume at a 15:1 ratio. Guide the vacuum nozzle over leaves and small debris. The mulched material will be collected in the bag.

Figure 7: The unit operating in vacuum mode, collecting leaves.

Figure 8: The mulching function reduces debris volume significantly.
Maintenance
- Cleaning: After each use, disconnect the batteries and clean the unit with a damp cloth. Remove any debris from the air intake and exhaust vents.
- Collection Bag: Empty the 40L collection bag regularly. The bag features a bottom zip for easy emptying. Clean the bag as needed to prevent clogging.
- Mulcher Blades: Periodically inspect the mulcher blades for wear or damage. If necessary, have them replaced by a qualified service technician.
- Battery Care: Store batteries in a cool, dry place away from direct sunlight. Do not store batteries in a discharged state for extended periods.
- Storage: Store the unit in a dry, secure location out of reach of children.
Troubleshooting
| Problem | Possible Cause | Solution |
|---|---|---|
| Unit does not start | Batteries not installed correctly or discharged. | Ensure batteries are fully charged and properly seated. |
| Reduced airflow/suction | Clogged nozzle/tube or full collection bag. | Clear any blockages from the nozzle/tube. Empty and clean the collection bag. |
| Excessive vibration | Debris caught in mulcher blades or damaged blades. | Disconnect power, clear debris. Inspect blades for damage; replace if necessary. |
| Short battery life | Batteries not fully charged or aged batteries. | Ensure full charge. Consider replacing old batteries if performance degrades significantly. |
Specifications
- Brand: AIVOLT
- Model Name: Leaf Blower Vacuum Mulcher
- Item Model Number: YA6601-2
- Power Source: Battery Powered
- Voltage: 40 Volts (2 x 20V)
- Battery Capacity: 2 x 4.0Ah Li-ion
- Air Volume: 600 CFM
- Air Speed: 160 MPH
- Speed Modes: 4 + Turbo
- Collection Bag Capacity: 40 Liters
- Mulching Ratio: 15:1
- Item Weight: 11.97 pounds
- Product Dimensions: 11"L x 6.3"W x 45.7"H
Warranty and Support
AIVOLT provides a satisfying after-sale service for this product. Should you have any questions before or after sales, please feel free to contact us. We are always here to help you solve any problems you may have.
For specific warranty details and to contact customer support, please refer to the contact information provided in your product packaging or visit the official AIVOLT website.


