
QWORK QS35107
QWORK Stainless Steel Cookie Press Kit
User Manual
1. Product Overview
The QWORK Stainless Steel Cookie Press Kit (Model: QS35107) is designed for creating various cookie shapes and for frosting decoration. It features a durable stainless steel body and an ergonomic lever for ease of use. This kit includes 13 cookie discs for diverse shapes and 8 frosting tips for decorative applications.
Key Features:
- Sturdy Construction: Stainless steel body ensures stability and long-term durability.
- Easy to Handle: Ergonomic lever design reduces effort, suitable for both beginners and experienced bakers.
- Versatile Accessories: Comes with 13 cookie discs and 8 cream tips for a wide range of decorating and cookie shaping options.
- Simple to Clean: Designed for easy disassembly, rinsing, and quick maintenance after each use.
2. Safety Instructions
- Always handle the cookie press and its accessories with care.
- Keep out of reach of children when not in use.
- Ensure all parts are properly assembled before use to prevent accidents.
- Do not force the lever if the dough is too stiff; this can damage the mechanism.
- Wash all components thoroughly before first use and after each subsequent use.
- Proposition 65 Warning: This product may contain chemicals known to the State of California to cause cancer and birth defects or other reproductive harm.
3. Package Contents
Verify that all items listed below are included in your package:
- 1 x QWORK Stainless Steel Cookie Press
- 13 x Cookie Discs (various shapes)
- 8 x Frosting Tips (various designs)

Figure 3.1: Complete set of QWORK Cookie Press Kit components.
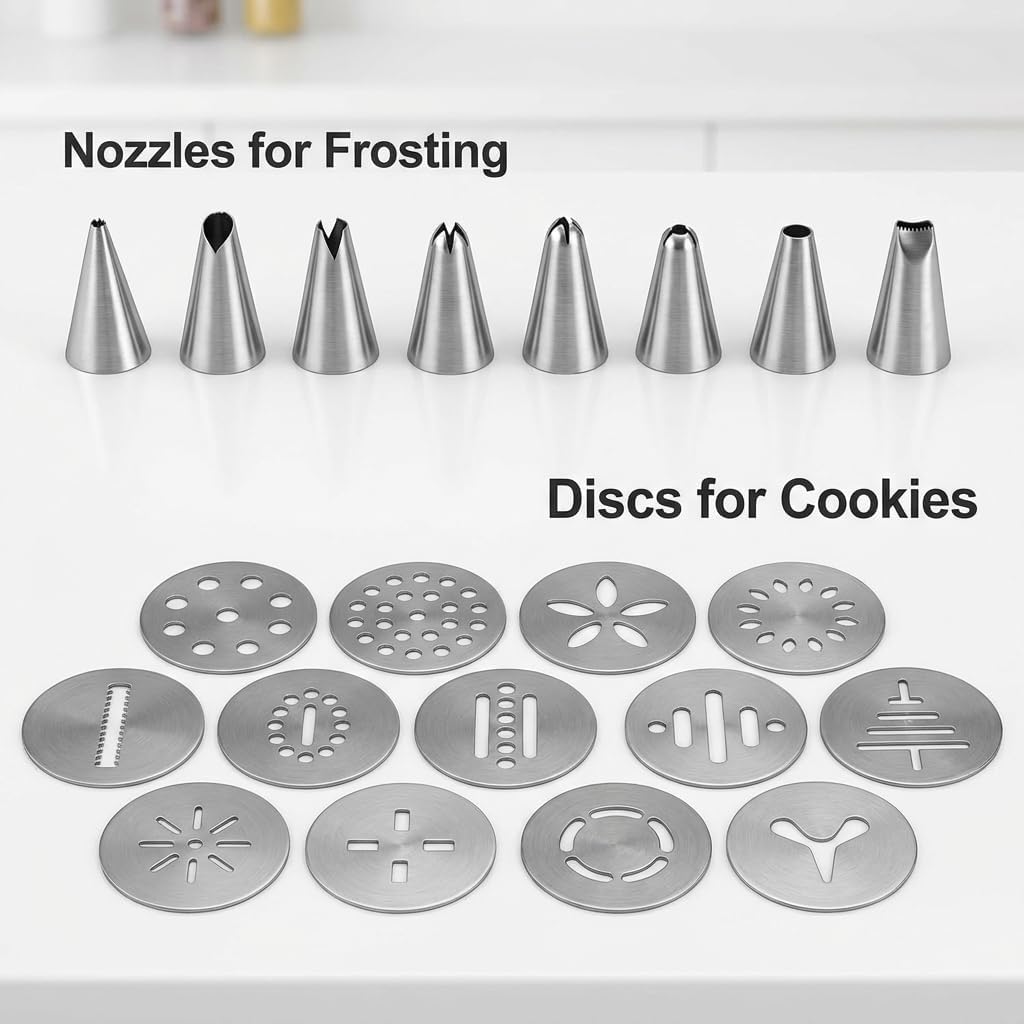
Figure 3.2: Detailed view of frosting nozzles and cookie discs.
4. Setup and Assembly
- Disassemble: Unscrew the bottom ring and remove the plunger rod from the cookie press barrel.
- Prepare Dough: Ensure your cookie dough is at room temperature and soft. The press works best with soft butter dough within 20k–40k cP viscosity. Hard dough will not press effectively and may damage the unit.
- Load Dough: Fill the barrel of the cookie press with your prepared dough.
- Attach Disc/Tip:
- For cookies: Select one of the 13 cookie discs and place it into the bottom ring.
- For frosting: Select one of the 8 frosting tips and insert it into the bottom ring.
- Secure Bottom Ring: Screw the bottom ring, with the chosen disc or tip, securely onto the barrel of the cookie press.
- Insert Plunger: Reinsert the plunger rod into the top of the barrel and ensure it is properly seated.
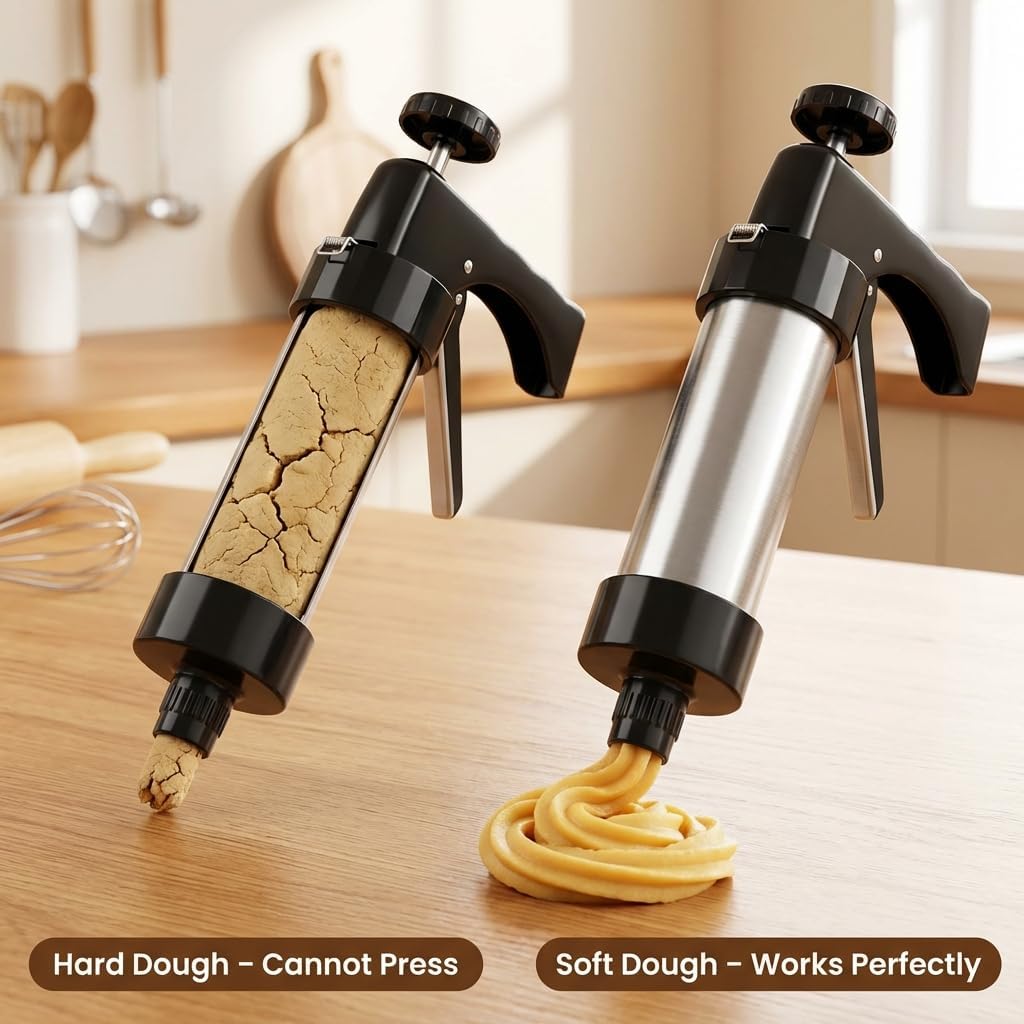
Figure 4.1: Importance of using soft dough for optimal performance.
5. Operating Instructions
- Priming the Press: Before first use or after loading new dough, press the lever a few times until the dough starts to emerge from the disc or tip.
- Making Cookies:
- Place the cookie press directly onto an ungreased baking sheet.
- Press the lever firmly and evenly once to dispense a single cookie shape.
- Lift the press straight up. Repeat for desired number of cookies, spacing them appropriately on the baking sheet.
- Decorating with Frosting:
- Hold the press at the desired angle over your baked goods.
- Gently press the lever to dispense frosting, guiding the press to create your desired design.

Figure 5.1: Demonstrating even pressing for best cookie results.
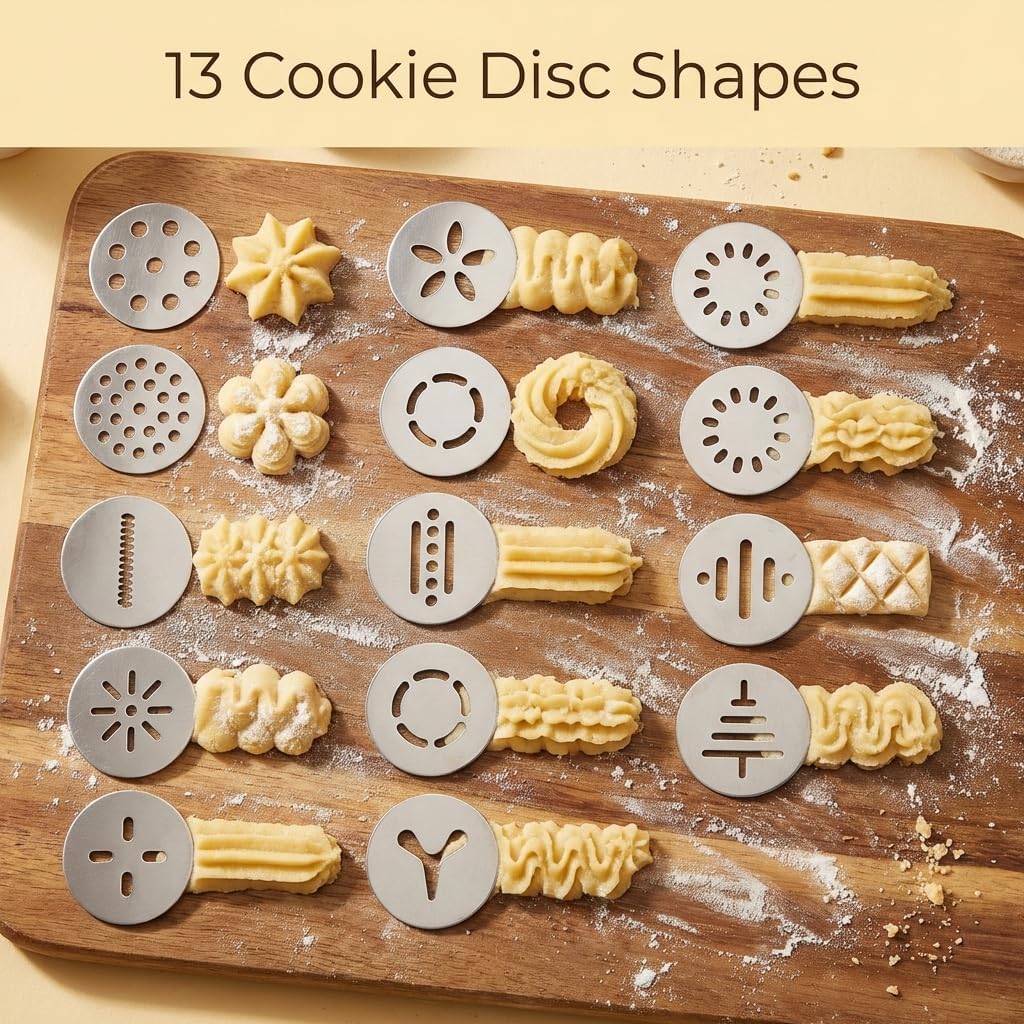
Figure 5.2: Examples of cookie shapes achievable with the 13 included discs.
6. Maintenance and Cleaning
Regular cleaning ensures the longevity and hygienic use of your cookie press.
- Disassemble: Unscrew the bottom ring and remove the plunger rod. Separate all components: barrel, plunger rod, bottom ring, cookie disc/frosting tip.
- Wash: Wash all parts by hand with warm, soapy water. Use a small brush if necessary to clean any dough residue from the discs or tips.
- Rinse: Rinse all components thoroughly with clean water.
- Dry: Dry all parts completely before reassembly or storage to prevent rust, especially for the stainless steel components.
- Storage: Store the clean, dry cookie press and its accessories in a safe place.
Figure 6.1: Disassembled components for easy cleaning.
7. Troubleshooting
| Problem | Possible Cause | Solution |
|---|---|---|
| Dough does not press out or is difficult to press. | Dough is too hard or cold. | Ensure dough is at room temperature and soft. The press works best with soft butter dough (20k–40k cP viscosity). |
| Cookie shapes are inconsistent or incomplete. | Air pockets in the dough; uneven pressure; disc not properly seated. | Ensure dough is packed tightly into the barrel without large air pockets. Apply firm, even pressure. Check that the disc is correctly placed and the bottom ring is tightened. |
| Lever mechanism feels loose or doesn't engage properly. | Internal mechanism issue; excessive force applied. | Avoid applying excessive force, especially with hard dough. If the issue persists, contact customer support. |
| Dough leaks from the sides of the disc. | Bottom ring not tightened sufficiently; disc not seated correctly. | Ensure the bottom ring is securely tightened and the disc is flat against the barrel opening. |
8. Specifications
- Model Number: QS35107
- Brand: QWORK
- Material: Stainless Steel (body)
- Package Dimensions: 9.13 x 6.38 x 2.4 inches
- Item Weight: 14.4 ounces
- Included Accessories: 13 Cookie Discs, 8 Frosting Tips
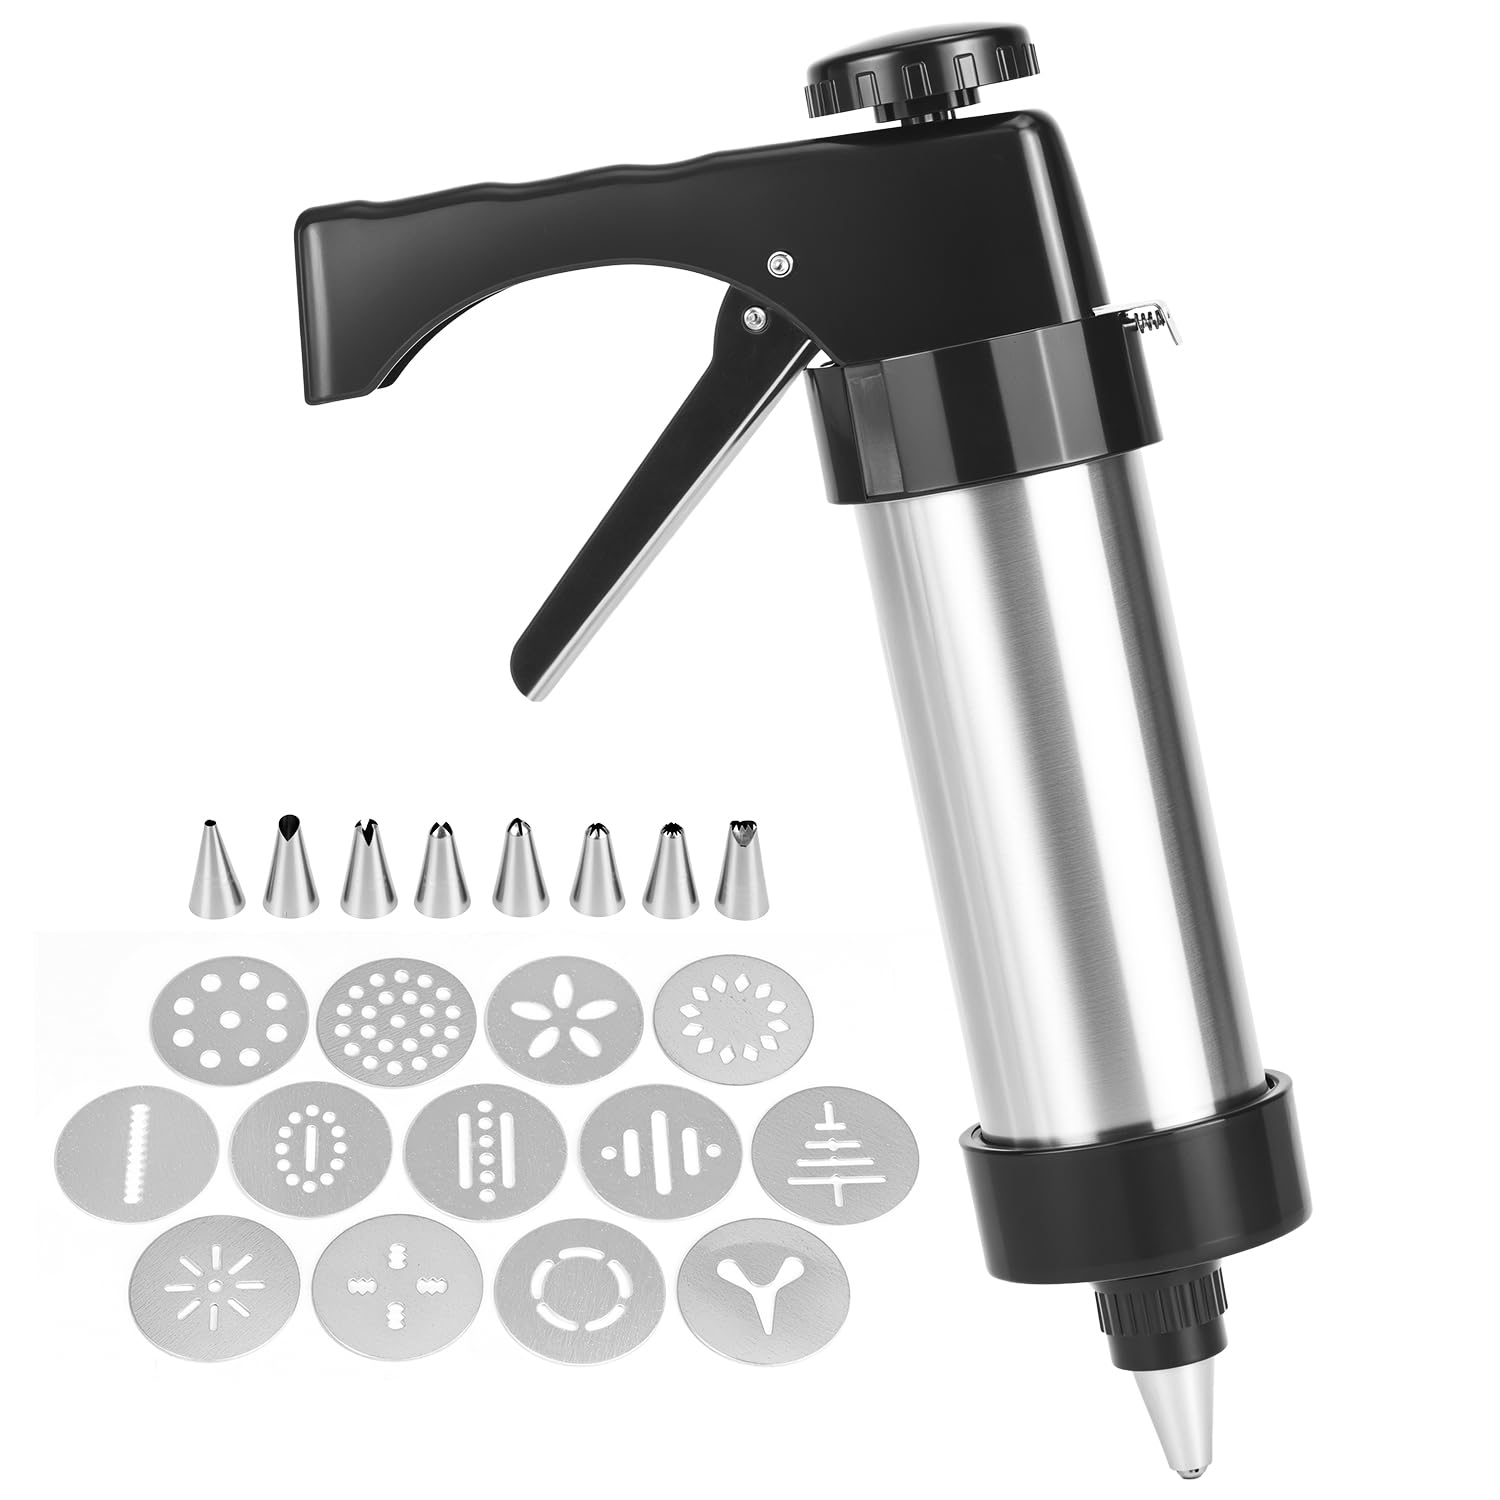
Figure 8.1: Product dimensions.
9. Warranty and Support
For warranty information or technical support, please contact QWORK customer service. Refer to your purchase documentation for specific warranty terms and contact details.
Manufacturer: QWORK
Ask a question about this manual
Ask about setup, troubleshooting, compatibility, parts, safety, or missing instructions. Manuals+ will review the question and use this page’s manual context to help answer it.