
1. Introduction
Thank you for purchasing the Peasur Solar Light. This manual provides detailed instructions for the installation, operation, and maintenance of your 381 LED 3-Mode Split Motion Sensor Outdoor Light (Model WS48P). Please read this manual thoroughly before use to ensure proper function and longevity of the product.
This solar light is designed for outdoor use, providing efficient and reliable illumination for areas such as gardens, patios, garages, and aisles. Its split design allows for flexible placement of the solar panel and light unit.
2. Safety Instructions
- Ensure all components are securely fastened during installation to prevent the light from falling.
- Do not disassemble or modify the product. Unauthorized modifications may cause damage and void the warranty.
- Keep the solar panel clean to ensure optimal charging efficiency.
- Avoid placing the light near heat sources or flammable materials.
- This product is designed for outdoor use and is IP65 waterproof. However, avoid submerging it in water.
- Do not stare directly into the LED light when it is active, as it can be very bright.
- Dispose of the product and its components according to local environmental regulations at the end of its lifespan.
3. Package Contents
Please check the package to ensure all components are present and in good condition:
- 1 x Peasur Solar Light Unit (381 LEDs)
- 1 x Solar Panel with 5-meter cable
- 1 x Mounting Bracket for Light Unit
- 1 x Mounting Bracket for Solar Panel
- 1 x Set of Screws and Wall Plugs
- 1 x User Manual
4. Setup and Installation
The Peasur Solar Light offers flexible installation options due to its split design, allowing the solar panel to be placed separately from the light unit for optimal sun exposure.
4.1 Choosing an Installation Location
- Solar Panel: Select a location that receives direct sunlight for 6-8 hours daily. This is crucial for efficient charging. Ideal locations include rooftops, south-facing walls, or open areas.
- Light Unit: Install the light unit in the desired illumination area, such as a garage, patio, garden, or aisle. The 5-meter cable allows for significant separation from the solar panel.
- Recommended Installation Height: For optimal motion detection and lighting coverage, install the light unit at a height of 2-3 meters (approximately 78-118 inches).
4.2 Installation Steps
- Mount the Solar Panel:
Using the provided screws and wall plugs, securely attach the solar panel mounting bracket to your chosen sunny location. Adjust the angle of the solar panel to face the sun directly for maximum charging efficiency.

Image: Solar panel mounted on a roof, connected to a light unit on a wall. This setup demonstrates the solar panel charging for 6-8 hours during the day and the light unit providing illumination for 8-12 hours at night.
- Mount the Light Unit:
Attach the light unit mounting bracket to the desired wall or surface using the screws and wall plugs. Ensure the light unit is positioned to cover the area you wish to illuminate. The light unit has a 270° lighting angle and a 120° detection angle for its motion sensor.
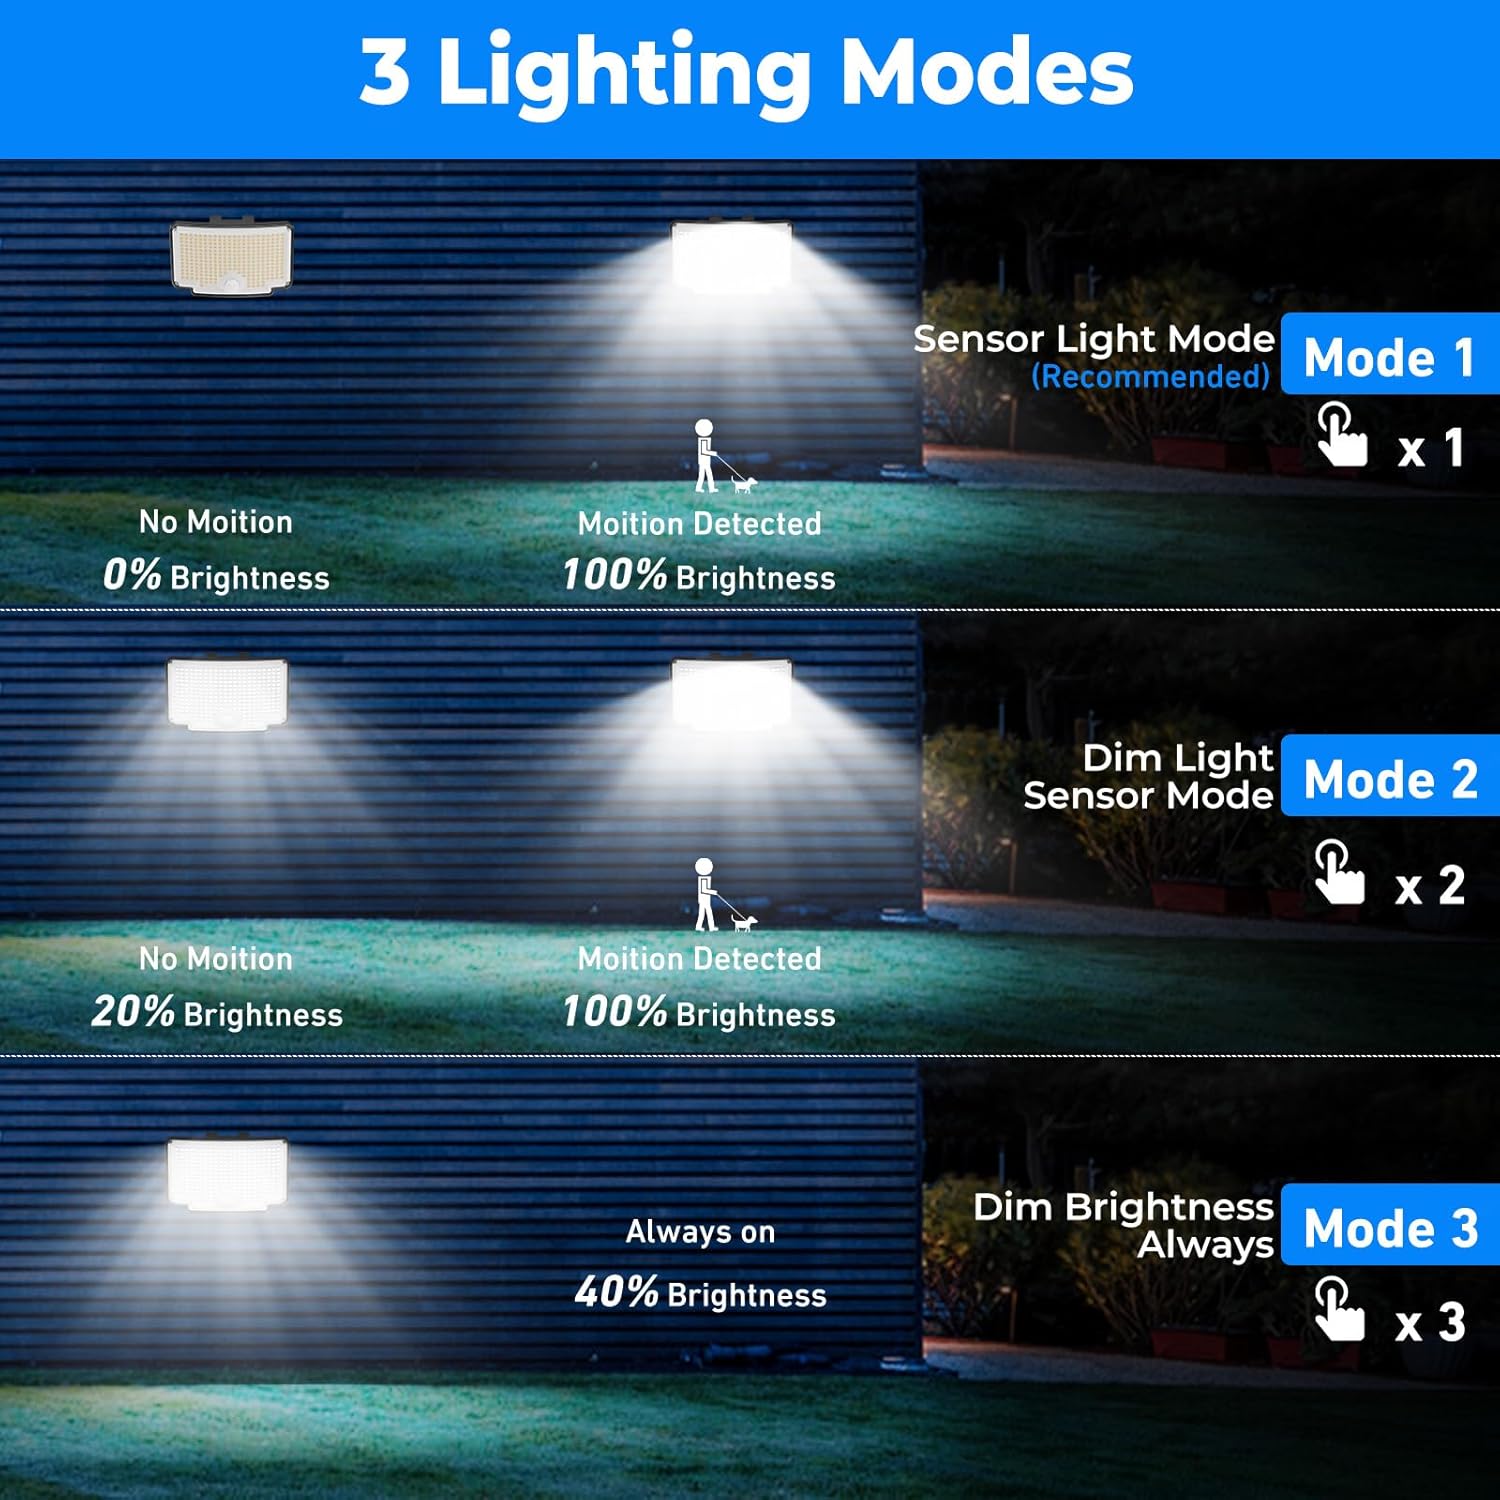
Image: Peasur solar light mounted above a garage door, demonstrating its motion sensor capabilities with a 120° detection angle, 78-118 inch detection range, and a wide 270° lighting angle. The ideal installation height is shown as 2-3 meters.
- Connect the Solar Panel to the Light Unit:
Connect the 5-meter cable from the solar panel to the input port on the light unit. Ensure the connection is secure.
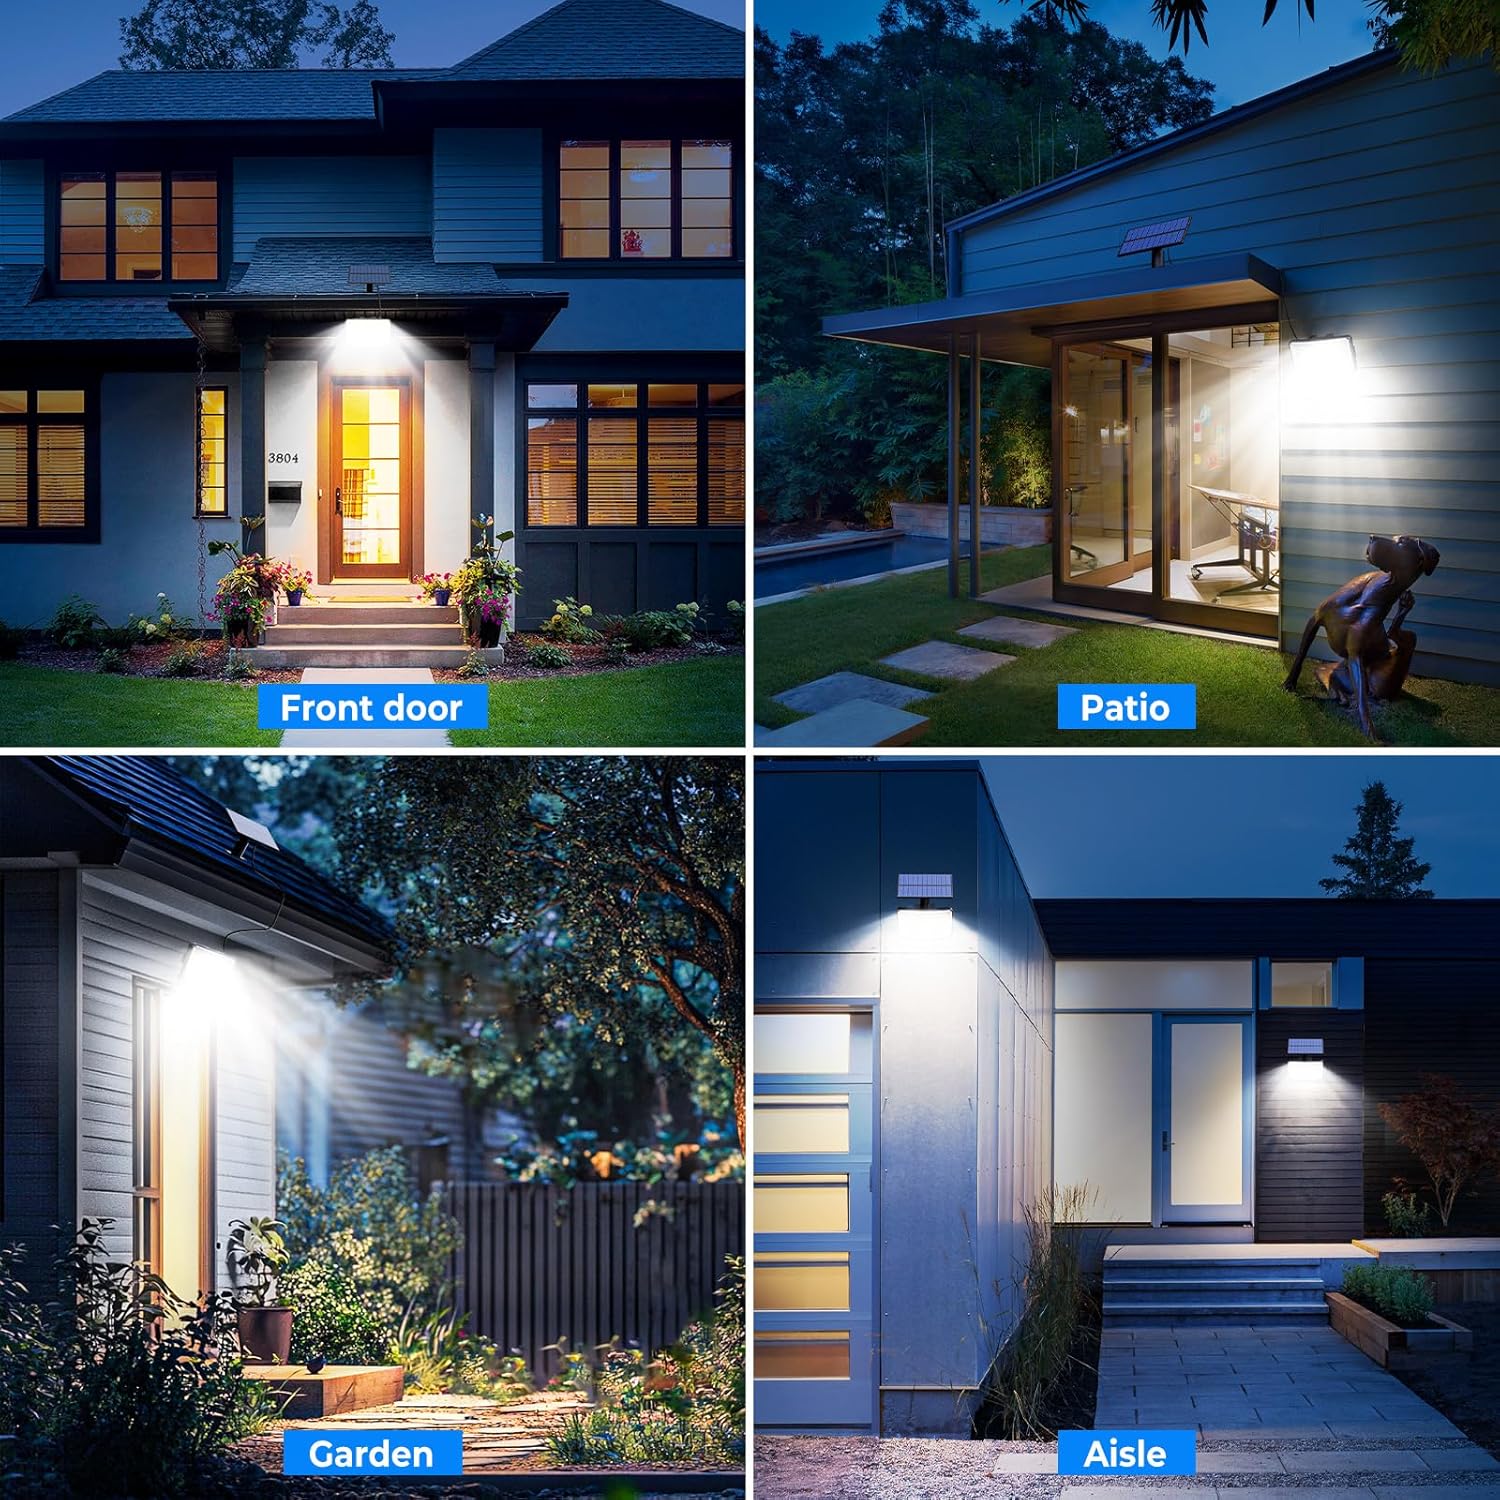
Image: Illustration of two installation methods. The top image shows the solar panel and light unit installed together, suitable for direct mounting. The bottom image shows the solar panel mounted on a roof and the light unit on a wall, connected by the 5-meter extension cord for flexible placement.
- Initial Charge:
Allow the solar panel to charge the light for at least 6-8 hours in direct sunlight before first use. The light will automatically turn on at dusk once charged.
5. Operating Instructions
The Peasur Solar Light features three distinct lighting modes, selectable via a button on the back of the light unit. The light operates automatically from dusk till dawn, based on the selected mode.
5.1 Mode Selection
Press the button on the back of the light unit to cycle through the modes:

Image: Visual representation of the three lighting modes. Mode 1 (Sensor Light Mode) activates 100% brightness only upon motion detection. Mode 2 (Dim Light Sensor Mode) maintains 20% brightness, increasing to 100% upon motion. Mode 3 (Dim Brightness Always On) provides a constant 40% brightness.
- Mode 1 (Sensor Light Mode - Recommended):
The light remains off (0% brightness) until motion is detected. Upon detecting motion, it illuminates at 100% brightness for approximately 15-30 seconds, then turns off again if no further motion is detected.
- Mode 2 (Dim Light Sensor Mode):
The light stays on at a dim brightness (20%) continuously from dusk. When motion is detected, it brightens to 100% for approximately 15-30 seconds, then returns to 20% dim brightness.
- Mode 3 (Dim Brightness Always On):
The light automatically turns on at dusk and stays on at a constant 40% brightness throughout the night until dawn or battery depletion.
To turn the light off, cycle through the modes until it is no longer illuminated.
6. Maintenance
Regular maintenance ensures optimal performance and extends the lifespan of your Peasur Solar Light.
- Cleaning the Solar Panel: Periodically wipe the solar panel with a soft, damp cloth to remove dust, dirt, leaves, or snow. A clean panel ensures maximum sunlight absorption and charging efficiency.
- Cleaning the Light Unit: Clean the LED light surface and motion sensor window with a soft, damp cloth to maintain optimal light output and sensor sensitivity.
- Battery Care: The integrated battery is designed for long-term use. Avoid prolonged storage in a completely discharged state. If storing the light, ensure it is fully charged first.
- Weather Resistance: The light is IP65 waterproof and designed to withstand rain, snow, and wind. However, ensure all connections remain secure and free from debris.

Image: The Peasur solar light and its separate solar panel are depicted under various weather conditions, including rain, snow, and wind, highlighting its IP65 waterproof rating and robust design for outdoor use.
7. Troubleshooting
If your Peasur Solar Light is not functioning as expected, please refer to the following common issues and solutions:
| Problem | Possible Cause | Solution |
|---|---|---|
| Light does not turn on at night. |
|
|
| Light stays dim or flickers. |
|
|
| Motion sensor not working or too sensitive. |
|
|
| Light turns off too quickly. |
|
|
8. Specifications
| Feature | Detail |
|---|---|
| Model Number | WS48P |
| LED Quantity | 381 LEDs |
| Light Color | Cold White |
| Lighting Angle | 270° |
| Motion Sensor Detection Angle | 120° |
| Motion Sensor Detection Range | 78-118 inches (2-3 meters) |
| Solar Panel Cable Length | 5 meters |
| Charging Time | 6-8 hours (direct sunlight) |
| Lighting Duration | 8-12 hours (depending on mode and charge) |
| Waterproof Rating | IP65 |
| Material | ABS Plastic |
| Product Dimensions (Light Unit) | Approx. 14.48 x 8.64 x 3.05 cm |
| Power Source | Solar Powered |
| Control Method | Push Button |
9. Warranty and Support
Peasur provides a standard warranty for this product against defects in materials and workmanship under normal use. The specific warranty period may vary by region and retailer. Please retain your purchase receipt as proof of purchase.
For warranty claims, technical support, or any questions regarding your Peasur Solar Light, please contact our customer service team. We offer 24-hour customer service to assist you.
Customer Service Contact: Refer to the contact information provided with your purchase or on the official Peasur website.